Some of the links in this article are «affiliate links», a link with a special tracking code. This means if you click on an affiliate link and purchase the item, I will receive an affiliate commission.
The price of the item is the same whether it is an affiliate link or not. Regardless, we only recommend products or services we believe will add value to our readers.
By using the affiliate links, you are helping support Edit Video Faster, and I genuinely appreciate your support.
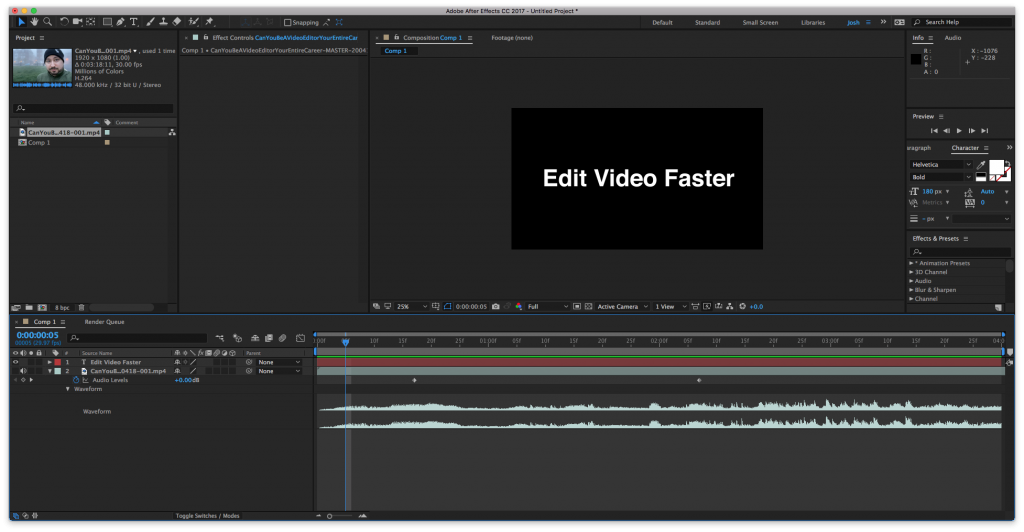
This tutorial is on how to change volume levels in After Effects. I’ll also show you how to show the Waveforms, some shortcuts and how to fade audio in and out.
Recapping Tutorial on Changing Volume in After Effects
Show Audio Levels to Change Volume
To change the volume on a clip in After Effects, select the layer in the composition’s timeline. Hit the “L” key to bring up the Audio Levels property.
Where it says +0.00dB, you can click it and drag it to the left to turn it down or drag it to the right to turn the volume up. Alternatively you can click the +0.00dB and type in a value. A layer will only go up to +12.00dB. If you still need your audio louder, just duplicate the layer (select the layer and hit Command+D if you’re on a Mac or Control+D if you’re on a PC).
Show Audio Waveforms in After Effects
To “see” the audio you want to view the Waveforms. When you hit the “L” key the Audio Levels property will appear along with the collapsed Waveform property. Click the triangle next to Waveform to see the waveforms in the timeline. You can also use the keyboard shortcut “LL” (hitting the “L” key twice in a row rapidly) to just show the Waveform property. This will automatically twirl the Waveform property open as well. After you use the “LL” shortcut you can use the “L” key to bring the Audio Levels property back up.
Fade Audio In or Out in After Effects
Just like pretty much every other property in After Effects you can keyframe Audio Levels. Click the Stopwatch next the Audio Levels, change the value, move the Time Position Indicator, and change the value again. Repeat as needed!
That’s how to change volume in After Effects. Hope you were able to learn something new!
Below are useful links related to the tutorial:
- Every Safari Shortcut I Know (and it’s a lot)
- Having Some Fun by AudioJungle (affiliate link) (FYI this link autoplays music!)
- Edit Video Faster’s Twitter
Reach out to me if you have any questions on this tutorial or anything else After Effects, motion graphics, video or post production-related. I’m here to help you emotionally, mentally and technically as a video editor.
Обновлено: 09.02.2023
Моушн-дизайнер и преподаватель в Bang Bang Education Константин Новиков составил большую подборку полезных скриптов и плагинов в After Effects на все случаи жизни — и объяснил, зачем нужен каждый из них.
Zl Explode Shape Layers: разбирает и группирует шейповые слои, которые были созданы, например, в Illustrator, а также убирает артборд, который часто очень мешает работать.
Reposition Anchor Point: очень простой скрипт, который дает одну удобную функцию — перемещение энкор-пойнта в один из углов объекта или в центр. Вы просто выделяете все объекты, у которых вам нужно сместить AP, и нажимаете «переместить».
Flow: скрипт, который позволяет удобно управлять графиками скорости и значения. Кроме того, в нем много предустановок шейповой анимации.
Motion: «швейцарский нож», которым пользуются многие моушн-дизайнеры. В нем есть все перечисленное выше плюс около полусотни встроенных скриптов, которые позволяют делать анимационные ходы и приемы одним кликом. Например, сгруппировать анимацию нескольких слоев под одним слайдером или добавить какую-то элементарную физику в сцену. Есть даже функция, которая чистит проект и группирует все исходники по отдельным папочкам.
Overlord: своеобразный телепорт для данных между After Effects и Illustrator. Одной кнопкой он перекидывает все шейпы в АE, при этом вам не нужно сохранять какие-то дополнительные файлы и при необходимости можно также переслать вектор обратно.
Скрипты, нужные в первую очередь для персонажной анимации
Limber: предназначен для того, чтобы очень быстро создавать конечности — руки, ноги, пальцы, ну или, например, лапки у паука. В первую очередь используют для создания конечностей с угловатыми суставами — локтями и коленями.
Rubber Hose: этот скрипт делает классические диснеевские руки-сосиски и ноги-сосиски, у которых нет локтей и которые прекрасно тянутся.
Character Tool: по своей механике ближе к Rubber Hose. Кроме того, в скрипте есть еще куча мелких, но полезных функций.
DuIK: скрипт номер один для персонажных аниматоров. Он не очень юзер-френдли, но это связано, скорее всего, с большим количеством функций в нем. Это целая система для производства персонажей с руками, ногами, позвоночником и хвостом. В нем постоянно пополняющийся список анимационных предустановок. Чего только стоит кнопка «цикл походки», которая заставляет вашу марионетку шагать (у аниматоров это занимает минимум полдня), или «кей клинер», который оптимизирует анимацию и позволяет добавить в нее «изинги» и «овершуты». Скрипт постоянно развивается и абсолютно бесплатен. Пользуюсь им не только для персонажей.
Newton: плагин, который добавляет физику в проекты: если вам, например, не хочется разбираться с графиками и думать, как должен прыгать мячик, или нужно сделать так, чтобы сотня мячиков упала и заполнила логотип. Пару лет назад Apple сделала себе целый ролик на этом плагине. Одним словом, плагин позволяет соединять объекты невидимыми пружинками между собой, бросать их вниз и наслаждаться тем, как физика все делает за вас.
rd: comp setter: целая группа скриптов, которые упрощают работу. Например, rd: comp setter позволяет изменить параметры всех выделенных композиций: сменить им разрешение или частоту кадров. Около полусотни скриптов на все случаи жизни.
Rift: в пару кликов можно упорядочить слои и ключи в композиции на ваше усмотрение: выстроить их по CTI (бегунку) или же, наоборот, сделать их хаотичными. В проектах, где, например, надо сделать сдвижку в один кадр в сотне слоев, но чтобы при этом анимация заканчивалась в определенную секунду (выравниванием ключей), это незаменимый помощник.
Declutter: все очень просто: скрипт наводит порядок в проекте. Создает папочки и сортирует все элементы проекта. Помогает при работе с чужими проектами.
FormParticularStardust: три эффекта, которые по-разному работают с частицами. Можно сделать падающий снег, вращающиеся вихри, что-то похожее на дымку или логотип, разлетающийся на мелкие точечки. Stardust имеет нодовую систему и поэтому людям, склонным к визуальному программированию, легко найти с ним общий язык.
Element 3d: плагин номер один для тех, кто хочет работать с 3D-объектами в AE без использования сторонних программ. Может превратить любой текстовый слой в 3D-текст, работает с готовыми 3D-файлами. А еще имеет наборы объектов, благодаря которым можно, например, собрать огромный трехмерный город (Metropolitan Pack) и сделать пролет камерой по нему — причем это займет у вас не больше получаса, включая рендер.
Optical Flares: второй плагин от Эндрю Крамера и студии VideoCopilot. Это большая база настраиваемых бликов, вспышек и пересветов. Его часто используют для того, чтобы оживить параллаксы или видео, добавив в них игры света и бликов.
Deep GlowVibrance: два плагина, которые позволяют добавить эффект свечения в ваши объекты.
Более сложные визуальные эффекты для тех, кто давно работает в АE
Slitscan: делает эффект отставания или замораживания линии пикселей.
AE Pixel Sorter: эффект стекания пикселей по контрастной области.
Lockdown: позволяет неплохо прикрепить текстуру к неоднородному и неплоскому движущемуся объекту.
Три плагина-диспетчера рендера для опытных пользователей, которым не хватает настроек и кодеков в Media Encoder:
Перечень композиций и элементов видеоряда находится на панели «Проект». В отличие от панелей «Таймлайн» и «Элементы управления эффектами», порядок расположения элементов на панели «Проект» не влияет на конечный вид создаваемых вами фильмов. Организовывать элементы видеоряда и композиции можно различными способами, включая использование папок. Элементы видеоряда в сплошном цвете автоматически размещаются в папке «Сплошные».
Папки, созданные на панели «Проект», существуют только на этой панели. Можно развернуть папку, отобразив ее содержимое, разместить ее внутри другой папки. Чтобы переместить файл или папку на верхний уровень панели «Проект», перетащите файл или папку в серую область данных в верхней части панели.
Для поиска элементов видеоряда по различным критериям (например, по отсутствию исходных файлов) можно использовать поле поиска на панели «Проект». См. раздел Поиск и фильтры на панелях «Временная шкала», «Проект» и «Эффекты и стили».
В данном видеоруководстве от Джеффа Сенгстэка (Jeff Sengstack) и Infinite Skills предлагаются практические инструкции по размещению ресурсов на панели «Проект».
Обрезка элементов видеоряда на панели «Видеоряд»
Для обрезки элемента видеоряда и его вставки в композицию можно использовать элементы управления «Задать точку входа» , «Задать точку выхода» , «Редактирование вставки со сдвигом» и «Редактирование наложения» . Иногда удобнее обрезать элемент видеоряда на панели «Видеоряд» без добавления в композицию и обрезки его слоя на таймлайне.
Сценарии управления элементами видеоряда
Джефф Альмасол (Jeff Almasol) предлагает на своем веб-сайте redefinery сценарий, который автоматически записывает определенную информацию об элементах видеоряда или слоях в поля комментариев для соответствующих элементов на панели проекта или панели «Таймлайн».
Кристофер Грин (Christopher Green) предлагает на своем веб-сайте сценарий (Project_Items_Renamer.jsx), с помощью которого можно переименовать композиции и элементы видеоряда, выделенные на панели «Проект». Можно выполнять поиск и замену текста в именах, добавлять символы в начало или конец имен или обрезать указанное количество символов с начала или конца имен.
Ллойд Альварес (Lloyd Alvarez) предлагает на веб-сайте After Effects Scripts сценарий, с помощью которого в проектах After Effects можно осуществлять поиск и замену путей к источникам элементов видеоряда. Это удобно при пересылке исходных файлов, обновлении проекта после перемещения источников или обновлении проекта после его переноса на другой компьютер.
Отображение информации об элементах
- Чтобы отобразить информацию об элементе видеоряда или композиции выделите их на панели «Проект». Сведения отображаются в верхней части панели «Проект» рядом с его миниатюрой.
- Чтобы отобразить идентификатор создателя файлов для элемента видеоряда, щелкните его на панели «Проект», удерживая клавишу ALT (Windows) или OPTION (Mac OS).
Создание папки
Выберите «Файл» > «Создать» > «Создать папку» или щелкните значок «Создать новую папку» в нижней части панели «Проект».
Переименование и сортировка элементов
-
Чтобы переименовать композицию, элемент видеоряда или папку, выполните одно из предложенных ниже действий.
- Для сортировки элементов по записями в любом из столбцов щелкните имя столбца на панели «Проект».
- Чтобы дублировать или копировать элемент на панели «Проект», выделите его и выберите «Правка» > «Дублировать или изменить» > «Копировать».
- Чтобы копировать элемент видеоряда в Проводник (Windows) или Finder (Mac OS), перетащите элемент из панели «Проект» на рабочий стол.
- Чтобы отобразить, где находится элемент видеоряда, используемый в композиции, на панели «Проект» щелкните этот элемент правой кнопкой мыши (Windows) или левой кнопкой мыши, удерживая нажатой клавишу CONTROL (Mac OS), и выберите «Показать в композиции». Затем выберите экземпляр для отображения (имя композиции, имя слоя).
- Чтобы отобразить элемент оригинального видеоряда, связанный со слоем на панели «Проект», на панели «Временная шкала» щелкните слой правой кнопкой мыши (Windows) или левой кнопкой мыши, удерживая нажатой клавишу CONTROL (Mac OS), выберите «Показать источник слоя в проекте».
- Чтобы показать местоположение элемента видеоряда в Adobe Bridge, Проводнике Windows или Finder, на панели «Проект» щелкните элемент правой кнопкой мыши (Windows) или щелкните мышью при нажатой клавише CONTROL (Mac OS) и выберите «Открыть в Bridge», «Открыть в Проводнике Windows» или «Открыть в Finder».
- Для открытия элемента видеоряда на панели «Видеоряд» дважды щелкните его на панели «Проект».
- Чтобы открыть выделенные элементы видеоряда на панели «Видеоряд», нажмите клавишу ВВОД на цифровой клавиатуре, когда панель «Проект» активна.
- Переименование папки сплошных заливок: можно переименовать существующую папку сплошных заливок. При этом каждая новая сплошная заливка
создается в переименованной папке вместо отдельной папки с названием «Сплошные заливки». Чтобы переименовать папку, выполните любое из следующих действий. - Установка имени по умолчанию для папки сплошных заливок: можно изменить имя по умолчанию для
папки сплошных заливок, созданной в новых проектах. Чтобы изменить имя, выполните следующие
действия. - Вложение папки сплошных заливок в другие папки : можно вкладывать папку «Сплошные заливки» в другие папки. Для вложения перетащите папку сплошных заливок в другую папку в текущем проекте. Когда процедура вложения в папки завершится, новые сплошные заливки будут по-прежнему создаваться во вложенной папке.
- Настройка любой папки в качестве папки сплошных заливок: можно настроить папку в качестве папки сплошных заливок. Чтобы настроить папку в качестве папки сплошных заливок, выполните следующие действия.
- Чтобы удалить элемент из проекта, выделите его на панели «Проект» и нажмите «Удалить».
- Чтобы удалить из проекта все неиспользуемые элементы видеоряда, выберите «Файл» > «Удалить неиспользуемые видеоряды».
- Чтобы удалить из проекта все повторяющиеся элементы видеоряда, выберите «Файл» > «Объединить весь видеоряд». After Effects считает элементы видеоряда повторяющимися, только если в них используются те же самые настройки интерпретации видеоряда.
- Как удалить карту из apple pay
- Как удалить dns сервер с компьютера
- 1с ошибка субд out of memory for query result 1с
- Как удалить vk play machine с компьютера
- D color dc1002hd обновление прошивки через usb
Выберите элемент на панели «Проект», нажмите ВВОД (Windows) или ВВОД (Mac OS) и введите новое имя.
Щелкните правой кнопкой мыши необходимый элемент (Windows) или щелкните необходимый элемент, удерживая нажатой клавишу CONTROL (Mac OS), затем выберите «Переименовать» и введите новое имя.
Можно использовать столбец «Комментарий» для создания пользовательского параметра сортировки. Переименуйте столбец, введите соответствующий информацию для каждого элемента (например, номер камеры) и рассортируйте информацию по этому столбцу.
Копирование элементов
Показать элементы видеоряда
Обновление элементов видеоряда
Чтобы обновить элементы видеоряда, выделенные на панели «Проект», подключив текущие версии исходных файлов видеоряда, выберите команду «Файл» > «Перезагрузить видеоряд».
Просмотр элемента видеоряда на панели «Видеоряд» или в проигрывателе, назначенном операционной системой
При просмотре элементов на панели «Видеоряд» отображаются результаты интерпретации видеоряда. (См. раздел Интерпретация элементов видеоряда.)
Чтобы открыть источник элемента видеоряда с помощью проигрывателя, используемого с данным типом файлов, на панели «Проект» дважды щелкните элементу, удерживая клавишу ALT (Windows) или OPTION (Mac OS). Инструкции по переназначению приложений для открытия файлов по умолчанию см. в документации к используемой ОС.
Улучшенная организация папки сплошных заливок позволяет более эффективно упорядочить сплошные заливки, значения null и корректирующие слои. Можно выполнять следующие задачи.
Выберите папку и нажмите клавишу «Ввод» (Windows) или Return (Mac).
Введите новое имя в соответствующем поле.
Щелкните правой кнопкой мыши и выберите Переименовать . Например, переименуйте папку, присвоив ей имя «Цветные квадраты».
После переименования папки выводится предупреждение при попытке создать сплошную заливку.
Нажмите «Да» и выберите папку «Цветные квадраты», чтобы продолжать использовать переименованную папку.
Если требуется создать сплошную заливку в новой папке сплошных заливок, нажмите кнопку «Нет» и используйте папку «Сплошные заливки».
Чтобы открыть окно Установки , выберите Установки > Новый проект .
В окне Установки введите новое имя в текстовом поле Новая папка «Сплошные заливки» для проекта и нажмите кнопку ОК .
Эти настройки применяются к создаваемым папкам. Текущие проекты не затрагиваются.
Вкладывать папки в службе «Проекты группы» невозможно.
Щелкните правой кнопкой мыши требуемую папку на панели Проект .
Выберите папку сплошных заливок в меню, чтобы настроить ее в качестве папки сплошных заливок.
Настраивать папки в качестве папки сплошных заливок можно только по очереди.
Можно открыть и редактировать элемент видеоряда в исходном приложении непосредственно из проекта After Effects. Исходное приложение должно быть установлено на компьютере с достаточным объемом оперативной памяти. При редактировании и сохранении изменений в исходном приложении в случае, когда активным приложением становится After Effects, изменения применяются ко всем экземплярам видеоряда.
При редактировании видеоряда с альфа-каналом убедитесь, что в другом приложении отображаются и редактируются все каналы, включая альфа-канал. В противном случае внесенные изменения могут не отразиться на альфа-канале, что приведет к расхождению с цветовыми каналами.
При редактировании последовательности неподвижных изображений, выбранных на панели «Временная шкала» или «Композиция», отдельно открывается изображение, которое отображается в данный момент. При редактировании последовательности изображений, выбранных на панели «Проект», открывается первое изображение последовательности.
На панели «Проект», «Композиция» или «Временная шкала» выберите элемент видеоряда или слой, источником которого является элемент видеоряда. При выборе набора неподвижных изображений на панели «Композиция» или «Таймлайн» переместите индикатор текущего времени в кадр, где отображается неподвижное изображение, которое необходимо отредактировать.
Отредактируйте видеоряд в исходном приложении и сохраните изменения.
Перед уменьшением проекта, удалением неиспользуемых видеорядов или сведением видеоряда рекомендуется создать резервную копию проекта, предварительно расширив и сохранив его. (См. раздел Сохранение и резервное копирование проектов в After Effects.)
Карл Ларсен (Carl Larsen) демонстрирует использование команд «Сбор файлов» и «Сбор видеоряда» в видеоруководстве на веб-сайте Creative COW, посвященном организации, сбору и архивированию файлов и видеоряда проекта.
При удалении повторяющегося элемента, связи относящихся к нему слоев обновляются и закрепляются за оставшимся экземпляром.
Команда служит для удаления как неиспользуемых элементов видеоряда, так и всех других композиций, не входящих в выбранную композицию в качестве вложенных композиций.
Если в выбранную композицию входят отключенные элементы (т. е. переключатель «Видео» или «Аудио» на панели «Временная шкала» не выделен), данные элементы после применения команды «Уменьшить проект» не удаляются.
Если выражение в выбранной композиции ссылается на элемент композиции, которая не является вложенной, после применения команды «Уменьшить проект» лишняя композиция удаляется, как и соответствующее выражение. После выбора команды «Уменьшить проект» появляется предупреждение, что позволяет при необходимости отменить команду. Чтобы не удалять выражения из композиции, которая не является вложенной, перетащите эту композицию в ту композицию, которая ссылается на неё. Затем снимите выделение с переключателей «Аудио» и «Видео» для добавленной композиции.


Александр Петин запись закреплена
Пропал вэйформ на звуке. Кэш чистил, отображение включено , генерировал. Не помогло. Куда копать?


Александр, скрин в студию с вашим невидимым, но включенным вэйвформом
Дмитрий, Мультикам . До вчерашнего дня вэйформ был. Открыл секвенцию на таймлинии звук с исходника включить. Закрыл и всё, нет вэйформа.
Александр, внутри нэста или на нулевом клипе если добавить в сиквенс вейв форм есть?
И у меня не нест, а мультикам . Премьер который сам собирает.
Александр, тогда не понимаю ваше удивление. в несте может быть надцать аудиотреков. как вы хотите чтобы он вам показывал вэйвформ?
Дмитрий, Он показывал. Я выше всё объяснил. И показал, что внутри секвенции. Причём здесь нест 20 аудиотреков? Вэйформ должен отображаться в любой ситуации, если это отображение не отключить.
Александр, в случае с нестом это будет не вейвформ а каша из надцати дорожек.
Чистите медиакэш и по новой рендерите аудио нестов.
Дмитрий, Я писал выше :- кэш чистил. Какие аудио нестов? Это звук с . рекордеров. Собран и смонтирован мультикам. Лень что ли выше поднятся и прочитать? Я
When you nest a sequence with more than one audio clip, your nested sequence will not have a single waveform to reference.
To generate the waveforms you must select the nested sequence and go to Sequence > Render Audio in the top menu bar.
«
Александр, лень чтоли глаза разуть — у вас мультикам в нест лег. на вашем же скрине выше НАПИСАНО NESTED SEQ, я даже красным обвел

Во многих своих уроках я часто пользуюсь горячими клавишами и это не потому что я люблю издеватся над зрителями,а потому что попросту привык их (клавиши) использовать. В этой статье расскажу об основных клавишах в After Effects которые необходимо как минумум знать (пользоватся это на ваше усмотрение), плюс как бонус, будет информация о том как можно эти горячие кнопки перенастроить (т.к. в After Effects сделать кастом кнопок не так просто как может показаться на первый взгляд).
Использование горячих клавиш (в любой из программ), значительно ускоряет работу. Рассмотрим основные клавиши используемые в After Effects по умолчанию:
Инструментарий и слои:
“V” = Selection Tool (Основной инструмент по умолчанию)
“H” или “Зажимаем Пробел на окне просмотра и двигаем левой кнопкой мыши” = Hand Tool («Рука» позволяющая быстро передвигатся по окну просмотра)
“Z” или “Колесико мыши в окне предпросмотра” = Zoom Tool (Обычное увеличение рабочего окна композиции, всегда пользуюсь колесико, как большинство)
“W” = Rotation Tool (Инструмент вращения)
“C” = Camera Mode (Камера в After Effects, можно нажать несколько раз «С» чтобы выбрать нужный инструмент камеры, я обычно пользуюсь Undefind camera)
“Q” = Shape or Shape Masker tool (Шейпы, инструмент готовой маски определенной фигуры, можно также нажать несколько раз для выбора своей фигуры)
“G” = Pen tool (Маски, создание и редактирование масок)
“Ctrl + T” = Text Tool (Инструмент для создание текста, вертикального или горизонтального)
“Ctrl + Y” = Solid layer (Всегда, работая, создаю солид слой именно через этот хоткей)
“Ctrl + Alt + Y” = Adjusment Layer (То же самое что и солид,но только адж. слой)
“Enter” = по любому из выделенных слоев позволяет переименовать его.
На таймлайне и в работе:
“Ctrl + стрелка вправо” или Page Down = Следущий кадр (частоиспользуемое)
“Ctrl + стрелка влево” или Page Up = Предыдущий кадр (частоиспользуемое)
“Shift + Page Down” = Перепрыгнуть на 10 кадров вперед
“Shift + Page Up” = Перепрыгнуть на 10 кадров назад
“Alt + Page Down” = Сдвинуть выбраный слой на 1 фрейм вперед
“Alt + Page Up” = Сдвинуть выбраный слой на 1 фрейм назад
“Alt + ]” = Обрезать выбраный слой справа до курсора на таймлайне (частоиспользуемое)
“Alt + [” = Обрезать выбраный слой слева до курсора на таймлайне (частоиспользуемое)
«Home» = Передвинуть курсор в начало композиции
«End» = Передвинуть курсор в конец композиции
«]» = Передвинуть конец слоя к курсору (частоиспользуемое)
«[» = Передвинуь начало слоя к курсору (частоиспользуемое)
«+» = Увеличение таймлайна
«-» = Уменьшение таймлайна
“* (на numpad)” = Поставить маркер либо на выделенном слое либо на композиции (если слой не выделен)
“0 (Ноль на numpad)” = RAM превью (частоиспользуемое)
“, (Запятая на numpad)” = Ram превью ТОЛЬКО ЗВУКА
“M (два раза)” = Если на выделеном слое есть маски, то эта горячая клавиша открывает все настройки этой (-этих) масок
“F” = Если на выделеном слое есть маски (маска), то открывается ее параметр «Feather»
“U” = Открывает все параметры с простравленными ключами (keyframes) на выделенном слое
“L (два раза)” = На выделеном АУДИО слое открывает его waveforms (графические пики)
“I” = Перенести курсор в начало выделенного слоя
“O” = Перенести курсор в конец выделенного слоя
“J” = Перейти к предыдущему ключу на таймлайне (keyframes)
“K” = Перейти к следущему ключу на таймлайне (keyframes)
“B” = Обрезать «work area» композиции слева (частоиспользуемое)
“N” = Обрезать «work area» композиции справа (частоиспользуемое)
“Ctrl + D” = Склонировать выделенный слой (частоиспользуемое)
“Ctrl + Shift + D” = Разрезать выделеный слой на два (там где стоит курсор)
“P” = Position параметр у выделенного слоя
“S” = Scale параметр у выделенного слоя
“R” =Rotation параметр у выделенного слоя
“T” = Opacity/Intensivity параметр у выделенного слоя
«A» = Ancor point/Point of interest у выделенного слоя
“Ctrl + M” = Добавить композицию к рендеру (частоиспользуемое)
“Ctrl + C” = ничто иное как «контрлкопи» которую я так люблю называть. Копирование выделенного объекта, текста,слоя,ключей и всего-всего. (частоиспользуемое)
“Ctrl + V” = Вставка выделенного объекта, текста,слоя,ключей и всего-всего. (частоиспользуемое)
“Ctrl + X” = Вырезание выделенного объекта, текста,слоя,ключей и всего-всего. (частоиспользуемое)
“Ctrl + Z” = Откат предудущих действий (частоиспользуемое)
“Ctrl + S” = Сохранение проекта (частоиспользуемое)
“Ctrl + N” = Создание новой композиции
“Ctrl + Alt+ S” = Рендер одного фрейма из композиции
“Ctrl +Shift+ H” = Показывает композицию в окне просмотра без указателей слоев и пр. деталей композиции.
“F4” = Toggle switch modes, иначе говоря скрыть/открыть переключатели parent,modes,blending,3d switches на таймлайне. Любимая кнопка новичков.
“F9” = Easy Ease интерполяция ключа, на таймлайне.
“Ctrl +Shift+ С” = Прекомпоз выделенных слоев.
Конечно же это лишь часть всех горячих клавиш, я постарался указать самые распространенные. Конечно же все эти хоткейсы, можно кастомизировать по своему,но сделать это не так просто как допустим в вегасе или синеме, для этого необходимо найти:
C:UsersИмя пользователяAppDataRoamingAdobeAfter Effectsверсия программы
В этой папке находим текстовый файл который называется:
«Adobe After Effects версия программы Shortcuts.txt»
Читайте также:
- After Effects User Guide
- Beta releases
- Beta Program Overview
- After Effects Beta Home
- Features in Beta
- Properties panel (Beta)
- 3D Model Import (Beta)
- Getting started
- Get started with After Effects
- What’s new in After Effects
- Release Notes | After Effects
- After Effects system requirements
- Keyboard shortcuts in After Effects
- Supported File formats | After Effects
- Hardware recommendations
- After Effects for Apple silicon
- Planning and setup
- Workspaces
- General user interface items
- Get to know After Effects interface
- Workflows
- Workspaces, panels, and viewers
- Projects and compositions
- Projects
- Composition basics
- Precomposing, nesting, and pre-rendering
- View detailed performance information with the Composition Profiler
- CINEMA 4D Composition Renderer
- Importing footage
- Preparing and importing still images
- Importing from After Effects and Adobe Premiere Pro
- Importing and interpreting video and audio
- Preparing and importing 3D image files
- Importing and interpreting footage items
- Working with footage items
- Detect edit points using Scene Edit Detection
- XMP metadata
- Text and Graphics
- Text
- Formatting characters and the Character panel
- Text effects
- Creating and editing text layers
- Formatting paragraphs and the Paragraph panel
- Extruding text and shape layers
- Animating text
- Examples and resources for text animation
- Live Text Templates
- Motion Graphics
- Work with Motion Graphics templates in After Effects
- Use expressions to create drop-down lists in Motion Graphics templates
- Work with Essential Properties to create Motion Graphics templates
- Replace images and videos in Motion Graphics templates and Essential Properties
- Text
- Drawing, Painting, and Paths
- Overview of shape layers, paths, and vector graphics
- Paint tools: Brush, Clone Stamp, and Eraser
- Taper shape strokes
- Shape attributes, paint operations, and path operations for shape layers
- Use Offset Paths shape effect to alter shapes
- Creating shapes
- Create masks
- Remove objects from your videos with the Content-Aware Fill panel
- Roto Brush and Refine Matte
- Layers, Markers, and Camera
- Selecting and arranging layers
- Blending modes and layer styles
- 3D layers
- Layer properties
- Creating layers
- Managing layers
- Layer markers and composition markers
- Cameras, lights, and points of interest
- Animation, Keyframes, Motion Tracking, and Keying
- Animation
- Animation basics
- Animating with Puppet tools
- Managing and animating shape paths and masks
- Animating Sketch and Capture shapes using After Effects
- Assorted animation tools
- Work with Data-driven animation
- Keyframe
- Keyframe interpolation
- Setting, selecting, and deleting keyframes
- Editing, moving, and copying keyframes
- Motion tracking
- Tracking and stabilizing motion
- Face Tracking
- Mask Tracking
- Mask Reference
- Speed
- Time-stretching and time-remapping
- Timecode and time display units
- Keying
- Keying
- Keying effects
- Animation
- Transparency and Compositing
- Compositing and transparency overview and resources
- Alpha channels and masks
- Track Mattes and Traveling Mattes
- Adjusting color
- Color basics
- Color management
- Color Correction effects
- OpenColorIO and ACES color management
- Effects and Animation Presets
- Effects and animation presets overview
- Effect list
- Simulation effects
- Stylize effects
- Audio effects
- Distort effects
- Perspective effects
- Channel effects
- Generate effects
- Transition effects
- The Rolling Shutter Repair effect
- Blur and Sharpen effects
- 3D Channel effects
- Utility effects
- Matte effects
- Noise and Grain effects
- Detail-preserving Upscale effect
- Obsolete effects
- Expressions and Automation
- Expression
- Expression basics
- Understanding the expression language
- Using expression controls
- Syntax differences between the JavaScript and Legacy ExtendScript expression engines
- Editing expressions
- Expression errors
- Using the Expressions editor
- Use expressions to edit and access text properties
- Expression language reference
- Expression examples
- Automation
- Automation
- Scripts
- Expression
- Immersive video, VR, and 3D
- Construct VR environments in After Effects
- Apply immersive video effects
- Compositing tools for VR/360 videos
- Tracking 3D camera movement
- Work in 3D Design Space
- 3D Transform Gizmos
- Do more with 3D animation
- Preview changes to 3D designs real time with the Mercury 3D engine
- Add responsive design to your graphics
- Views and Previews
- Previewing
- Video preview with Mercury Transmit
- Modifying and using views
- Rendering and Exporting
- Basics of rendering and exporting
- H.264 Encoding in After Effects
- Export an After Effects project as an Adobe Premiere Pro project
- Converting movies
- Multi-frame rendering
- Automated rendering and network rendering
- Rendering and exporting still images and still-image sequences
- Using the GoPro CineForm codec in After Effects
- Working with other applications
- Dynamic Link and After Effects
- Working with After Effects and other applications
- Sync Settings in After Effects
- Creative Cloud Libraries in After Effects
- Plug-ins
- Cinema 4D and Cineware
- Collaboration: Frame.io, and Team Projects
- Collaboration in Premiere Pro and After Effects
- Frame.io
- Install and activate Frame.io
- Use Frame.io with Premiere Pro and After Effects
- Frequently asked questions
- Team Projects
- Get Started with Team Projects
- Create a Team Project
- Collaborate with Team Projects
- Memory, storage, performance
- Memory and storage
- How After Effects handles low memory issues while previewing
- Improve performance
- Preferences
- GPU and GPU driver requirements for After Effects
- Knowledge Base
- Known issues
- Fixed issues
- After Effects and macOS Ventura
- How After Effects handles low memory issues while previewing
Third-party effects in this category included with After
Effects:
-
CC Glue Gun effect
-
CC Light Burst 2.5 effect
-
CC Light Rays effect
-
CC Light Sweep effect
-
CC Threads effect
4-Color Gradient effect
The 4-Color Gradient effect produces a four-color gradient.
The gradient is defined by four effect points, the positions and
colors of which can be animated using the Positions & Colors
controls. The gradient is composed of four solid-color circles blended
together, each with an effect point as its center.
This effect works with 8-bpc and 16-bpc color.
Blend
Higher values create more gradual transitions between colors.
Jitter
The amount of jitter (noise) in the gradient.
The jitter, which reduces banding, affects only those areas where
banding could occur.
Opacity
The opacity of the gradient, as a fraction of the Opacity
value for the layer.
Blending Mode
The blending mode to use in combining the gradient with the layer.
Advanced Lightning effect
The Advanced Lightning effect creates simulations of electrical discharges. Unlike the Lightning effect, Advanced Lightning doesn’t self-animate. Animate the Conductivity State or other properties to animate the lightning.
The Advanced Lighting effect includes the Alpha Obstacle feature, with which you can make the lightning go around designated objects.
Chris Zwar provides a detailed description on his website of how he used the Advanced Lightning effect to simulate blood vessel capillaries.
Eran Stern provides a video introduction to the Advanced Lightning effect on the Motionworks website.
This effect works with 8-bpc color.
Lightning Type
Specifies the characteristics of the lightning.
note: The
type determines the nature of the Direction/Outer Radius contextual control.
In the Breaking type, the branches are focused toward the Direction
point as the distance between Origin and Direction increases.
Origin
Specifies the point of origin for the lightning.
Direction, Outer Radius
This control changes depending on the Lightning Type:
Not In Use
The Direction or Outer Radius control is not available if
Lightning Type is Vertical.
Outer Radius
Specifies the distance that the lightning travels from its
origin. This control is enabled if Omni or Anywhere is selected
as the lightning type. Use it to terminate the lightning at a defined
distance from the origin.
Direction
Specifies the direction that the lightning travels. This
control is enabled if any of the following lightning types are selected:
Direction, Strike, Breaking, Bouncy, and Two-Way Strike.
Conductivity State
Changes the path of the lightning.
Core Settings
These controls adjust various characteristics of the core
of the lightning.
Glow Settings
These controls adjust the glow of the lightning.
note: To
disable the glow, set Glow Opacity to 0. This setting can speed
up rendering time greatly.
Alpha Obstacle
Specifies the influence of the alpha channel of the original
layer on the path of the lightning. When Alpha Obstacle is greater
than zero, the lightning attempts to wrap itself around opaque areas
of the layer, seeing them as an obstacle. When Alpha Obstacle is
less than zero, the lightning tries to stay inside the opaque areas,
avoiding the transparent areas. The lighting can cross the boundaries
between opaque and transparent areas, but Alpha Obstacle values
further from zero cause the crossing to happen less often.
note: If
Alpha Obstacles is set to a value other than 0, it’s not always
possible to preview the correct result in less than full resolution;
full resolution may reveal new obstacles. Be sure to check the result
in full resolution before final rendering.
Turbulence
Specifies the amount of turbulence in the lightning path.
Higher values result in a more complex strike containing more branches
and forks, and lower values produce simpler strikes with fewer branches.
Forking
Specifies what percentage of a branch is forked. Turbulence
and Alpha Obstacle settings influence forking.
Decay
Specifies the amount of continuous decay or dissipation of
the lightning strength and influences where the opacity of the forks
begins to fade.
Decay Main Core
Decays the main core along with its forks.
Composite On Original
Composites the lightning with the original layer using the
Add blending mode. When deselected, only the lightning is visible.
Complexity
Specifies the complexity of the turbulence in the lightning.
Min. Forkdistance
Specifies the minimum pixel distance between new forks. Lower
values create more forks in the lightning. Higher values result
in fewer forks.
Termination Threshold
Specifies the level at which a path terminates, based on resistance
in the atmosphere and possible alpha collision. At lower values,
the path terminates more easily when encountering resistance or
alpha obstacles. At higher values, the path more persistently moves
around alpha obstacles.
note: Increasing Turbulence or Complexity
values causes resistance to increase in some areas. These areas
change as conductivity changes. Increasing the Alpha Obstacle value
causes resistance to increase at alpha edges.
Main Core Collision Only
Calculates collisions only on the main core. The forks aren’t
affected. This control is relevant only if you select Alpha Obstacle.
Fractal Type
Specifies the type of fractal turbulence used to create the lightning.
Core Drain
Specifies the percentage by which the core strength is drained
when creating a new fork. Increasing this value reduces the opacity
of the core where new forks appear. Because forks draw their strength
from the main core, decreasing this value reduces the opacity of
the forks as well.
Fork Strength
Specifies the opacity of the new fork. This amount is measured
as a percentage of the Core Drain value.
Fork Variation
Specifies the amount of variation in the opacity of the fork
and determines how much the fork opacity deviates from the amount
set for Fork Strength.
Audio Spectrum effect
Apply the Audio Spectrum effect to a video layer to display the audio spectrum of a layer that contains audio (and optionally video). The effect displays the magnitude of audio levels at frequencies in the range that you define using Start Frequency and End Frequency. This effect can display the audio spectrum in several different ways, including along a mask path.
Jerzy Drozda, Jr. provides a demonstration of the Audio Spectrum effect on the Motionworks website.
Audio Spectrum uses the audio source footage without time-remapping, effects,
stretch, or levels. To display the spectrum with such effects, precompose
the audio layer before applying the Audio Spectrum effect.
To prevent other masks on the layer from clipping
the output of the Audio Spectrum effect, set their mask modes to
None. (See Mask
modes.)
This effect works with 8-bpc, 16-bpc, and 32-bpc color.

and right)
Audio Layer
The audio layer you want to use as input.
Start Point, End Point
Specifies the position at which the spectrum starts or ends
if Path is set to None.
Path
The mask path along which to display the audio spectrum.
Use Polar Path
The path starts from a single point and appears as a radial
graph.
Start Frequency, End Frequency
The lowest and highest frequencies, in hertz, to display.
Frequency Bands
The number of frequency bands into which to divide displayed
frequencies.
Maximum Height
Maximum height, in pixels, of a displayed frequency.
Audio Duration
Duration of audio, in milliseconds, used to calculate the spectrum.
Audio Offset
Time offset in milliseconds used to retrieve the audio.
Thickness
Thickness of the bands.
Softness
How feathered or blurry the bands appear.
Inside Color, Outside Color
Inside and outside colors of the bands.
Blend Overlapping Colors
Specifies that overlapping spectrums are blended.
Hue Interpolation
If the value is greater than 0, the frequencies displayed rotate
through the hue color space.
Dynamic Hue Phase
If selected, and the Hue Interpolation is greater than 0,
the Start color shifts to the maximum frequency in the range of
displayed frequencies. This setting allows the hue to follow the
fundamental frequency of the spectrum displayed as it changes.
Color Symmetry
If selected, and the Hue Interpolation is greater than 0,
the start and end colors are the same. This setting allows color
continuity on closed paths.
Display Options
Specifies whether to display frequency as Digital, Analog Lines,
or Analog Dots.
Side Options
Specifies whether to display the spectrum above the path
(Side A), below the path (Side B), or both (Side A & B).
Duration Averaging
Specifies that audio frequencies are averaged to reduce randomness.
Composite On Original
If selected, displays the original layer with the effect.
Audio Waveform effect
Apply the Audio Waveform effect to a video layer to
display the audio waveform of a layer that contains audio (and optionally
video). You can display the audio waveform in several different
ways, including along an open or closed mask path.
note: Audio Waveform
uses the audio source footage without time-remapping, effects, stretch,
or levels. To display the spectrum with such effects, precompose
the audio layer before applying the Audio Waveform effect.
To prevent masks on the layer from clipping the
output of the Audio Waveform effect, set their mask modes to None.
(See Mask
modes.)
This effect works with 8-bpc, 16-bpc, and 32-bpc color.

and right)
Audio Layer
The audio layer you want to display as a waveform.
Start Point, End Point
The position at which the waveform starts and ends, if Path
is set to None.
Path
If set to None, the audio waveform is displayed along the
path of the layer.
Displayed Samples
Number of samples to display in the waveform.
Maximum Height
Maximum height, in pixels, of a displayed frequency.
Audio Duration
Duration of audio, in milliseconds, used to calculate the waveform.
Audio Offset
Time offset, in milliseconds, used to retrieve the audio.
Thickness
The thickness of the waveform.
Softness
How feathered or blurry the waveform appears.
Inside Color, Outside Color
The inside and outside colors of the waveform.
Waveform Options
Mono combines the left and right channels of the audio layer.
Nonstereo audio layers play as Mono.
Display Options
Digital displays each sample as a single vertical line connecting
the minimum and maximum source sample. This option simulates the
display used on digital equipment. Analog Lines displays each sample
as a line connecting the previous and next sample from either the
minimum or maximum audio source sample. This option simulates the
retracing seen in the display of an analog oscilloscope. Analog
Dots displays each sample as a dot representing either the minimum
or maximum audio source sample.
Composite On Original
Composites the audio waveform with the original layer using
the Add blending mode. When deselected, only the audio waveform
is visible.
Beam effect
The Beam effect simulates the movement of a beam, such as a laser beam. You can make the beam shoot, or you can create a wandlike beam with a stationary start or end point. The beam looks best when motion blur is enabled and the shutter angle is set to 360.
John Dickinson provides a video tutorial and example project on the Motionworks website that demonstrate the use of the Beam effect.
This effect works with 8-bpc, 16-bpc, and 32-bpc color.

The Length control specifies the length of the beam based on
a percentage of the Time specified. For example, a setting of 100%
means that the visible beam length is at its maximum when the Time
control is 50%. Time specifies the time of the beam’s travel from
start to end as a percentage. The 3D Perspective control uses 3D
perspective based on start and end thickness if Time is animated.
Cell Pattern effect
The Cell Pattern effect generates cellular patterns based on cellular noise. Use it to create static or moving background textures and patterns. The patterns can be used in turn as textured mattes, as transition maps, or as a source for displacement maps.
John Dickinson provides an example project on the Motionworks website that demonstrates the use of the Cell Pattern effect in a seamlessly looping background animation.
Richard Harrington provides additional information and examples for using the Cell Pattern effect on his website.
This effect works with 8-bpc color.

map (center), which is used as a displacement map for the Displacement
Map effect (right).
Cell Pattern
The cell pattern to use. HQ denotes high-quality
patterns that render with more definition than their unmarked counterparts.
Mixed Crystals is available only as a high-quality option.
note: The
Static Plates option is identical in appearance to the Plates option. However,
when evolving, the static plates retain a uniform lightness value,
whereas the plates shift the lightness of the cell pattern.
Invert
Inverts the cell pattern. Black areas become white, and white
areas become black.
Contrast/Sharpness
Specifies the contrast of the cell pattern when you use the Bubbles,
Crystals, Pillow, Mixed Crystals, or Tubular cell pattern. The control specifies
sharpness for any of the Plate or Crystallize options.
note: The
option chosen from the Overflow menu affects the contrast.
Overflow
How the effect remaps values that fall outside the grayscale
range of 0-255. Overflow isn’t available if sharpness-based cell
patterns are chosen.
Clip
Values above 255 are mapped to 255. Values below 0 are mapped
to 0. Contrast amount controls how much of the image falls outside
the range 0-255; higher contrast amounts result in a mostly black
or white image, with less gray. Therefore, less subtle cellular
detail appears at higher contrast settings.
Soft Clamp
Remaps grayscale values to fall inside the 0–255 range.
Contrast appears reduced; cells are mostly gray with few areas of
pure black or white.
Wrap Back
Values above 255 or below 0 are reflected back into the 0-255 range.
For example, a value of 258 (255+3) is reflected to 252 (255-3),
and a value of ‑3 is reflected to 3. With this setting, Contrast
values above 100 increase complexity and detail.
Disperse
How randomly the pattern is drawn. Lower values cause more
uniform or gridlike cell patterns.
note: If you set the Disperse
value above 1.0, set the layer to Best quality to avoid artifacts.
Size
The size of the cells. The default size is 60.
Offset
Determines the portion of the fractal shape used to create
the pattern.
Tiling Options
Choose Enable Tiling to create a pattern built of repeating
tiles. Cells Horizontal and Cells Vertical determine how many cells
wide and how many cells high each tile is.
Evolution
Animating this setting results in changes of the pattern
over time.
note: Although the Evolution value is set in units
called revolutions, it’s important to realize that
these revolutions are progressive. The Evolution state continues
to progress infinitely at each new value. Use the Cycle Evolution
option to return the Evolution setting to its original state at
each revolution.
Evolution Options
Evolution Options provide controls that render the effect
for one short cycle and then loop it for the duration of your clip.
Use these controls to pre-render cell pattern elements into loops,
and thus speed up rendering time.
Cycle Evolution
Creates a loop that forces the Evolution state to return
to its starting point.
Cycle
The number of revolutions of the Evolution setting that the
cell pattern cycles through before it repeats. The amount of time
between Evolution keyframes determines the timing of the Evolution
cycles.
note: The Cycle control affects only the state of the
cell pattern, not geometrics or other controls, so you can get different
results with different Size or Offset settings.
Random Seed
Specifies a value from which to generate the cell pattern. Animating
this property results in flashing from one cell pattern to another (within
the same cell pattern type), which is not usually the result that
you want. For smooth transition of the cell pattern, animate the
Evolution property.
note: Create new cell pattern animations
by reusing previously created Evolution cycles and changing only
the Random Seed value. Using a new Random Seed value alters the
cell pattern without disturbing the Evolution animation.
Checkerboard effect
The Checkerboard effect creates a checkerboard pattern
of rectangles, half of which are transparent.
This effect works with 8-bpc color.
Anchor
The point of origin of the checkerboard pattern. Moving this
point offsets the pattern.
Size From
How the dimensions of the rectangles are determined:
Corner Point
The dimensions of each rectangle are the dimensions of the rectangle
with opposite corners defined by the Anchor and Corner points.
Width Slider
The height and width of a rectangle are equal to the Width
value, meaning that the rectangles are squares.
Width & Height Sliders
The height of a rectangle is equal to the Height value. The
width of a rectangle is equal to the Width value.
Feather
Thickness of the edge feather within the checkerboard pattern.
Color
The color of the nontransparent rectangles.
Opacity
The opacity of the colored rectangles.
Blending Mode
The blending mode to use to composite the checkerboard pattern
on top of the original layer. These blending modes work identically
to the ones in the Timeline panel, except for the default None mode,
which renders the checkerboard pattern only.
Circle effect
The Circle effect creates a customizable solid disk
or ring.
This effect works with 8-bpc color.
Edge
None creates a solid disk. The other options all create rings.
Each option corresponds to a different set of properties that determine
the shape and edge treatment of the ring:
Edge Radius
The difference between the Edge Radius property and the Radius property
is the thickness of the ring.
Thickness
The Thickness property sets the thickness of the ring.
Thickness * Radius
The product of the Thickness property and the Radius property
is the thickness of the ring.
Thickness & Feather * Radius
The product of the Thickness property and the Radius property
is the thickness of the ring. The product of the Feather property and
the Radius property is the feather of the ring.
Feather
The thickness of the feather.
Invert Circle
Inverts the matte.
Blending Mode
The blending mode used to combine the shape and the original
layer. These blending modes behave like the blending modes in the Timeline
panel, except for None, which displays only the shape, without the original
layer.
Ellipse effect
The Ellipse effect draws an ellipse.
This effect works with 8-bpc, 16-bpc, and 32-bpc color.
Eyedropper Fill effect
The Eyedropper Fill effect (formerly the Color Picker
effect) applies a sampled color to the source layer. This effect
is useful for quickly picking a solid color from a sample point
on the original layer or picking a color value from one layer and using
blending modes to apply this color to a second layer.
This effect works with 8-bpc color.
Sample Point
The center of the sampled area.
Sample Radius
The radius of the sampled area.
Average Pixel Color
Which color values are sampled:
Skip
Empty
Samples the average RGB color values, excluding the color
values of transparent pixels.
All
Samples the average of all RGB color values, including color
values of transparent pixels.
All Premultiplied
Samples the average of all RGB color values, premultiplied with
the alpha channel.
Including Alpha
Samples the average of all RGB color and alpha channel values.
This setting results in the sampled color also containing the average transparency
of the sampled pixels.
Maintain Original Alpha
Maintains the alpha channel of the original layer. If you
choose Including Alpha in the Average Pixel Color menu, the original
alpha is stenciled over the sampled color.
Blend With Original
The transparency of the effect. The result of the effect
is blended with the original image, with the effect result composited
on top. The higher you set this value, the less the effect affects
the layer. For example, if you set this value to 100%, the effect
has no visible result on the layer; if you set this value to 0%,
the original image doesn’t show through.
Fill effect
The Fill effect fills specified masks with a specified color. If you want to add both a stroke and a fill to a closed path, the order in which you apply the stroke and fill determines the visible width of the stroke: If the fill is applied before the stroke, the full stroke brush size is visible; if the stroke is applied before the fill, the fill appears on top of the stroke, obscuring the half of the stroke that falls inside the path.
This effect works in 32-bit color.
Fractal effect
The Fractal effect renders the Mandelbrot or Julia set,
creating colorful textures. When you first apply the effect, the
picture you see is the classic sample of the Mandelbrot set; the
set is the area that is colored black. Any pixel outside the set is
colorized, depending on how close it is to the set.
This effect works with 8-bpc and 16-bpc color.

fractal with Lightness Gradient palette (lower-left) and Julia fractal
(lower-right)
Set Choice
Specifies the set used. Mandelbrot is the typical Mandelbrot
set. Mandelbrot Inverse is the Mandelbrot set mathematically inverted.
Julia always changes depending on the center point from the Mandelbrot
set and can produce the set of all possible Julia sets. Julia Inverse
is the inverse of the Julia set. To see a Julia set, you may want
to set the magnification to a negative value, because these sets
tend to fill up the complex plane outside the normal boundary. Mandelbrot
Over Julia is the same as Mandelbrot, except that it changes when
the Julia center point changes. Mandelbrot Inverse over Julia is the
same as Mandelbrot Inverse, except that it changes when the Julia
center point changes.
Mandelbrot, Julia
Specify the settings for the specified set. X (Real) and
Y (Imaginary) specify the pixels at the center of the image for
either the Mandelbrot or Julia set. Magnification specifies the
magnification of the effect. Escape Limit specifies how many times
the calculation looks for a color for a given pixel before it assigns
the color black. It also sets the maximum number of line segments
the Selection tool can use when tracing the path of a point. Higher
numbers require longer render times.
Color
Specifies the color of the effect:
Overlay
Displays a ghosted version of the opposite set. For example,
when viewing the Julia set, use this control to display a ghosted
version of the Mandelbrot set. When you select Overlay, a white
cross hair with a black drop shadow appears so you can see the exact
point at the center of the opposite set. This control is useful
because the Julia set depends on the center point of the Mandelbrot
set.
Transparency
Specifies whether black pixels are transparent. If you choose Solid
Color from the Palette menu, this control specifies whether everything inside
or outside the set is transparent.
Palette
Specifies the palette to use when drawing the set. Lightness
Gradient creates a gradient that ranges from black to white, passing
through the hue specified by the Hue control. Then it applies the
same gradient eight more times, each time using the hue 45° away
on the color wheel. The Cycle Steps control specifies the number
of colors in the gradient. Hue Wheel uses all the color from the
Hue color wheel, with maximum brightness and saturation. Black And
White uses alternating bands of black and white. Solid Color turns
everything transparent except the inside of the set, which uses
the color specified by the Hue control. Select Transparent to get
the opposite result.
Hue
Specifies the hue for solid colors and the starting hue
for color gradients. This control works well for creating smooth
color changes or for cycling through the palette. Cycle Steps specifies
the number of bands of different color that appear before the cycle
starts over. Cycle Offset specifies where, other than the beginning,
a cycle starts.
Edge Highlight
Highlights the edges between color bands. This control requires
low-quality mode. If you want to use high-quality edge highlighting,
use the Find Edges effect instead.
High Quality Settings
Specify the oversampling settings for the effect:
Oversample Method
Specifies the method used to oversample the effect: Edge Detect-Fast-May
Miss Pixels performs a simple edge detection and oversamples only
those pixels. This option is the fastest, especially in areas with
a lot of solid color, such as black, and it generally produces results
indistinguishable from Brute Force. Brute Force-Slow-Every Pixel
oversamples every pixel in the image. It is slow but precise.
Oversample Factor
Specifies the amount of oversampling to perform. For example,
a value of 4 specifies that each pixel is sampled 16 times (4×4=16)
and that the average color is used. Higher values produce better
quality output but require longer render times.
When the Fractal effect is selected in the
Effect Controls panel, you can use After Effects tools in the following
way. (If you don’t want the Fractal tools active, deselect the effect
before using tools.)
- Use the Selection tool and click while holding the Alt (Windows) or Option (Mac OS) key. If the path leads out of the bounded rectangle (-2, -2, 2, 2), it has gone into infinity; in such a case, the starting-point color is based on how many line segments it takes to reach infinity. If the path ends within the rectangle, it’s colored black.
- Use the Zoom tool to zoom in or out on a particular point, or hold down Ctrl (Windows) or Command (Mac OS), click and hold the Magnifying tool over the center of the image, and navigate from the center. For example, to zoom straight in, stay in the center; to move up, drag up a little and then quickly move back to the center.
- Use the Hand tool to pan the image. Press Ctrl (Windows) or Command (Mac OS) to pan the opposite fractal. For example, when viewing the Julia set, press Ctrl (Windows) or Command (Mac OS) to pan the Mandelbrot set and see how the Julia set depends on the center point of the Mandelbrot set.
- Use the arrow keys to pan the center point by 1 pixel. Press Shift as you press an arrow key to adjust the point by 10 pixels. Press Ctrl (Windows) or Command (Mac OS) as you press an arrow key to adjust the center point of the opposite set.
Gradient Ramp effect | CC
The Gradient Ramp effect creates a color gradient. You can create linear or radial ramps, and vary the position and colors of the ramp over time. Use the Start Of Ramp and End Of Ramp properties to specify the start and end positions. Use the Ramp Scatter control to disperse the ramp colors and eliminate banding.
This effect works with 8-bpc, 16-bpc, and 32-bpc color.
Ramps often don’t broadcast well; severe banding occurs because
the broadcast chrominance signal doesn’t contain sufficient resolution
to reproduce the ramp smoothly. The Ramp Scatter control dithers
the ramp colors, eliminating the banding apparent to the human eye.
Grid effect
Use the Grid effect to create a customizable grid. Render this grid in a solid color or as a mask in the alpha channel of the source layer. This effect is good for generating design elements and mattes within which other effects can be applied.
John Dickinson provides a video tutorial on his Motionworks website that demonstrates the use of the Grid effect.
This effect works with 8-bpc color.
Use Grid with the Advanced Lightning effect to
create lightning forks that follow a grid pattern.
Anchor
The point of origin of the grid pattern. Moving this point
offsets the pattern.
Size From
How the dimensions of the rectangles are determined:
Corner Point
The dimensions of each rectangle are the dimensions of the rectangle
with opposite corners defined by the Anchor and Corner points.
Width Slider
The height and width of a rectangle are equal to the Width
value, meaning that the rectangles are squares.
Width & Height Sliders
The height of a rectangle is equal to the Height value. The
width of a rectangle is equal to the Width value.
Border
The thickness of the grid lines. A value of 0 causes the
grid to disappear.
note: The anti-aliasing of the grid borders
may cause the visible thickness to vary.
Feather
The softness of the grid.
Invert Grid
Inverts the transparent and opaque areas of the grid.
Color
The color of the grid.
Opacity
The opacity of the grid.
Blending Mode
The blending mode to use to composite the grid on top of
the original layer. These blending modes work identically to the
ones in the Timeline panel, except for the default None mode, which
renders the grid only.
Lens Flare effect
The Lens Flare effect simulates the refraction caused
by shining a bright light into the camera lens. Specify a location
for the center of the flare by clicking anywhere inside the image
thumbnail or by dragging its cross hair.
This effect works with 8-bpc color.

Paint Bucket effect
The Paint Bucket effect (formerly Basic Fill effect)
is a nondestructive paint effect that fills an area with a solid
color. It works much like the Paint Bucket tool in Adobe Photoshop.
Use the Paint Bucket effect for colorizing cartoon-type outlined
drawings or replacing areas of color in an image.
This effect works with 8-bpc color.
Fill Point
The effect fills an area that contains the Fill Point. The
area is determined by analyzing pixels that neighbor the Fill Point
and expanding the fill area by adding matching pixels. How far the
fill color spreads depends upon the Tolerance setting, as well as
the option you choose from the Fill Selector menu.
Fill Selector
Which values to operate on:
Color &
Alpha
Specifies that the effect fills the RGB and alpha channels
of the fill area with the new color.
Straight Color
Specifies that the effect fills only the RGB channels of
the fill area with the new color.
Transparency
Specifies that the effect fills only the transparent areas
near the fill point. You must set a fill point in a transparent
area for this option to work.
Opacity
Specifies that the effect fills only the opaque areas near
the fill point. You must set a fill point in an opaque area for
this option to work.
Alpha Channel
Specifies that the effect fills either the opaque or transparent areas
in the whole image, depending upon the alpha channel value at the
point you set the fill point.
Tolerance
How far the color values of a pixel can be from the Fill
Point color values and still match. Higher values expand the range
of pixels that the effect fills.
View Threshold
Shows what pixels match—that is, which pixels are within
the Tolerance value of the color values of the Fill Point pixel.
This option is especially useful in tracking leaks. If a small gap
exists, the color can flow over and fill areas not intended to be
filled.
Stroke
How the effect treats the edges of the filled area:
Antialias
Anti-aliases the edges of the filled area.
Feather
Creates a feathered edge for the filled area. Feather Softness
values create a more gradually disappearing edge.
Spread
Expands the area of the fill color. The Spread Radius value
indicates the number of pixels the fill color extends beyond the
edge of the fill area.
Choke
Contracts the area of the fill color. The Spread Radius
value indicates the number of pixels the fill color shrinks from
the edge of the fill area.
Stroke
Confines the fill to only the border of the selected area.
The Stroke Width value indicates the width of the stroke, in pixels.
Opacity
Opacity of the filled area.
Blending Mode
The blending mode to use to composite the result of the effect on top of the original layer. All of these blending modes operate like the blending modes in the Timeline panel, except for Fill Only. Use Fill Only to show only the fill.
If you apply multiple instances of Paint Bucket to a layer, be sure not to set more than one to use the Fill Only blending mode. If you set more than one instance to use this blending mode, only the first application of the effect is shown.
Radio Waves effect
The Radio Waves effect creates radiating waves from a stationary or animated effect control point. You can use this effect to generate pond ripples, sound waves, or intricate geometric patterns. Use the Reflection control to make the shapes bounce off the sides of the layer. You can also use Radio Waves to create realistic wave displacement maps that work well with the Caustics effect.
Satya demonstrates animation of the mask that the radio wave shape is based on. He also demonstrates that you can get smooth, organic contours (rather than discrete waves) by using a very high value for Frequency, together with carefully chosen Fade-in Time and Fade-out Time settings.
This effect works with 8-bpc color.

and Image Contour wave type with Sine stroke profile (lower-right)
Producer Point
The point from which the waves appear.
Parameters Are Set At
Specifies whether parameters can be animated for individual
waves. Birth specifies that each wave maintains the same parameter settings
over time. Each Frame specifies that the waves change as the parameters change.
For example, if you create a star wave with an animated rotation property,
select Birth to offset each star from the previous one to create
a twisting tunnel, or select Each Frame to make all the stars rotate
in unison as the rotation property changes.
Render Quality
Controls the quality of the output. Radio Waves creates smooth, anti-aliased
shapes by rendering high-resolution versions of the shapes and then scaling
them down by oversampling. For example, to create a 100×100-pixel image,
it may generate a 400×400-pixel image and then scale it down using
4x oversampling. Oversampling provides high-quality results but
results in long render times. This option works only with Best quality
mode.
Wave Type
What to base the wave shape on.
Polygon
What kind of polygon to use for the wave shape. These controls
are available if Polygon is chosen for Wave Type.
Sides
Three sides create a triangle, four create a square, and
so on. Size values above 64 result in a smooth circle. You can also
approximate a circle by setting Sides to 3, Curve Size to 1, and
Curvyness to about 0.62.
Curve Size
Specifies how much of each side is curved at each point.
Curvyness
Specifies how extreme the curve is at each point of the wave.
Star
Specifies that the polygon is shaped like a star. To change
the number of points on the star, change the number of sides.
Star Depth
Specifies the angles of a star by controlling the distance
between inner points and the center of the star.
Mask
Specifies the mask used to create a wave. This control is
available if you choose Mask from the Wave Type pop-up menu.
Image Contour controls
You can base the wave shape on the contours
of an image by choosing Image Contours for Wave Type.
Source Layer
The layer to use as input for the creation of the image contours. Select
an animated layer to emit moving shapes. A well-defined outline,
high-contrast grayscale layer, or alpha channel works well as a
source. The Radio Waves effect detects edges and converts sources
into outlines.
Source Center
Specifies the center point of the shape, relative to the
source layer. For example, if you isolate a shape that is positioned
in the left half of the frame, the shape radiates to the left by
default; you can move the source center anywhere on the layer.
Value Channel
The color attributes of the source layer used to define the
image contours.
Invert Input
Inverts the chosen value channel option.
Value Threshold
Specifies the threshold for the chosen value channel. It
determines the percentage value at which everything below it or
above it is mapped to either white or black. This control can make
a big difference in the shape of the wave.
Pre-Blur
Smooths out the value channel before the value threshold
is sampled. If you have a high-contrast image, such as white on
black, and you want the wave to follow the edges very closely, set
this option to 0.
Tolerance
Defines how tightly the wave conforms to the layer. A high
setting results in sharp corners; a low value can make the wave
shape more sensitive to noise.
Contour
Specifies the shape in the source layer that you want to
use as the emitted wave. Contour numbers the shapes by their order
in the frame from top to bottom, left to right. The shape in the
upper-left corner is number 1.
Wave Motion controls
Wave Motion controls specify how the wave emits
from the center point.
Frequency
Specifies the number of waves per second flowing out of the producer
point.
Expansion
Specifies the speed at which the wave travels from the producer point
once it is born. This option doesn’t affect the number of waves
per second.
Orientation
Specifies the rotation of the shape at birth around its center
point. To animate the rotation, use the Spin control.
Direction
Specifies the initial direction of a wave if Velocity is
greater than 0. By default, particles are emitted from the producer
point in an expanding radial pattern.
Velocity
Specifies the speed at which the wave moves in the specified
direction.
Spin
Controls the continued rotation of a shape after it is born.
Lifespan (sec)
Specifies the time, in seconds (including the fade-in and
fade-out times), that the wave exists.
Tip: To
prevent waves from abruptly disappearing when their lifetime ends,
use the Fade Out Time control.
Reflection
Specifies whether the waves bounce off the edges of the layer
and back into the scene. This option is effective for generating
displacement maps for use as water ripples.
Stroke controls
Stroke controls specify the appearance of the
stroke of a wave.
Profile
Controls the appearance of the stroke that defines the shape.
The outline of the shape is animated in the wave that emanates from
the effect point. The quality of the stroke is defined as a 3D wave
type.
Color
Specifies the color of the stroke.
Opacity
Specifies the maximum possible opacity of the stroke. The
actual opacity of the stroke takes into account this setting in
conjunction with the Fade-in Time and Fade-out Time controls.
Fade-in Time
Specifies the amount of time it takes the wave to fade into
view. Fade-in Time is measured in seconds and begins with 0 opacity
at birth. For example, if the Lifespan is 3 seconds and Fade-in
Time is 1 second, the stroke is completely transparent at birth
and fades smoothly to full opacity at 1 second.
Fade-out Time
Specifies the amount of time it takes the wave to fade out
of view. Fade-out Time is measured backward in time from the end
of the Lifespan. If the Lifespan is 3 seconds and Fade-out Time
is 1 second, the wave begins to fade out at 2 seconds. If the sum
of Fade-in Time and Fade-out Time is greater than the Lifespan value,
the intersection point of the two fades is calculated so that the
wave doesn’t reach full transparency. If either Fade-in Time or
Fade-out Time is longer than the Lifespan, that amount is truncated
to equal the Lifespan.
Start Width
Specifies the width of the shape at its birth. End Width
specifies the width of the shape at the end of its lifespan.
Stroke effect
The Stroke effect creates a stroke or border around
the path defined by one or more masks. You can also specify stroke
color, opacity, and spacing, as well as brush characteristics. Specify
whether the stroke appears on top of the image, on a transparent
image, or if it reveals the original alpha channel. To use a path created
in Illustrator, copy the path and paste it into a layer in After
Effects.
This effect works with 8-bpc color.
Andrew Kramer provides a video tutorial on his Video Copilot website that demonstrates
the use the Stroke effect to reveal an image as if it is being written by
hand on a wall.
Steve Holmes provides a tutorial on the Layers Magazine website that shows
how to create and prepare vines, swirls, and flourishes in Illustrator
and then import, reveal, and animate them in After Effects using
the Stroke effect.

applied (lower-right)
Brush Hardness
Specifies the edge quality of the stroke, between hard and
soft.
Spacing
Specifies the spacing between stroke segments.
Paint Style
Specifies whether the stroke is applied to the original layer
or to a transparent layer.
Vegas effect
The Vegas effect generates running lights and other path-based pulse animations around an object. You can outline just about anything, surround it with lights or longer pulses, and then animate it to create the appearance of lights chasing around the object.
This effect works with 8-bpc color.
John Dickinson provides an example on his Motionworks website of an EKG (electrocardiogram) simulation created using the Vegas effect.
Stroke
What to base the stroke on: Image Contours or Mask/Path.
Image Contours
If Image Contours is chosen from the Stroke menu, you specify what
layer to take the image contours from and how to interpret the input
layer.
Input Layer
The layer whose image contours are used. High-contrast, grayscale layers,
and alpha channels work well and are easy to work with.
Invert Input
Inverts the input layer before creating the stroke.
If Layer Sizes Differ
Determines how to adjust the layers if the size of the input layer
differs from the size of the layer to which Vegas is applied. Center
centers the input layer in the composition at its original size.
Stretch To Fit scales the input layer to match the layer to which
Vegas is applied.
Channel
The color attribute of the input layer used to define the
contours.
Threshold
The percentage value at which everything below or above is mapped
to either white or black. This property is important in determining
the location of the edges that the effect strokes.
Pre-Blur
Smooths out the input layer before the threshold is sampled.
Set this option to 0 if you have a high-contrast image and want
the stroke to follow the edges very closely.
Tolerance
Defines how tightly the stroke conforms to the input layer.
A high value results in sharp corners, while low values can make
the stroking sensitive to noise.
Render
Specifies whether to apply the effect to a selected contour
or to all contours in the layer.
Selected Contour
Specifies the contour to use when Selected Contour is selected
from the Render menu. Contours are numbered from upper-left to lower-right;
the contour with the highest point is number 1, the second highest point
is number 2, and so on.
Shorter Contours Have
Specifies whether shorter contours have fewer segments. By
default, the effect breaks each contour into the same number of segments.
For example, if you apply the effect to the letter R, the outside
contour may look fine with 32 segments, but the inside contour may
be almost solid. To resolve this issue, select Fewer Segments.
Mask/Path
The mask or path to use for the stroke. You can use either
closed or open masks.
Segments
Specifies the number of segments used to create each stroked contour.
For example, if the effect is applied to the word Vegas and
Segments is set to 10, the outline of each of the letters, plus
the inner contours of e, g, and a, are
broken into 10 segments.
Length
Determines the length of the stroke of a segment in relation
to its maximum possible length. For example, if Segments is set
to 1, the maximum length of a stroke is one complete trip around
the object outline. If Segments is set to 3, the maximum length
of a segment is 1/3 of the total outline, and so on.
Segment Distribution
Determines the spacing of the segments. Bunched puts the
segments together like boxcars in a train: The shorter the segment
length, the shorter the overall length of the train. Even spaces
the segments evenly around the contour.
Rotation
Animates the segments around the contour. For example, to
create the appearance of running lights, start with a large number
of segments set to 50% of their length, and then animate Rotation
to move the lights around the shapes.
Random Phase
Specifies that the stroke starting point is different for
each contour. By default, the effect strokes a contour beginning
at its highest point on the screen. In the event of a tie, it starts
at the leftmost highest point.
Blend Mode
Determines how the stroke is applied to the layer. Transparent creates
the effect on a transparent background. Over places the stroke over
the existing layer. Under places the stroke behind the existing
layer. Stencil uses the stroke as an alpha channel mask, filling
the stroke with the pixels of the original layer.
Color
Specifies the color of the stroke, unless Stencil is chosen
for Blending Mode.
Width
Specifies the width of the stroke in pixels. Fractional values
are supported.
Hardness
Determines how sharp or blurry the edges of the stroke are.
A value of 1 creates a slight blur; a value of 0.0 blurs the line
so that few solid areas of color remain.
Start, End Opacity
Specify the opacity at the beginning or end of the stroke.
Mid-point Opacity
Specifies the opacity of the midpoint of the stroke. This control
works in terms of relative opacity, not absolute opacity. Setting
it to 0 makes the change in opacity smooth from the start point
to the end point, as if there were no midpoint at all.
Mid-point Position
Specifies the location of the midpoint within a segment: Lower
values move the midpoint closer to the beginning; higher values
move the midpoint closer to the end. Use this control to move the
midpoint opacity from the center of the stroke.
Write-on effect
The Write-on effect animates strokes on a layer. For
example, you can simulate the action of hand-writing of cursive
text or signatures.
note: A convenient way to animate Brush Position
is to use Motion Sketch to create Position keyframes on a new solid
layer and then use an expression on the Brush Position property
to link it to the Position property on the new solid layer. (See Sketch a
motion path with Motion Sketch and Add,
edit, and remove expressions.)
This effect works with 8-bpc color.
Other methods of animating paint strokes and text are also available.
For example, you can animate text by using the type tools and text
animators, and you can animate a paint stroke applied with a paint
tool. Paint strokes can have a Write-on Duration setting, which
you can use to create similar results as with the Write-on effect.
You can also animate shape paths for a similar result with the Trim
Paths operation. (See Animating
text, Animate
and edit paint strokes, and Shape
attributes, paint operations, and path operations for shape layers.)
Brush Position
The position of the brush. Animate this property to create
a stroke.
Stroke Length (secs)
The duration, in seconds, of each brush mark. If this value is
0, the brush mark has unlimited duration. Use a single, constant,
nonzero value to create a snakelike movement of the stroke. Animate
this value to make the stroke expand and contract.
Brush Spacing (secs)
The time interval, in seconds, between brush marks. Smaller
values produce smoother paint strokes but take more time to render.
Paint Time Properties and Brush Time Properties
Specifies whether paint properties and brush properties are
applied to each brush mark or to the entire stroke. Choose None
to apply values at each time to all brush marks in the stroke. Choose
a property name for each brush mark to retain the value for that
property at the time that the brush mark was drawn. For example,
if you choose Color, then each brush mark keeps the color specified
by the Color value at the time that the mark was drawn.
Paint Style
How the paint stroke interacts with the original image:
On Original Image
Paint stroke appears over original image.
On Transparent
Paint stroke appears over transparency; the original image doesn’t
appear.
Reveal Original Image
The original image is revealed by the paint stroke.
Во многих своих уроках я часто пользуюсь горячими клавишами и это не потому что я люблю издеватся над зрителями,а потому что попросту привык их (клавиши) использовать. В этой статье расскажу об основных клавишах в After Effects которые необходимо как минумум знать (пользоватся это на ваше усмотрение), плюс как бонус, будет информация о том как можно эти горячие кнопки перенастроить (т.к. в After Effects сделать кастом кнопок не так просто как может показаться на первый взгляд).
Использование горячих клавиш (в любой из программ), значительно ускоряет работу. Рассмотрим основные клавиши используемые в After Effects по умолчанию:
Инструментарий и слои:
“V” = Selection Tool (Основной инструмент по умолчанию)
“H” или “Зажимаем Пробел на окне просмотра и двигаем левой кнопкой мыши” = Hand Tool («Рука» позволяющая быстро передвигатся по окну просмотра)
“Z” или “Колесико мыши в окне предпросмотра” = Zoom Tool (Обычное увеличение рабочего окна композиции, всегда пользуюсь колесико, как большинство)
“W” = Rotation Tool (Инструмент вращения)
“C” = Camera Mode (Камера в After Effects, можно нажать несколько раз «С» чтобы выбрать нужный инструмент камеры, я обычно пользуюсь Undefind camera)
“Y” = Behind Tool (Инструмент для управления pivot/anchor point’ом у объекта)
“Q” = Shape or Shape Masker tool (Шейпы, инструмент готовой маски определенной фигуры, можно также нажать несколько раз для выбора своей фигуры)
“G” = Pen tool (Маски, создание и редактирование масок)
“Ctrl + T” = Text Tool (Инструмент для создание текста, вертикального или горизонтального)
“Ctrl + Y” = Solid layer (Всегда, работая, создаю солид слой именно через этот хоткей)
“Ctrl + Alt + Y” = Adjusment Layer (То же самое что и солид,но только адж. слой)
“Enter” = по любому из выделенных слоев позволяет переименовать его.
На таймлайне и в работе:
“Ctrl + стрелка вправо” или Page Down = Следущий кадр (частоиспользуемое)
“Ctrl + стрелка влево” или Page Up = Предыдущий кадр (частоиспользуемое)
“Shift + Page Down” = Перепрыгнуть на 10 кадров вперед
“Shift + Page Up” = Перепрыгнуть на 10 кадров назад
“Alt + Page Down” = Сдвинуть выбраный слой на 1 фрейм вперед
“Alt + Page Up” = Сдвинуть выбраный слой на 1 фрейм назад
“Alt + ]” = Обрезать выбраный слой справа до курсора на таймлайне (частоиспользуемое)
“Alt + [” = Обрезать выбраный слой слева до курсора на таймлайне (частоиспользуемое)
«Home» = Передвинуть курсор в начало композиции
«End» = Передвинуть курсор в конец композиции
«]» = Передвинуть конец слоя к курсору (частоиспользуемое)
«[« = Передвинуь начало слоя к курсору (частоиспользуемое)
«+» = Увеличение таймлайна
«-« = Уменьшение таймлайна
“* (на numpad)” = Поставить маркер либо на выделенном слое либо на композиции (если слой не выделен)
“0 (Ноль на numpad)” = RAM превью (частоиспользуемое)
“, (Запятая на numpad)” = Ram превью ТОЛЬКО ЗВУКА
“M (два раза)” = Если на выделеном слое есть маски, то эта горячая клавиша открывает все настройки этой (-этих) масок
“F” = Если на выделеном слое есть маски (маска), то открывается ее параметр «Feather»
“U” = Открывает все параметры с простравленными ключами (keyframes) на выделенном слое
“L (два раза)” = На выделеном АУДИО слое открывает его waveforms (графические пики)
“I” = Перенести курсор в начало выделенного слоя
“O” = Перенести курсор в конец выделенного слоя
“J” = Перейти к предыдущему ключу на таймлайне (keyframes)
“K” = Перейти к следущему ключу на таймлайне (keyframes)
“B” = Обрезать «work area» композиции слева (частоиспользуемое)
“N” = Обрезать «work area» композиции справа (частоиспользуемое)
“Ctrl + D” = Склонировать выделенный слой (частоиспользуемое)
“Ctrl + Shift + D” = Разрезать выделеный слой на два (там где стоит курсор)
“P” = Position параметр у выделенного слоя
“S” = Scale параметр у выделенного слоя
“R” =Rotation параметр у выделенного слоя
“T” = Opacity/Intensivity параметр у выделенного слоя
«A» = Ancor point/Point of interest у выделенного слоя
“Ctrl + M” = Добавить композицию к рендеру (частоиспользуемое)
“ ‘ ” = Показать Safe Area границ в окне предпросмотра. Это кнопка «э» на русской раскладке (частоиспользуемое)
“Ctrl + C” = ничто иное как «контрлкопи» которую я так люблю называть. Копирование выделенного объекта, текста,слоя,ключей и всего-всего. (частоиспользуемое)
“Ctrl + V” = Вставка выделенного объекта, текста,слоя,ключей и всего-всего. (частоиспользуемое)
“Ctrl + X” = Вырезание выделенного объекта, текста,слоя,ключей и всего-всего. (частоиспользуемое)
“Ctrl + Z” = Откат предудущих действий (частоиспользуемое)
“Ctrl + S” = Сохранение проекта (частоиспользуемое)
“Ctrl + N” = Создание новой композиции
“Ctrl + Alt+ S” = Рендер одного фрейма из композиции
“Ctrl +Shift+ H” = Показывает композицию в окне просмотра без указателей слоев и пр. деталей композиции.
“F4” = Toggle switch modes, иначе говоря скрыть/открыть переключатели parent,modes,blending,3d switches на таймлайне. Любимая кнопка новичков.
“F9” = Easy Ease интерполяция ключа, на таймлайне.
“Ctrl +Shift+ С” = Прекомпоз выделенных слоев.
Конечно же это лишь часть всех горячих клавиш, я постарался указать самые распространенные. Конечно же все эти хоткейсы, можно кастомизировать по своему,но сделать это не так просто как допустим в вегасе или синеме, для этого необходимо найти:
Папку (в win7)
C:UsersИмя пользователяAppDataRoamingAdobeAfter Effectsверсия программы
В этой папке находим текстовый файл который называется:
«Adobe After Effects версия программы Shortcuts.txt»
В этом текстовом файле вы можете найти и изменить (добавить или убрать) любой из действующих hotkeys’ов, в After Effects.
Но будьте аккуратны при изменении данного файла! Рекомендую сделать дополнительный бекап этого файла во избежания креша After Effects!
Cейчас я покажу вам, как сделать включение или выключение выражений для параметров с помощью Slider Control (или Checkbox Control) в Adobe After Effects. Иногда бывает нужно сделать тряску с помощью Wiggle, но он будет работать на протяжении всей анимации. Использую методы из данного урока вы сможете включать или выключать любые выражения в нужный момент времени (и Wiggle в том числе), делать плавные затухания и переходы.
https://www.youtube.com/watch?v=2BkP7LXutUA
Меня часто спрашиваю, как регулировать влияние выражения wiggle на параметр, на котором оно прописано. Ведь в обычном состоянии любое выражение будет действовать постоянно на протяжении всей длины слоя или даже композиции. Так что же предпринять, если я хочу сделать колебания лишь в определенный момент времени? Не резать же слой на куски!
На самом деле все просто, достаточно лишь вспомнить математику на уровне хотя бы школьной программы. Классический wiggle имеет два параметра: (частота, амплитуда). Если мы будем анимировать амплитуду, то тем самым сможем влиять и на действие этого выражения. Но как менять и анимировать числа, записанные в коде самого выражения?
Для этой цели в After Effects есть специальный эффекты Expression Controls, которые позволяют привязывать к себе любые значения внутри выражений и за счет этого анимировать их значения. Сами по себе они никак не влияют на картинку слоя, на котором лежат. В случае с wiggle просто тащим «спираль» вместо ввода амплитуды на параметр Slider Control, и After Effects сам прописывает нужную часть кода, для ссылки на это значение.
Код: Выделить всё
wiggle (10, effect("Slider Control")("Slider"));
А со значением Slider Control уже работаем так же, как и с любым другим параметром: включаем анимацию, расставляем ключевые кадры и т.д. Кстати, названия слайдеров (как и любых других эффектов) можно задавать собственные, чтобы они выглядели более осмысленно и не путались друг с другом. Для переименования нужно выделить название эффекта, нажать Enter и ввести новое имя.
Выше я упомянул математику, так вот, значения слайдеров можно умножать, делить, складывать и вычитать для достижения нужного значения. Это может помочь в случае с более сложными выражениями, когда нужно выполнить затухание результирующего значения. Но тут уже надо смотреть конкретно и по месту.
И последний совет: поскольку After Effects использует язык программирования JavaScript для записи выражений, мы можем создавать очень сложные схемы проверок и вычислений, по сути это уже будут целые микро-программы обработки данных. Например, в видео-уроке я применил простую проверку переменной времени time, используя условные операторы if — else.
Вы наверное уже поняли, что для работы с подобной информацией нужно хорошо понимать, что из себя представляют выражения (expressions) в After Effects и по какому принципу они создаются. Любое выражение — это кусочек кода JavaScript, даже привычный всем wiggle() по сути является вызовом математической функции изменения параметра начального значения, записанным в упрощенной форме. Человеку, не знакомому с программированием все это может показаться не таким очевидным. В таком случае задавайте вопросы, попробуем разобраться вместе.
.  .
.
Полезные ссылки:
Эффект Wave Warp — (Деформация волны)
216
Эффект Wave Warp — (Деформация волны) в After Effects относится к группе Distort (Искажение). Эффект понятен и прост в настройках. Ниже расcмотрим параметры
Этот эффект работает с цветом 8 бит на канал и 16 бит на канал.

Параметры с переводом:
Wave Typ — Тип волны
— Sine — Синус, волна
— Square — Квадрат
— Triangle — Треугольник
— Sawtooth — Зубчатый
— Circle — Круг
— Semicircle — Полукруги
— Uncircle — Разделёные круги
— Noise — Шум
— Smooth Noise — Плавный шум
Wave Height — Высота волны (Расстояние между пиками волн (в пикселях).
Wave Width — Ширина волны Размер волны (в пикселях).
Direction — Направление (Направление волны проходит через изображение. Например, при выборе значения 225° волны проходят по диагонали из верхнего правого угла в нижний левый.)
Wave Speed — Скорость волны (Скорость (в циклах в секунду), с которой волны идут. При выборе отрицательного значение устанавливается обратное направление волны; при выборе значения 0 движение отсутствует. Чтобы изменить скорость волны во времени, следует задать для этого элемента управления значение 0 и задать ключевые кадры или выражения для свойства «Фаза».)
Pinning — Закрепление (Задает края для привязки, чтобы избежать смещения пикселей по краям.)
Phase — Фаза (Точка вдоль волны, в которой начинается цикл волны. Например, при выборе угла 0° волна начинается в средней точке уклона вниз, а при выборе угла 90° — в нижней точке дна.)
Antialiasing (Best Quality) — Сглаживание (выбор качества сглаживания)
— Low — Низкое
— Medium — Среднее
— High — Высокое
(Задает объем сглаживания краев на изображении. Во многих случаях при выборе более низких значений достигается удовлетворительный результат. При использовании более высоких значений время рендеринга может существенно увеличиться.)
Эффект Wave Warp — «Деформация волны» создает внешний вид волны, проходящей по изображению. Можно создавать различные формы волны, включая прямоугольную, круговую и синусоидальную. К эффекту «Волнообразная деформация» автоматически применяется анимация при постоянной скорости во временном диапазоне (без ключевых кадров или выражений). Чтобы изменить значения скорости, следует задать ключевые кадры или выражения.
Привет друзья!
В этом видео уроке Вы узнаете, как сделать эффект печатной машинки или набор текста на клавиатуре. Также попробуете добавить звук печатной машинки. Мы будем делать анимацию в программе Adobe After Effects. Урок подойдет для начинающих аниматоров и моушн дизайнеров.
В уроке используются инструменты анимации:
▸Как сделать прозрачность – “T” (Opacity)
▸Открыть анимацию позиции – “P” (Position)
▸Дублирование слоя “Ctrl + D”
▸Отрезать слой “Ctrl + Shift + D”
▸Переименовать слой Enter
Примечания:
▸Timeline – рабочая область видеоролика (макета).
▸Анимация – эффект оживления картинки путем движения в кадре.
▸Помните, анимация движения объекта должна выражать его характер!
▸В этом уроке будем использовать базовые инструменты анимации.
Структура урока:
▸Как создать текст слой (0:55)
▸Как сделать эффект набор текста (1:33)
▸Как сделать появление текста по словам (2:45)
▸Как добавить звук печатной машинки (3:42)
▸Как добавить звук клавиатуры (4:40)
▸Как сделать эффект курсора (5:50)


Подписывайся на мой канал, чтобы смотреть новые уроки
и не забывай ставить лайк,если видео было полезным.

Шаг 1

Создадим новую композицию размером 1920×1080 px.
Количество кадров по желанию, здесь ставлю 30fps. И время видео ролика 10 секунд.
Дальше загружаем в проект картинку с фоном, на котором будем делать анимацию текста. Картинку скачайте ниже:

Шаг 2 Как создать текстовый слой?

В верхнем меню выбираем Layer / New / Text Layer. На панели слоев появляется красный слой для текста. Курсором нажимаем на место где появится текст и пишем. Я использую заготовленный текст.
“How typing on a manual typewriter
can start the flow of your writing”
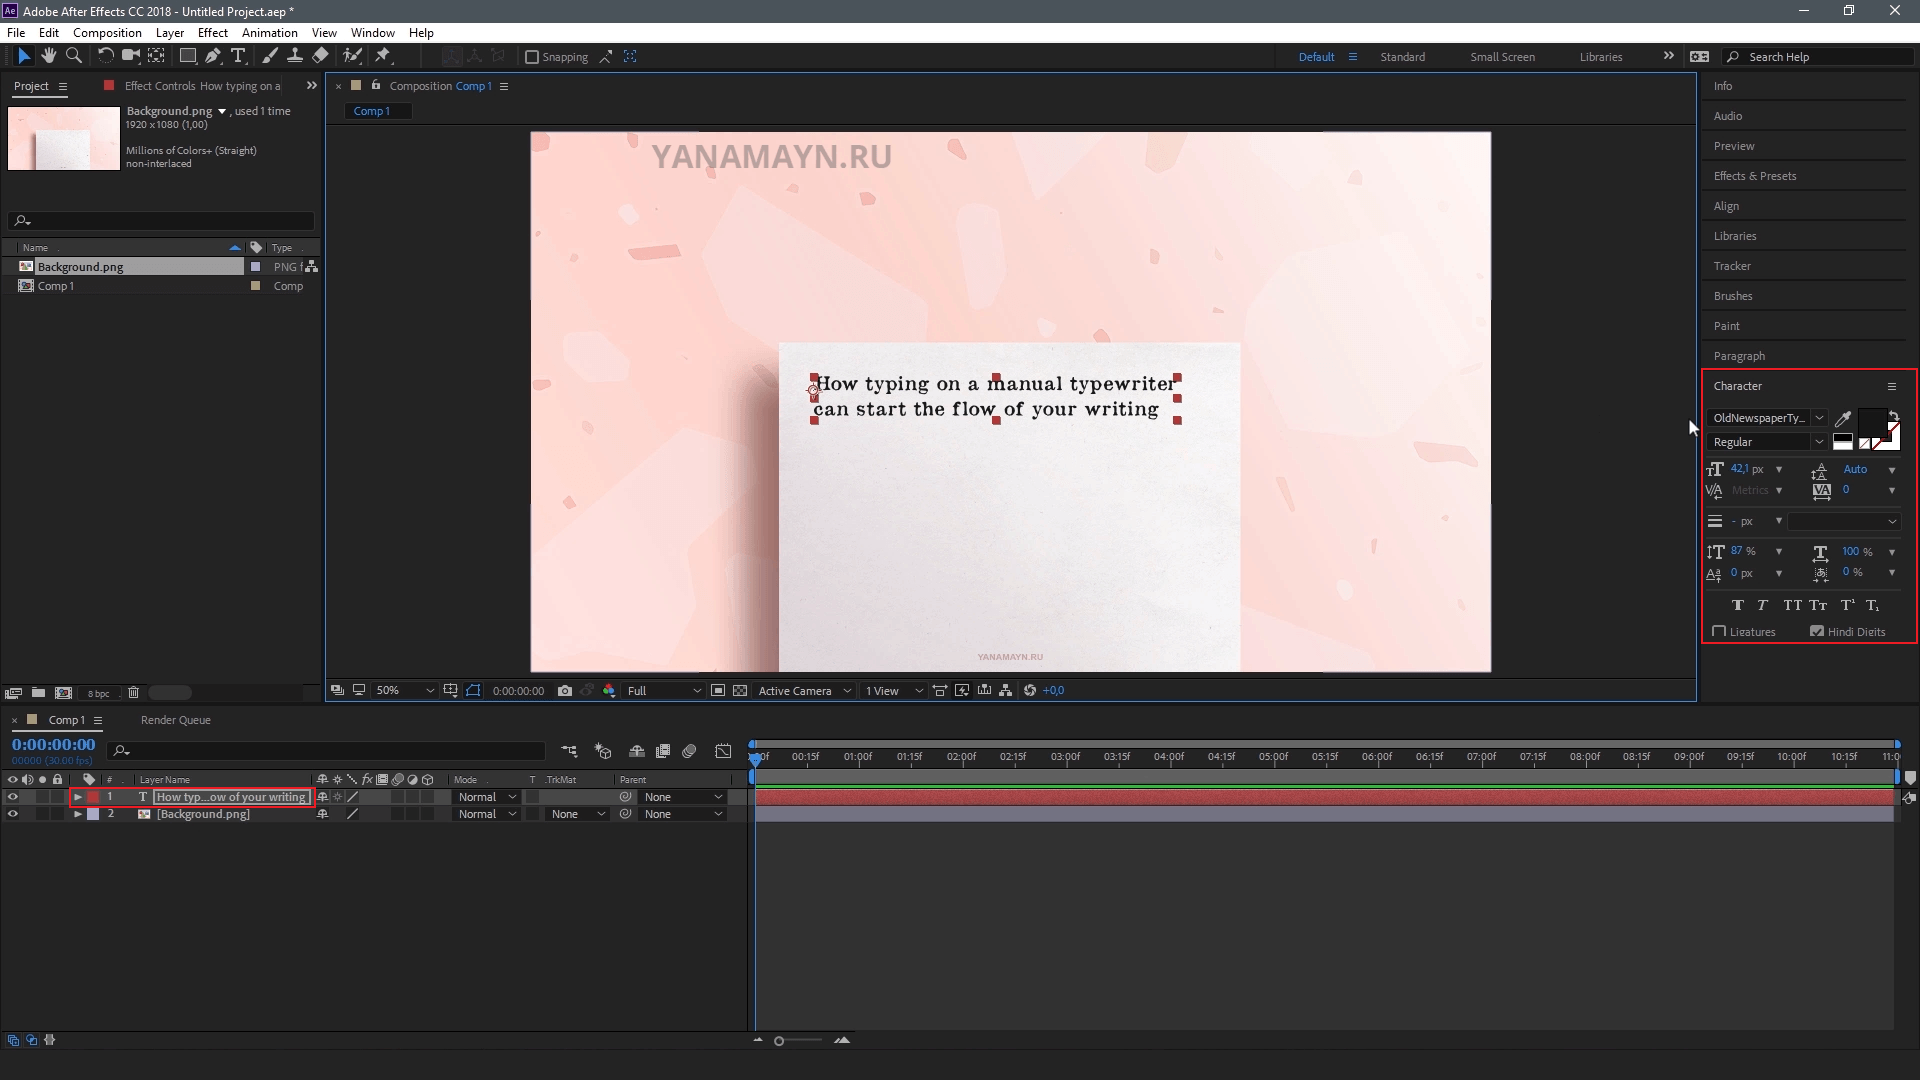
Также для эффекта печатной машинки использую специфичный дизайн шрифта. Подобный шрифт вы можете поискать на любом сайте со шрифтами. Я скачал этот шрифт с сайта Dafont.com в разделе Typewriter.
Шаг 3 Как сделать эффект печатной машинки?

Справа в меню выбираем строку Effects & Presets и в поиске пишем Typewriter. Находим эффект Typewriter и переносим его на слой с текстом.
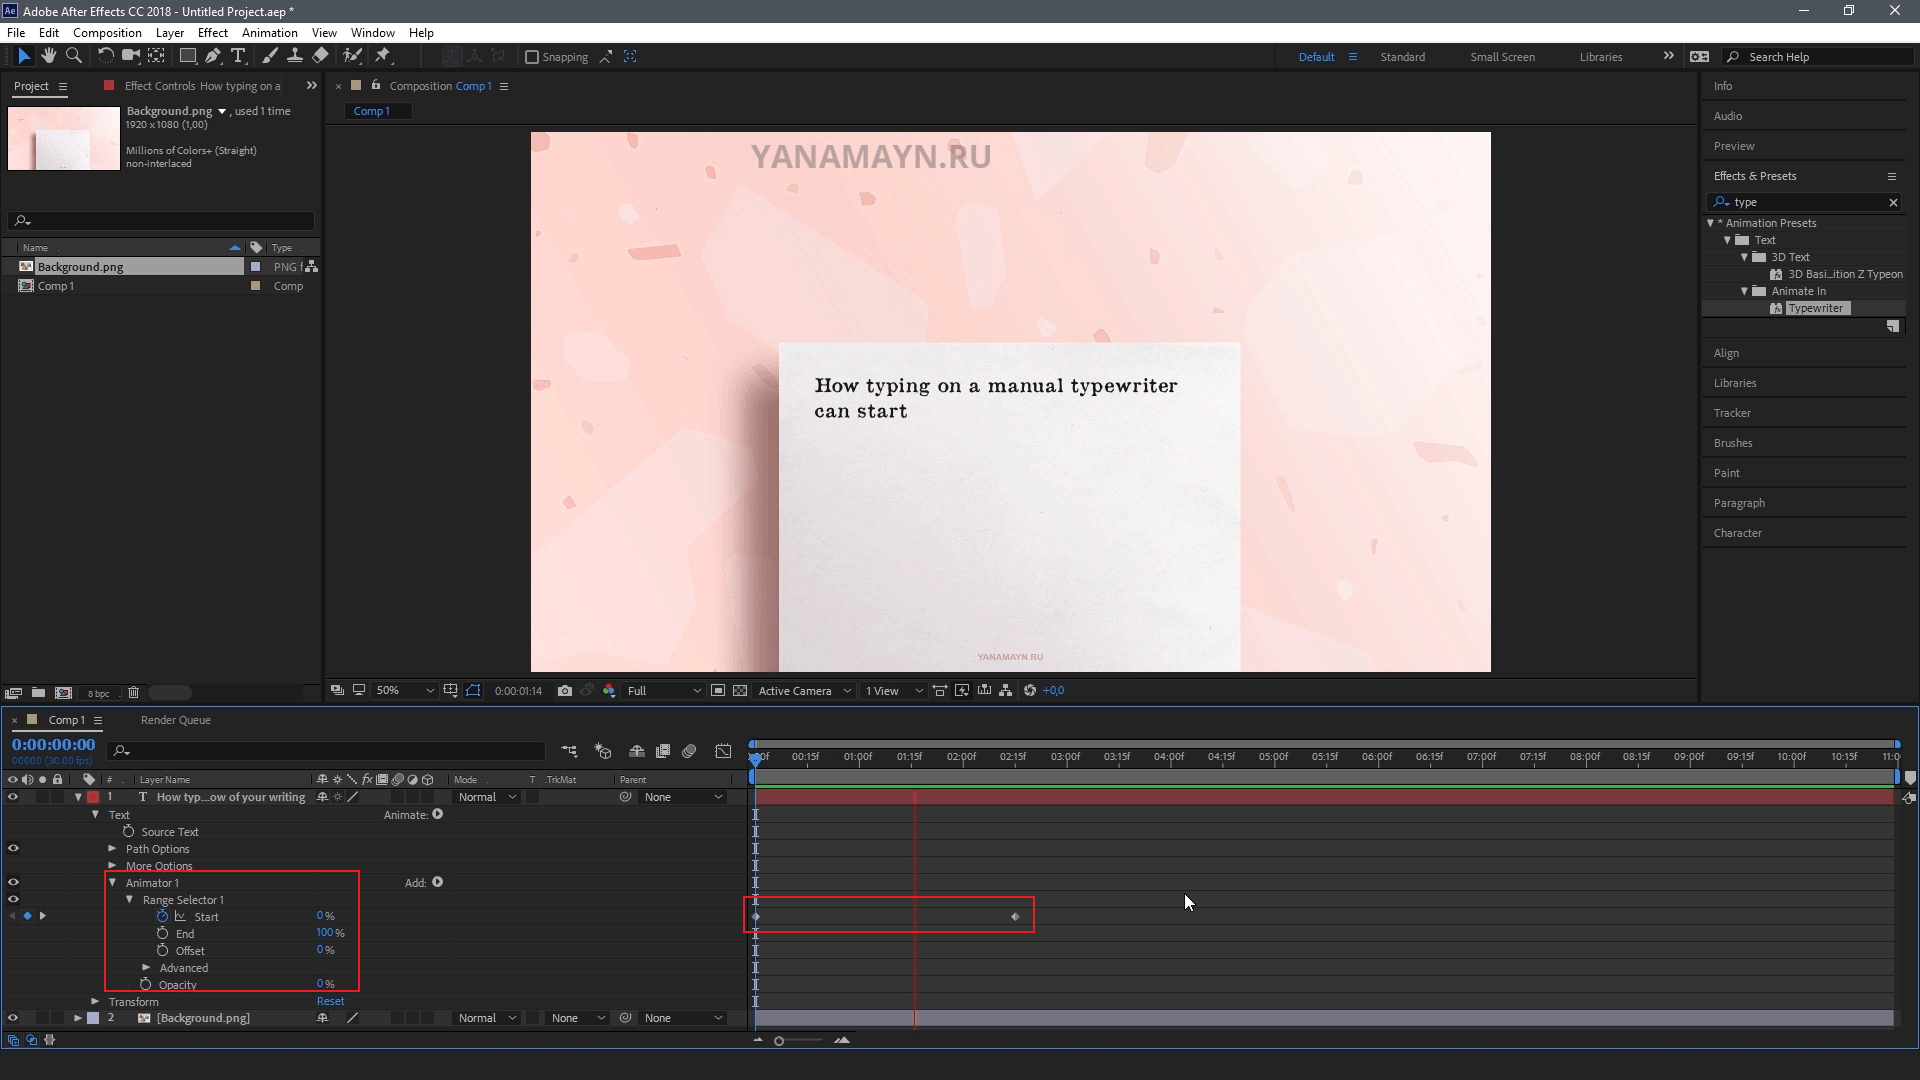
Далее заходим в настройки слоя с текстом Text / Animator 1 / Range Selector. Видим, что у строчки Start уже стоят 2 ключа с анимацией от 0 до 100. Собственно эти ключи и анимируют появление текста по буквам. 0 – нет текста, 100 – полное заполнение.
Если разведем ключи дальше друг от друга, то анимация появления букв будет медленнее. Если свести ключи ближе друг к другу, то текст проявится быстро. Таким образом настраивается скорость проявления текста.
Шаг 4 Как сделать появление текста по словам?
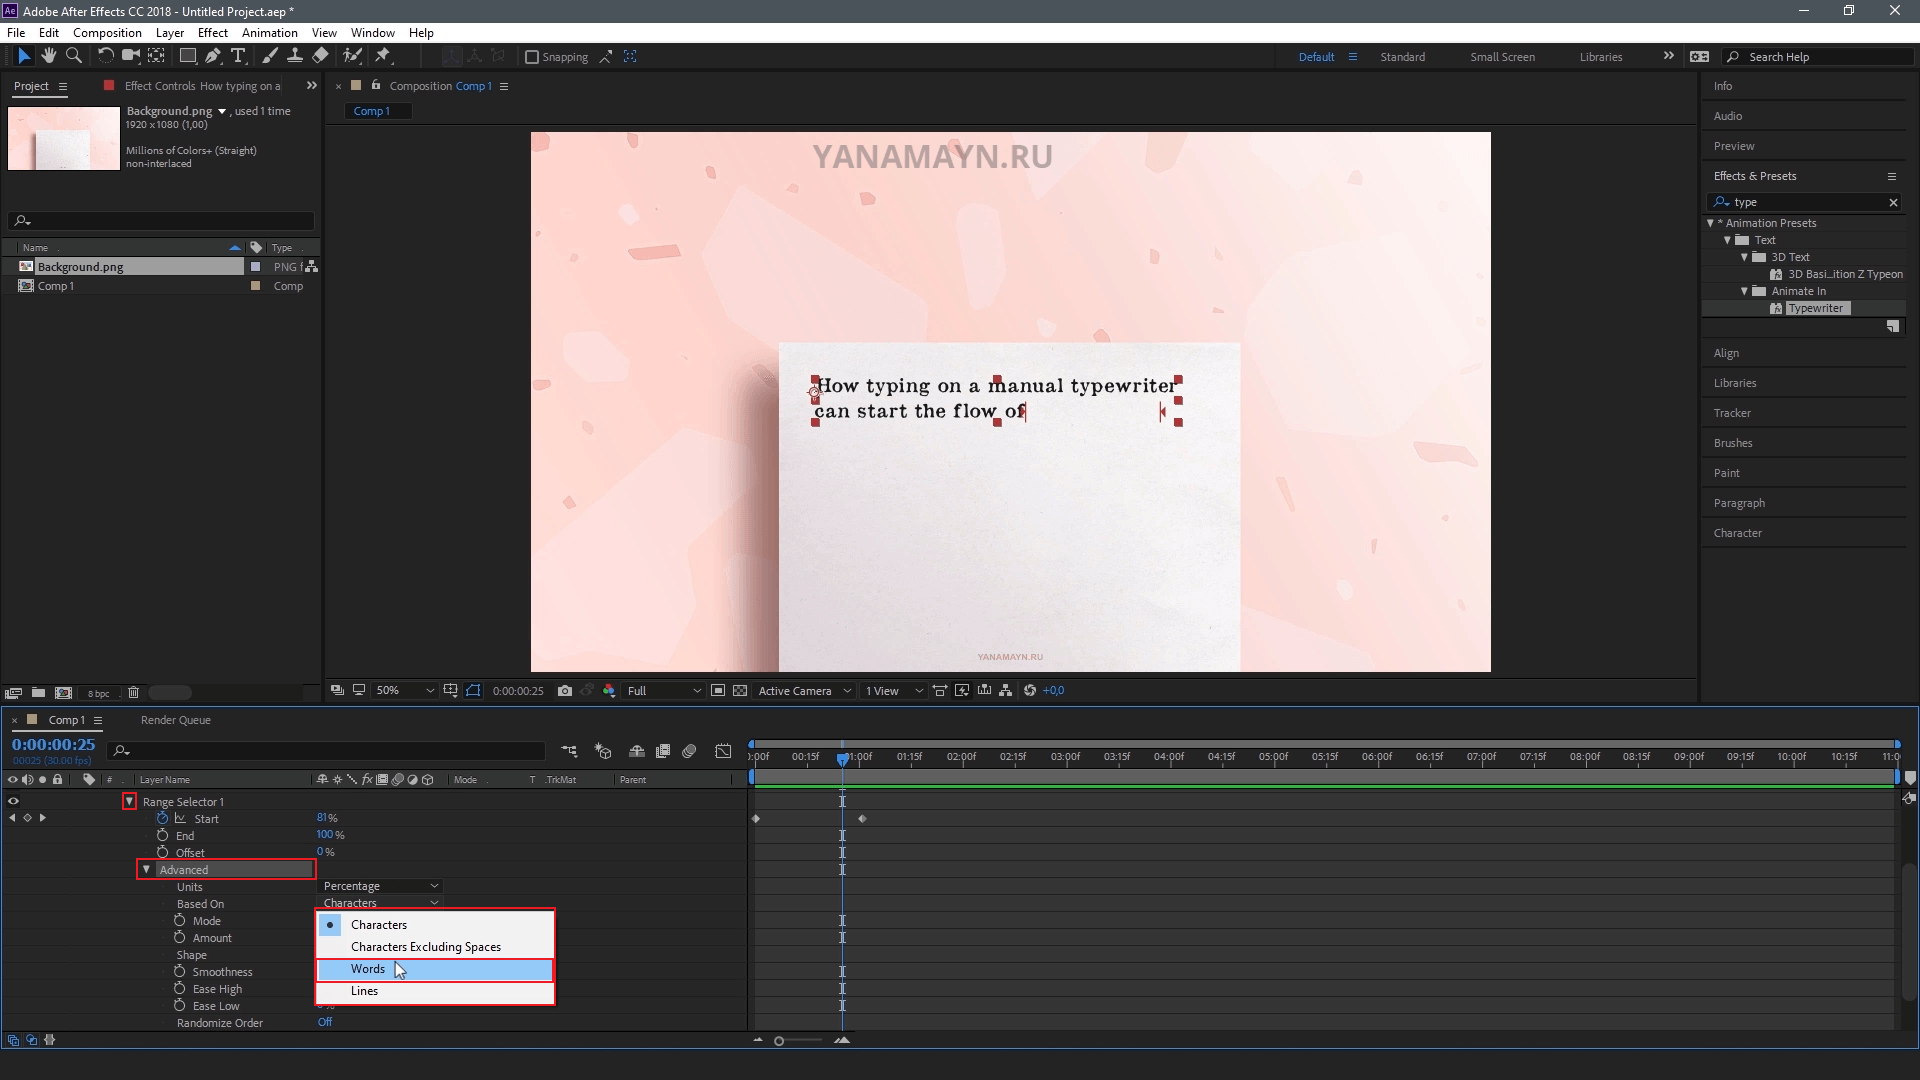
В строке Range Selector заходим в настройки Advanced, далее находим строку Based on и меняем в меню с Character на Words. Теперь видим как программа проявляет текст по словам.
Еще один эффект. Ниже находим строку Smoothness и увеличиваем настройки до 100%. Видим что в конце написанной буквы появляется полупрозрачная следующая буква. Сворачиваем настройки используя клавишу U и давайте добавим звук печатной машинки. Звук доступен для скачивания ниже.
Как скачать?


Шаг 5 Как добавить звук печатной машинки?
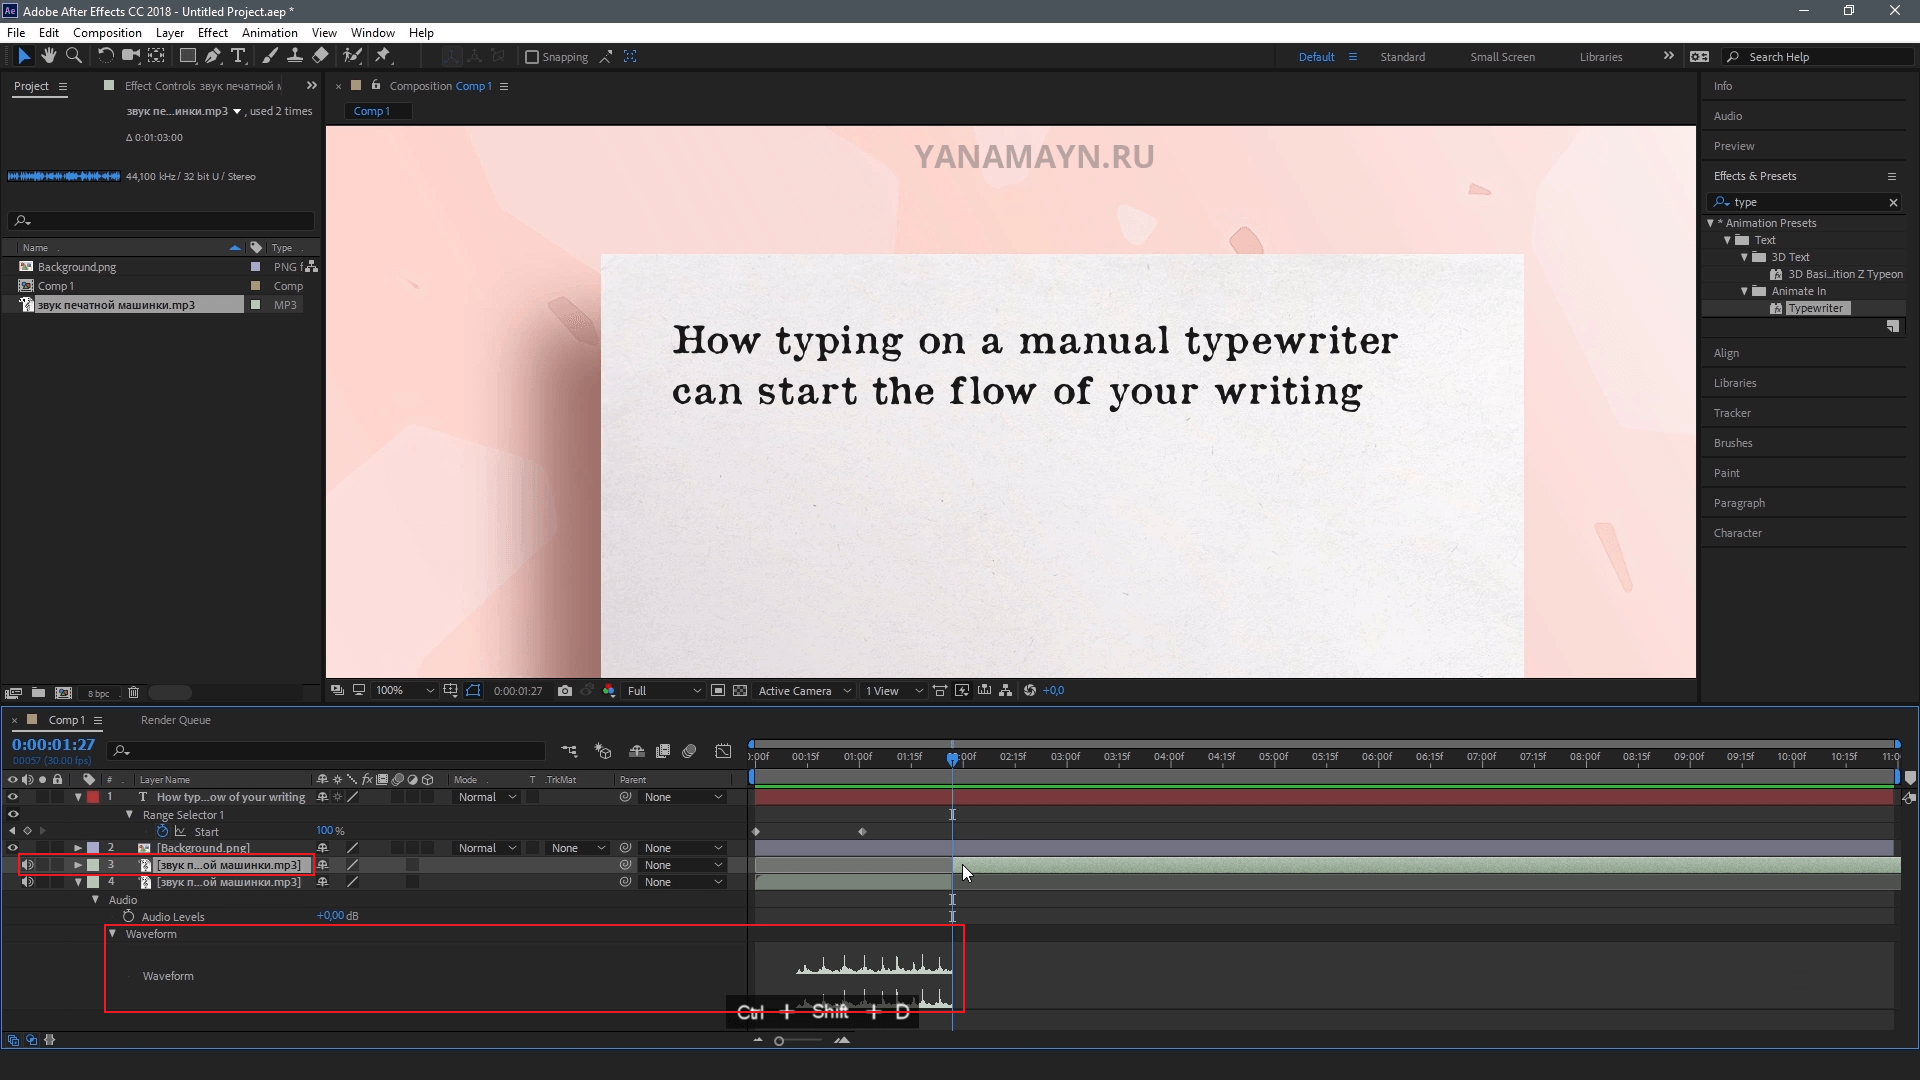
Переносим звуковой файл в проект на область слоев. Ставим в вниз. Заходим в настройки / Audio / Waveform. Видим как появился график аудиозаписи. Находим на графике нужный участок звука, подходящий по длине написания текста. Ставим индикатор Timeline на месте, где будем разрезать дорожку. Нажимаем сочетание клавиш Ctrl + Shift + D. Такой командой программа разделяет выделенные слои (если слои не выделены, разделяет все слои.) Также подгоняем ключи анимации текста под длину звука и смотрим результат.
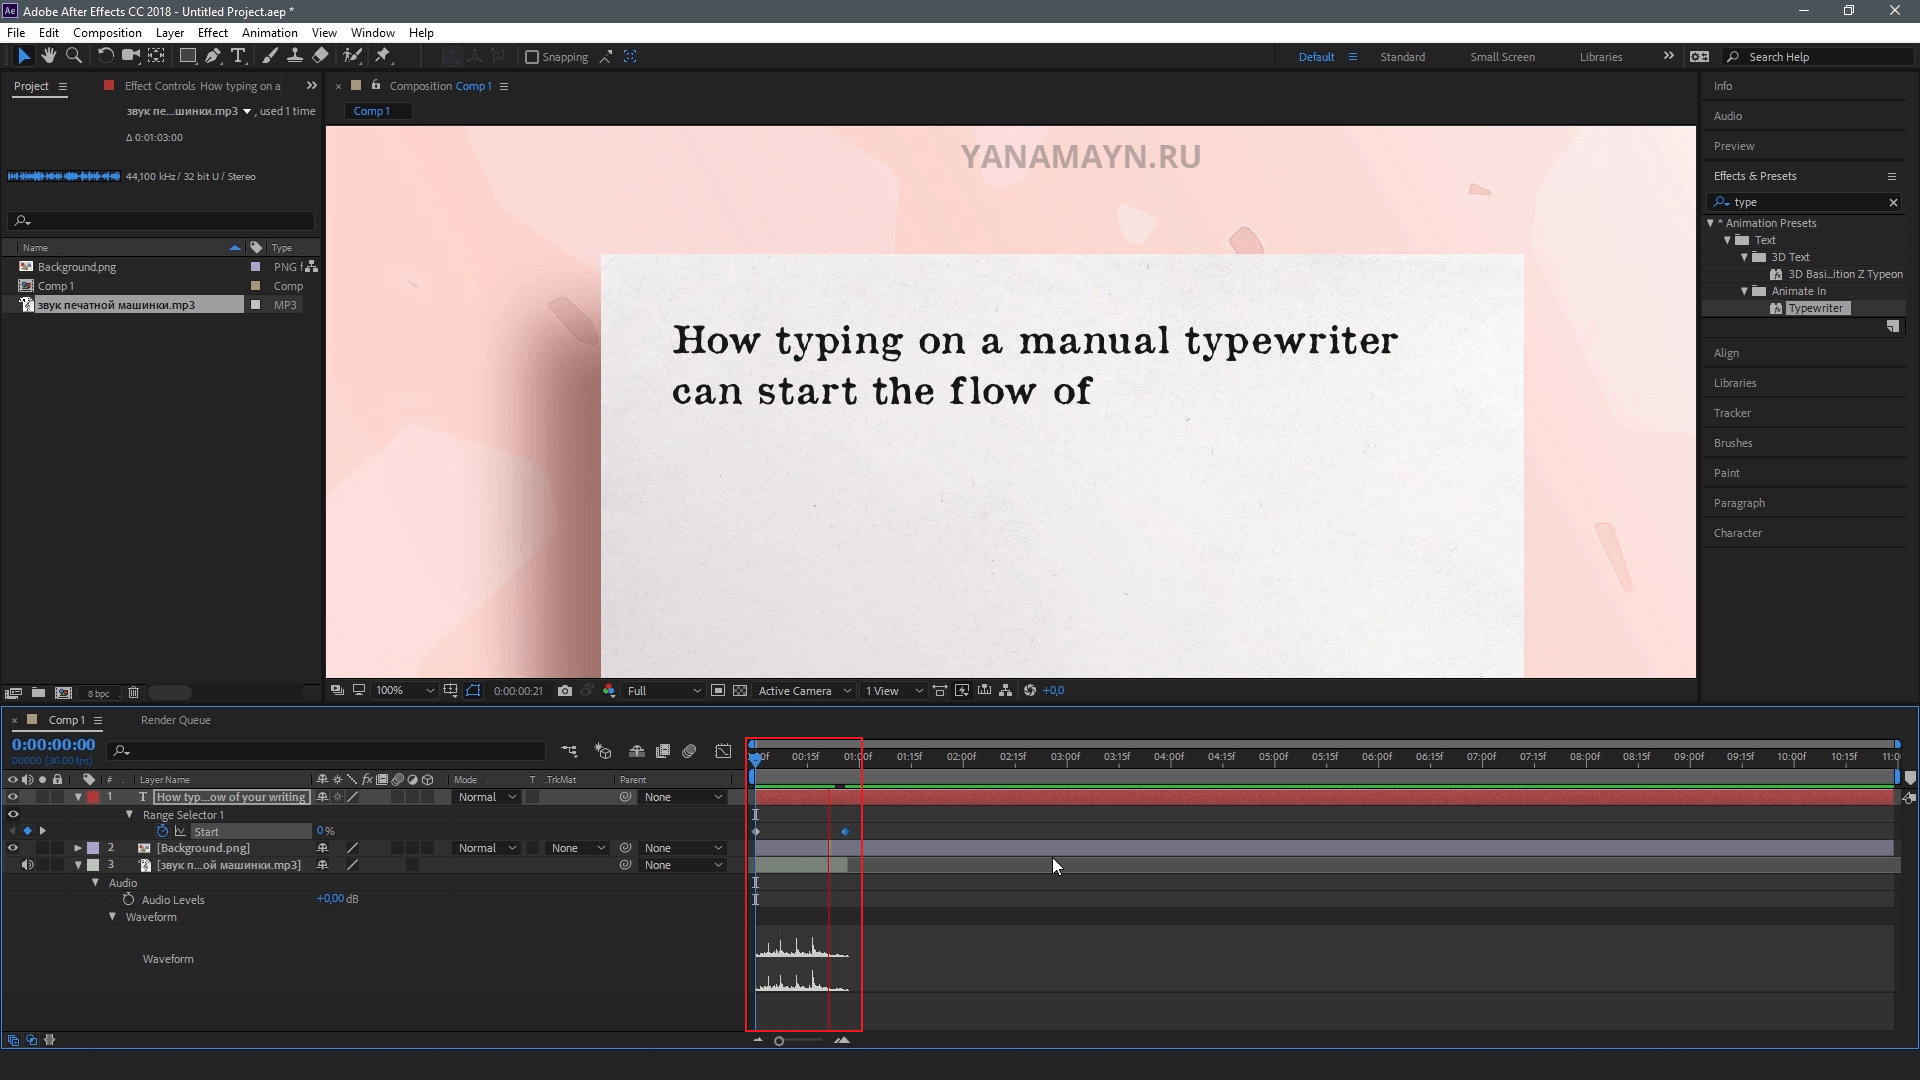
Продлим звуковую дорожку двигая за правый край. Оставим только маленький фрагмент звука и к нему подтягиваем ключи анимации текста. Таким образом анимация и звук стали короче. Вы можете настраивать звуковую дорожку любой длины используя график Waveform.
Как сделать эффект набора текста на клавиатуре со звуком?

Дублируем текст с анимацией появления используя сочетание клавиш Ctrl + D. Загружаем в проект звук набора текста на клавиатуре. Открываем настройки / Audio / Waveform и находим нужный участок со звуком клавиатуры.
Справа в меню открываем строку Character и меняем шрифт на Open Sans или другой прямой шрифт без засечек. Подстраиваем расположение ключей под картинку звука. Отрезаем лишний звук и смотрим результат.
Как сделать ввод текста с мигающим курсором?
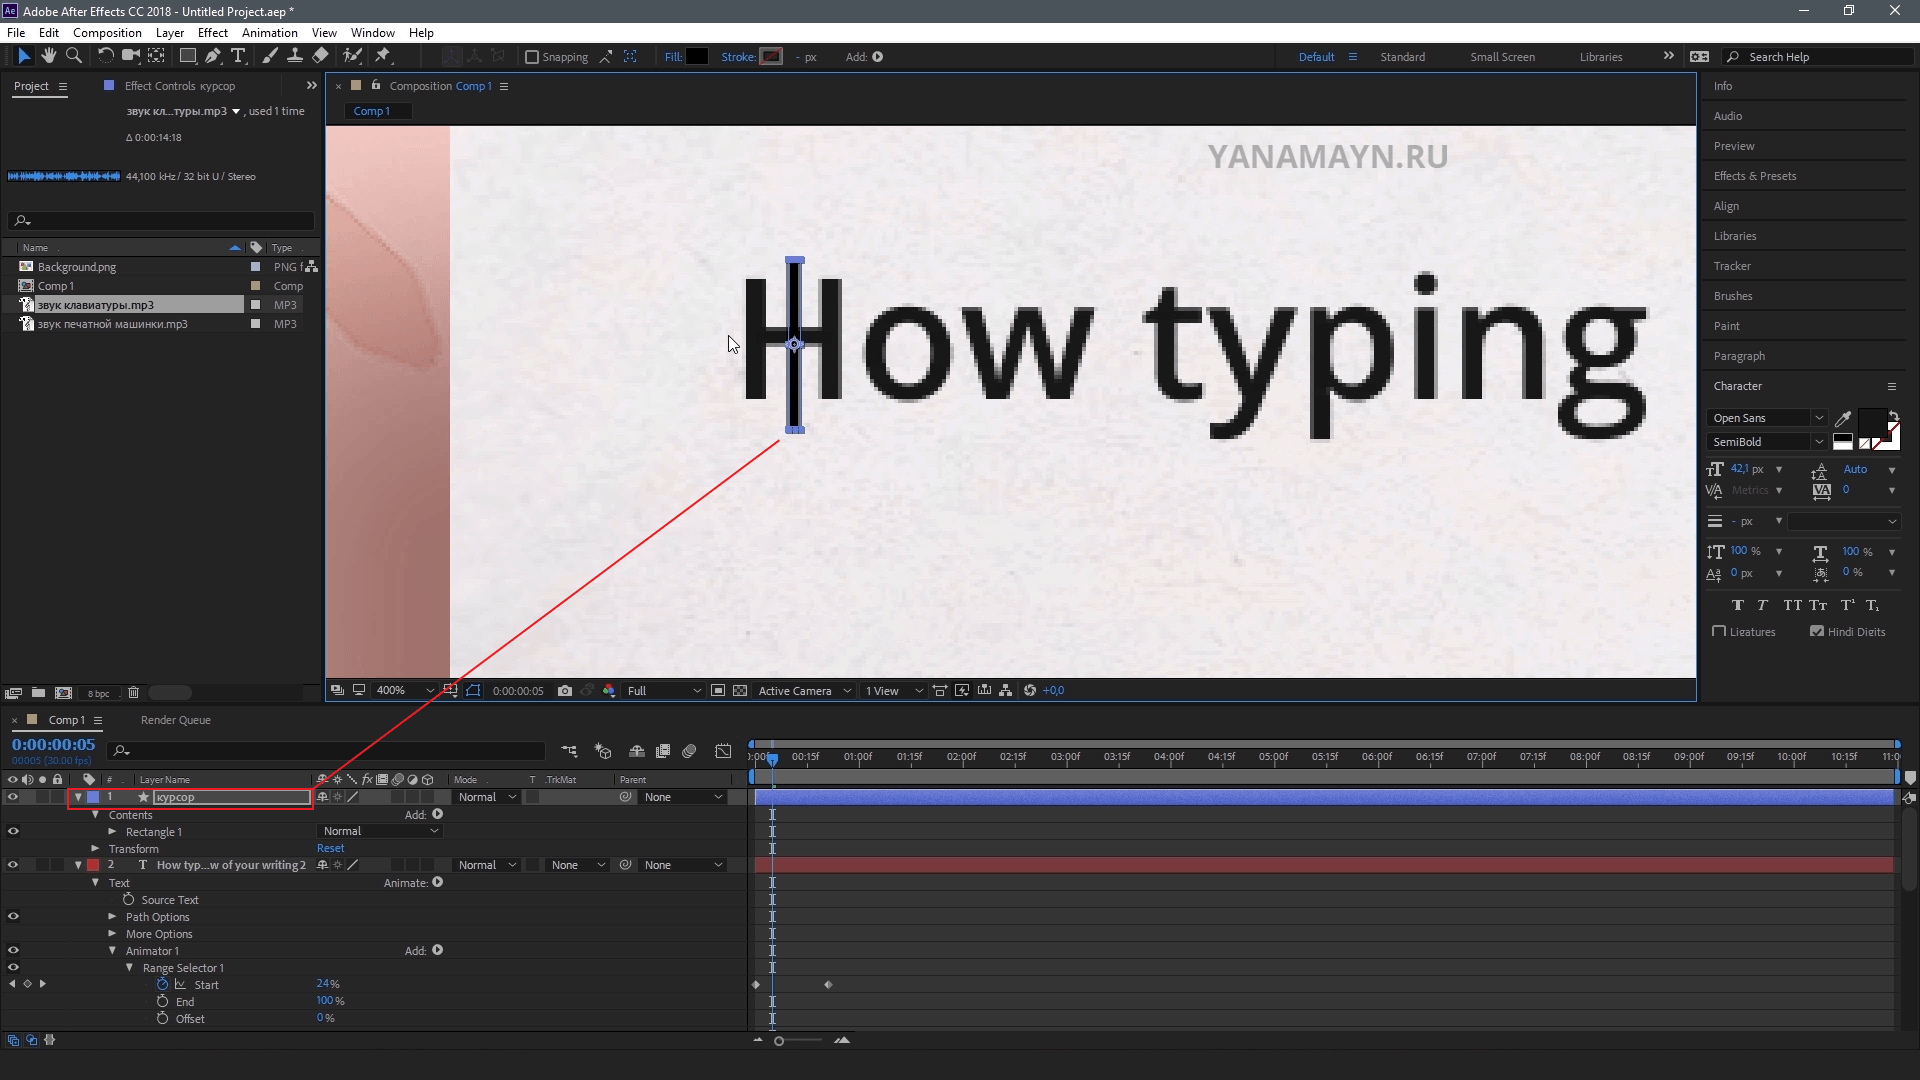
Создадим новый векторный слой. В верхнем меню выбираем Layer / New / Shape Layer. Как переименовать слой? Выделяем векторный слой и нажимаем клавишу Enter для того, чтобы переименовать текст. Подпишем слой “Курсор”. Вверху на панели выбираем цвет заливки черный а фигуру рисунка прямоугольник.
Увеличиваем изображение используя scroll колесико мышки и рисуем фигуру курсора. Размер курсора должен получится по размеру текста. Как сделать центр вращения слоя? Выбираем слой и нажимаем на него правой кнопкой мыши. Выбираем Transform / Center Anchor Point in Layer Content.
Вернемся в настройки текста и отключим полупрозрачное появление следующей буквы (ставим 0%). Теперь текст стал четким и переносим курсор в начало первого слова.
Как сделать ввод текста с мигающим курсором?
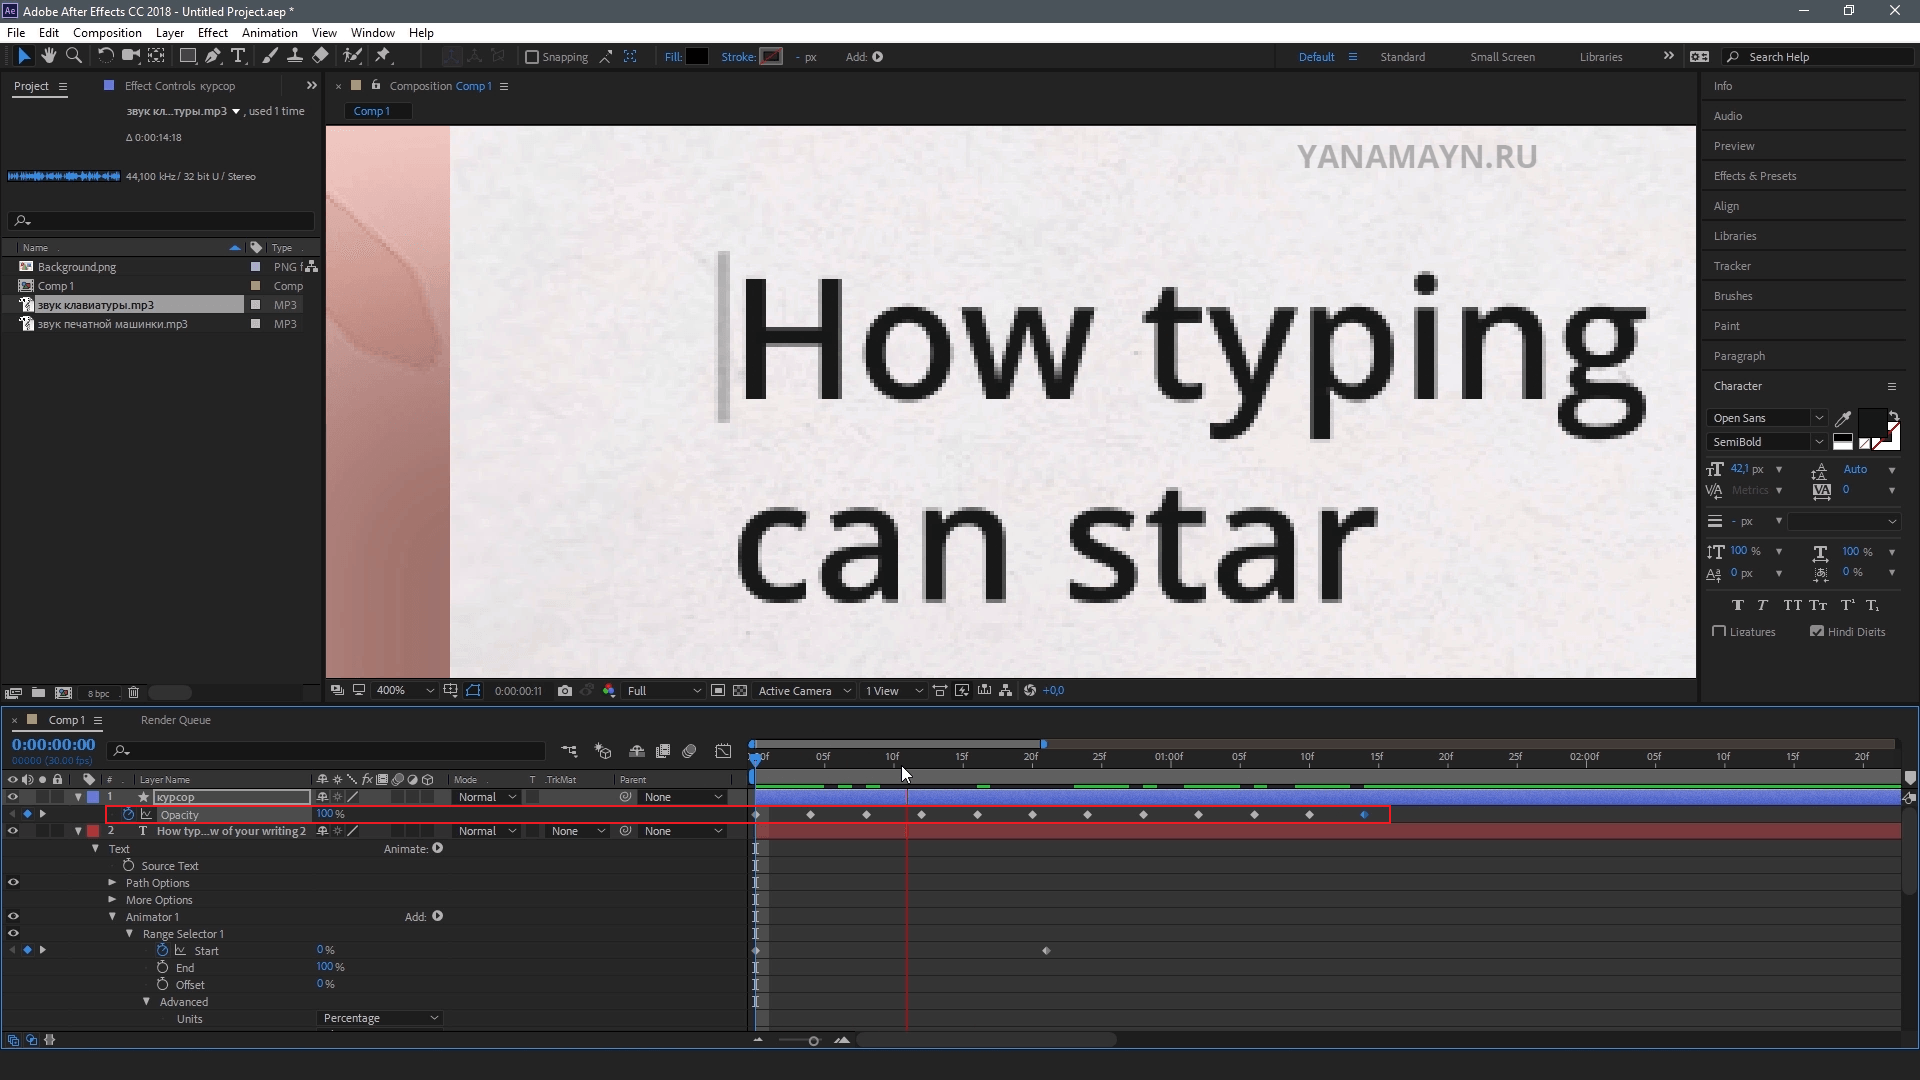
Выбираем слой с курсором. Нажимаем клавишу T и открываем анимацию прозрачности. Ставим ключи 100 – 0 – 100 – 0% через небольшие интервалы.
Также вы можете копировать ключи используя клавиши Ctrl + C и Ctrl + V для вставки.
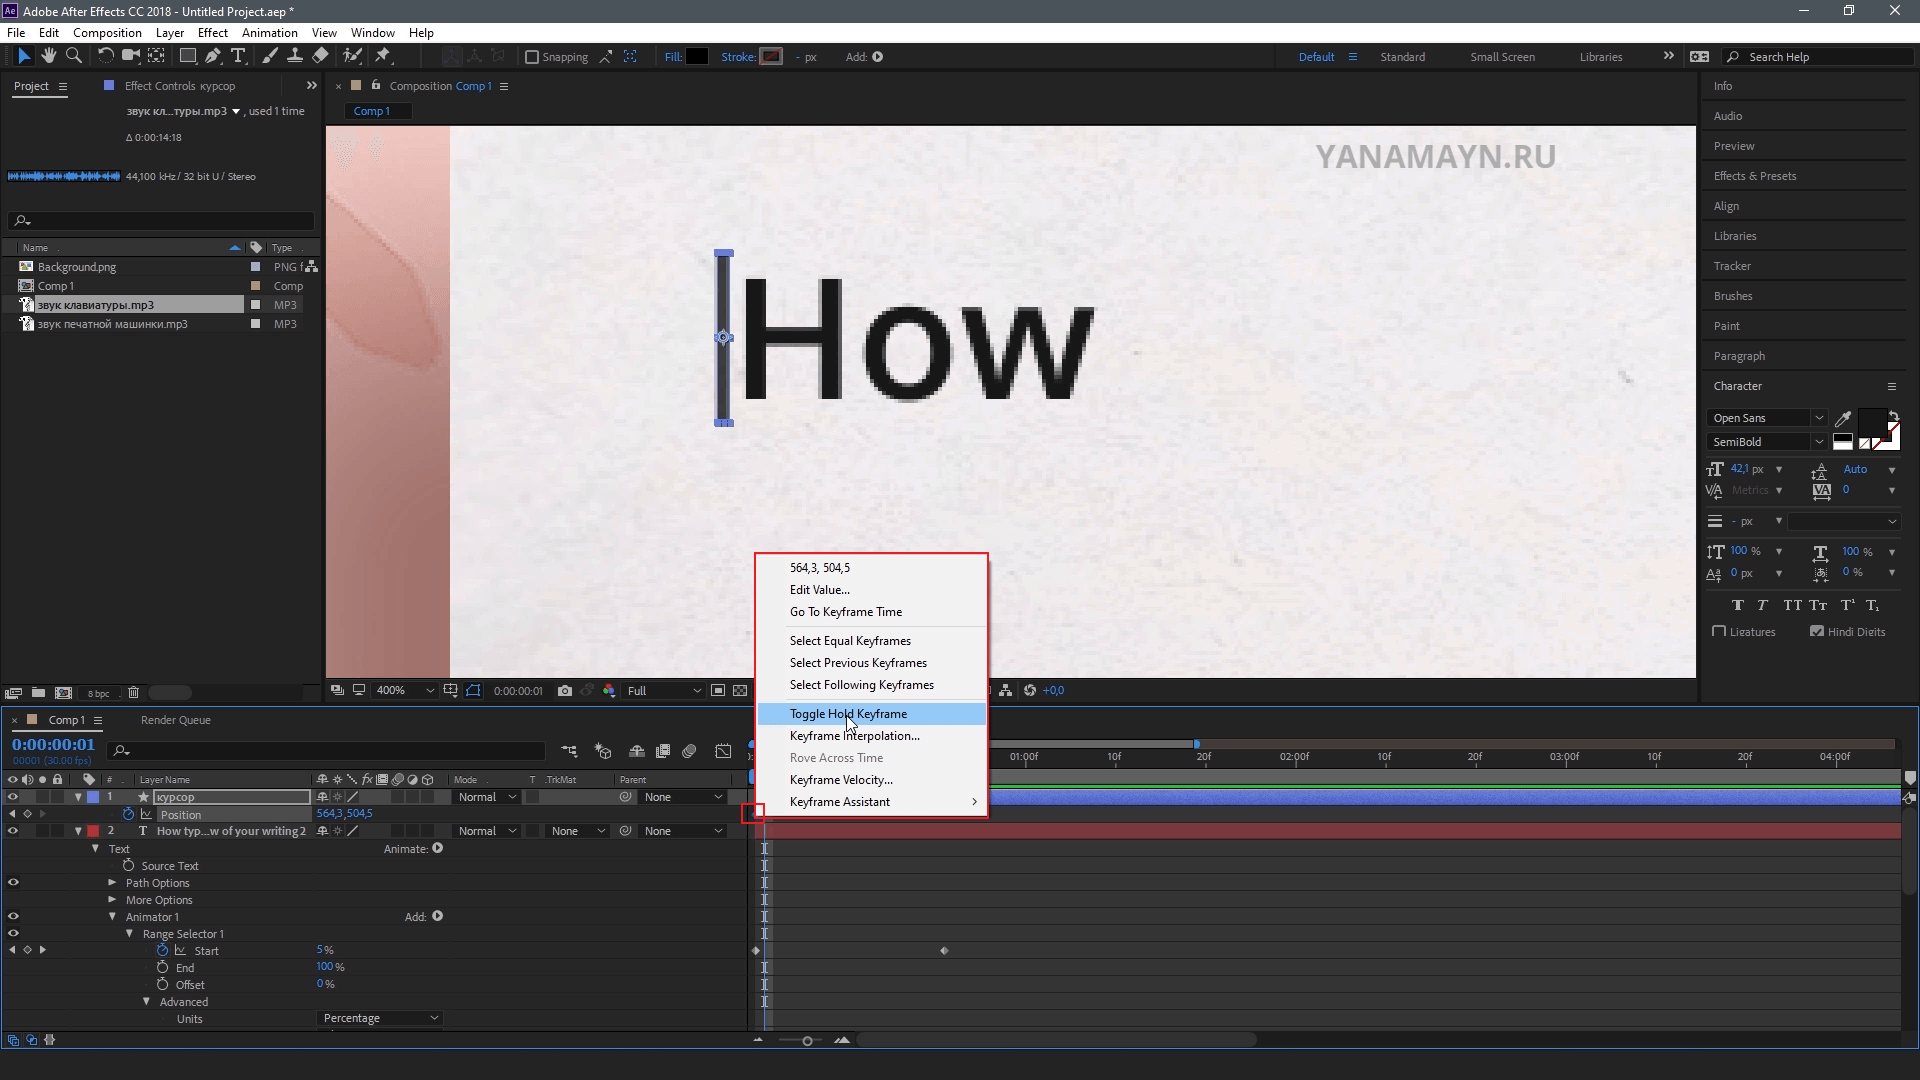
Далее заходим в анимацию позиции используя клавишу P. Выставляем timeline в начало ролика. Нажимаем на часики и ставим первый ключ анимации. На ключ нажимаем правой кнопкой мыши и в всплывающем меню выбираем Toggle Hold Keyframe.

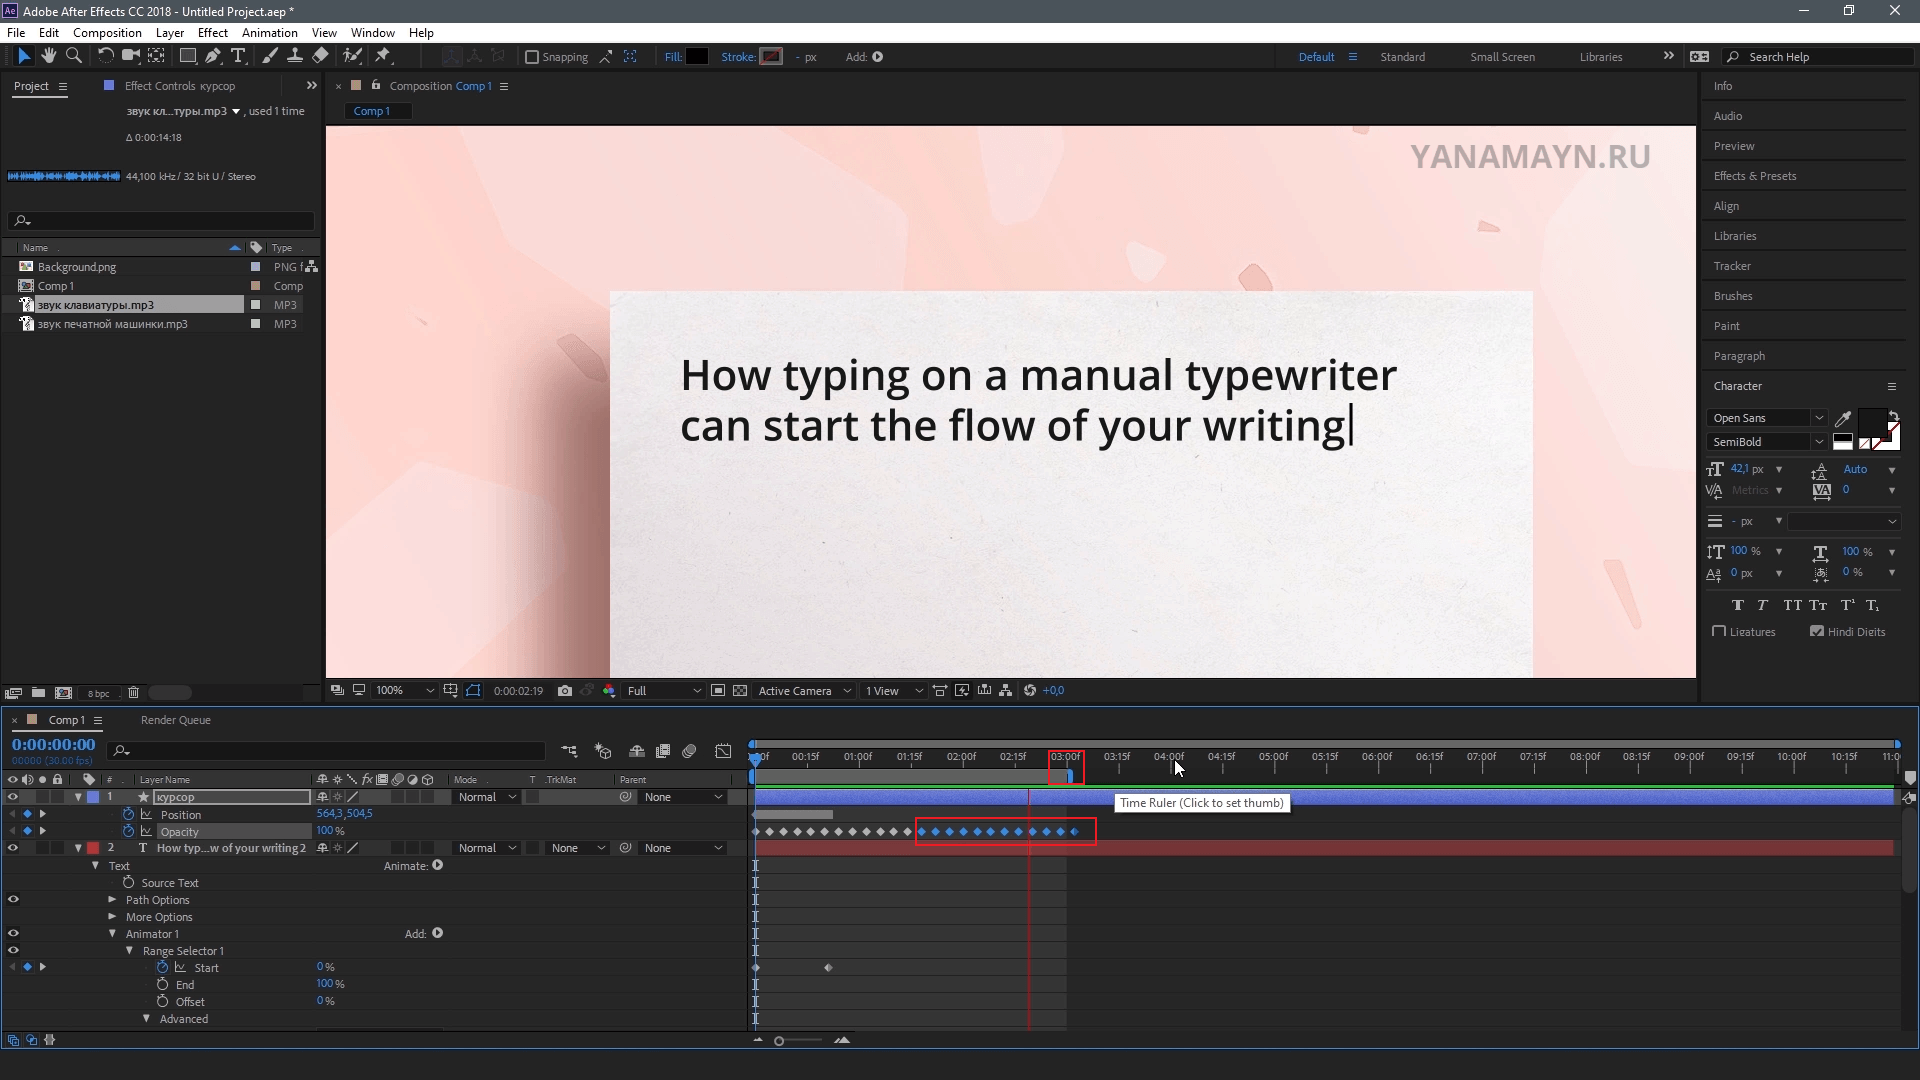
Начинаем сдвигать картинку курсора к концу где появляется следующий текст. Для отступа интервала видео используйте синий индикатор на панели Timeline. После того как поставили ключи позиции подтягиваем край композиции ролика, чтобы убрать лишнее время. Оставшееся время без анимации курсора заполним эффектом мигания курсора. Для этого скопируйте предыдущие ключи.
Вот такая анимация набора текста в стиле печатной машинки со звуками получилась.
Спасибо за просмотр!
Больше уроков по рисунку и анимации вы можете найти на странице мастер-классы.
![]()
Ivan
Автор курсов по анимации
Подписывайся на мой канал, чтобы смотреть новые уроки
и не забывай ставить лайк,если видео было полезным.

СОХРАНИ, ЧТОБЫ НЕ ПОТЕРЯТЬ
Чтобы сохранить Пин :
- Наведите курсор на изображение
- Нажмите кнопку на кнопку Save / Сохранить
- Добавьте или измените описание Пина
- Выберите доску для Пина