Бесплатный фоторедактор онлайн для всех
Бесплатное редактирование фотографий с помощью фоторедактора Fotor всего несколькими кликами. Он охватывает все онлайн-инструменты для фоторедактирования, поэтому Вы можете обрезать изображения, менять их размер, добавлять текст к фотографиям, а также легко создавать фотоколлажи и графические дизайны.
Как редактировать фотографии?
Всего 4 простых шага между Вами и созданием прекрасных изображений, как у профессионального фотографа.
фоторедактор Fotor делает редактирование изображений чрезвычайно простым. Различные стильные фотоэффекты и функции редактирования, несомненно, смогут удовлетворить все Ваши потребности в редактировании. Он идеален как для новичков, так и для профессионалов.
Множество учебных пособий и руководств по фторедактированию онлайн
Узнайте, как сделать Ваши фотографии потрясающими с помощью лучшего бесплатного фоторедактора Fotor.
1. Что такое редактирование фотографий?
Редактирование фотографий – быстрый цифровой способ улучшить изображение. Несмотря на то, что камеры и телефоны являются отличными устройствами для фотографирования, иногда они не очень хорошо фиксируют хорошие кадры. Редактирование фотографий позволяет Вам шлифовать изображения по освещению и цветам, добавляя эффекты фотографий, стирая фон, удаляя ненужные предметы, чтобы сделать Ваши фотографии более красивыми. Редактируйте фотографии с помощью лучшего фоторедактора онлайн Fotor и получайте еще больше от Ваших фотографий.
2. Как я могу редактировать фотографии онлайн бесплатно?
Вы можете сделать это с помощью бесплатного фоторедактора онлайн Fotor. Сначала откройте сайт бесплатного фоторедактора онлайн Fotor. Затем выберите одну функцию редактирования, которая Вам нужна, например, базовые настройки, портретная красота или фотоэффекты, на левой панели инструментов. И наконец, примените эту функцию, загрузите и поделитесь последней частью.
3. Fotor лучше, чем фотошоп?
Да, Fotor лучше, чем Фотошоп. BBC назвала Fotor «Фотошоп Лайт». Несмотря на то, что Fotor является фоторедактором онлайн, таким как Фотошоп, от сферы использования до его функций, Fotor имеет менее крутую кривую обучения, чем Фотошоп. Профессиональным фотографом и графическим дизайнером может стать любой, никаких навыков не требуется.
Второе поколение цифровых улучшителей фото и инструментов дизайна после Photoshop.
—BBC News
![]()
WebAward 2017 за выдающиеся достижения
—WebAwards
![]()
Онлайн фоторедактор Fotor тонко настраивает ваши изображения прямо в вашем браузере.
—Windows Central
![]()
Бесплатное улучшение фотографий в один клик
—Techradar
![]()
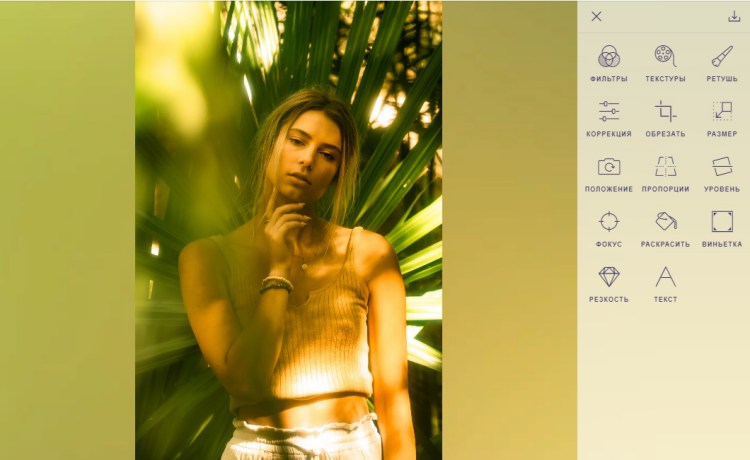
Возможности Editor.Pho.to
Хотите легко и качественно обработать фото онлайн? Тогда Editor.Pho.to — как раз то, что вам нужно. Наш бесплатный фоторедактор быстро исправит недостатки и улучшит качество цифровых фотографий.
Обрезка, поворот и изменение размера
Самыми востребованными в фоторедактировании являются такие базовые операции, как обрезка и поворот изображений. Поэтому мы создали интуитивно понятные и быстрые инструменты для выполнения этих действий.
С помощью функции «Поворот» вы можете вращать изображение на 90 градусов вправо и влево, отразить картинку по вертикали или горизонтали и выровнять горизонт. Все операции осуществляются легко и быстро. Чтобы кадрировать (или обрезать) фото, достаточно выбрать область обрезки. При сохранении обработанной фотографии вы можете выбрать расширение (.jpg или .png), качество и размер файла.
Обработать фото
Коррекция изображения
Используйте инструмент «Экспозиция» для регулировки яркости и контраста, коррекции теней и светлых участков фотографии. Вы также можете изменить цветовой тон, насыщенность и температуру. Инструмент «Резкость» позволяет увеличить резкость изображения в тех случаях, когда это необходимо. Меняя настройки каждого инструмента, вы будуте видеть происходящие изменения в режиме реального времени.
Сделать коррекцию фото
Фоторамки, стикеры и текст
С фоторедактором Editor.Pho.to вы сможете с легкостью создать веселые и модные картинки, используя забавные стикеры, стильные фоторамки и красивые текстовые подписи.
В вашем распоряжении более 300 стикеров, 30 обрамлений (их толщину можно настроить) и 20 декоративных шрифтов для текстовых надписей. Большое поле для экспериментов.
Украсить фото
Фотоэффекты и фотофильтры
Трудно представить мир фотографии без возможности превратить фото из цветного в черно-белое, обработать его фильтром сепия или сделать виньетирование. Для творческой обработки у нас также есть эффект пикселизации.
Создавайте винтажные фотографии с помощью эффекта ретро, используйте Tilt-Shift эффект, чтобы превратить пейзажные снимки в «игрушечные» или же акцентируйте внимание зрителя на центральной области изображения с помощью эффекта виньетирования.
Применить эффекты
Он имеет уязвимости в безопасности и может не показывать все возможности на этом и других сайтах.
|
tanyaspb27 |
|
|
1 |
|
как можно изменить содержимое файла фотографии, не меняя самого фото?22.07.2013, 04:15. Показов 1780. Ответов 5
Собственно — всё в названии.
__________________ |

|
киберпаразит
9719 / 2783 / 188 Регистрация: 14.06.2011 Сообщений: 9,586 |
|
|
22.07.2013, 05:50 |
2 |
|
не совсем понял… аттрибуты, датувремя создания поменять чтоли? если да, то что-то вроде Attribute Changer
0 |
|
Особый статус
8425 / 1704 / 87 Регистрация: 15.04.2011 Сообщений: 5,515 |
|
|
22.07.2013, 07:29 |
3 |
|
Да,вам нужно прибегнуть к HEX
0 |
|
36 / 37 / 1 Регистрация: 11.06.2013 Сообщений: 163 |
|
|
22.07.2013, 08:14 |
4 |
|
Изменить дату создания итп итд программа SetFileDate есть, несложная, удобная
0 |
|
2528 / 830 / 36 Регистрация: 28.09.2011 Сообщений: 4,319 |
|
|
22.07.2013, 08:22 |
5 |
|
не совсем понял. совсем не понял!..
изменяет именно содержимое файла картинки, не меняя саму картинку о каком собственно содержании речь?!
0 |

|
gecata |
|
22.07.2013, 12:11
|
|
Не по теме: Хм… Когда мне нужно всобачить ту же картинку (скажем, на форум, куда я её уже выкладывала, а воспользоваться тэгами почему-то нельзя), я в любом графическом редакторе обрезаю одну из сторон картинки на пиксель — и вуаля! Или тычу в автоподстройку…
0 |
![]()
Download Article
![]()
Download Article
Photoshop is a well-known application used to edit and enhance images. Photoshop allows you to do everything from cropping an image, to adding objects that aren’t in the image. This wikiHow teaches some common editing techniques in Photoshop.
-

1
-
2
Open the photo that you want to edit. Use the following steps to open an image:
- Click File in the menu bar at the top of the screen.
- Click Open
- Select an image and then click Open.
Advertisement
-
3
Click the Crop tool. It’s the icon that resembles two angled lines forming a square.
-
4
Click and drag over the subject of your image. This displays a rectangle around the area you selected. The dark area outside the rectangle is the area that will be removed from the photo when it is cropped.
- You can adjust the cropping area by clicking and dragging the edges of the rectangle around the area you selected.
-
5
Click the checkmark icon. It’s in the center above Photoshop. This crops your image.
-
6
Save the image. Once you are happy with how the image looks, use the following steps to save the image:
- Click File
- Click Save As.
- Type a name for the image (consider giving the edited image a different file name from the original).
- Select an image format next to «Save as type» (JPEG, PNG, and GIF are common file types.
- Click Save.


Advertisement
-
1
-
2
Open the photo that you want to edit. Use the following steps to open an image:
- Click File in the menu bar at the top of the screen.
- Click Open
- Select an image and then click Open.
-
3
Duplicate the background layer (optional). When editing photos in Photoshop, it’s a good idea to duplicate the background layer. That way if you mess up the image, you can delete the layer and start again with the original. Use the following steps to duplicate the background layer.
- Right-click the background layer in the Layers panel (If you don’t see the Layers panel on-screen, click Window in the menu bar and click Layers).
- Click Duplicate layer.
-
4
Click and hold the spot healing tool. It’s in the toolbar to the left. It resembles a rectangular double-ended brush. Clicking and holding the tool displays a pop-out menu with more tools.
-
5
Click the red-eye tools. It’s in the menu that appears when you click and hold the spot healing tool. It has an icon that resembles an eyeball with a Plus sign (+) next to it.
-
6
Click and drag over one eye, and then the other. Use the red-eye tool to click and drag over the entire eye. Photoshop will automatically remove the recolor the red parts of the eye.
- If the eye ends up looking fuzzy, too dark or too light, you adjust the pupil size and darken amount in the upper-right corner.
-
7
Save the image. Once you are happy with how the image looks, use the following steps to save the image:
- Click File
- Click Save As.
- Type a name for the image (consider giving the edited image a different file name from the original).
- Select an image format next to «Save as type» (JPEG, PNG, and GIF are common file types.
- Click Save.


Advertisement
-
1
Open Photoshop. It has a blue square icon that says «Ps» in the middle. Photoshop is available with a subscription from https://www.adobe.com/products/photoshop.html.
- The spot healing tool can be used to remove unsightly blemishes or spots of an image.
-
2
Open the photo that you want to edit. Use the following steps to open an image:
- Click File in the menu bar at the top of the screen.
- Click Open
- Select an image and then click Open.
-
3
Duplicate the background layer (optional). When editing photos in Photoshop, it’s a good idea to duplicate the background layer. That way if you mess up the image, you can delete the layer and start again with the original. Use the following steps to duplicate the background layer.
- Right-click the background layer in the Layers panel (If you don’t see the Layers panel on-screen, click Window in the menu bar and click Layers).
- Click Duplicate layer.
-
4
Click on the spot healing tool. It’s in the toolbar to the left. It resembles a rectangular double-ended brush.
-
5
Click a part of the image that needs healing. This removes spots and blemishes by blending over them with the color and texture around the spot.
- You can adjust the size of the brush by pressing [ and ] on your keyboard.
- You can click and drag to heal a larger part of the image, though this tends to leave a blurry streak on the image.
-
6
Save the image. Once you are happy with how the image looks, use the following steps to save the image:
- Click File
- Click Save As.
- Type a name for the image (consider giving the edited image a different file name from the original).
- Select an image format next to «Save as type» (JPEG, PNG, and GIF are common file types.
- Click Save.


Advertisement
-
1
-
2
Open the photo that you want to edit. Use the following steps to open an image:
- Click File in the menu bar at the top of the screen.
- Click Open
- Select an image and then click Open.
-
3
Duplicate the background layer (optional). When editing photos in Photoshop, it’s a good idea to duplicate the background layer. That way if you mess up the image, you can delete the layer and start again with the original. Use the following steps to duplicate the background layer.
- Right-click the background layer in the Layers panel (If you don’t see the Layers panel on-screen, click Window in the menu bar and click Layers).
- Click Duplicate layer.
-
4
Select a color. To select a color, click the colored square (black by default) below the tools the toolbar to the left. Then click a hue in the rainbow-colored bar. Then click a tint and shade in the larger square on the left. Then click Ok.
- Click the colored square underneath the first colored square to pick a secondary color or background color.
- To select a color from within the image, click the eyedropper tool in the toolbar to the left and click the color you want from within the image.
-
5
Click the brush tool. It’s the icon that resembles a paintbrush in the toolbar to the left. The type of brush you have selected will be displayed in the upper-left corner.
-
6
Click the brush type drop-down menu. It’s in the upper-left corner next to the brush type you have selected (round dot by default). This displays a drop-down menu with different brush settings.
-
7
Click a brush type. There are many icons that represent the different brushes you can select. These different brushes are useful for drawing on the image or adding texture. Click a brush you want to use.
- If you don’t see anything you like, you can download, and install more Photoshop brushes.
-
8
Adjust the brush size. Use the slider bar at the top of the menu below size to adjust the size of the brush. Drag it right to make the brush bigger.
- Alternatively, you can adjust the size of the brush by pressing [ and ] on your keyboard.
-
9
Adjust the hardness of your brush (not available for all brushes). Some brushes have the ability to adjust the hardness of the brush. Use the second slider bar below «Hardness» to adjust the hardness of the brush. Dragging it to the left will add a softer gradient around the edges of the brush.
- To adjust the opacity of the brush, click Opacity at the top of Photoshop. Drag the slider bar to the right to make the color more solid. Drag it to the left to make the color more transparent.
-
10
Use the brush to draw on the image. Click once on the image to stamp the select brush on the image. Click and drag to streak the brush over the image.
- If you make a mistake, press Ctrl+Z to undo once. To undo more steps, click Window in the menu bar at the top, then click History. Click the step you want to go back to in the History panel.
- When using the brush tool, you may want to consider drawing on a separate layer. To add a new layer, click the small icon that resembles a sheet of paper in the lower-right corner of the Layers panel.
-
11
Save the image. Once you are happy with how the image looks, use the following steps to save the image:
- Click File
- Click Save As.
- Type a name for the image (consider giving the edited image a different file name from the original).
- Select an image format next to «Save as type» (JPEG, PNG, and GIF are common file types.
- Click Save.


Advertisement
-
1
-
2
Open the photo that you want to edit. Use the following steps to open an image:
- Click File in the menu bar at the top of the screen.
- Click Open
- Select an image and then click Open.
-
3
Click the Lasso Tool. It’s the icon that resembles a lasso in the toolbar to the left. The lasso tool is used to copy parts of an image that you can paste in another part of the image, or on a separate image.
- Some versions of Photoshop have the Magnetic Lasso tool, and Polygonal Lasso tool. These make it easier to draw around a shape. Click and hold the lasso tool in the toolbar to access these other versions of the lasso tool.
-
4
Draw around the shape you want to copy. With the lasso tool selected, click the edge of the shape you want to copy in the image and drag to draw around the shape. You will see it draw a line. Draw a complete line around the shape. Return to the point you started drawing from to complete the shape. You will see a dotted outline around the shape. This is the selection.
- To add more to the selection, click the icon that resembles two squares joined in the upper-left corner and use the lasso tool to draw more to add to your selection
- To remove parts of your selection, click the icon that resembles a square with the corner cut out. Then use the lasso tool to draw over parts of your selection that you want to remove.
- The Magnetic Lasso tool will automatically try to detect the shape you are trying to outline as you draw.
- To use the Polygonal Lasso tool, click individual spots around the shape to create line segments that outline the shape.
-
5
Click Edit. It’s in the menu bar at the top of the page.
-
6
Click Copy. It’s in the Edit menu. This copies the selection.
-
7
Click Edit. It’s in the menu bar at the top of the page.
-
8
Click Paste. This pastes the copied selection into the image as a separate layer. You can paste the selection in the same image or a separate image.
- You may need to use the eraser tool to remove parts of the background you accidentally copied around the edges.
-
9
Click the Move tool. It’s the icon that resembles a mouse cursor with a cross-arrow next to it. It’s the first icon in the toolbar to the left.
-
10
Click and drag on the selection. With the move tool selected. you can move the selection you pasted to any location in the image by clicking it and dragging it.
- To change the size of the pasted selection, click it with the move tool. Then click the checkbox next to «Show Transform Controls» in the upper-left corner. Then click and drag one of the corners of the box around your selection to change the size of it. Press and hold ⇧ Shift while dragging to keep the selection proportional.
-
11
Save the image. Once you are happy with how the image looks, use the following steps to save the image:
- Click File
- Click Save As.
- Type a name for the image (consider giving the edited image a different file name from the original).
- Select an image format next to «Save as type» (JPEG, PNG, and GIF are common file types.
- Click Save.


Advertisement
-
1
-
2
Open the photo that you want to edit. Use the following steps to open an image:
- Click File in the menu bar at the top of the screen.
- Click Open
- Select an image and then click Open.
-
3
Duplicate the background layer (optional). When editing photos in Photoshop, it’s a good idea to duplicate the background layer. That way if you mess up the image, you can delete the layer and start again with the original. Use the following steps to duplicate the background layer.
- Right-click the background layer in the Layers panel (If you don’t see the Layers panel on-screen, click Window in the menu bar and click Layers).
- Click Duplicate layer.
-
4
Click Filter. It’s in the menu bar at the top of Photoshop.
-
5
Click Filter Gallery. It’s near the top of the Filter menu. This opens the Filter window
- To see the entire image, you may need to stretch the filter gallery window out depending on the size of your image.
-
6
Click a filter category. Filter categories are listed to the right of the image window in the Filter Gallery. Clicking a category displays a list of filters with a thumbnail preview for each filter. Filter categories include; Artistic, Brush Strokes, Distort, Sketch, Stylize, Texture.
-
7
Click a filter. When you see a filter you like, click on it. The image window to the left displays a preview of how the filter will affect your image.
-
8
Adjust the filter settings. Each filter has different settings displayed in the window to the right. Experiment by adjusting the slider bars in this window to see how they modify the image.
-
9
Click Ok. When the like how the image looks, click Ok in the panel to the right to apply the filter. Filters can be applied to an entire image, an image selection, or an individual layer.
-
10
Save the image. Once you are happy with how the image looks, use the following steps to save the image:
- Click File
- Click Save As.
- Type a name for the image (consider giving the edited image a different file name from the original).
- Select an image format next to «Save as type» (JPEG, PNG, and GIF are common file types.
- Click Save.


Advertisement
-
1
Open Photoshop. It has a blue square icon that says «Ps» in the middle.
-
2
Select a background color. To select a background color, click the colored square behind (white by default) behind the primary-colored square below the tools in the toolbar to the left. Then click a hue in the rainbow-colored bar. Then click a tint and shade in the larger square on the left. Then click Ok. This is the color you will use as the background color of a new image.
-
3
Create a new Photoshop file. Use the following steps to open a new Photoshop image with the background color you selected:
- Click File.
- Click New.
- Type your desired height, and width dimension settings in the boxes.
- Select your desired resolution next to «Resolution».
- Select Background Color next to «Background contents.
- Click Ok.
-
4
Place a photo on top of the background. Use the following steps to place another photo as a separate layer on top of your background color:
- Click File
- Click Place.
- Select the image you want to import.
- Click Place.
-
5
Click and hold the marquee tool. This displays different marquee shapes you can use to create a selection within the image.
-
6
Select a marquee shape. You can select a rectangle or oval marquee.
- Alternatively, you can use the lasso tool to create a selection of your own shape.
-
7
Click and drag inside the image. You will see a dotted outline around the selected part of the image.
- To create a gradient around the edges of the masked image, type a number next to «Feather» in the upper-left corner. For example, type «25 px» to feather the edges by 25 pixels.
-
8
Click Layer. It’s in the menu bar at the top of the screen.
-
9
Click Layer Mask. This displays a sub-menu with masking options.
-
10
Click Reveal Selection. This creates a mask of your image in the shape that you selected. The background color shows around the masked parts of the image.
-
11
Save the image. Once you are happy with how the image looks, use the following steps to save the image:
- Click File
- Click Save As.
- Type a name for the image (consider giving the edited image a different file name from the original).
- Select an image format next to «Save as type» (JPEG, PNG, and GIF are common file types.
- Click Save.


Advertisement
Ask a Question
200 characters left
Include your email address to get a message when this question is answered.
Submit
Advertisement
Thanks for submitting a tip for review!
About This Article
Article SummaryX
1. Open an image in Photoshop.
2. Click the colored square below the tools in the toolbar.
3. Use the color picker window to pick a primary color.
4. Use the brush tool to draw or mark the image.
5. Use the eraser tool to erase marks or parts of the image.
6. Use the spot healing tool to remove unsightly spots and blemishes.
7. Use the red-eye tool and drag over eyes in an image to remove red-eye.
8. Use the lasso tool to draw a selection around a shape in an image that you want to copy.
9. Click Filter followed by Filter Gallery. Then select a filter.
Did this summary help you?
Thanks to all authors for creating a page that has been read 10,205 times.
Is this article up to date?
![]()
Download Article
![]()
Download Article
Photoshop is a well-known application used to edit and enhance images. Photoshop allows you to do everything from cropping an image, to adding objects that aren’t in the image. This wikiHow teaches some common editing techniques in Photoshop.
-
1
-
2
Open the photo that you want to edit. Use the following steps to open an image:
- Click File in the menu bar at the top of the screen.
- Click Open
- Select an image and then click Open.
Advertisement
-
3
Click the Crop tool. It’s the icon that resembles two angled lines forming a square.
-
4
Click and drag over the subject of your image. This displays a rectangle around the area you selected. The dark area outside the rectangle is the area that will be removed from the photo when it is cropped.
- You can adjust the cropping area by clicking and dragging the edges of the rectangle around the area you selected.
-
5
Click the checkmark icon. It’s in the center above Photoshop. This crops your image.
-
6
Save the image. Once you are happy with how the image looks, use the following steps to save the image:
- Click File
- Click Save As.
- Type a name for the image (consider giving the edited image a different file name from the original).
- Select an image format next to «Save as type» (JPEG, PNG, and GIF are common file types.
- Click Save.
Advertisement
-
1
-
2
Open the photo that you want to edit. Use the following steps to open an image:
- Click File in the menu bar at the top of the screen.
- Click Open
- Select an image and then click Open.
-
3
Duplicate the background layer (optional). When editing photos in Photoshop, it’s a good idea to duplicate the background layer. That way if you mess up the image, you can delete the layer and start again with the original. Use the following steps to duplicate the background layer.
- Right-click the background layer in the Layers panel (If you don’t see the Layers panel on-screen, click Window in the menu bar and click Layers).
- Click Duplicate layer.
-
4
Click and hold the spot healing tool. It’s in the toolbar to the left. It resembles a rectangular double-ended brush. Clicking and holding the tool displays a pop-out menu with more tools.
-
5
Click the red-eye tools. It’s in the menu that appears when you click and hold the spot healing tool. It has an icon that resembles an eyeball with a Plus sign (+) next to it.
-
6
Click and drag over one eye, and then the other. Use the red-eye tool to click and drag over the entire eye. Photoshop will automatically remove the recolor the red parts of the eye.
- If the eye ends up looking fuzzy, too dark or too light, you adjust the pupil size and darken amount in the upper-right corner.
-
7
Save the image. Once you are happy with how the image looks, use the following steps to save the image:
- Click File
- Click Save As.
- Type a name for the image (consider giving the edited image a different file name from the original).
- Select an image format next to «Save as type» (JPEG, PNG, and GIF are common file types.
- Click Save.
Advertisement
-
1
Open Photoshop. It has a blue square icon that says «Ps» in the middle. Photoshop is available with a subscription from https://www.adobe.com/products/photoshop.html.
- The spot healing tool can be used to remove unsightly blemishes or spots of an image.
-
2
Open the photo that you want to edit. Use the following steps to open an image:
- Click File in the menu bar at the top of the screen.
- Click Open
- Select an image and then click Open.
-
3
Duplicate the background layer (optional). When editing photos in Photoshop, it’s a good idea to duplicate the background layer. That way if you mess up the image, you can delete the layer and start again with the original. Use the following steps to duplicate the background layer.
- Right-click the background layer in the Layers panel (If you don’t see the Layers panel on-screen, click Window in the menu bar and click Layers).
- Click Duplicate layer.
-
4
Click on the spot healing tool. It’s in the toolbar to the left. It resembles a rectangular double-ended brush.
-
5
Click a part of the image that needs healing. This removes spots and blemishes by blending over them with the color and texture around the spot.
- You can adjust the size of the brush by pressing [ and ] on your keyboard.
- You can click and drag to heal a larger part of the image, though this tends to leave a blurry streak on the image.
-
6
Save the image. Once you are happy with how the image looks, use the following steps to save the image:
- Click File
- Click Save As.
- Type a name for the image (consider giving the edited image a different file name from the original).
- Select an image format next to «Save as type» (JPEG, PNG, and GIF are common file types.
- Click Save.
Advertisement
-
1
-
2
Open the photo that you want to edit. Use the following steps to open an image:
- Click File in the menu bar at the top of the screen.
- Click Open
- Select an image and then click Open.
-
3
Duplicate the background layer (optional). When editing photos in Photoshop, it’s a good idea to duplicate the background layer. That way if you mess up the image, you can delete the layer and start again with the original. Use the following steps to duplicate the background layer.
- Right-click the background layer in the Layers panel (If you don’t see the Layers panel on-screen, click Window in the menu bar and click Layers).
- Click Duplicate layer.
-
4
Select a color. To select a color, click the colored square (black by default) below the tools the toolbar to the left. Then click a hue in the rainbow-colored bar. Then click a tint and shade in the larger square on the left. Then click Ok.
- Click the colored square underneath the first colored square to pick a secondary color or background color.
- To select a color from within the image, click the eyedropper tool in the toolbar to the left and click the color you want from within the image.
-
5
Click the brush tool. It’s the icon that resembles a paintbrush in the toolbar to the left. The type of brush you have selected will be displayed in the upper-left corner.
-
6
Click the brush type drop-down menu. It’s in the upper-left corner next to the brush type you have selected (round dot by default). This displays a drop-down menu with different brush settings.
-
7
Click a brush type. There are many icons that represent the different brushes you can select. These different brushes are useful for drawing on the image or adding texture. Click a brush you want to use.
- If you don’t see anything you like, you can download, and install more Photoshop brushes.
-
8
Adjust the brush size. Use the slider bar at the top of the menu below size to adjust the size of the brush. Drag it right to make the brush bigger.
- Alternatively, you can adjust the size of the brush by pressing [ and ] on your keyboard.
-
9
Adjust the hardness of your brush (not available for all brushes). Some brushes have the ability to adjust the hardness of the brush. Use the second slider bar below «Hardness» to adjust the hardness of the brush. Dragging it to the left will add a softer gradient around the edges of the brush.
- To adjust the opacity of the brush, click Opacity at the top of Photoshop. Drag the slider bar to the right to make the color more solid. Drag it to the left to make the color more transparent.
-
10
Use the brush to draw on the image. Click once on the image to stamp the select brush on the image. Click and drag to streak the brush over the image.
- If you make a mistake, press Ctrl+Z to undo once. To undo more steps, click Window in the menu bar at the top, then click History. Click the step you want to go back to in the History panel.
- When using the brush tool, you may want to consider drawing on a separate layer. To add a new layer, click the small icon that resembles a sheet of paper in the lower-right corner of the Layers panel.
-
11
Save the image. Once you are happy with how the image looks, use the following steps to save the image:
- Click File
- Click Save As.
- Type a name for the image (consider giving the edited image a different file name from the original).
- Select an image format next to «Save as type» (JPEG, PNG, and GIF are common file types.
- Click Save.
Advertisement
-
1
-
2
Open the photo that you want to edit. Use the following steps to open an image:
- Click File in the menu bar at the top of the screen.
- Click Open
- Select an image and then click Open.
-
3
Click the Lasso Tool. It’s the icon that resembles a lasso in the toolbar to the left. The lasso tool is used to copy parts of an image that you can paste in another part of the image, or on a separate image.
- Some versions of Photoshop have the Magnetic Lasso tool, and Polygonal Lasso tool. These make it easier to draw around a shape. Click and hold the lasso tool in the toolbar to access these other versions of the lasso tool.
-
4
Draw around the shape you want to copy. With the lasso tool selected, click the edge of the shape you want to copy in the image and drag to draw around the shape. You will see it draw a line. Draw a complete line around the shape. Return to the point you started drawing from to complete the shape. You will see a dotted outline around the shape. This is the selection.
- To add more to the selection, click the icon that resembles two squares joined in the upper-left corner and use the lasso tool to draw more to add to your selection
- To remove parts of your selection, click the icon that resembles a square with the corner cut out. Then use the lasso tool to draw over parts of your selection that you want to remove.
- The Magnetic Lasso tool will automatically try to detect the shape you are trying to outline as you draw.
- To use the Polygonal Lasso tool, click individual spots around the shape to create line segments that outline the shape.
-
5
Click Edit. It’s in the menu bar at the top of the page.
-
6
Click Copy. It’s in the Edit menu. This copies the selection.
-
7
Click Edit. It’s in the menu bar at the top of the page.
-
8
Click Paste. This pastes the copied selection into the image as a separate layer. You can paste the selection in the same image or a separate image.
- You may need to use the eraser tool to remove parts of the background you accidentally copied around the edges.
-
9
Click the Move tool. It’s the icon that resembles a mouse cursor with a cross-arrow next to it. It’s the first icon in the toolbar to the left.
-
10
Click and drag on the selection. With the move tool selected. you can move the selection you pasted to any location in the image by clicking it and dragging it.
- To change the size of the pasted selection, click it with the move tool. Then click the checkbox next to «Show Transform Controls» in the upper-left corner. Then click and drag one of the corners of the box around your selection to change the size of it. Press and hold ⇧ Shift while dragging to keep the selection proportional.
-
11
Save the image. Once you are happy with how the image looks, use the following steps to save the image:
- Click File
- Click Save As.
- Type a name for the image (consider giving the edited image a different file name from the original).
- Select an image format next to «Save as type» (JPEG, PNG, and GIF are common file types.
- Click Save.
Advertisement
-
1
-
2
Open the photo that you want to edit. Use the following steps to open an image:
- Click File in the menu bar at the top of the screen.
- Click Open
- Select an image and then click Open.
-
3
Duplicate the background layer (optional). When editing photos in Photoshop, it’s a good idea to duplicate the background layer. That way if you mess up the image, you can delete the layer and start again with the original. Use the following steps to duplicate the background layer.
- Right-click the background layer in the Layers panel (If you don’t see the Layers panel on-screen, click Window in the menu bar and click Layers).
- Click Duplicate layer.
-
4
Click Filter. It’s in the menu bar at the top of Photoshop.
-
5
Click Filter Gallery. It’s near the top of the Filter menu. This opens the Filter window
- To see the entire image, you may need to stretch the filter gallery window out depending on the size of your image.
-
6
Click a filter category. Filter categories are listed to the right of the image window in the Filter Gallery. Clicking a category displays a list of filters with a thumbnail preview for each filter. Filter categories include; Artistic, Brush Strokes, Distort, Sketch, Stylize, Texture.
-
7
Click a filter. When you see a filter you like, click on it. The image window to the left displays a preview of how the filter will affect your image.
-
8
Adjust the filter settings. Each filter has different settings displayed in the window to the right. Experiment by adjusting the slider bars in this window to see how they modify the image.
-
9
Click Ok. When the like how the image looks, click Ok in the panel to the right to apply the filter. Filters can be applied to an entire image, an image selection, or an individual layer.
-
10
Save the image. Once you are happy with how the image looks, use the following steps to save the image:
- Click File
- Click Save As.
- Type a name for the image (consider giving the edited image a different file name from the original).
- Select an image format next to «Save as type» (JPEG, PNG, and GIF are common file types.
- Click Save.
Advertisement
-
1
Open Photoshop. It has a blue square icon that says «Ps» in the middle.
-
2
Select a background color. To select a background color, click the colored square behind (white by default) behind the primary-colored square below the tools in the toolbar to the left. Then click a hue in the rainbow-colored bar. Then click a tint and shade in the larger square on the left. Then click Ok. This is the color you will use as the background color of a new image.
-
3
Create a new Photoshop file. Use the following steps to open a new Photoshop image with the background color you selected:
- Click File.
- Click New.
- Type your desired height, and width dimension settings in the boxes.
- Select your desired resolution next to «Resolution».
- Select Background Color next to «Background contents.
- Click Ok.
-
4
Place a photo on top of the background. Use the following steps to place another photo as a separate layer on top of your background color:
- Click File
- Click Place.
- Select the image you want to import.
- Click Place.
-
5
Click and hold the marquee tool. This displays different marquee shapes you can use to create a selection within the image.
-
6
Select a marquee shape. You can select a rectangle or oval marquee.
- Alternatively, you can use the lasso tool to create a selection of your own shape.
-
7
Click and drag inside the image. You will see a dotted outline around the selected part of the image.
- To create a gradient around the edges of the masked image, type a number next to «Feather» in the upper-left corner. For example, type «25 px» to feather the edges by 25 pixels.
-
8
Click Layer. It’s in the menu bar at the top of the screen.
-
9
Click Layer Mask. This displays a sub-menu with masking options.
-
10
Click Reveal Selection. This creates a mask of your image in the shape that you selected. The background color shows around the masked parts of the image.
-
11
Save the image. Once you are happy with how the image looks, use the following steps to save the image:
- Click File
- Click Save As.
- Type a name for the image (consider giving the edited image a different file name from the original).
- Select an image format next to «Save as type» (JPEG, PNG, and GIF are common file types.
- Click Save.
Advertisement
Ask a Question
200 characters left
Include your email address to get a message when this question is answered.
Submit
Advertisement
Thanks for submitting a tip for review!
About This Article
Article SummaryX
1. Open an image in Photoshop.
2. Click the colored square below the tools in the toolbar.
3. Use the color picker window to pick a primary color.
4. Use the brush tool to draw or mark the image.
5. Use the eraser tool to erase marks or parts of the image.
6. Use the spot healing tool to remove unsightly spots and blemishes.
7. Use the red-eye tool and drag over eyes in an image to remove red-eye.
8. Use the lasso tool to draw a selection around a shape in an image that you want to copy.
9. Click Filter followed by Filter Gallery. Then select a filter.
Did this summary help you?
Thanks to all authors for creating a page that has been read 10,205 times.
Is this article up to date?
Редактируйте изображения JPG с помощью современного браузера, такого как Chrome, Opera и Firefox.
При поддержке aspose.com и aspose.cloud
Загрузка редактора… Подождите
Как редактировать JPG изображения с помощью Aspose.Imaging Редактор изображений
- Кликните внутри области для загрузки файла, чтобы загрузить JPG файл, или перетащите JPG файл в эту область
- Отредактируйте изображение с помощью одной или нескольких операций, таких как обрезка, поворот, применение фильтра и т. д.
- Нажмите кнопку Применить, чтобы применить изменения для каждой операции. Нажмите кнопку Отменить для отмены текущей операции в редакторе
- Вы можете использовать кнопки Undo-Redo, чтобы отменить или повторить последние несколько операций
- Измените формат выходного изображения, если необходимо; Нажмите на кнопку «Получить результат»
- Ссылка на скачивание обработанных изображений будет доступна сразу после завершения операции модификации
- Вы также можете отправить ссылку на готовый файл на свой адрес электронной почты
- Учтите что файл будет удалён с наших серверов после 24 часов, а ссылки для загрузки прекратят работу после этого периода времени
Часто задаваемые вопросы
-
❓ Каким образом я могу редактировать JPG изображение?
Сначала вам нужно добавить файл JPG изображения для редактирования: перетащите файл JPG изображения или щелкните внутри белой области, чтобы выбрать файл JPG. Затем примените необходимые операции редактирования и нажмите кнопку «Получить результат». Когда операция модификации будет завершена, вы сможете загрузить файл результата
-
🛡️ Безопасно ли редактировать JPG изображения с помощью бесплатного приложения Aspose.Imaging «Редактор изображений»?
Конечно! Ссылка для загрузки файлов результатов будет доступна сразу после завершения операции модификации. Мы удаляем загруженные файлы через 24 часа, и ссылки на скачивание перестанут работать по истечении этого периода времени. Никто не имеет доступа к вашим файлам. Редактирование изображений абсолютно безопасно
Когда пользователь загружает свои файлы из сторонних сервисов, они обрабатываются таким же образом.
Единственное исключение из вышеуказанных политик возможно, когда пользователь решает поделиться своими файлами через форум, запросив бесплатную поддержку, в этом случае только наши разработчики имеют доступ к ним для анализа и решения проблемы.
-
💻 Можно ли редактировать JPG изображения на Linux, Mac OS или Android?
Да, вы можете использовать бесплатное приложение Aspose.Imaging «Редактор изображений» на любой операционной системе с веб-браузером. Наш сервис работает онлайн и не требует установки программного обеспечения
-
🌐 Какой браузер следует использовать для редактирования JPG изображения?
Вы можете использовать любой современный браузер для редактирования JPG изображения, например, Google Chrome, Firefox, Opera, Safari
-
❓ Могу ли я использовать полученное изображение в коммерческих целях?
Несмотря на то, что наши приложения бесплатны, вы не ограничены в коммерческом использовании полученных изображений, избегая при этом нарушения прав третьих лиц на исходные изображения. Например, вы можете создать NFT (не взаимозаменяемый токен) из своего изображения и попытаться продать его на торговых площадках NFT.
Возможности онлайн-версии Фотошопа
Фоторедактор Фотошоп Онлайн получил внушительный функционал, он располагает всем необходимым для обработки и создания профессиональной графики. Он мультиформатный – понимает форматы PSD, JPG, JPEG, BMP, TIFF, RAW, GIF, ICO, SVG, PDF, DXF и многие другие. Редактор не только открывает данные форматы, но и сохраняет файлы в этих форматах.
Доступно открытие файлов с диска или по прямой ссылке со сторонних ресурсов. Открываются и PSD, созданные в Adobe Photoshop, устанавливаемом на компьютерах.
В редакторе реализованы функции редактирования:
- Копирование и вставка выделенной части.
- Трансформация, свободная трансформация.
- Заливка и обводка выделенных фрагментов.
- Очистка выделенного фрагмента.
- Объединение копий.
В этом же блоке можно вернуться на несколько шагов назад, отменяя последние операции. Также доступно продвижение вперёд, если откат был ошибочным.
Блок Изображение включает массу полезных в обработке фотографий функций:
- Коррекция – отрегулируйте яркость снимка, поиграйте с кривыми и уровнями для равномерного распределения цветов, настройте экспозицию. Доступны регулировки сочности, насыщенности, цветового баланса, коррекция тени, света. Прочие функции – постеризация, поиск и замена цветов.
- Автоматическая коррекция – регулирование тона и контрастности, настройка цветовой коррекции в автоматическом режиме.
- Настройка размера изображения или холста.
- Трансформация – повороты и отражения.
Как и в любом другом редакторе, в Фотошоп Онлайн реализована работа со слоями. Пользователи могут создавать новые слои и дубликаты, редактировать стили слоёв, накладывая на них всевозможные эффекты:
- Тиснение – делает детали изображения вдавленными.
- Обводка – контур определённой толщины и определённого цвета вокруг выделанной части изображения.
- Внутренние тени – отбрасывание тени внутрь выделенного объекта с настройкой цвета, радиуса и интенсивности.
- Внешнее свечение – лёгкий ореол вокруг объекта со множеством настроек.
- Глянец – делает детали глянцевыми, заставляя блестеть.
- Наложение цвета – позволяет наложить цвет полностью или с определённым процентом прозрачности.
- Наложение градиента – градиентный рисунок на поверхности объекта.
- Наложение узора – на объекты накладываются узоры из библиотеки.
Также поддерживаются тени и внешнее свечение.
Большое значение уделяется многочисленным фильтрам. Они накладываются на всё изображение, либо на определённые слои или определённые объекты. Самый простой эффект – Размытие, который делает обрабатываемые объекты размытыми, без чётких краёв. Множество одноимённых эффектов позволяет создавать нужные размытия, в том числе с определёнными рисунками.
Также в Фотошоп Онлайн поддерживаются следующие фильтры:
- Искажения – волнообразное завихрение, сдвиги, зигзаги, волны и многое другое.
- Шумы – наложение на изображение шумов, часть из них позволяет добиться наложение эффекта ретро-фото.
- Оформление – группа эффектов, имитирующих акварельные краски, кристаллы, фрагменты, мозаики и многое другое.
- Рендеринг – создание облаков, солнечных бликов, прочих эффектов.
- Резкость – группа эффектов для наведения резкости на всём изображении, отдельных объектах или отдельных слоях.
- Стилизация – пакет оконтуривания, имитации масляной краски, других эффектов.
Набор фильтров достаточно большой, чтобы создавать эффекты любого уровня сложности.
Параметры эффектов, слоёв, отдельных объектов и фильтров редактируются в правой части дисплея, где появляются окна с различными настройками. При необходимости, панель с окнами можно настроить под себя, обеспечивая удобную работу.
В левой части располагается традиционная для Фотошопа панель инструментов. Здесь доступны инструменты выделения и перемещения, ластики, кисти и карандаши, градиенты и заливки, инструменты для ввода текстов с настраиваемыми шрифтами, инструменты для создания фигур. В самом низу размещена палитра цветов, с помощью которой выбираются цвета для тех или иных инструментов и эффектов.
Как загрузить фотографию и применить фильтры к ней?
Работать с Фотошоп Онлайн так же просто, как и с классическим редактором Adobe Photoshop. Он мгновенно распознаёт файлы различных форматов, открывая их и выводя на экран для последующего редактирования. Ничто не мешает начать работу с проектом в обычном Photoshop и продолжить её в Фотошоп Онлайн (либо наоборот).
Работа с изображением начинается с его загрузки. Кликните Открыть с компьютера и выберите документ, сохранённый на жёстком диске компьютера. Также можно воспользоваться классическим меню Файл – Открыть или выбрать Файл – Открыть больше – Открыть по ссылке и вставить в открывшееся поле ссылку на изображение, размещённое в сети.
Файл открыт – он появился в рабочем пространстве Фотошоп Онлайн, приступайте к редактированию. Самый простой способ обработки – наложить на изображение какой-либо фильтр. Следуйте инструкции:
- Загрузите файл любым удобным для вас способом – из локального хранилища или с какого-либо сайта.
- Кликните в верхнем меню Фильтр и выберите желаемый эффект – например, Резкость – Резкие границы, что сделает отдельные грани изображения более резкими.
- Настройте и примените выбранный фильтр (некоторые фильтры применяются в автоматическом режиме, не требуя подтверждения).
При необходимости, пользователь может накладывать на изображение неограниченное количество фильтров, в том числе из разных категорий, комбинируя их друг с другом. Также доступно наложение фильтров на определённые слои или выделенные объекты для достижения нужного эффекта.
При наличии знаний в Adobe Photoshop, вы без труда разберётесь с Фотошоп Онлайн. Он является продвинутым дизайнерским инструментом для редактирования изображений, наложения эффектов, подготовки файлов к печати или публикации.
Как сохранить готовый вариант проекта?
Фотошоп Онлайн поддерживает множество форматов сохранения. Пользователь может сохранить отредактированный файл как готовое к публикации изображение:
- Кликните в верхнем меню Файл.
- Выберите пункт Экспортировать как.
- Выберите желаемый формат сохранения (например, PNG или JPG).
- Если того потребует выбранный формат, укажите качество или иные параметры.
Если файл нуждается в дальнейшем редактировании, сохраните его в формате PSD. Данный формат позволяет сохранять изображение со всеми слоями, стилями, эффектами и прочими настройками. Пройдите в меню Файл – Сохранить как PSD – документ будет сохранён в папке Загрузки.
Нужно устранить мелкие дефекты на фото? На помощь придут онлайн-сервисы! Они не требуют установки и имеют необходимые инструменты для базовой обработки. Далее мы расскажем про лучшие фоторедакторы онлайн и поможем выбрать тот, который подойдет именно вам.
ФотоМАСТЕР: доступный десктопный аналог
Если вы боитесь браться за продвинутый софт и онлайн-сервисы привлекают вас своей простотой, попробуйте ФотоМАСТЕР. Этот редактор удобен в управлении и содержит кучу автоматических функций. Благодаря этому вы получите качественный результат за пару минут.
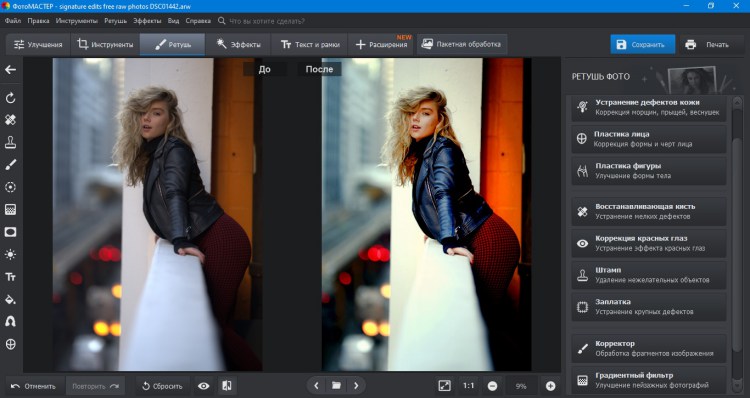
Преимущества:
- Качественная замена фона за три простых шага
- 100+ стильных эффектов и LUT-фильтров помогут создать wow-фото за несколько кликов
- Автоматическая обработка фото: исправление освещения, удаление дефектов кожи и пр.
- Профессиональная ретушь портретов: изменение черт лица, фигуры и т.д.
Скачайте ФотоМАСТЕР и создавайте яркие фотокадры с минимальными усилиями! Редактор совместим со всеми версиями Windows и стабильно работает даже на слабых устройствах.
Установите ФотоМАСТЕР прямо сейчас!
Для Windows 11, 10, 8, 7 и XP
Лучшие онлайн фоторедакторы
Ниже мы рассмотрим сервисы, которые помогут улучшить фото либо создать графику. Каждый из них можно использовать без оплаты, но некоторые являются урезанными версиями платных продуктов. Также мы выделили тройку лидеров для решения каждой задачи:
1. Pixrl — универсальное решение для фотографов, ретушеров и дизайнеров, создающих
промо-материалы, посты для социальных сетей и сториз.
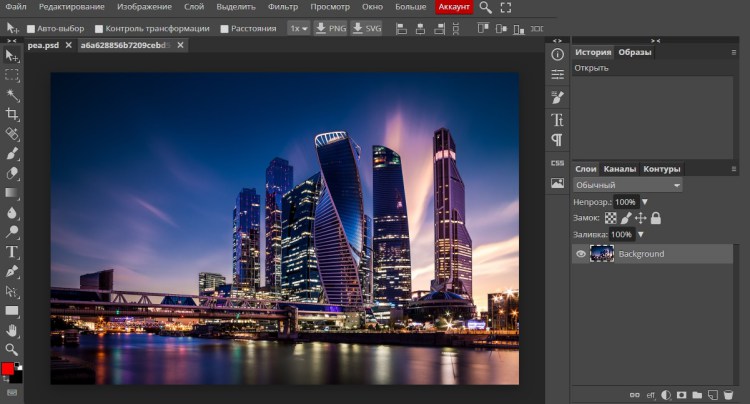
2. Photopea — более удобная альтернатива Фотошопу для профессиональной обработки фотографий, верстки и фотомонтажа в режиме онлайн.
3. Polarr — продвинутая обработка для пользователей без навыков редактирования.
Canva
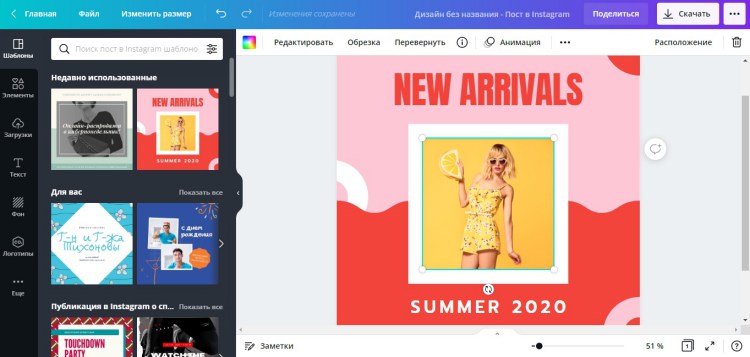
Цена: от 499 рублей/месяц; есть урезанная бесплатная версия.
Для кого подойдет: начинающим дизайнерам и СММ-щикам, ведущим аккаунты в соцсетях.
В Canva можно найти множество полезных функций для графического дизайна, которые подойдут как профессионалам, так и новичкам. В каталоге представлено множество готовых образцов, которые будут прекрасно смотреться на вашей страничке и в сториз Instagram. Присутствуют автоматические опции редактирования снимков, в том числе удаление и замена фона, различные эффекты (глитч, дуохром и т.д.). Можно накладывать надписи, добавлять рамки и анимированные или статичные стикеры.
Плюсы:
- 1000+ стильных шаблонов для графического дизайна.
- Автоматические опции для улучшения и стилизации снимков.
- Можно создавать модные «живые» фотографии для сториз.
- Крупная коллекция ресурсов для работы: шрифты, стикеры, фоны, рамки и пр.
Минусы:
- В free-версии заблокировано большинство шаблонов и графики.
- Ограниченные возможности обработки: только обрезка и фильтры.
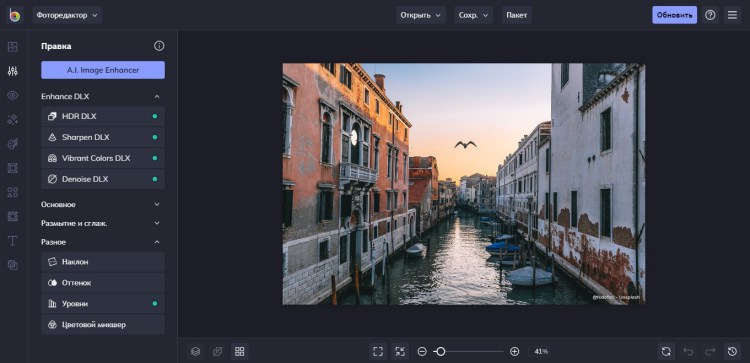
Pixlr Editor
Цена: от $4.90 в месяц; есть бесплатная урезанная версия.
Для кого подойдет: желающим стилизовать снимки.
Pixlr подойдет как для быстрых изменений, так и расширенного редактирования. Поставляется в двух версиях: X – простая версия для новичков и E – почти полноценная замена Фотошопа. Обе предлагают внушительный выбор эффектов, предустановленных и ручных настроек.
Имеются опции пластики, цветокоррекция, исправление дефектов камеры, стильные искажения вроде глитча и хроматической аберрации. В дополнение к этому сайт также предлагает готовые шаблоны, стоковые роялти-фри фотографии, иконки, стикеры и пр.
Плюсы:
- Поддерживаются слои, что позволяет создавать сложные макеты.
- Большой набор эффектов для быстрого повышения качества.
- Присутствуют возможности для фотомонтажа и цифрового арта.
Минусы:
- Снижает разрешение крупных файлов.
- Для ретуши есть только восстанавливающая кисть и штамп.
- Мало русскоязычных шрифтов
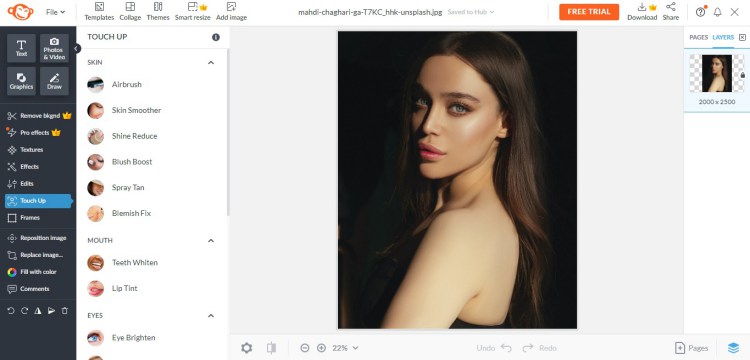
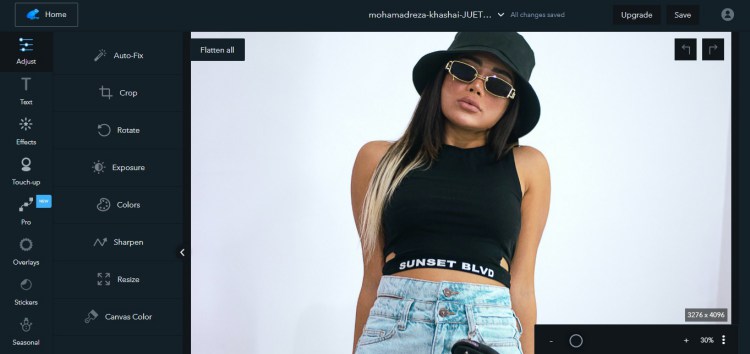
Fotor
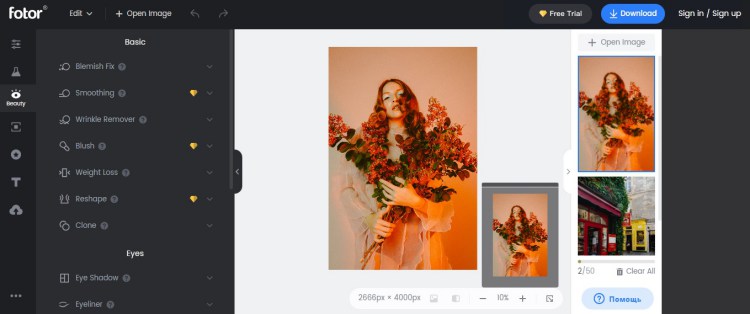
Цена: условно-бесплатно; премиум-подписка за $8.99 в месяц.
Для кого подойдет: новичкам, которые хотят профессионально обработать фото.
Fotor отличается большим количеством функций, но имеет простой, удобный в управлении интерфейс, который понравится новичкам. Сайт содержит крупный набор эффектов, инструменты пластики лица и тела, цветокоррекцию, добавление рамок, стикеров и текста. Можно применять художественные фильтры и рисовать на изображениях. Free версия открывает доступ практически ко всему функционалу, при оплате лицензии становятся доступны опции HDR и удаления фона, а также дополнительный набор эффектов.
Плюсы:
- Пакетная загрузка снимков
- Продвинутая ретушь: удаление морщин и пятен, сглаживание кожи, отбеливание зубов, пластика, виртуальный макияж.
- Поддерживается автоматизация действий (автоулучшение, замена фона и пр.).
- Авторизованные пользователи могут подключить облачное хранилище.
Минусы:
- Нет русскоязычного перевода.
- В бесплатной версии 1/3 экрана занимает реклама.
- Иногда тормозит при импорте
HD-разрешения.
PicMonkey
Цена: от $7.99 в месяц; есть демо-версия с урезанными функциями.
Для кого подойдет: пользователям, создающим контент для соцсетей; начинающим ретушерам.
PicMonkey — это бесплатное веб-приложение для легкого и быстрого улучшения фотографий.
С помощью сервиса вы можете добавлять текст, рамки, маски, стикеры и т.д. На сайте имеются инструменты ретуши и виртуального макияжа: удаление морщин, уменьшение блеска, отбеливание зубов, настройка оттенка губ, добавление туши, подводки для глаз и другое. Есть библиотека эффектов, которые помогут стилизовать снимки или улучшить их качество.
Плюсы:
- Можно создавать многослойные проекты.
- Генерация брендированного контента: логотипов, фирменных цветовых палеток, уникальных шрифтов и пр.
- Автоматическое улучшение цветового баланса, экспозиции, резкости.
- Есть возможность создавать проекты по шаблонам или с нуля.
Минусы:
- Требуется регистрация.
- Интерфейс на английском языке.
- В условно-бесплатной версии нельзя скачивать обработанную картинку.
Crello
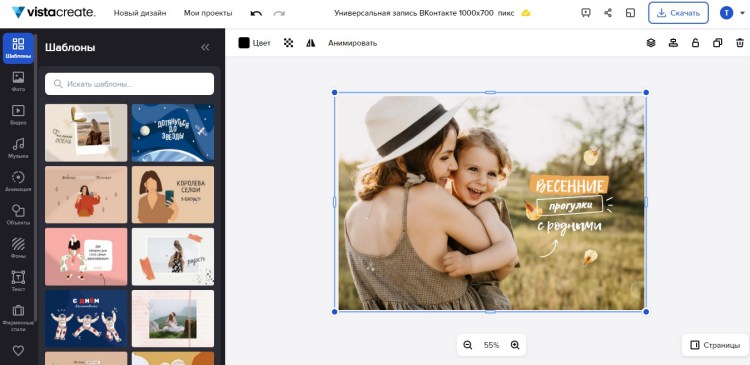
Цена: бесплатная урезанная версия; $10/месяц расширенный план.
Для кого подойдет: дизайнерам, создающим промо-материалы.
Crello (VistaCreate) — платформа для профессионального дизайна, позволяющая создавать маркетинговые материалы. Сервис предлагает более 10 000 готовых шаблонов и множество роялти-фри материалов: фотографии, иллюстрации, иконки, логотипы и прочее. Можно анимировать любые элементы проекта и сохранять фотографии как видеофайлы, что отлично подойдет для создателей контента для Инстаграма и ТикТока.
Плюсы:
- Есть форматы под определенные сети
(ВК, Instagram, YouTube и т.д.). - Сервис интегрирован с DepositPhotos и содержит 150+ миллионов фото.
- Результат можно сразу отправить
на нужные сайты.
Минусы:
- Обработка очень базовая: обрезка и небольшая коллекция фильтров.
- Чтобы скачать созданные проекты, нужно зарегистрироваться.
BeFunky
Цена: условно-бесплатная, полный доступ стоит $4.99 в месяц.
Для кого подойдет: профессиональным ретушерам и новичкам, желающим стилизовать кадры.
BeFunky — это продвинутый онлайн-редактор фотографий, который прост в использовании и освоении. Сервис позволяет применять множество различных эффектов, изменять цветовую схему, ретушировать портреты и т.д. Одной из интересных функций является «Мультипликатор», который преобразует любую фотографию в аниме-версию. Присутствуют также возможности верстки маркетинговых материалов: фоторекламы, листовок и пр.
Плюсы:
- Поддерживает пакетный импорт снимков.
- Имеется инструмент автоматического повышения качества.
- Более 100 бесплатных эффектов, разделенных по категориям.
- Внутреннее онлайн-хранилище фотографий.
Минусы:
- Не полностью переведен на русский.
- Большое количество рекламы.
- Продвинутые опции (шумоподавление, AI и прочие) доступны только в PRO.
SumoPaint
Цена: бесплатный с ограничениями; безлимитный за $9 в месяц.
Для кого подойдет: художникам и неопытным пользователям ПК.
SumoPaint объединяет инструменты для рисования арта, редактирования фотоснимков и создания 3D-моделей. Пользователи могут корректировать цветовую схему изображения, работать с RGB-каналами, настраивать экспозицию, яркость и другие параметры отображения. Имеются функции повышения качества: устранение шумов и усиление четкости. Есть предустановленные пресеты, поддерживается базовая обработка вроде обрезки и поворота. При желании можно переключиться на режим рисования, который также позволяет обрабатывать фото, но при этом обладает более богатым функционалом с поддержкой слоев.
Плюсы:
- Простое управление.
- Есть вариант для новичков и более продвинутых пользователей.
- Имеются опции для фотомонтажа, цифрового арта и графического дизайна.
- Результат можно сохранить напрямую в облачное хранилище.
Минусы:
- Внутренний редактор не переведен
на русский язык. - Нет поддержки RAW-файлов.
- Часто зависает при настройке.
Ribbet
Цена: есть урезанная бесплатная версия; премиум-подписка за $3.33 в месяц.
Для кого подойдет: желающим создать простой коллаж и провести базовое улучшение.
Ribbet предлагает довольно базовый набор изменения кадров: вы можете обрезать, повернуть, отразить картинку, увеличить резкость и подправить цветовой баланс. Чем данный сайт богат, так это многочисленными фильтрами и эффектами. Также пользователи могут применить автофиксацию снимка, при которой онлайн-ресурс самостоятельно проанализирует кадр и исправит все недочеты. Присутствует крупная коллекция инструментов ретуши, но почти все функции доступны только при покупке PRO-аккаунта.
Плюсы:
- Интуитивно-понятное управление.
- Более 50 эффектов, среди которых обработка цвета, HDR, скетчи и пр.
- Поддерживается импорт файлов
из Instagram и Facebook. - Есть хранилище, можно создавать библиотеки и делиться ими с другими.
Минусы:
- Не переведен на русский язык.
- Бесплатная версия позволяет
загружать не более 5 фото. - Возможности дизайна сводятся к наложению оверлеев, текста и стикеров.
- Не распознает RAW-формат.
Photopea
Цена: $3.3 в месяц для одного пользователя; есть бесплатный вариант.
Для кого подойдет: профессиональным фотографам; дизайнерам, создающим продукты полиграфии и оригинальные веб-макеты.
Photopea — хорошая бюджетная альтернатива Photoshop, в том числе тут можно открывать и изменять проекты PSD. Среди функционала можно найти обтравочные маски, восстанавливающую кисть, поддержку слоев, настройку кривых и уровней, свободную трансформацию и многое другое. Сайт предлагает практически все эффекты, которые находятся в Photoshop, и позволяет создавать 3D-открытки. При экспорте можно выбрать любой из 15 доступных форматов для сохранения.
Плюсы:
- Продвинутые возможности для верстки, фотомонтажа и арта.
- Можно редактировать проекты, созданные в Photoshop, GIMP, Sketch, Adobe XD и др.
- Поддерживается работа со смарт-объектами и отрисовка вектора.
Минусы:
- Не подходит для новичков.
- Отсутствует автоматизация действий.
- Может зависать на слабых устройствах.
Fotostars.me
Цена: бесплатный, но со встроенной рекламой.
Для кого подойдет: желающим исправить небольшие дефекты на фото.
Fotostars предлагает небольшой набор инструментов, но этого достаточно, чтобы провести расширенную обработку любого изображения. Вы можете выбрать готовый пресет из встроенной библиотеки, исправить яркость, контраст и блики. Также редактор позволяет убрать дымку, провести обрезку, изменить соотношение сторон, оттенок и температуру. Есть опции для профессионалов: исправление искажений объектива, кисть для удаления ненужных объектов и возможность исправлять недостатки на портретах.
Плюсы:
- Удобный минималистичный интерфейс
на русском языке. - Не требует оплаты и регистрации.
- Поддерживается точечная правка отдельных фрагментов снимка.
- Повышение четкости размытых снимков.
Минусы:
- Большой рекламный блок справа.
- Небольшая коллекция шрифтов.
- Только один формат экспорта.
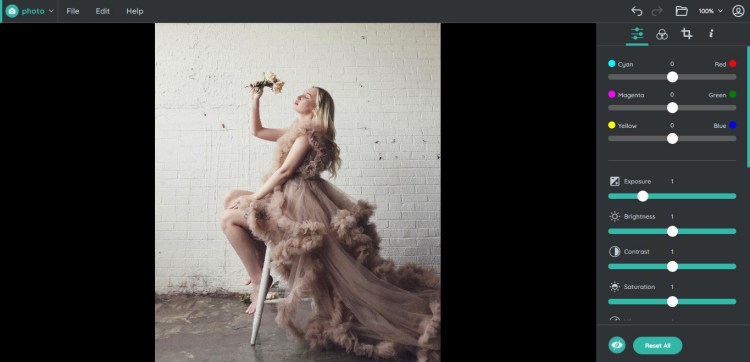
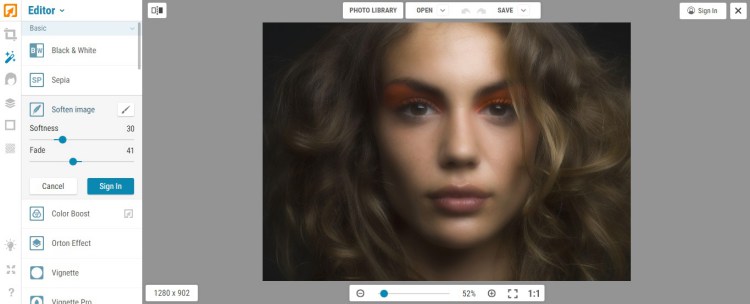
Polarr

Цена: бесплатно с ограничениями; премиум-подписка $3.99 в месяц.
Для кого подойдет: новичкам без навыков редактирования.
Для бесплатного редактора Polarr обладает действительно впечатляющим выбором опций: здесь присутствует расширенная работа с цветом, улучшение портретных снимков (в том числе в автоматическом режиме), стильные фотофильтры. Поддержка слоев и наложения позволяют добиваться эффектных кадров в стиле дуотон и проводить фотомонтаж. Разрешается точечная обработка при помощи интеллектуальных кистей маскирования. Сервис сохраняет историю всех изменений файла, так что вы можете быстро откатить неограниченное количество правок.
Плюсы:
- Большой набор бесплатных функций, в том числе HSL, LUT, искажение.
- Удобный русифицированный интерфейс с интуитивно-понятным управлением.
- Есть обучающие уроки на русском языке.
Минусы:
- Нет поддержки RAW.
- Зависает при загрузке
больших фотографий.
iPiccy
Цена: бесплатно, есть реклама.
Для кого подойдет: новичкам, желающим улучшить селфи.
Сайт предоставляет три модуля на выбор: редактирование, средство для коллажей и дизайна. Простой в использовании редактор поддерживает создание и сортировку слоев и предлагает множество базовых и расширенных правок. Почти любой вид изменений — от цветового оттенка до кривых и уровней — можно настраивать, передвигая ползунки.
Сервис содержит большой выбор инструментов для цветокоррекции, есть профессиональные опции типа пластики и HDR. Можно использовать кисть для маскировки отдельных частей фотографии. Сайт позволяет импортировать изображения с ПК или сразу сделать селфи на
веб-камеру; также поддерживается импорт из популярных социальных сетей.
Плюсы:
- Автоматическое исправление размытых кадров и освещения, шумоподавление.
- Позволяет создавать фотоманипуляции и графику для социальных сетей.
- Улучшение портретных снимков: удаление красных глаз, отбеливание зубов, изменение цвета глаз и волос, виртуальный макияж.
- Пресеты можно редактировать.
Минусы:
- Отсутствует русский перевод.
- Работает только с форматом JPG.
piZap
Цена: от $4.99 в месяц; есть бесплатный ограниченный вариант.
Для кого подойдет: начинающим дизайнерам, создающим графику для интернета.
Функционал piZap направлен в основном на создание промо-графики. Ресурс вмещает в себя крупное количество шаблонов для сториз, постов, превью роликов и пр. Возможности обработки изображений здесь также имеются — можно настроить яркость/контраст/температуру и т.д.; есть небольшая подборка фильтров, можно удалять объекты из кадра.
Картинку можно украсить рамочкой, наложить стилизованные надписи и добавить стикеры. Результат можно скачать или сразу отправить в Instagram, Facebook, Twitter, Tumblr.
Плюсы:
- Большая библиотека готовых шаблонов для социальных сетей.
- Автоматическая замена фона.
- Поддерживается наложение слоев и текстур со смешиванием.
Минусы:
- Требуется регистрация.
- Интерфейс на английском языке.
- Нельзя отретушировать портрет.
Piktochart
Цена: $14 в месяц; есть бесплатный ограниченный вариант.
Для кого подойдет: дизайнерам, создающим промо-материалы, презентации и инфографику.
Данный сервис используется для генерации инфографики, промо-материалов для интернета и прочего рода графики. Доступен быстрый старт на основе готовых шаблонов, которые можно изменять под свои предпочтения. Имеются библиотеки ресурсов: фоны, тексты, стикеры, фигуры. Можно загружать файлы с ПК или воспользоваться стоковыми фотографиями. Проект можно скачать как картинку PNG, документ в формате PDF или проект PowerPoint.
Плюсы:
- Интуитивно-понятное управление.
- Готовые образцы для любого типа задач.
- Можно создавать видеопрезентации и отмечать геолокацию.
- Командная работа над проектом.
Минусы:
- Поддерживает не все браузеры.
- Требуется регистрация через почту
или социальные сети. - Нет русскоязычной локализации.
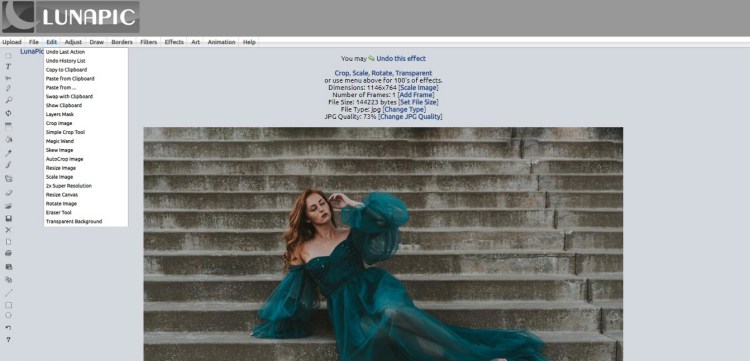
Lunapic
Цена: бесплатный.
Для кого подойдет: профессионалам и новичкам, создающим креативные фотопроекты.
Интерфейс Lunapic напоминает ранние 2000-е, но это никак не отразилось на функциональности продукта. Сайт предлагает множество интересных возможностей, как анимированные фотоэффекты, возможность создавать GIF, множество уникальных арт-фильтров. Есть крупная подборка инструментов рисования и в целом множество опций для арта.
Особенностью Lunapic является то, что вы можете использовать его как комплексный фоторедактор или выбрать отдельный функционал. Во время импорта вы можете сразу объединить изображения в коллажи и изменить разрешение.
Плюсы:
- Можно одновременно загружать
вплоть до 10 фото. - Более 100 фотоэффектов и фильтров.
- Автоматическое улучшение: освещения, контраст, цветовой баланс.
- Поддерживается создание анимации и редактирование видео.
Минусы:
- Только на английском языке.
- Неудобное управление и
устаревший дизайн. - Каждое действие открывается на отдельной странице.
Заключение
Только вы можете решить, какой из рассмотренных вариантов — самый лучший онлайн фоторедактор. Каждый из сайтов позволяет работать с фотокадрами на базовом уровне, некоторые предлагают более богатый функционал, другие пригодятся для быстрых правок. Выбор стоит делать, отталкиваясь от поставленной перед вами задачи.
Если же вам не хватает функций онлайн-сервисов, советуем установить ФотоМАСТЕР. Благодаря сочетанию удобного интерфейса и продвинутых опций редактор подходит как для опытных пользователей, так и для новичков. Софт можно использовать для любого типа работ, будь то графика для социальных аккаунтов, ретушь или улучшение качества. Скачайте редактор на свой компьютер и создавайте запоминающиеся кадры даже из неудачных снимков!