
Когда вы впервые посетите Чащу Апам в Сумеру Genshin Impact, вы обнаружите, что в этом районе постоянно идет дождь. Тем не менее, есть способ изменить погоду в этих лесах, чтобы прекратить вечно падающий дождь и сделать погоду солнечной или наоборот.
Чтобы изменить погоду в Чаще Апам, вам сначала нужно научиться песне Арапанду Песня источника (Rhythm of the Water Source), завершив цепочку квестов Варуна-гата:
- Варуна-гата
- Каменное воспоминание
- Разъярённая железяка
- Спящие корни
- Молитва о дожде на плодородной земле
После завершения Молитва о дожде на плодородной земле, Аранара предоставит вам власть контролировать машину Варуны, которая определяет погоду в Чаще Апам. Есть два способа получить доступ к машине Варуны.
Как получить доступ к машине Варуны в Genshin Impact: Способ #1
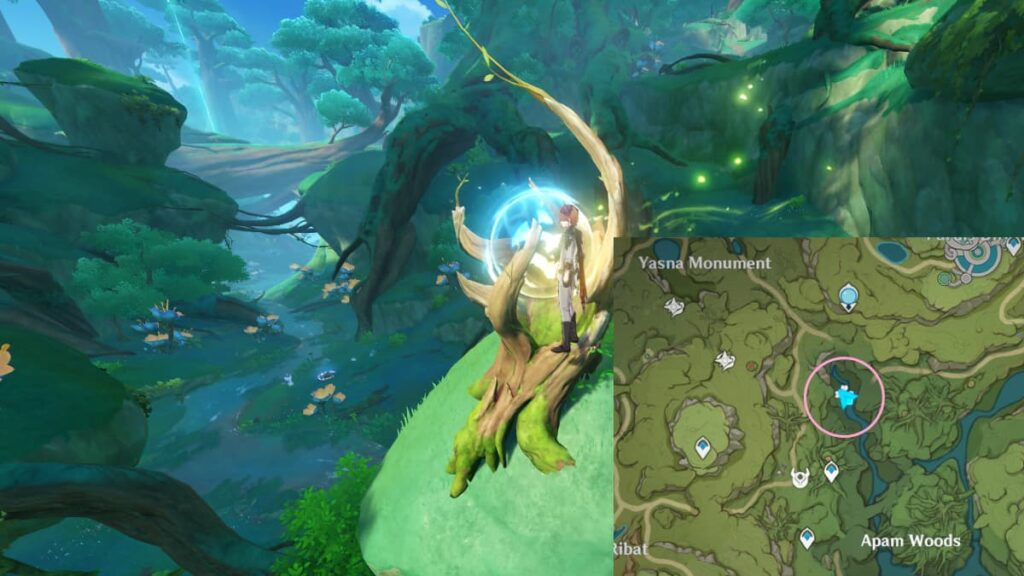
Первый способ — отправиться в область, обведенную на изображении выше, где вы найдете небольшую машину Варуны.
Как получить доступ к машине Варуны в Genshin Impact: Способ #2
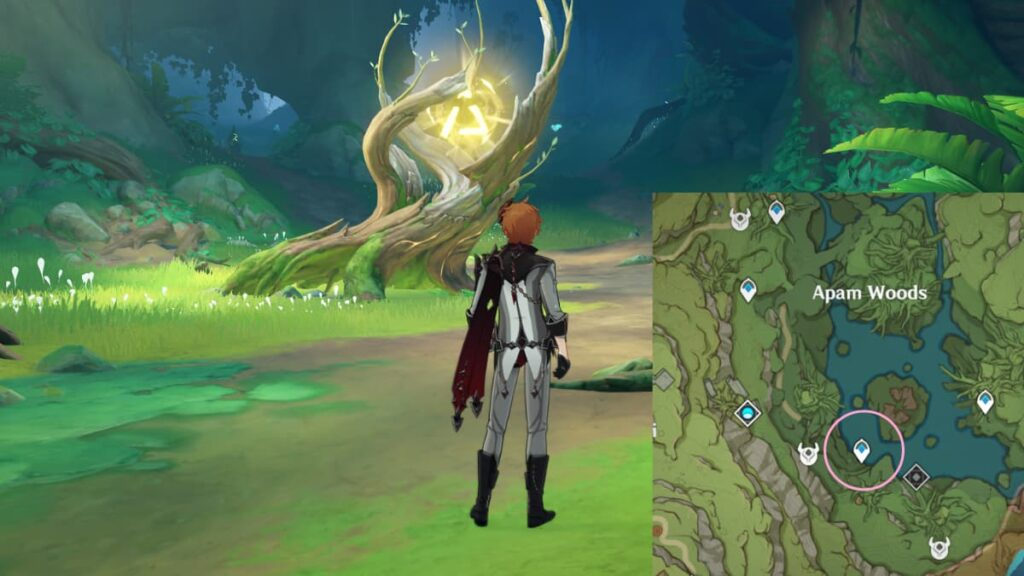
Второй способ заключается в том, чтобы отправиться в область Исход дождя через точку быстрого перемещения (телепорт), обведенную на изображении выше. Его можно разблокировать во время прохождения цепочки заданий Варуна-гата
.
Как остановить дождь в Чаще Апам Genshin Impact. Достижение Погода под контролем.
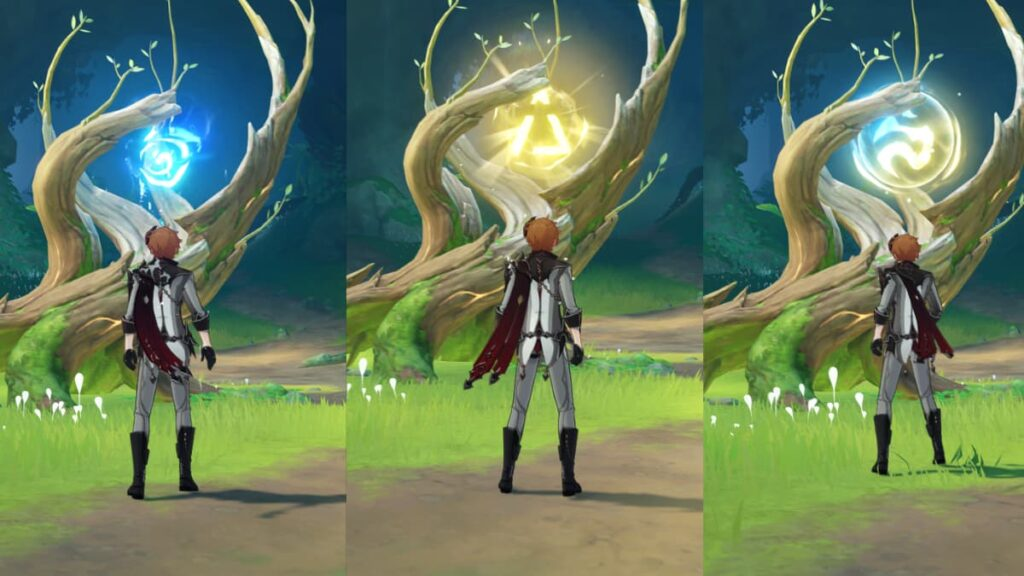
Встаньте перед машиной Варуны и сыграйте песню на старинной лире рядом с ней. Далее следуйте внутриигровым подсказкам, чтобы сыграть Песню источника (fa > mi > ti > fa > ti, первые четыре ноты на первой строке, пятая нота на второй строке). Как только это будет сделано, вы можете взаимодействовать с ядром машины Варуны, чтобы изменить погоду чаще Апам на следующую:
- Дождливая
- Солнечная
- Циркуляция (переменная)
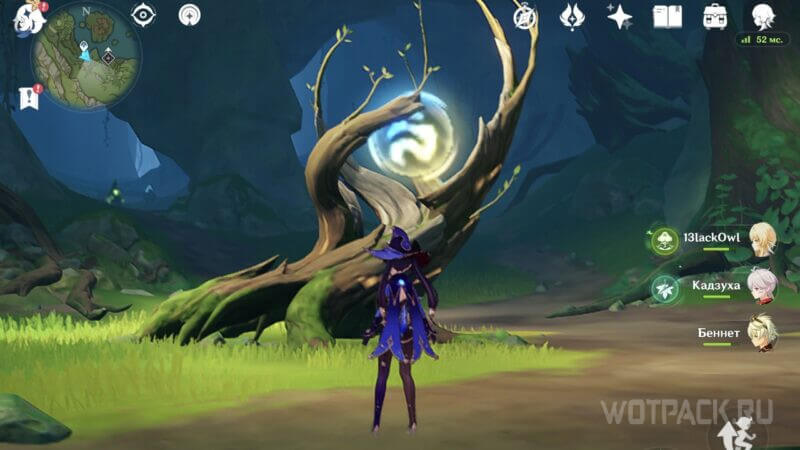
Вы можете отслеживать погоду, основываясь на том, как выглядит ядро. На изображении, установленном выше, первое изображение указывает на дождливую погоду, второе указывает на солнечную погоду, а третье указывает на циклическую погоду, которая регулярно смещается между солнцем и дождем. Изменение погоды в первый раз откроет достижение Чудеса Света под названием  Погода под контролем (Weather Control Activated).
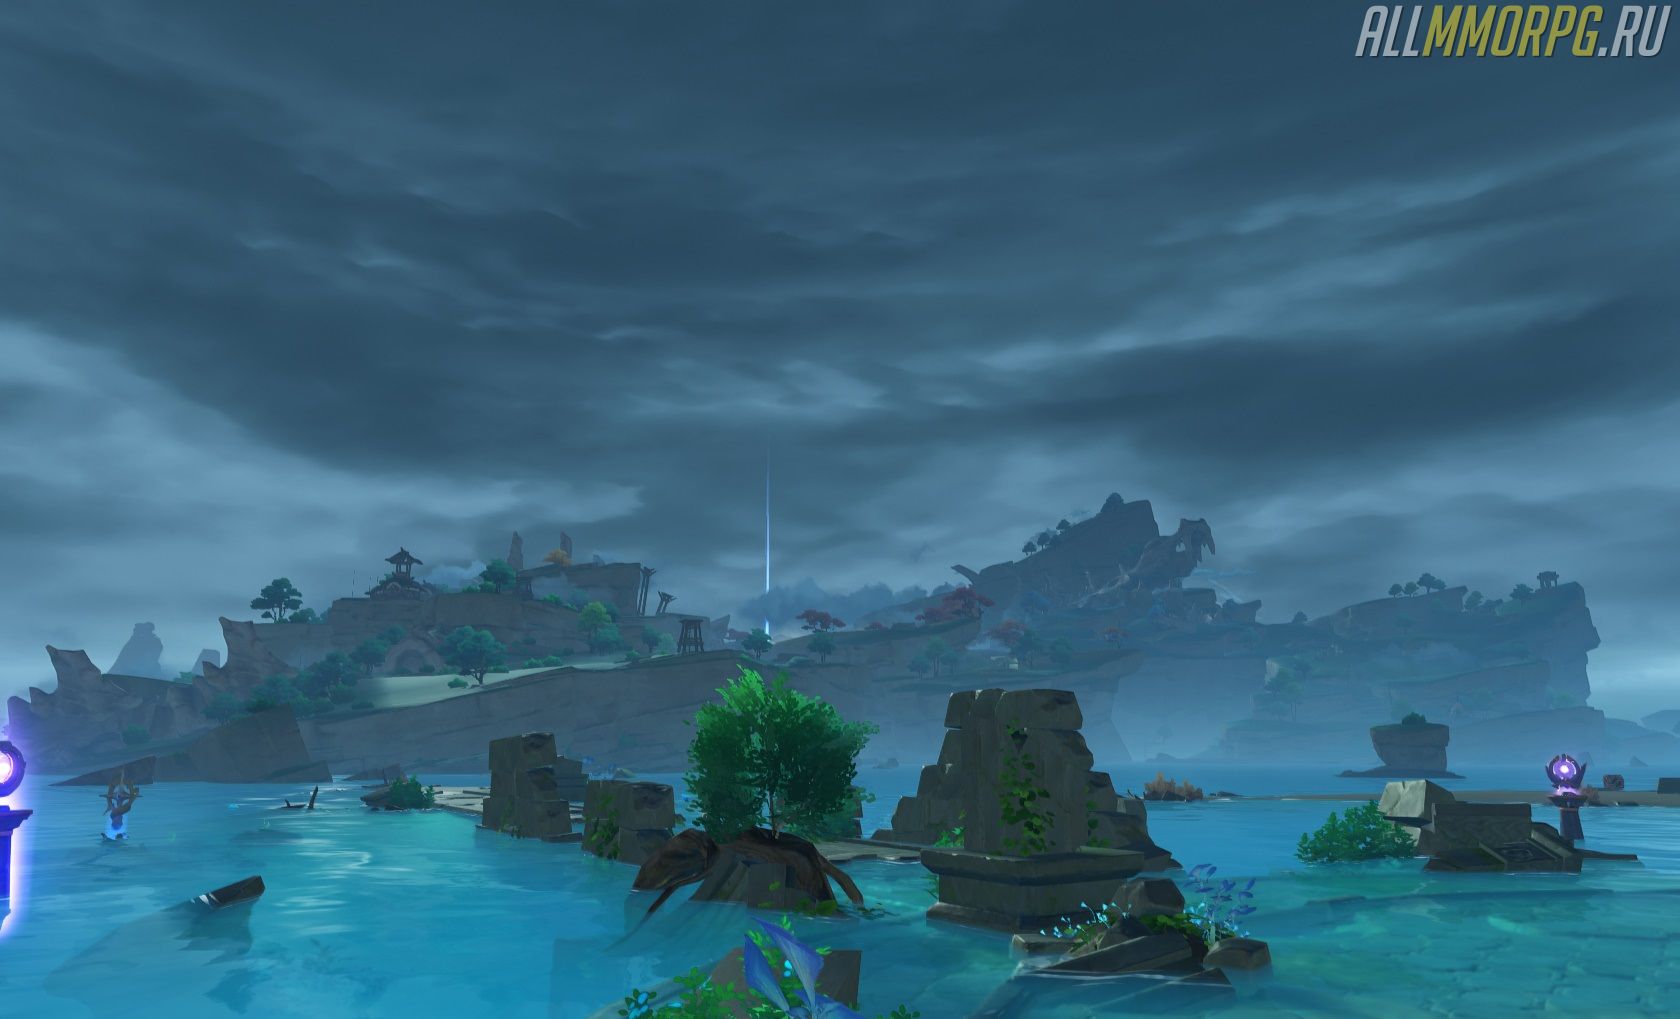

Когда вы впервые прибываете на остров Ясиори в Инадзуме, вы видите, что там постоянно идет дождь. К счастью, в ваших силах вернуть на эту локацию хорошую, солнечную погоду. Чтобы остановить дождь над Ясиори и сделать небо чистым, вам необходимо выполнить серию заданий «Наследие Оробаси». В этом гайде мы расскажем вам подробнее о том, как изменить погоду на острове Ясиори в Genshin Impact.
Содержание:
- 1. Прохождение «Наследие Оробаси. Часть 1
- 2. Прохождение «Наследие Оробаси. Часть 2
- 3. Прохождение «Наследие Оробаси. Часть 3
- 4. Прохождение «Наследие Оробаси. Часть 4
1. Прохождение «Наследие Оробаси. Часть 1»
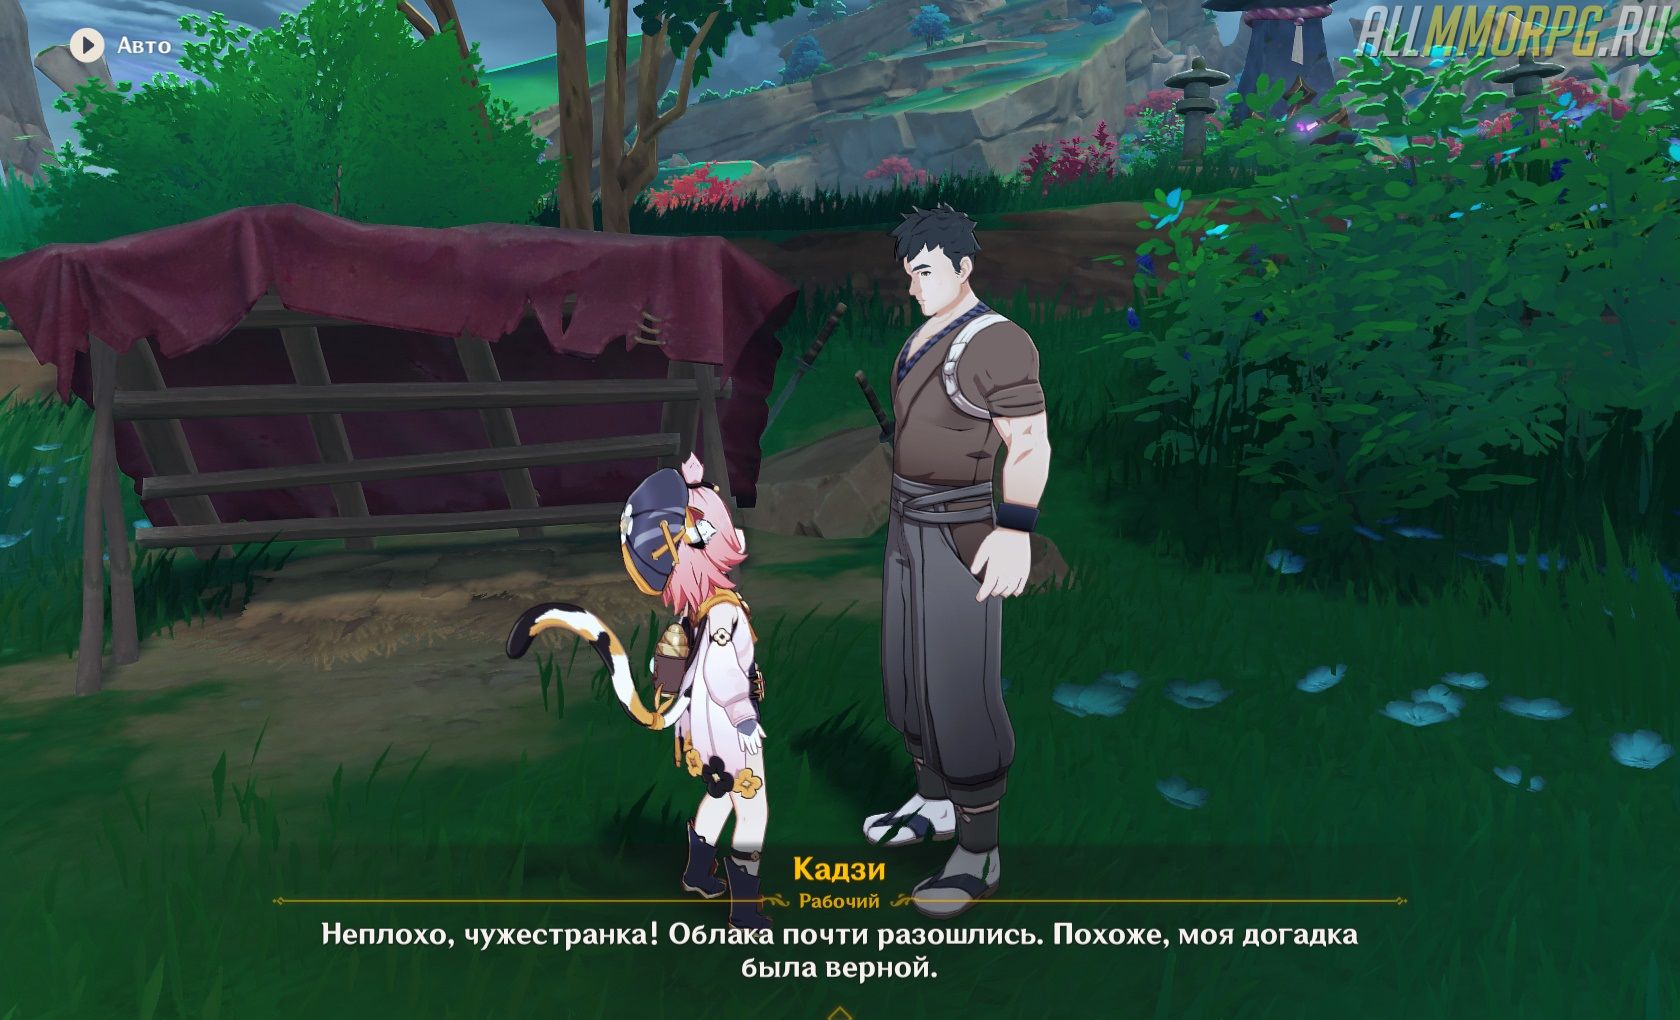
Чтобы приступить к выполнению квеста, найдите мужчину, которого зовут Кадзи. Местоположение этого НПС отмечено на скриншоте ниже.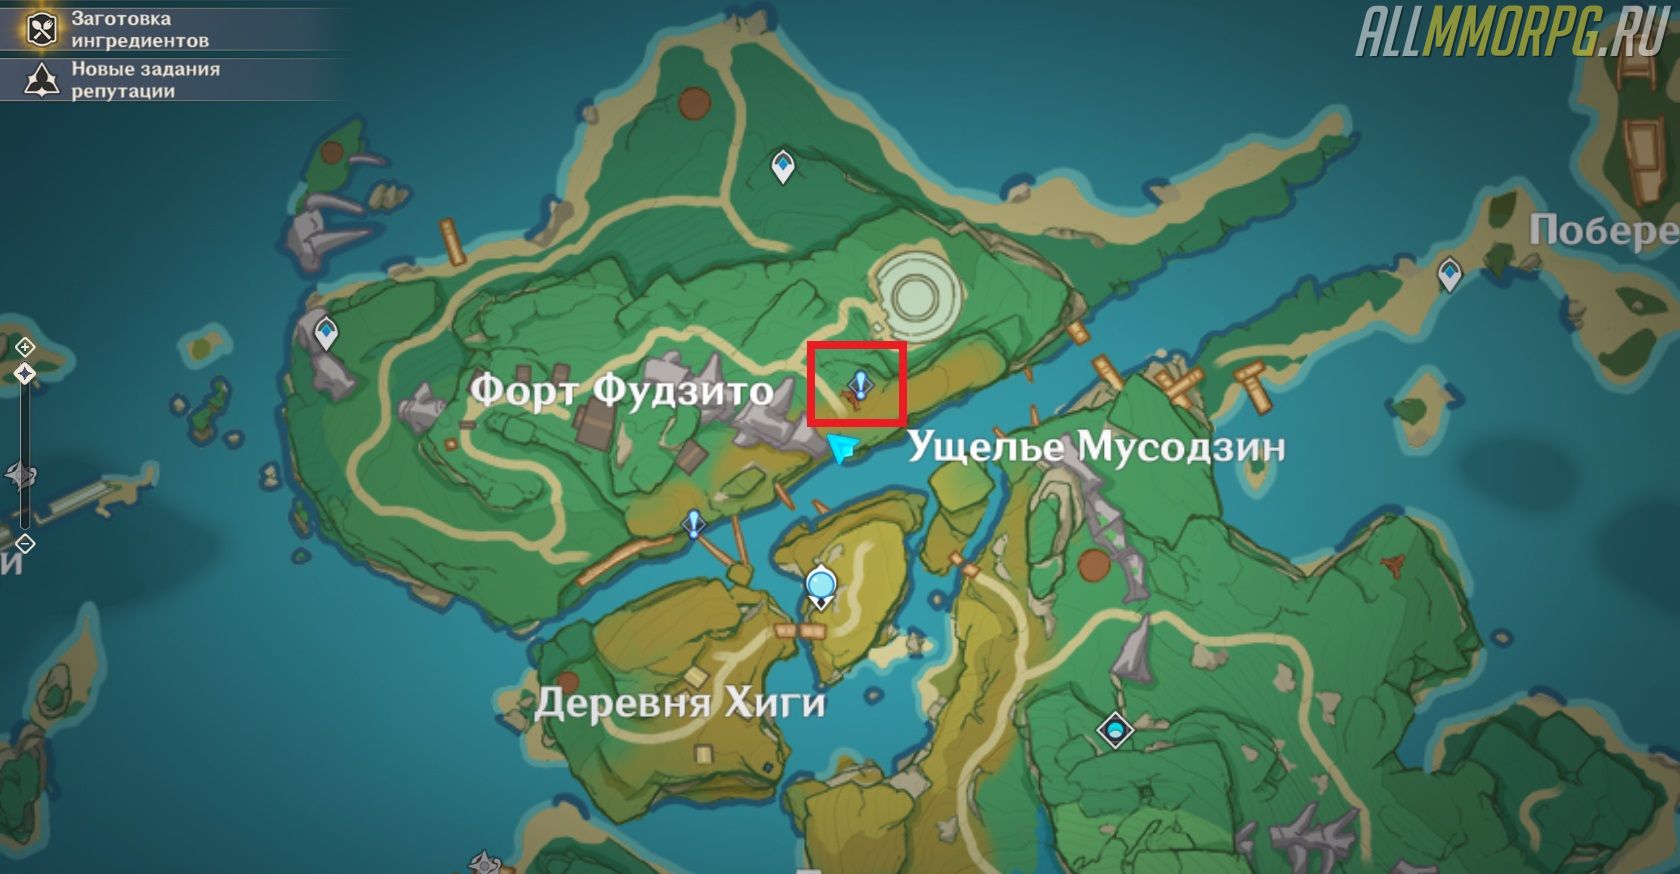
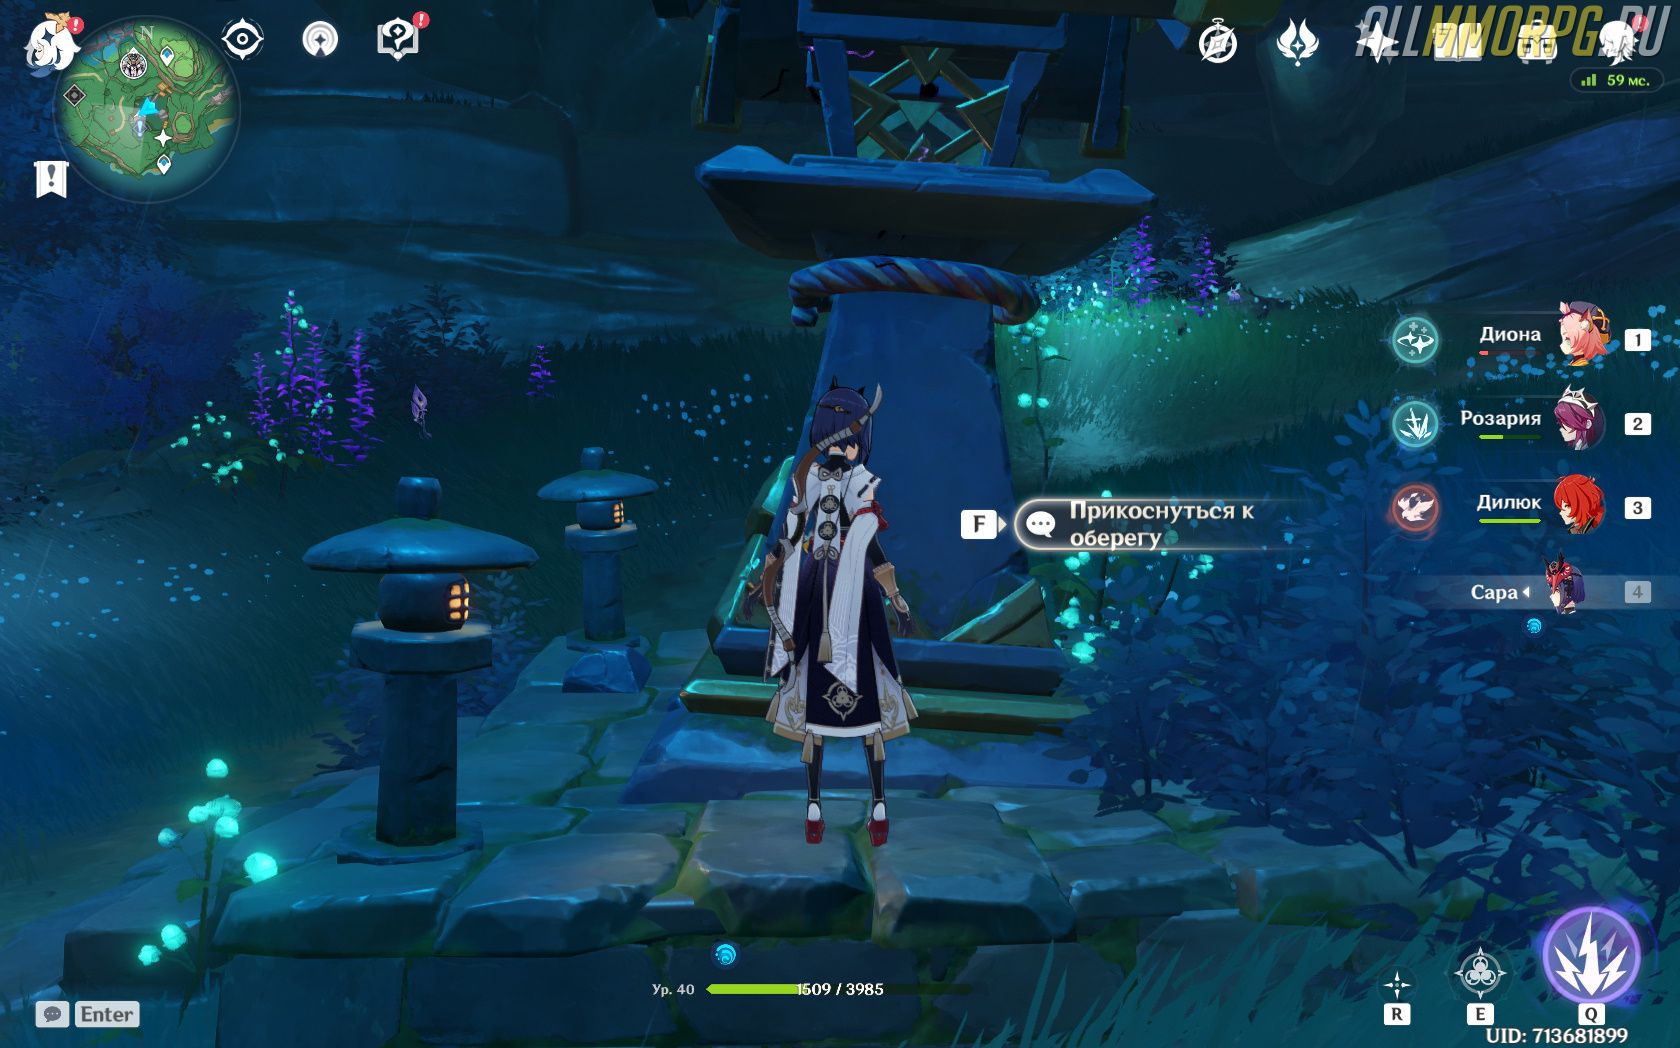
- После того, как Кадзи поделится с вами информацией о Татаригами и бедах на Ясиори, он попросит понаблюдать за оберегом. Оберег находится возле мужчины, за его спиной. Прикоснитесь к нему, нажав кнопку F.

- После осмотра объекта используйте чувство стихий, чтобы найти две части оберега. Находятся они тут:

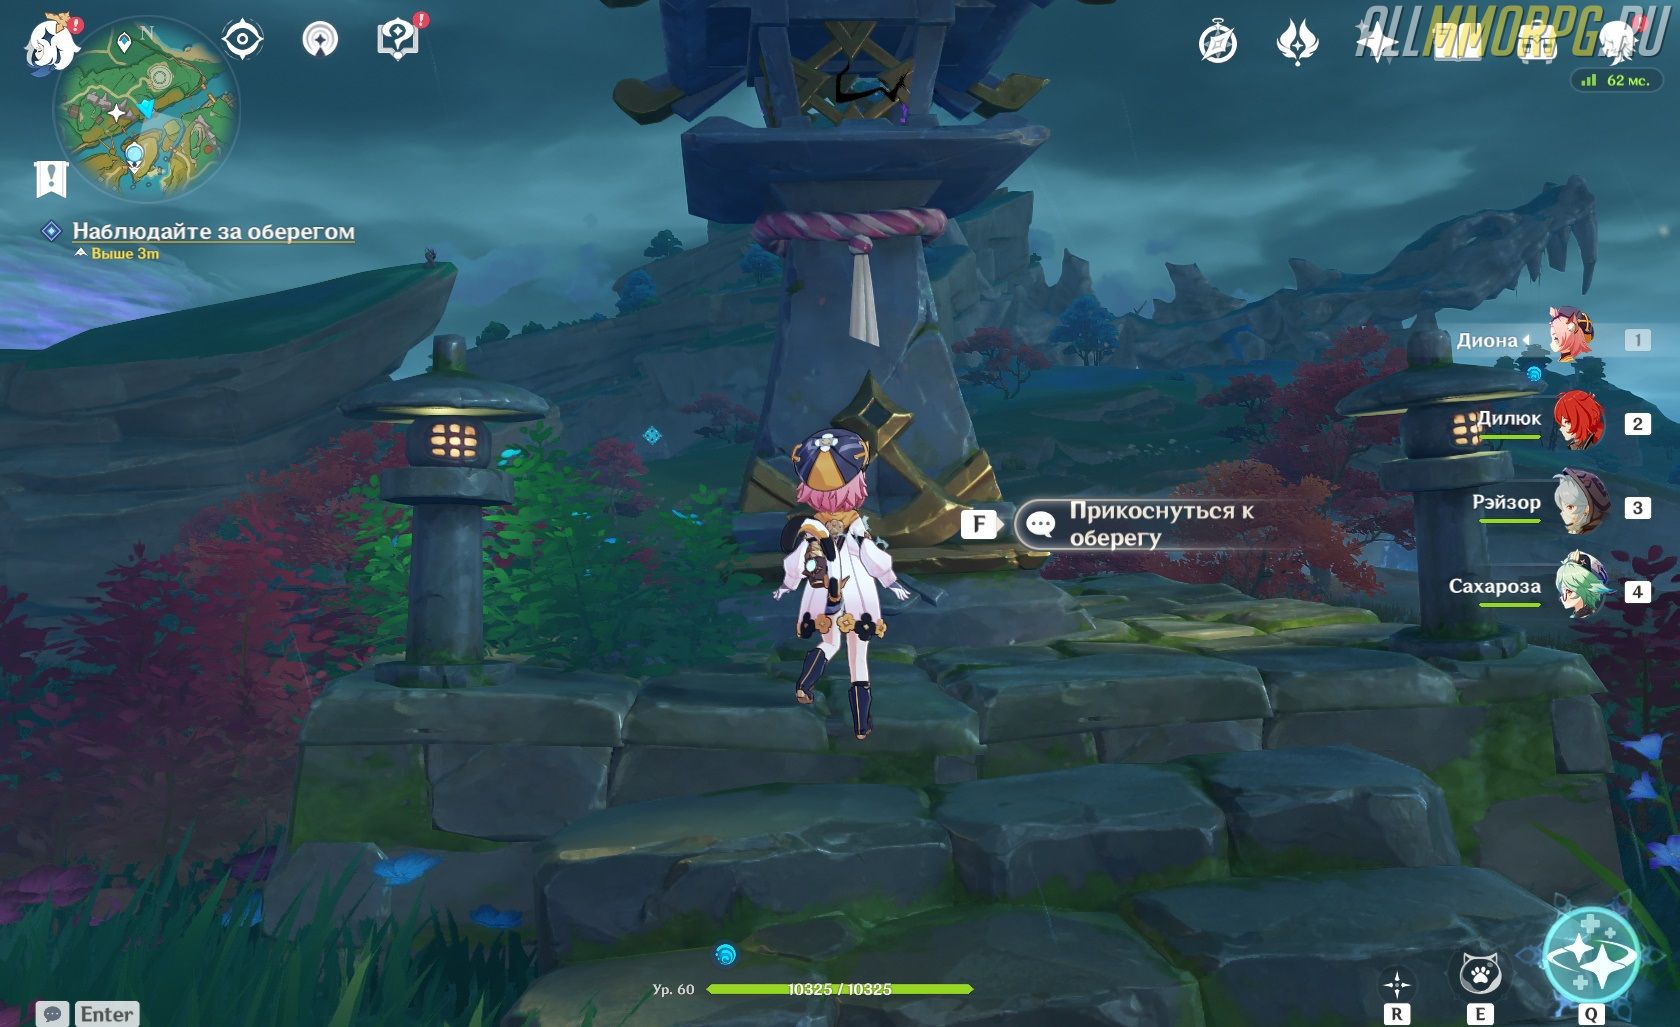
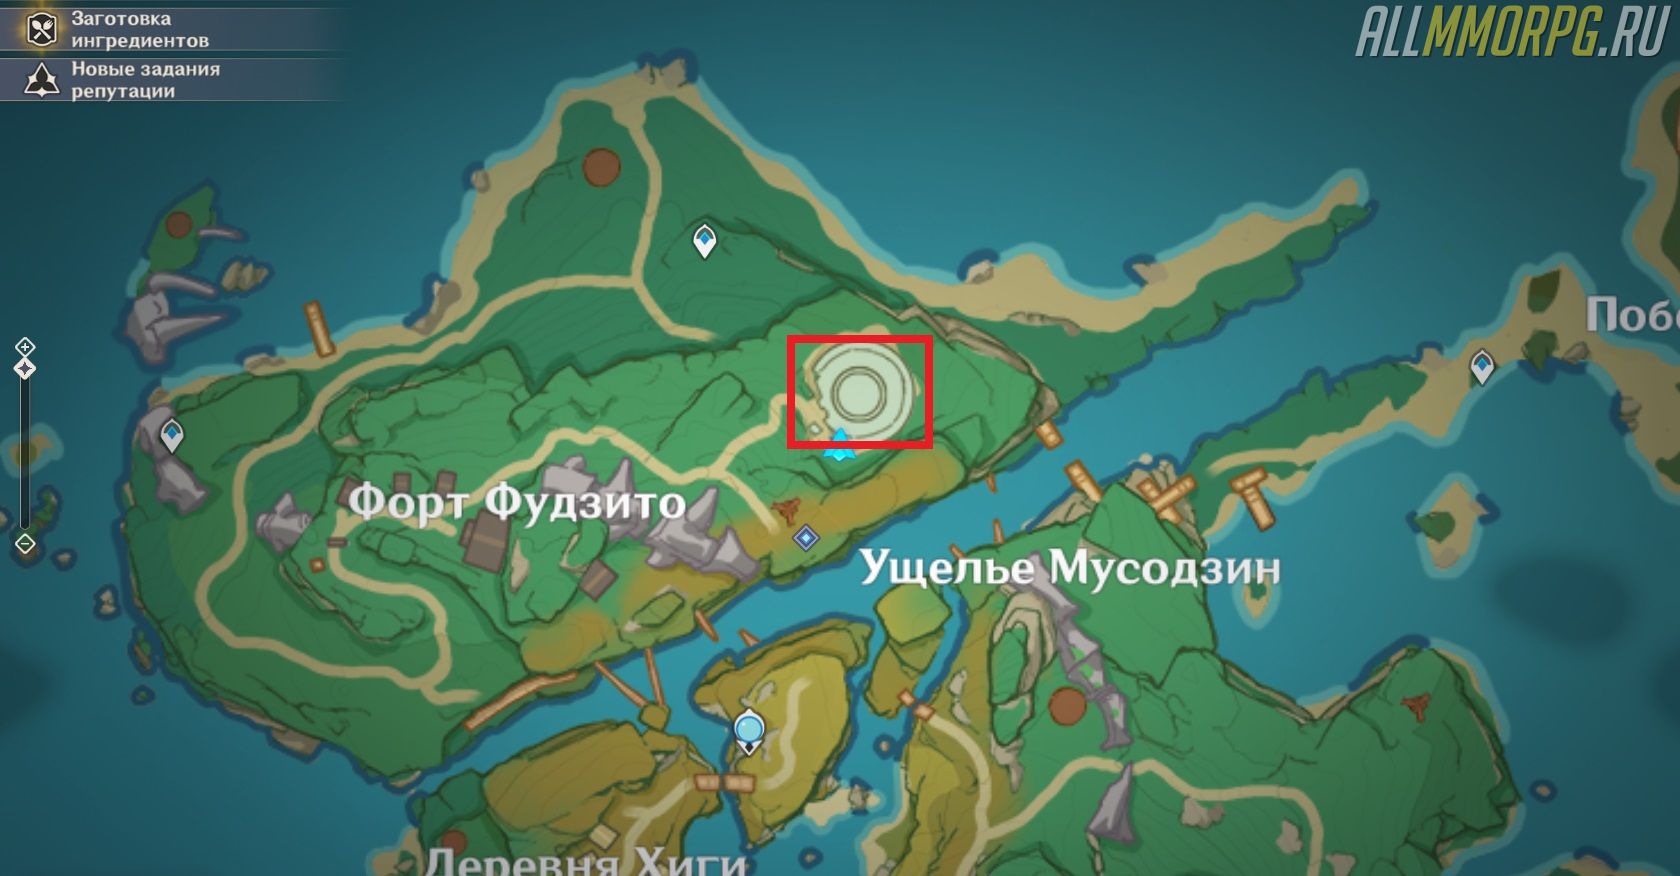
По сути, вам нужно всего лишь повернуть 1, 3 и 4 столб, а второй и повернуть, и наклонить (настроить высоту).
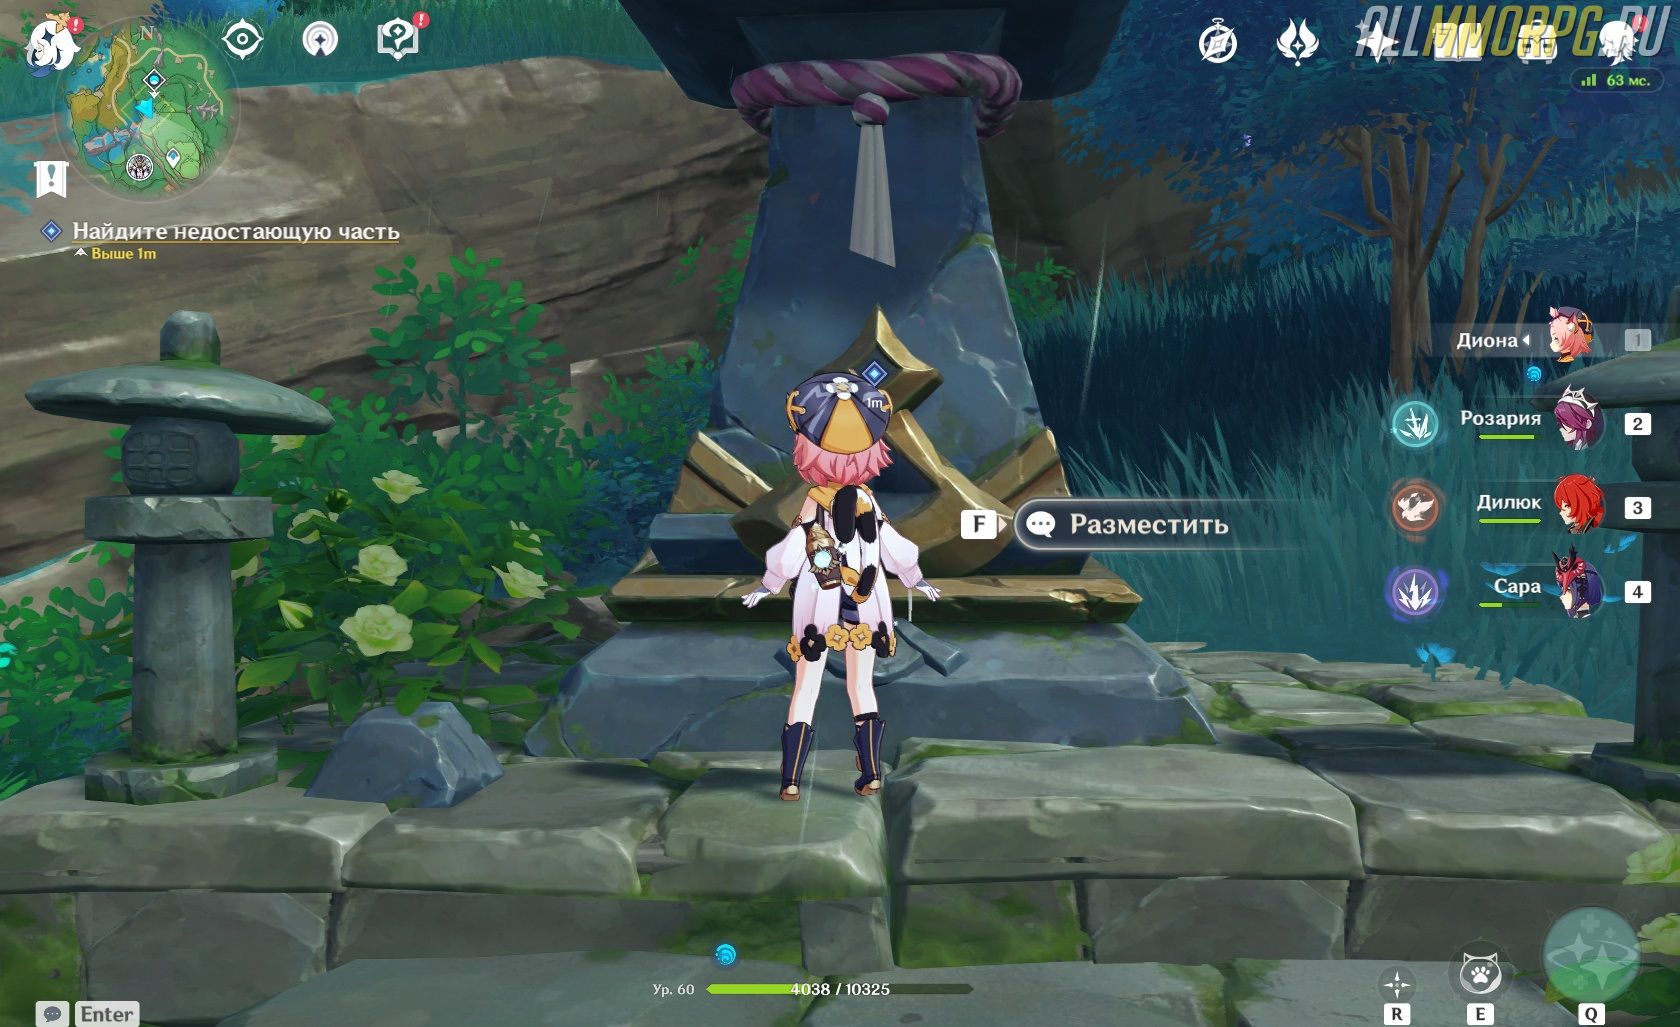
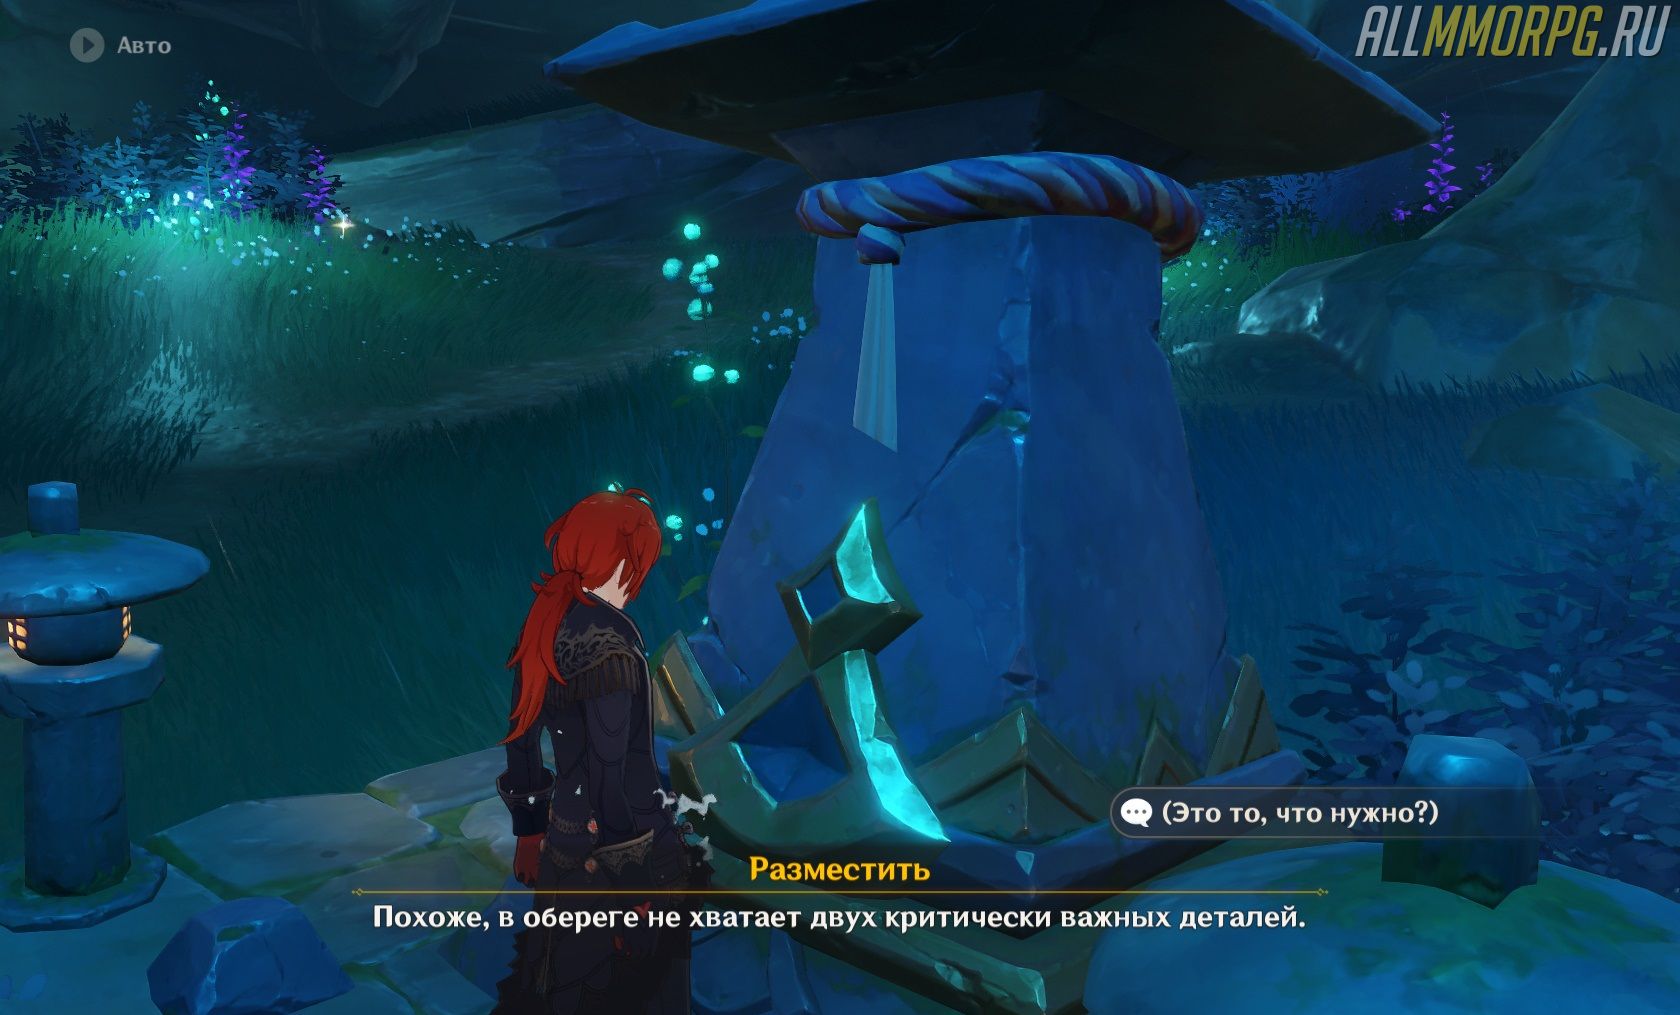
- Вернитесь к оберегу и установите найденные вами части. После этого погода над островом Ясиори немного улучшится. Но это еще не все.

- Вернитесь к Кадзи и поговорите с ним.

- Он попросит вас починить еще два оберега. Соглашайтесь и завершите 1 часть квеста «Наследие Оробаси».
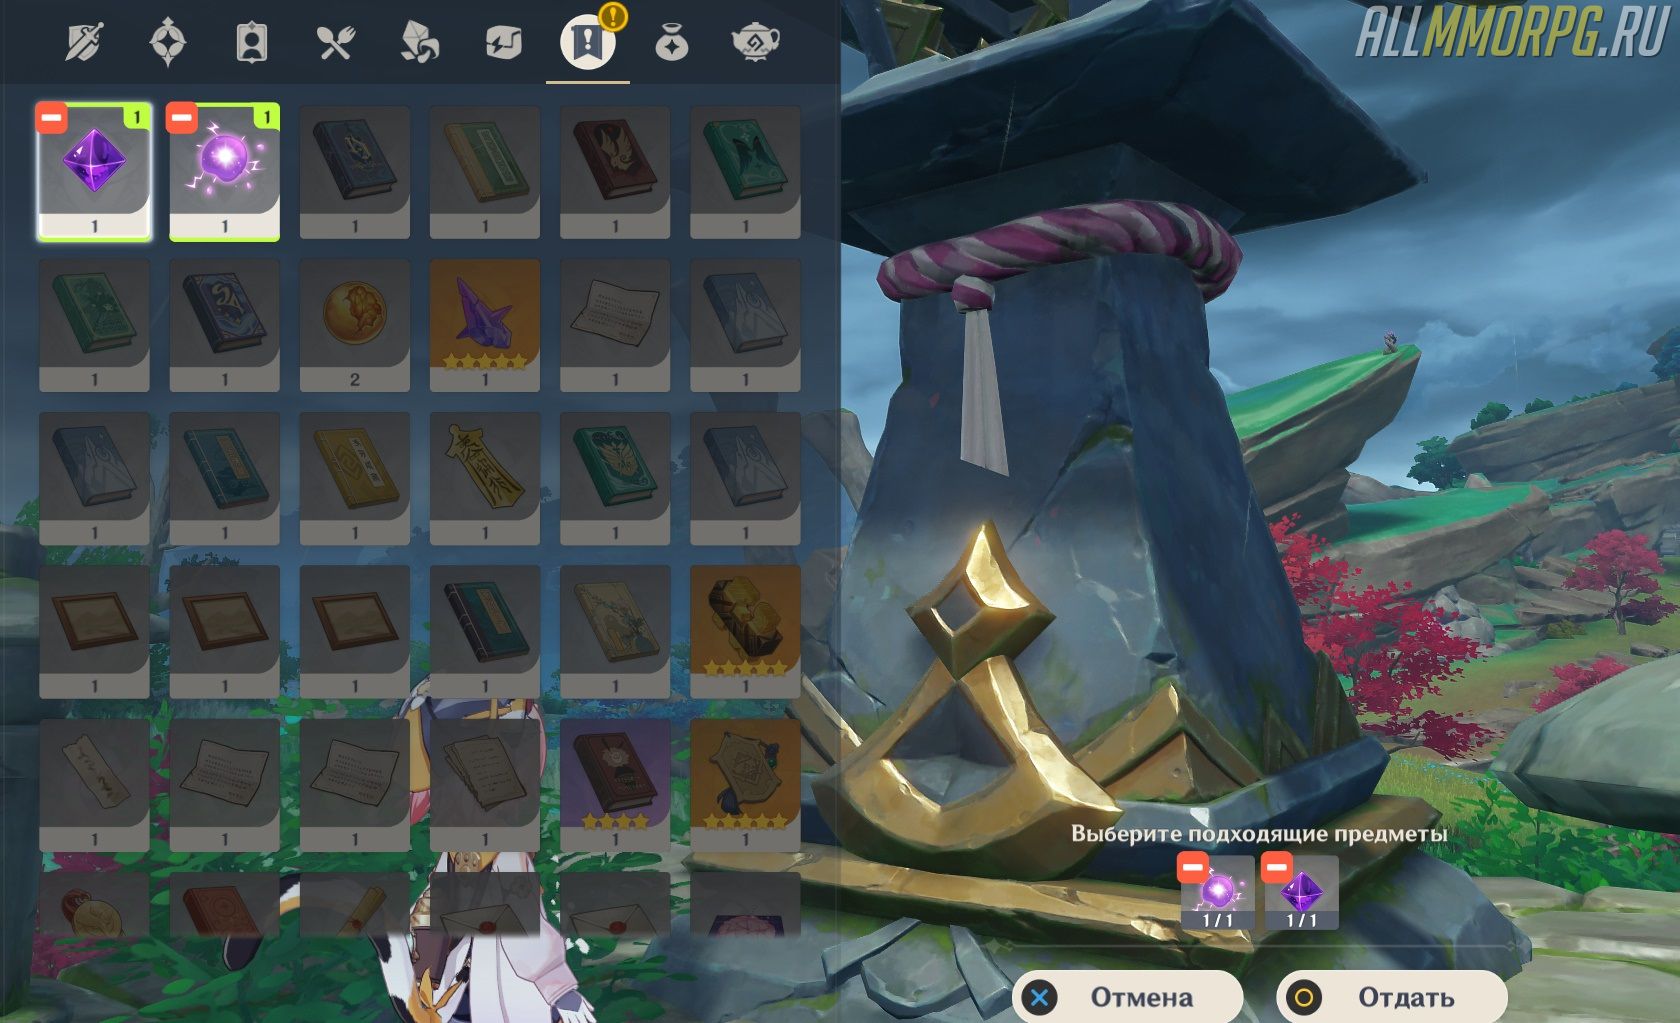
2. Прохождение «Наследие Оробаси. Часть 2»
- Телепортируйтесь к Голове Змея, победите самурая и взаимодействуйте с оберегом.

- Теперь вам снова необходимо найти две части оберега.
- Первая:
- Вторая:

- Вернитесь к оберегу и установите недостающие части.
3. Прохождение «Наследие Оробаси. Часть 3»
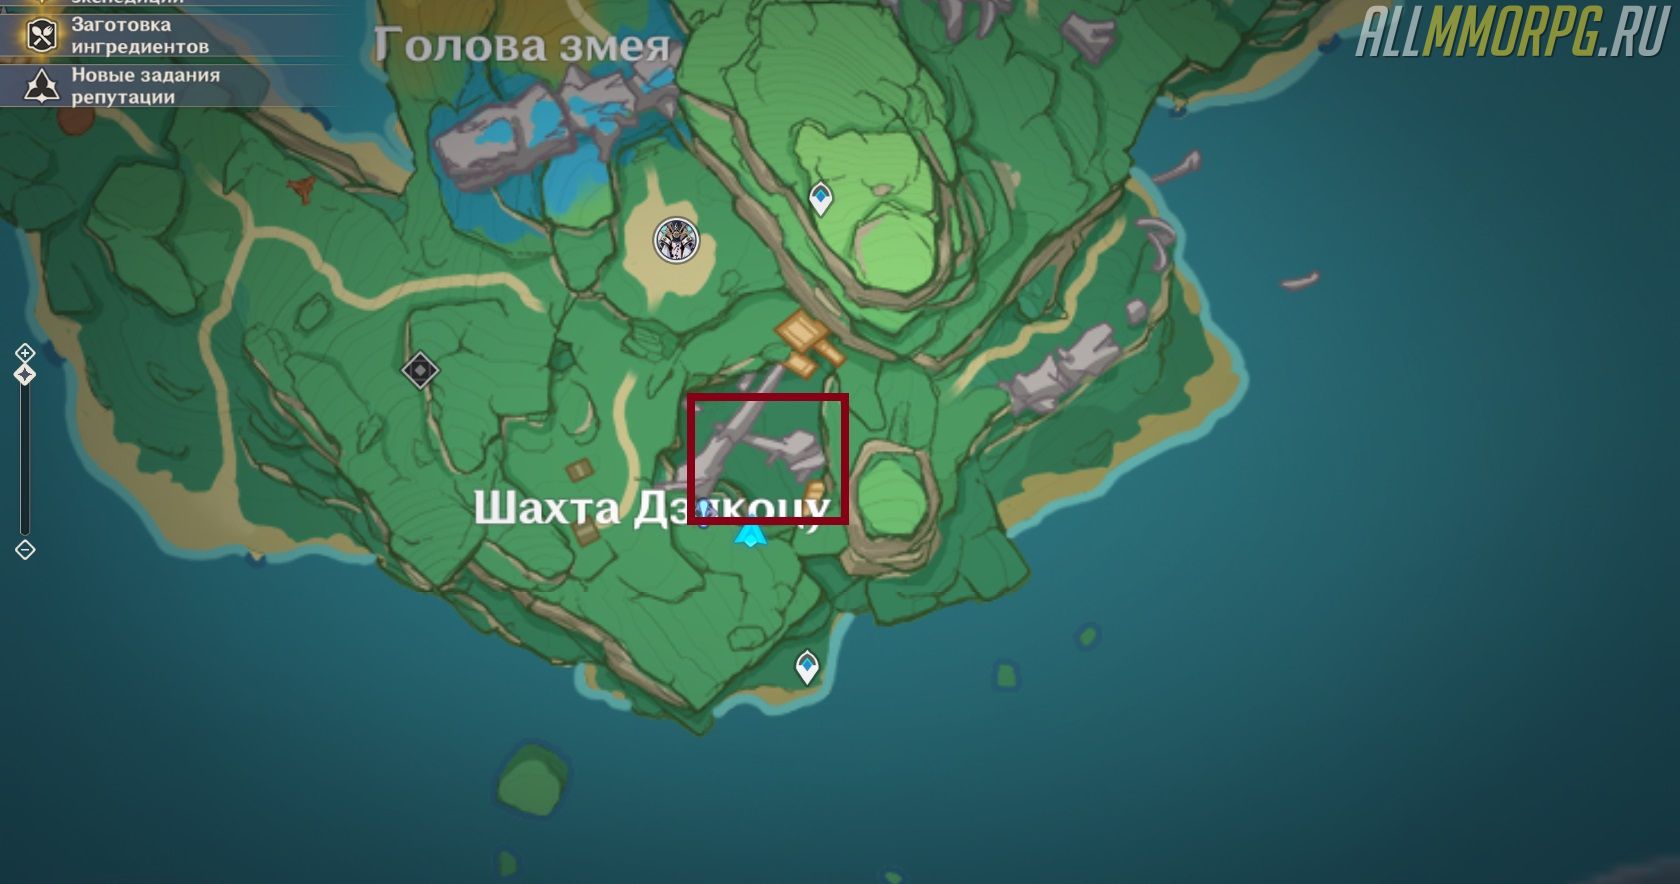
- Телепортируйтесь к Шахте Дзякоцу.

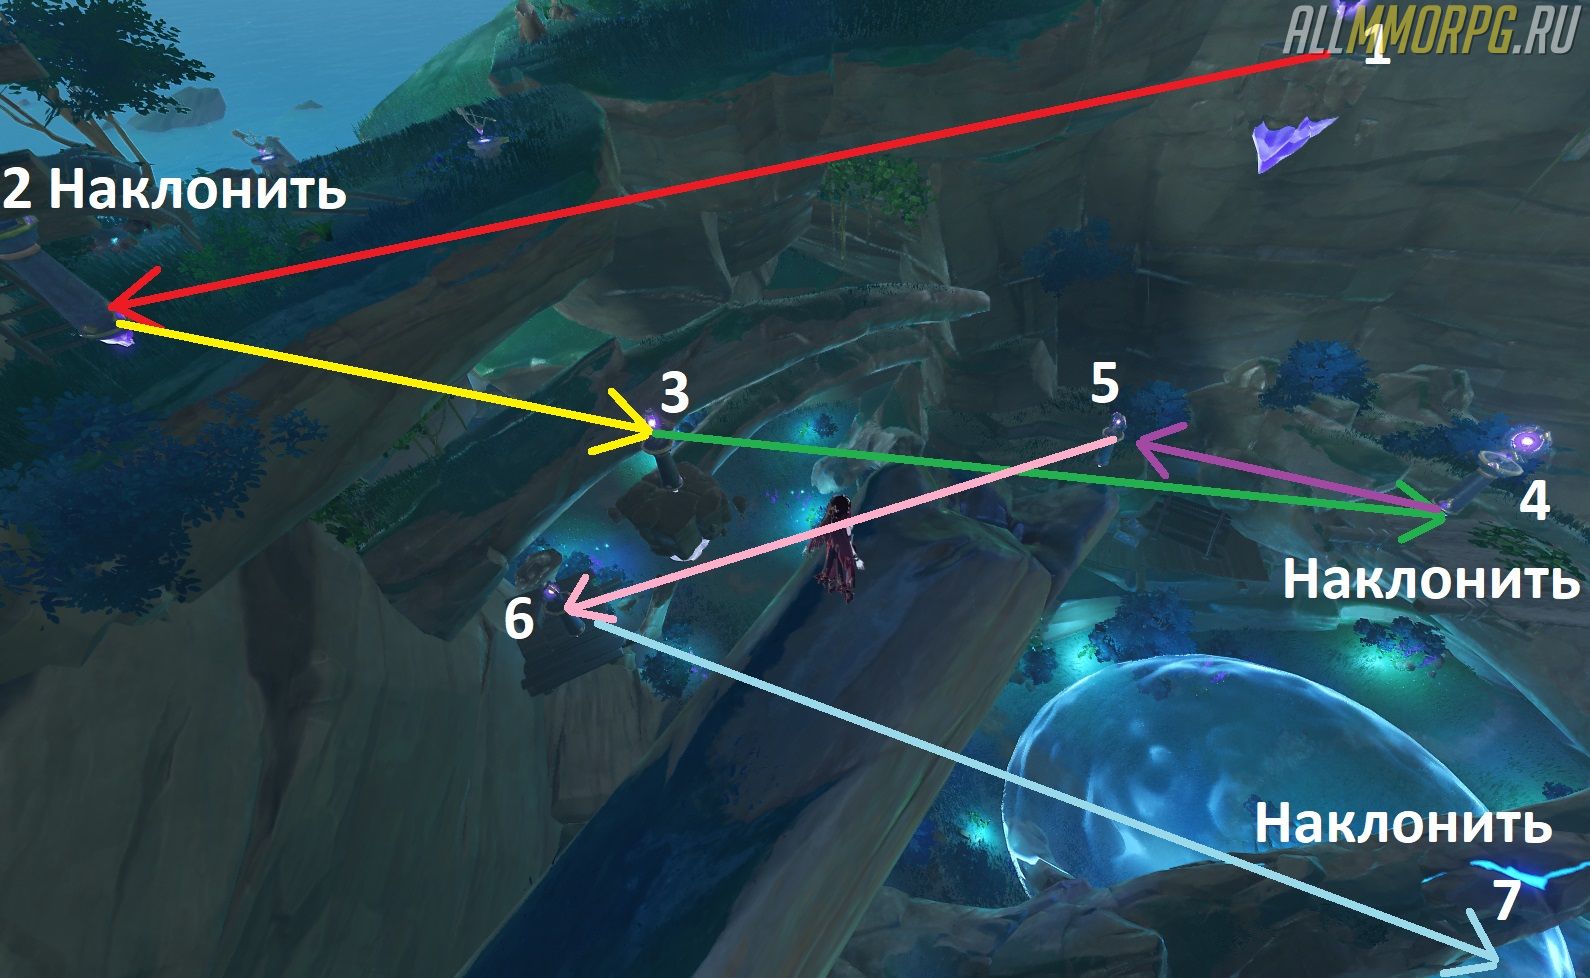
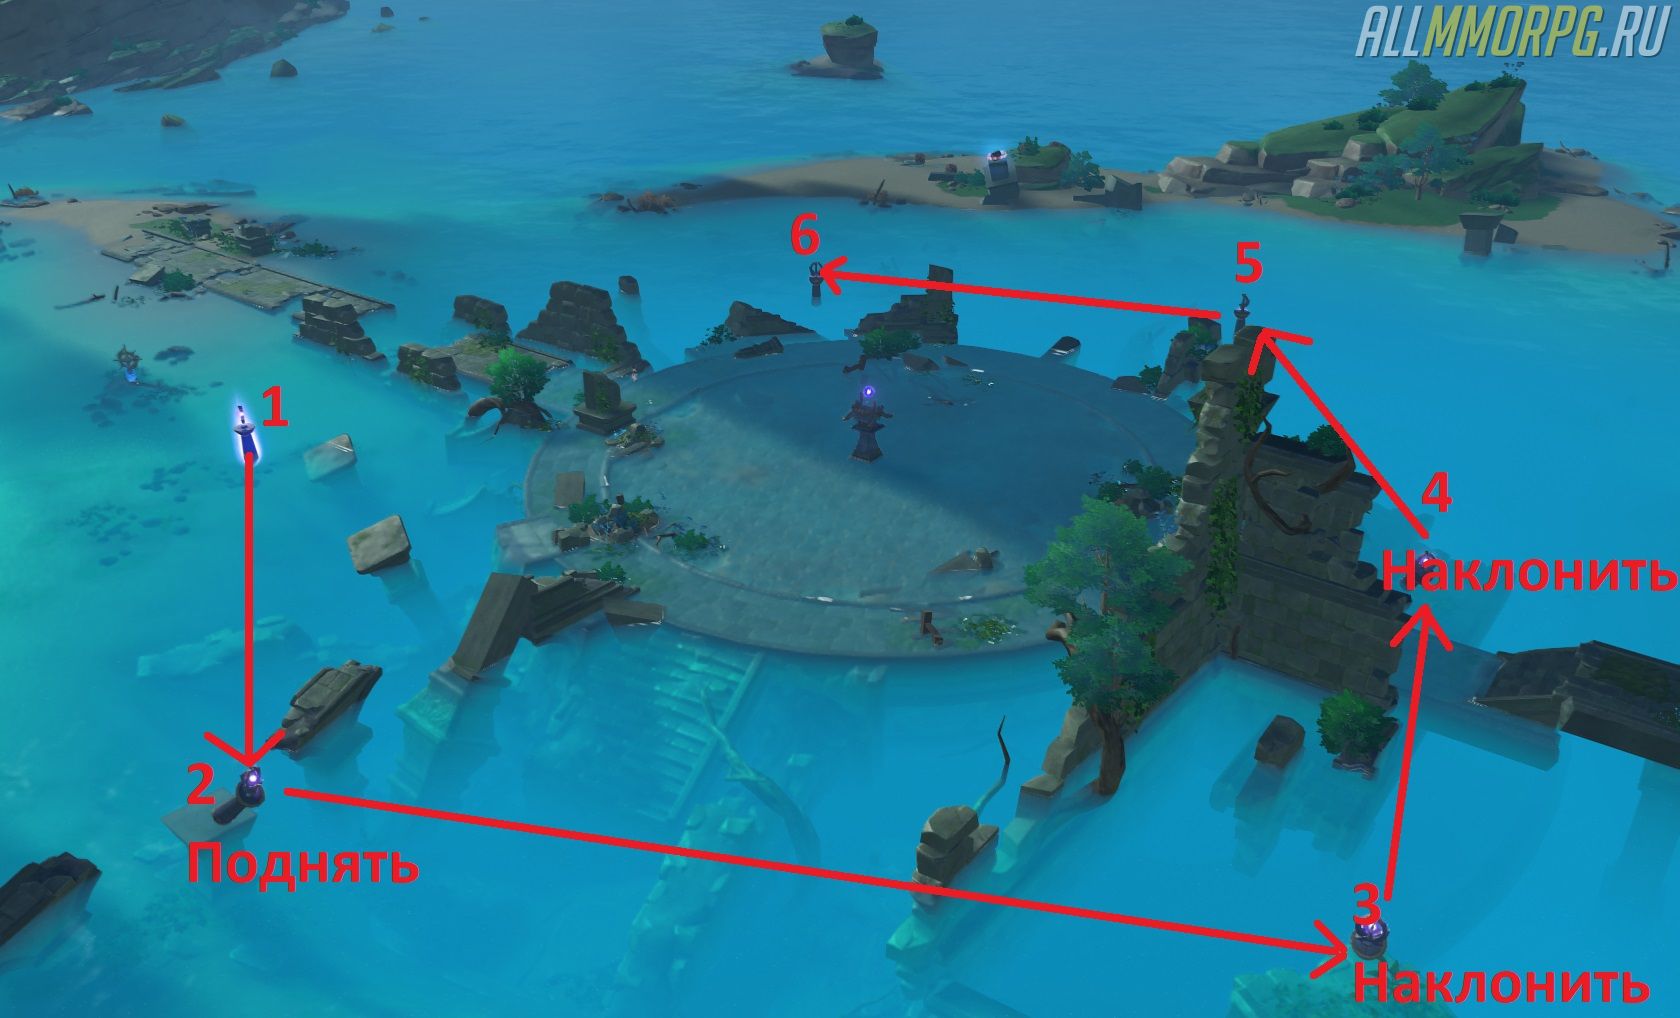
- Поверните столбы так, как указано на скриншоте ниже.

- Ударьте по первому столбу заряженной атакой любого лучника. Купол рассеется. Спуститесь вниз и взаимодействуйте с оберегом.

- Теперь вам нужно найти недостающие части оберега. Воспользуйтесь чувством стихий и следуйте за фиолетовым потоком, чтобы найти первую часть оберега. По пути на вас нападут гидро-слаймы. Убейте их и идите дальше.
 По пути на вас нападут гидро-слаймы. Убейте их и идите дальше.
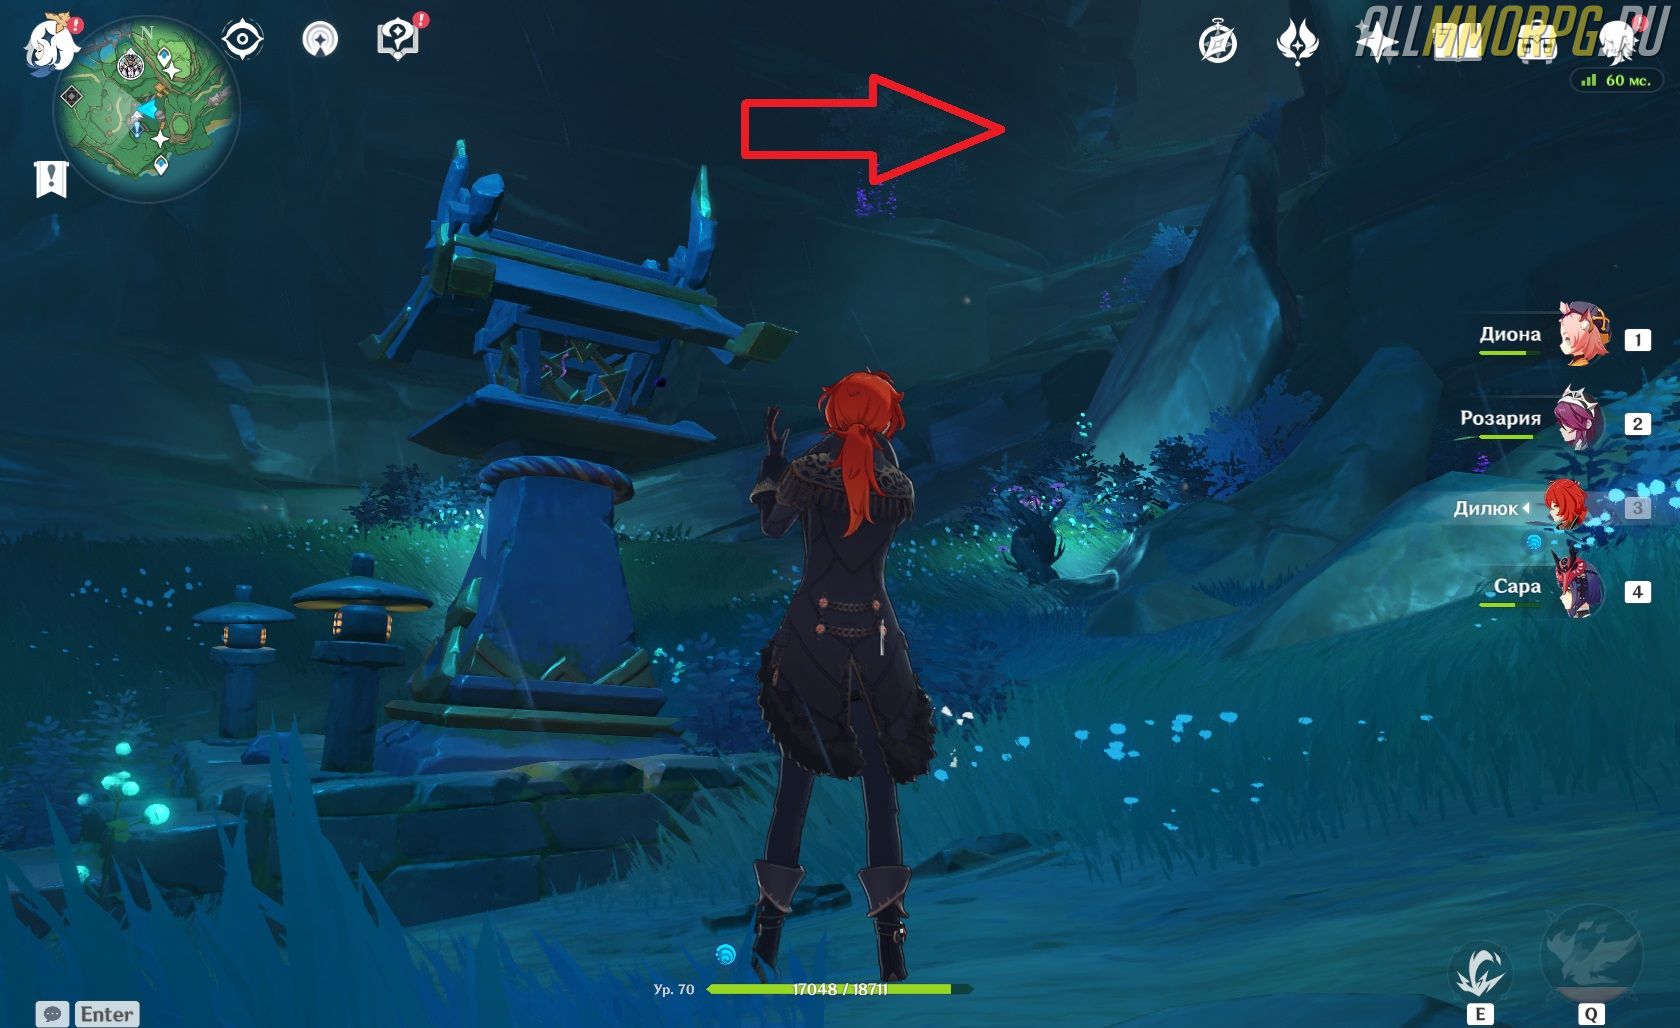
- Вернитесь к оберегу в центр шахты Дзякоцу и идите направо в проход в скале (см. изображение ниже).

- Добравшись до пропасти, не прыгайте вниз, а вскарабкайтесь по правой стороне скалы. Там возьмите электрогранум и пройдите через ближайший электробарьер. Внутри лежит вторая часть оберега.
- Отнесите обе части к оберегу и активируйте его.

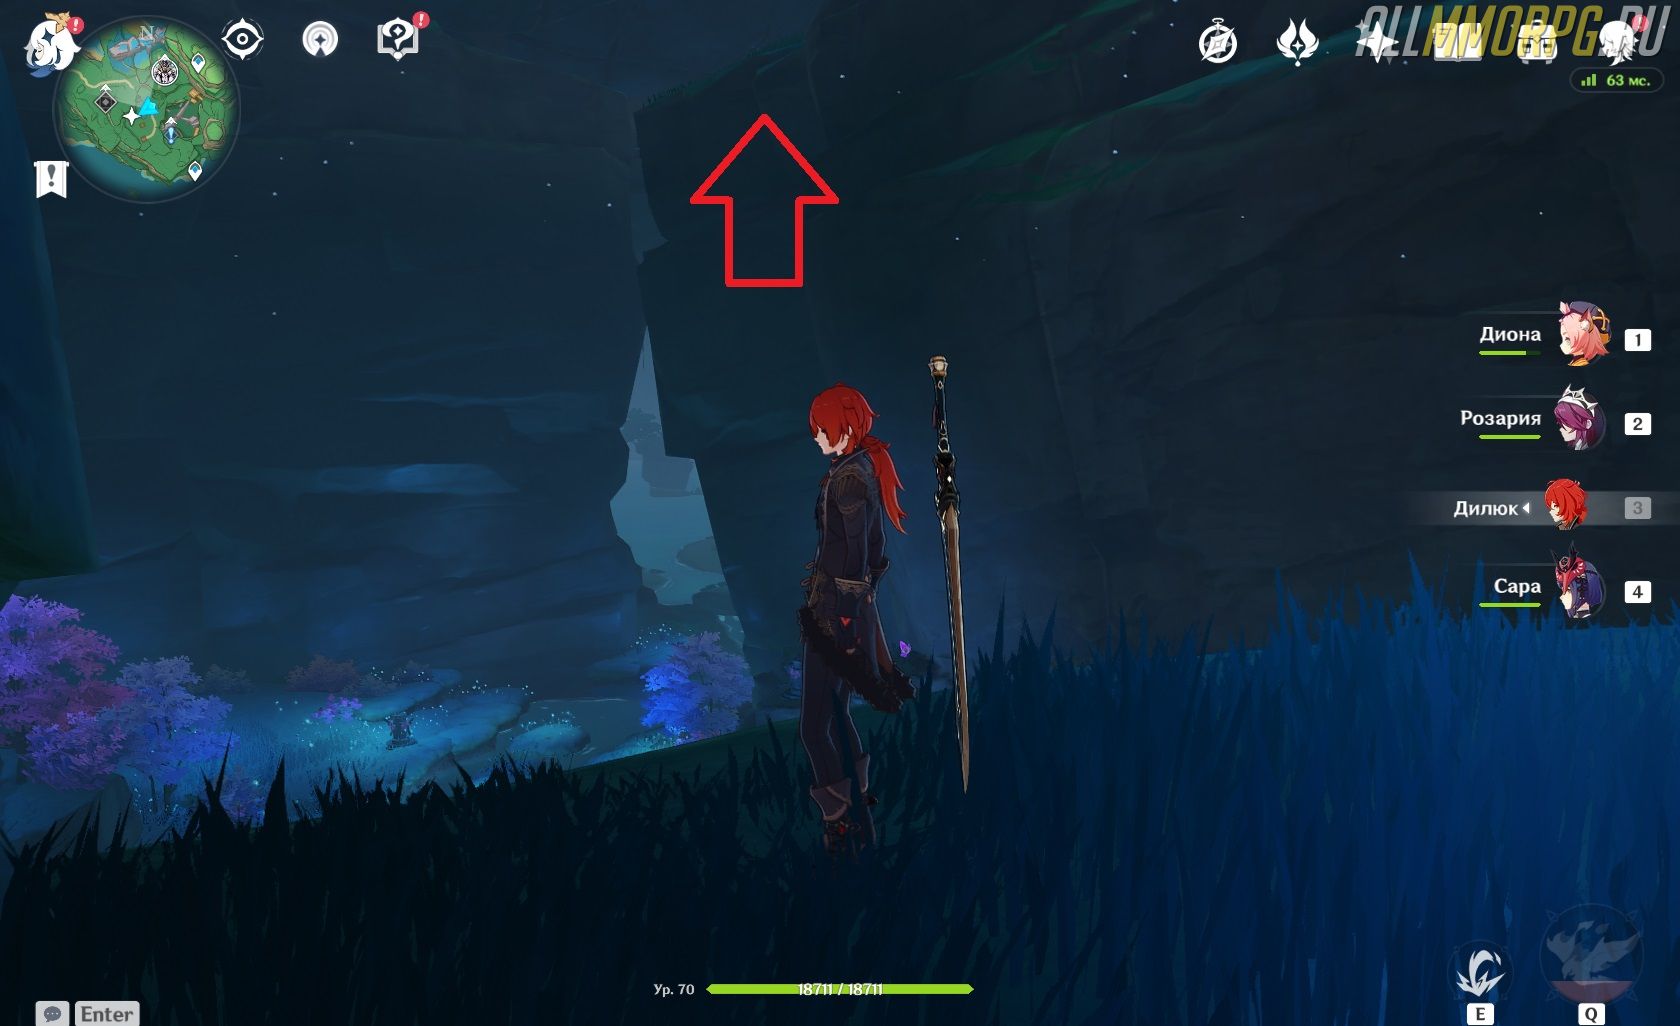 Там возьмите электрогранум и пройдите через ближайший электробарьер. Внутри лежит вторая часть оберега.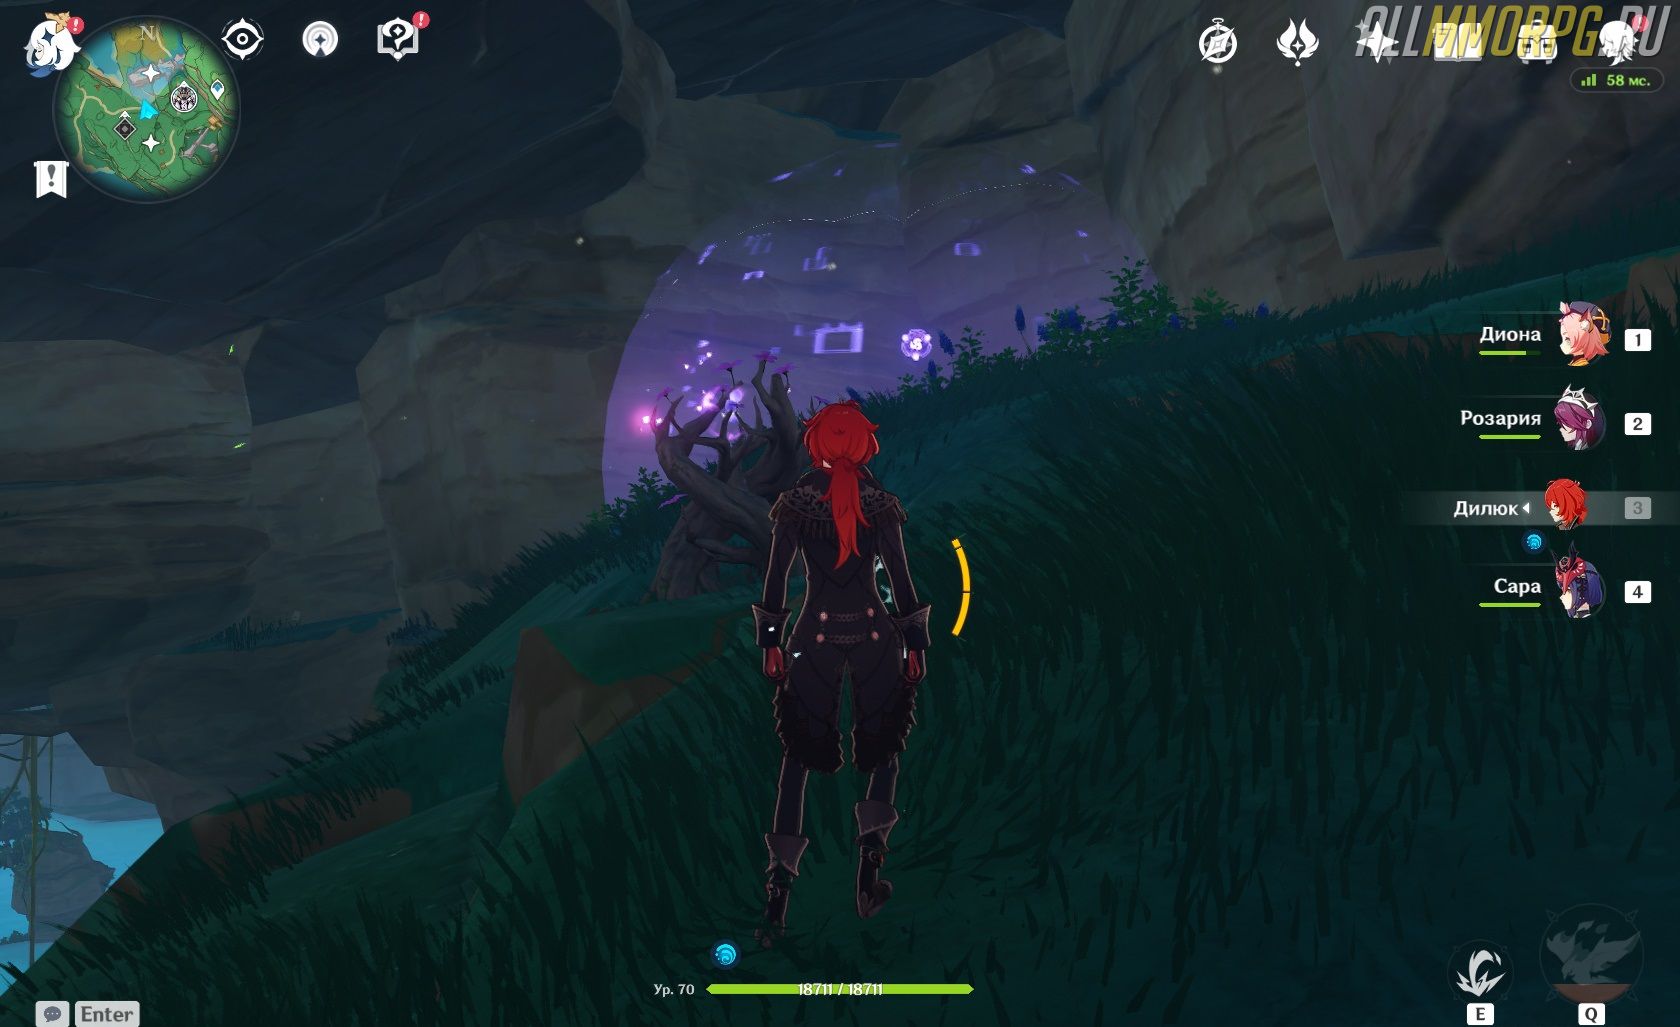
4. Прохождение «Наследие Оробаси. Часть 4»
- Вернитесь к Кадзи и расскажите ему о ремонте оберегов.

- Вам необходимо исследовать руины форта. Цель квеста находится под водным куполом. Снова придется расставить столбы в правильном порядке. Чтобы вам было удобно перемещаться по территории, воспользуйтесь волноходом.
- Когда купол исчезнет, подойдите к оберегу. На вас нападет босс Магу Кэнки. Убейте его и возьмите часть оберега.
- Теперь отыщите вторую часть оберега. Она находится неподалеку на краю арены (лежит внизу).
- Отнесите обе части к оберегу и установите их.

- Вернитесь к Кадзи и расскажите ему, что случилось. В награду за это вы получите рецепт на крафт копья Китаин, очки приключений, Камни Истока и опыт героя.
 По завершению квеста небо над Ясиори очистится от грозовых туч, а вы получите не только ценные награды, но и возможность пройти подземелье Поместье формации.
 Чтобы вам было удобно перемещаться по территории, воспользуйтесь волноходом.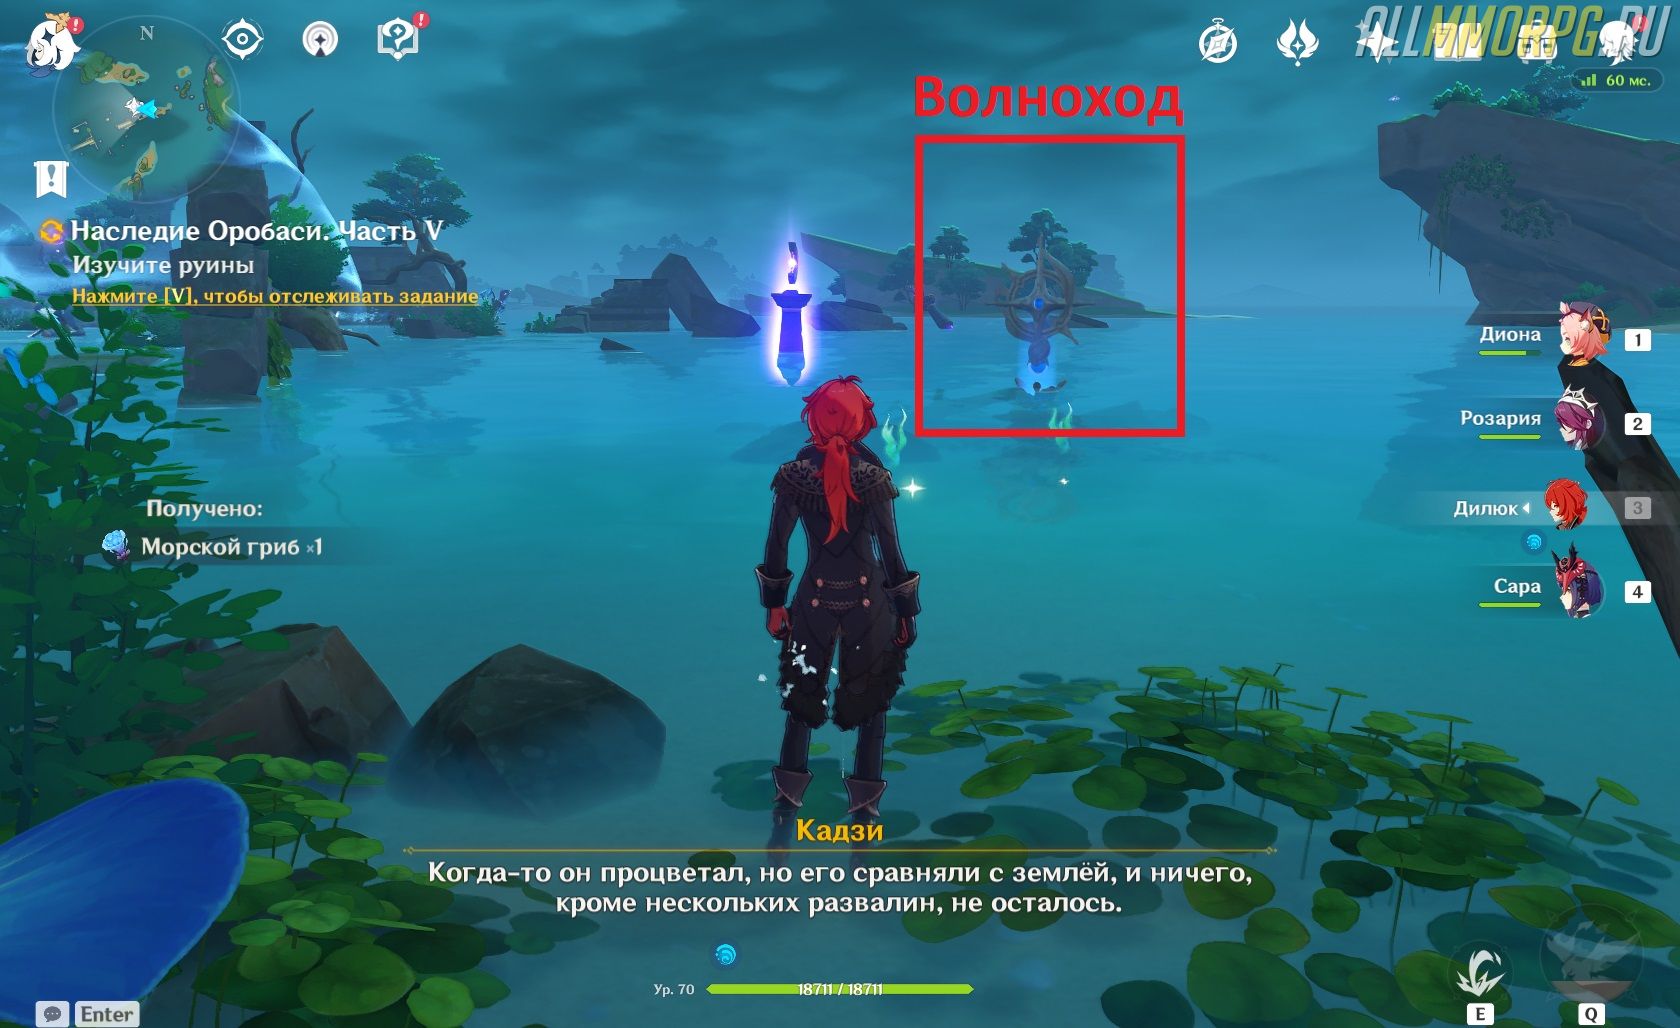
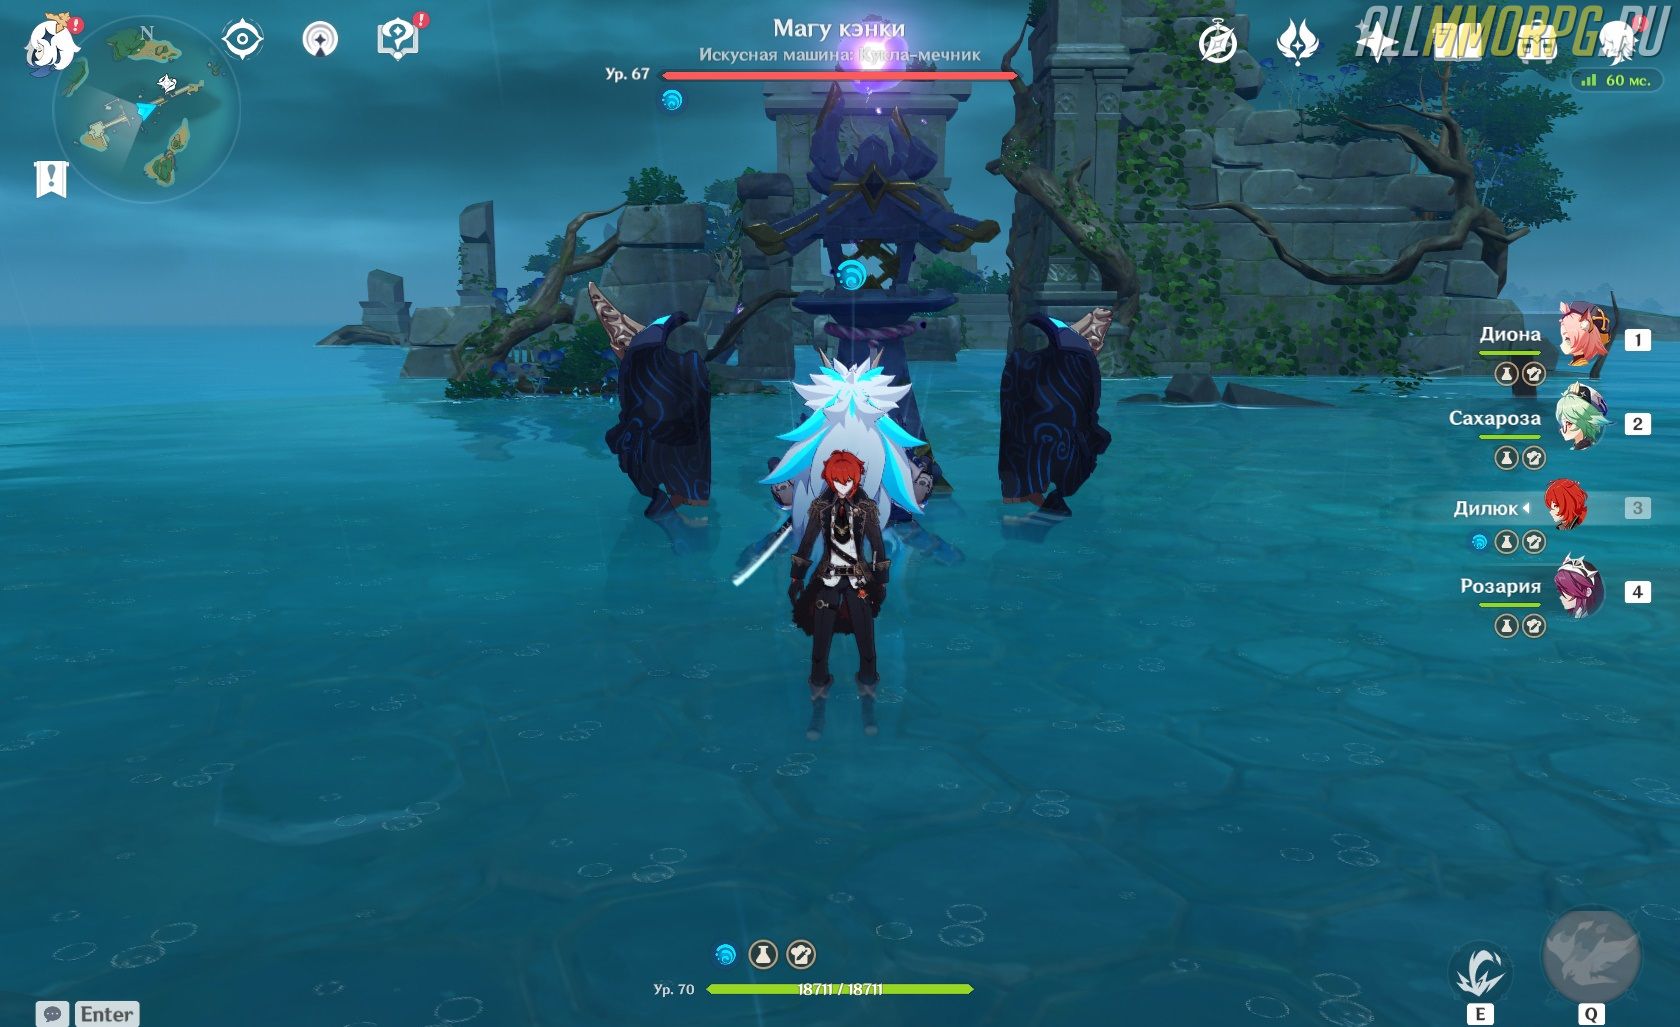
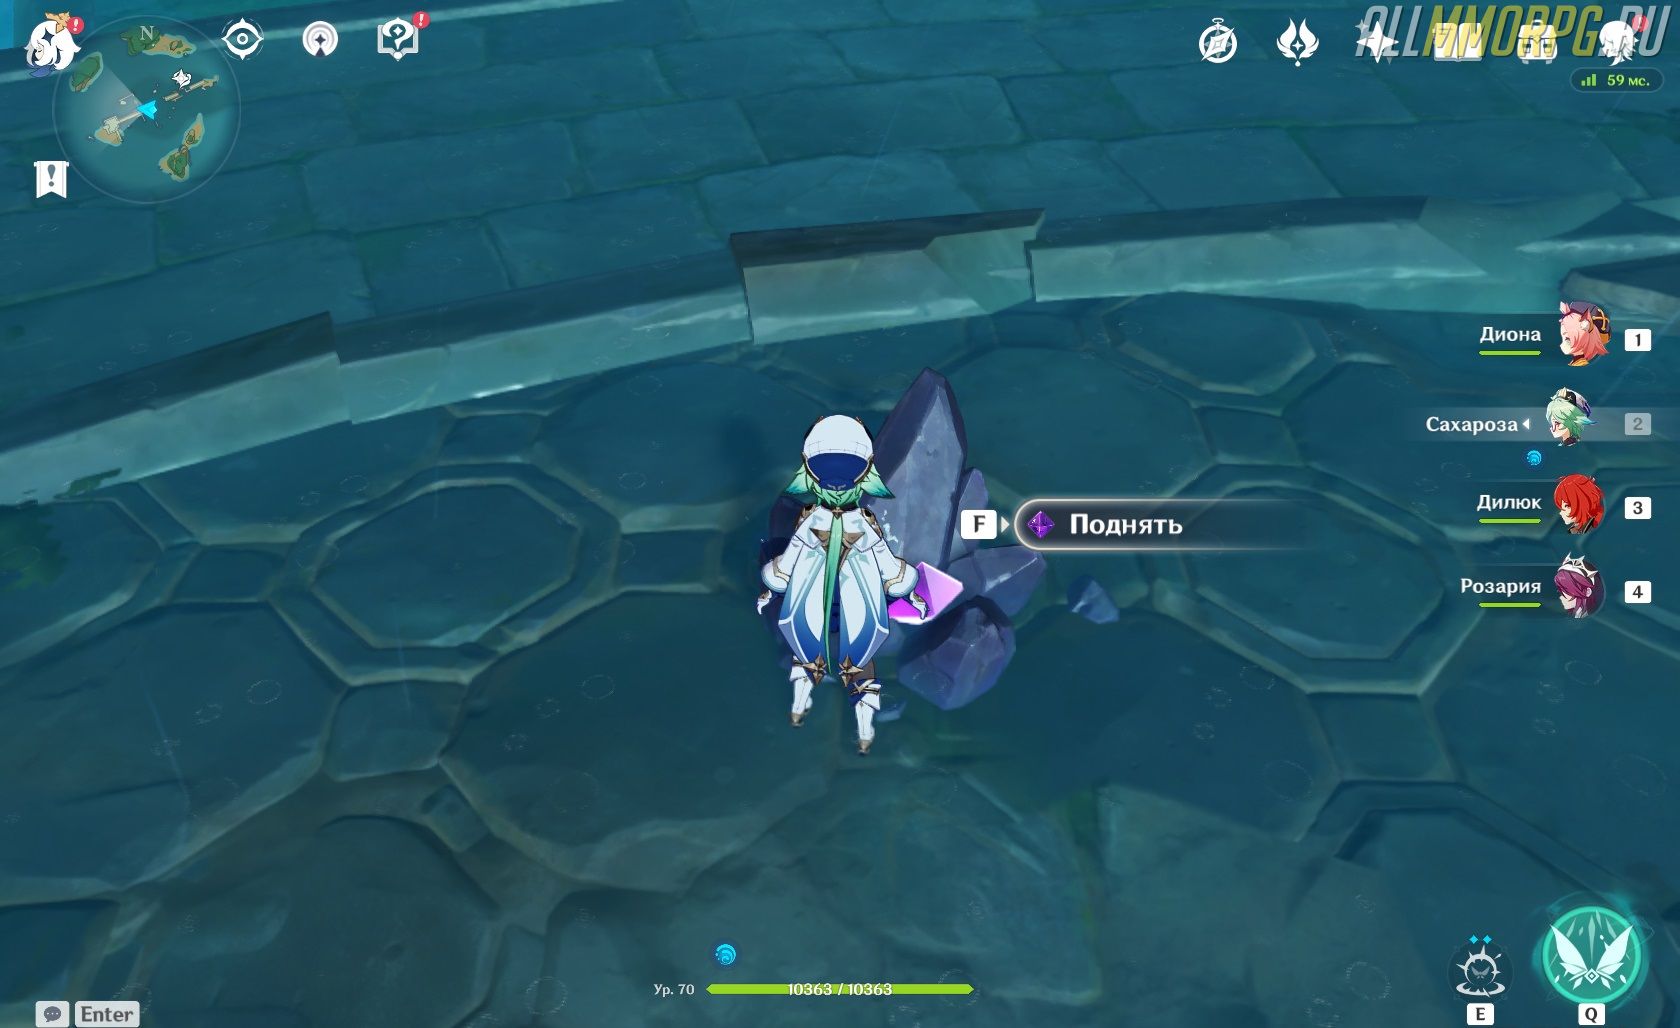
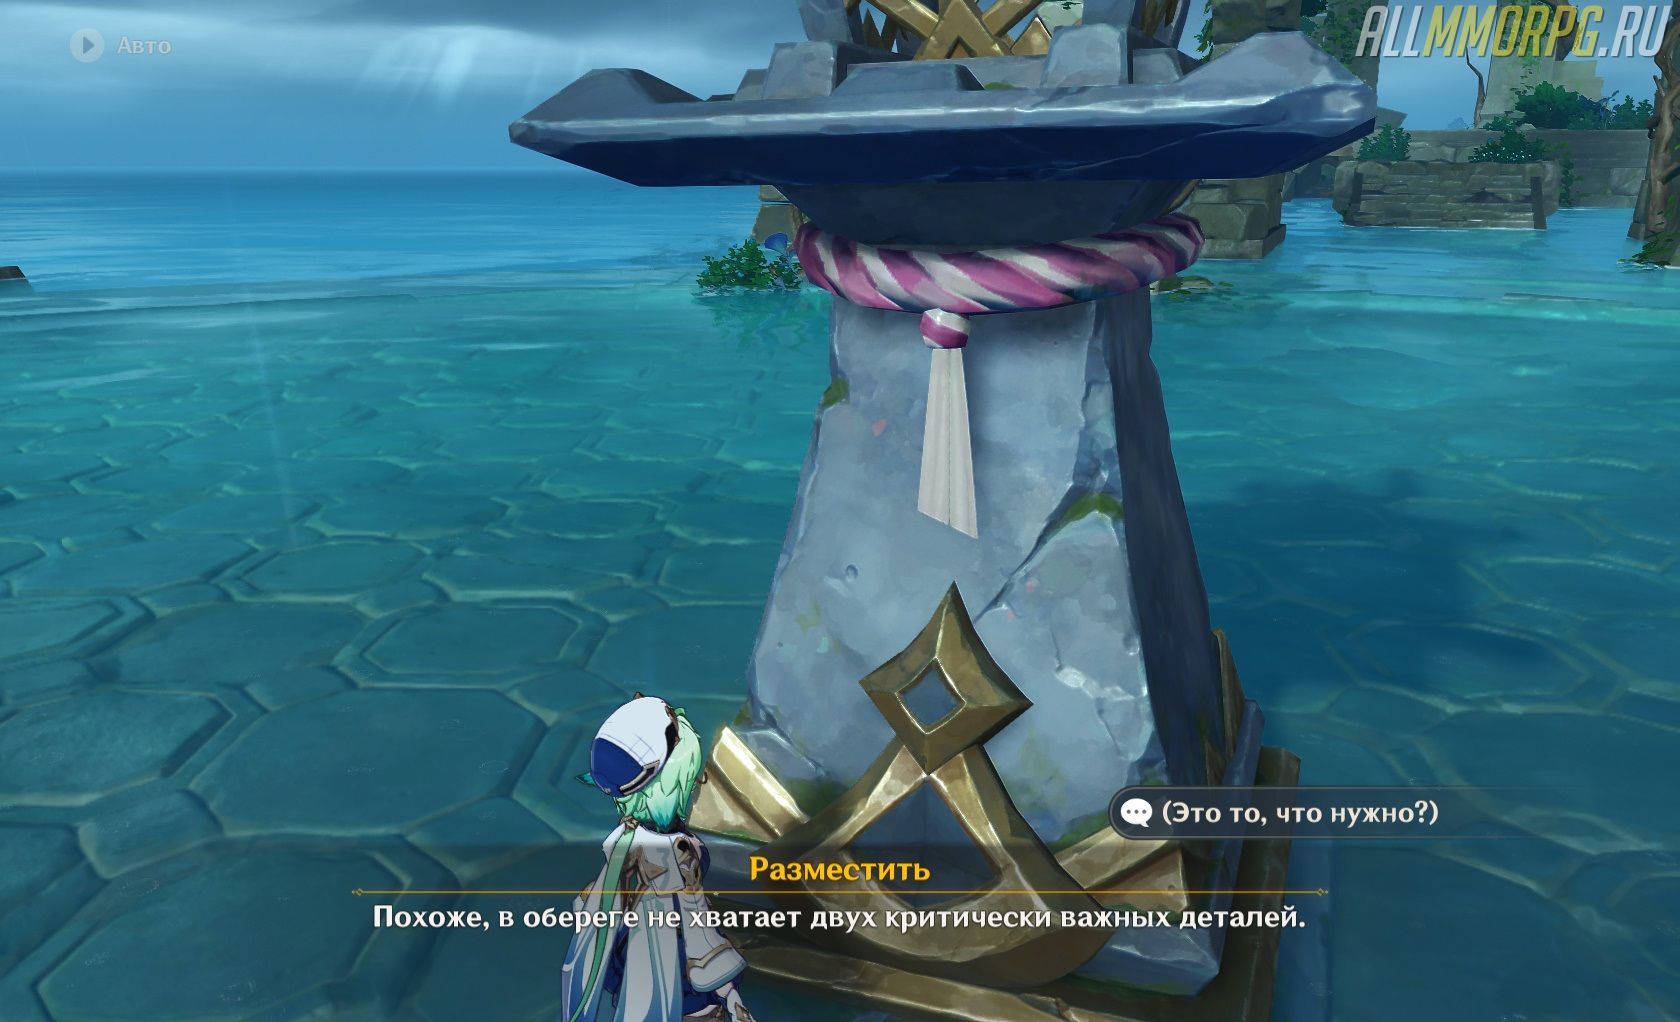
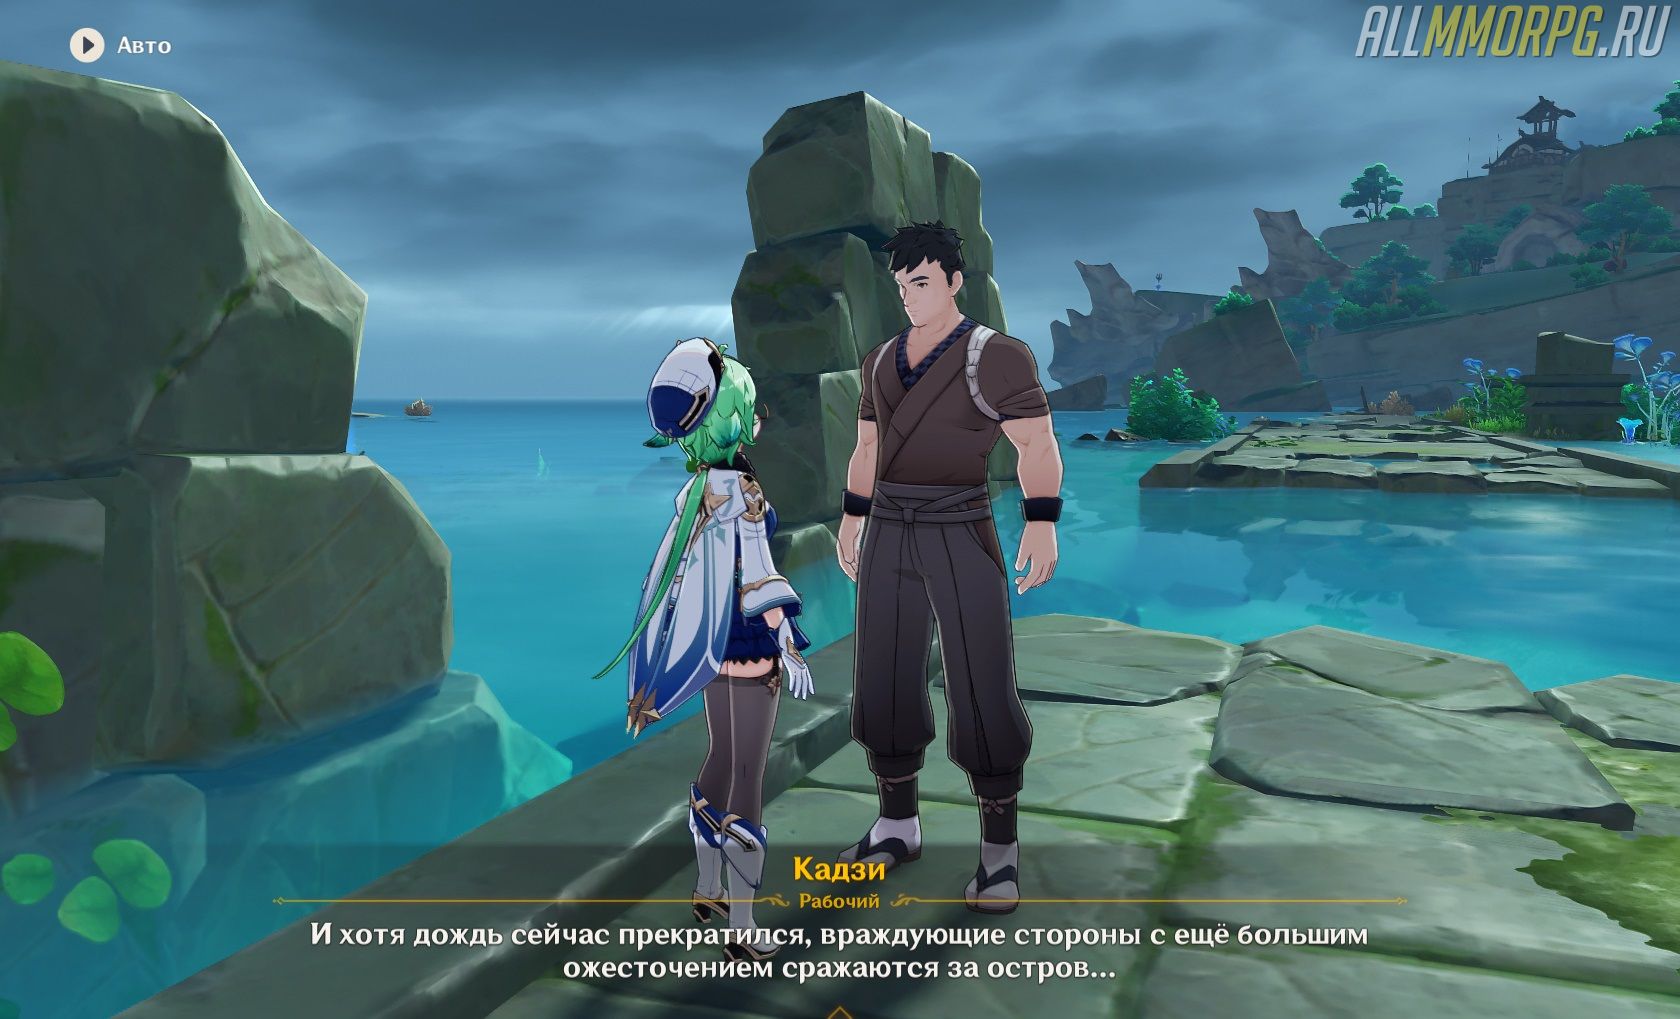 По завершению квеста небо над Ясиори очистится от грозовых туч, а вы получите не только ценные награды, но и возможность пройти подземелье Поместье формации.
Событие Summertime Odyssey от Genshin Impact проходит с с 15 июля 2022 г. по 24 августа 2022 г.. В это время вы можете исследовать Архипелаг Золотое Яблоко, ограниченную по времени область с сотнями головоломок и механик, которые обогатят ваш опыт исследования. Minacious Isle, на котором находится Мираж Моны, может переключаться между своей прошлой и настоящей формами с помощью функции «Место в воде», изменяя топографию острова.
Другая большая часть изучения острова связана с использованием потоки ветракоторый только спавнятся при ясной погоде. Но так как на Minacious Isle постоянно идут дожди, вам нужно взять дело в свои руки и вручную остановить дождь от дождя уметь пользоваться ветровыми потоками.
Как остановить дождь на Минациус-Айл (настоящая форма)

Направляйтесь в область, обведенную кружком на изображении выше, чтобы найти поляну с четырьмя монументами стихий. Обратите внимание на памятник Анемо.

Когда Памятник Анемо выключен, дождь пойдет. Но когда вы подсветите его, применив Анемо, дождь прекратится, а вокруг всего острова появятся ветровые потоки. Если вы хотите снова вызвать дождь, просто зажгите остальные монументы стихий, чтобы сбросить анемо, или подождите некоторое время, пока он не сбросится естественным образом.
Связанный: Как получить Радужный обломок в Genshin Impact
Как остановить дождь на Minacious Isle (прошлая форма)

Направляйтесь в область, обведенную кружком на изображении выше, чтобы найти поляну, и пройдите через вход в арку рядом с бассейном с водой, чтобы найти поляну. Посмотрите вперед — вы найдете монумент поджигателя на вершине строения.

Когда Поджигатель Памятник выключен, дождь пойдет. Но когда вы подожжете его, применив Пиро, дождь прекратится, а вокруг всего острова появятся ветровые потоки. Монумент поджигателя со временем автоматически сбрасывается. Когда это произойдет, просто активируйте его снова, чтобы убрать дождь.
В этой версии Minacious Isle разница более заметна, так как звезды на небе появляются только тогда, когда нет дождя. Имейте в виду, что во время дождя вы сможете увидеть «невидимые» мосты в небе. Вы все еще можете использовать их без дождя, но вы их не видите.
Ознакомьтесь с нашим руководством по расположению всех сундуков на архипелаге Золотое яблоко — событие «Летняя одиссея Genshin Impact», чтобы получить сотни ограниченных сундуков, пока они еще существуют.
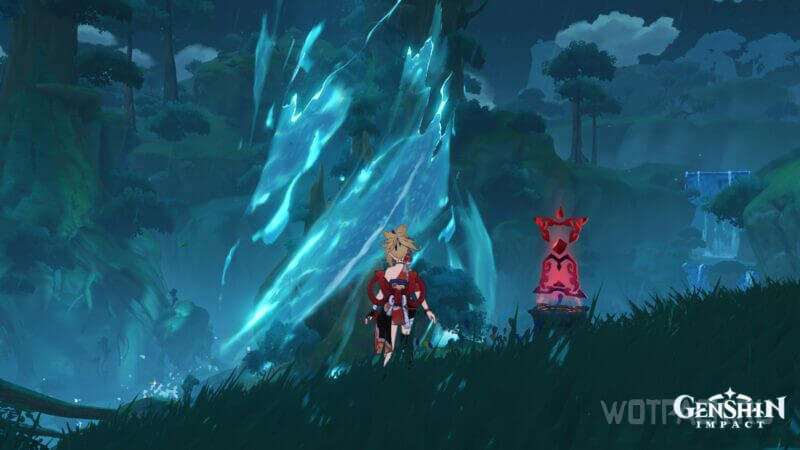
Варунастра в Genshin Impact — гигантский природный механизм Сумеру, фигурирующий в цепочке квестов Варуна-гата. Помимо заданий, связанных с ее очищением, машина скрывает в себе еще несколько возможностей для получения секретных наград.
О том, как запечатлеть ночное явление и запустить смену погоды на машине Варуны самостоятельно, расскажем в небольшом гайде.
Содержание
- Как открыть Варунастру в Genshin Impact
- Где находится Варунастра
- Как получить достижение Погода под контролем
- Как получить достижение Они входят в поток в Genshin Impact
Машина погоды откроется для самостоятельного изучения после полного прохождения квестовой цепочки Варуна-гата, последним заданием которой является Молитва о дожде на плодородной земле.
Где находится Варунастра
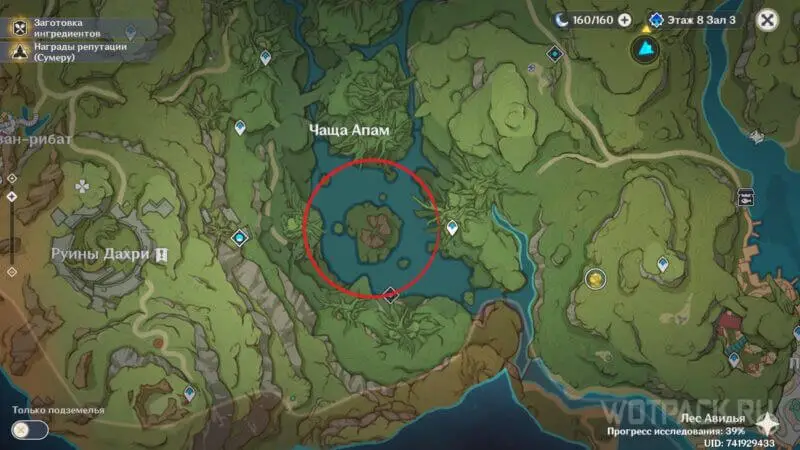
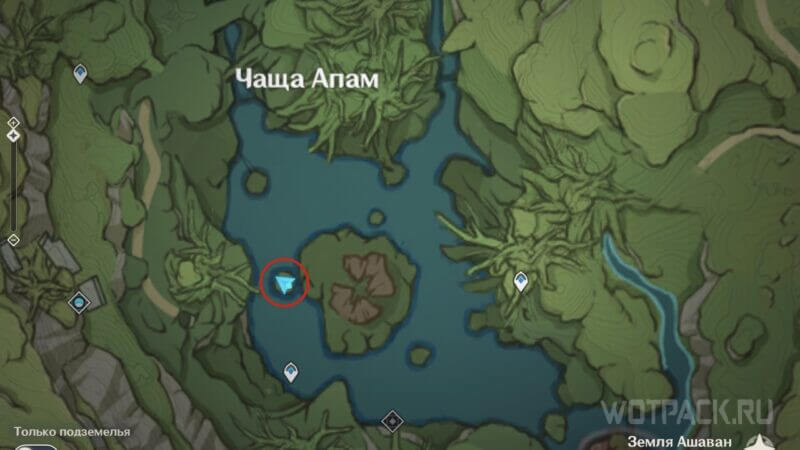
Варунастру можно найти в южной части Чащи Апам, на большом острове в центре водоема. Именно там отслеживается работа механизма.
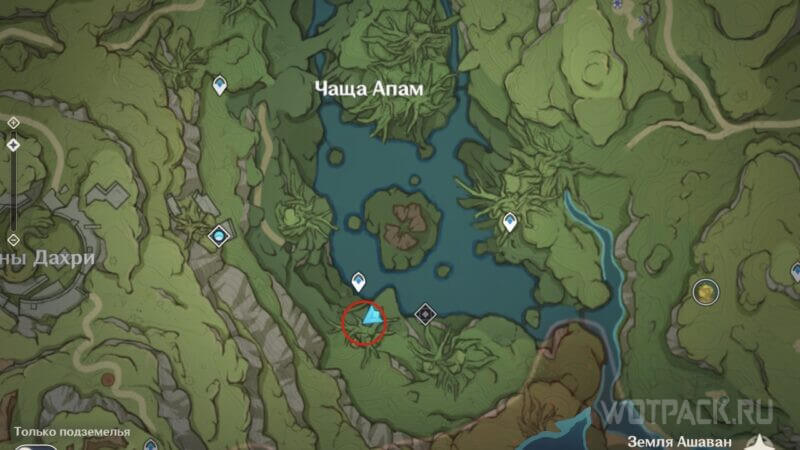
Чтобы подойти к самой машине, используйте открытый по квесту телепорт под локацией.
Как получить достижение Погода под контролем
За первую смену погоды на машине Варуны дается ачивка Погода под контролем. Найти механизм для управления природными явлениями можно прямо у огромного ствола посередине чащи.
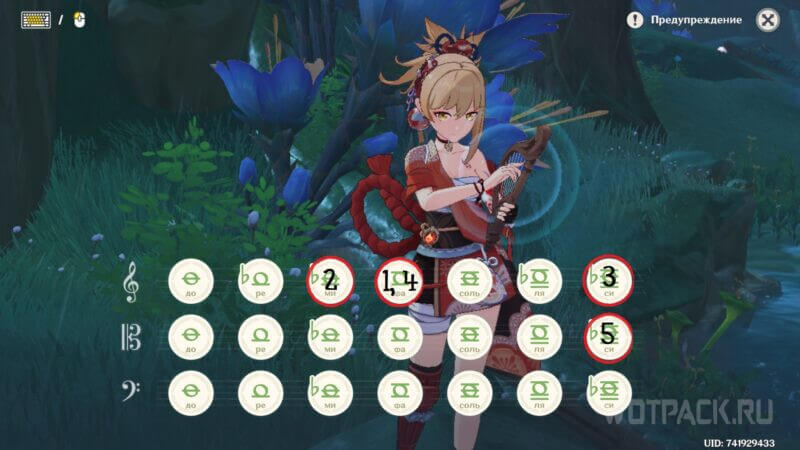
Чтобы активировать Варунастру, исполните рядом с ней мелодию Песня источника («фа, ми, си, фа» на верхней строчке и «си» на второй).

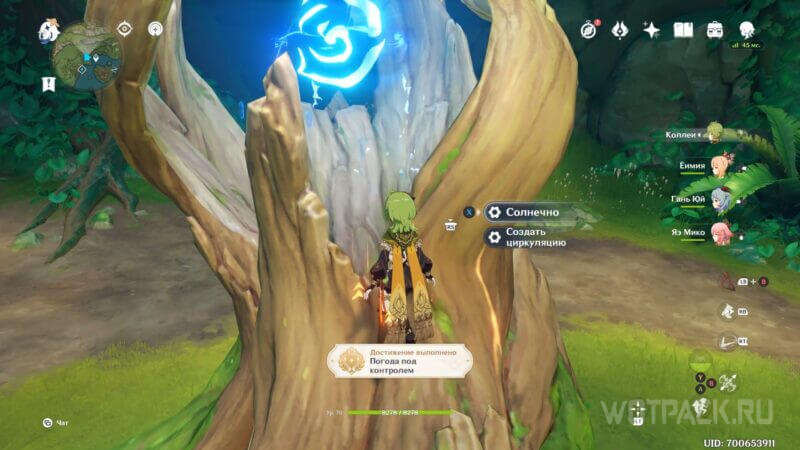
После того как машина запустится, выбирайте любой из вариантов погоды.
Как получить достижение Они входят в поток в Genshin Impact
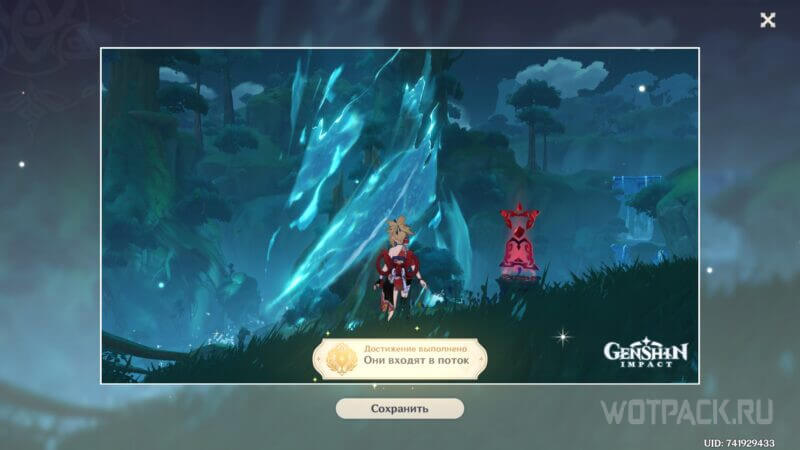
Чтобы получить достижение Они входят в поток, дождитесь смены погоды (если на машине включена Циркуляция) возле Варунастры в 00.00 по игровому времени. Когда водные потоки вокруг машины Варуны начнут закручиваться, используйте Фотокамеру из Инвентаря или встроенную камеру игры.
Получить ачивку можно без выполнения квестов Варуна-гата, поскольку в этом случае погода переключается самостоятельно.
Снимок можно сделать с любой точки и расстояния, откуда виден механизм.
Надеемся, наше руководство помогло вам получить достижения Погода под контролем и Они входят в поток в Genshin Impact. Пишите в комментариях, если возникли вопросы, — постараемся помочь. Следите за другими гайдами по Сумеру на нашем сайте.
Weather is an exploration mechanic in Teyvat. While exploring the world, the weather can shift. Depending on the new weather conditions, special properties will be applied to the environment, to your characters, and to opponents.
Overview
The weather throughout Teyvat varies depending on location and time. There are many different weather conditions, ranging from sunny skies to thunderstorms to thick fog.
Weather conditions are tied to areas of the map, so the player can often teleport to a different location to escape certain weather conditions. However, only the weather at the player’s current location is rendered, even if the player is only a few steps away from an area with different weather.
Areas affected by regular weather change over time, while areas affected by special weather conditions, such as areas with Special Environment climates, are perpetually affected by a particular weather condition. Areas with unique environmental shifts are not necessarily considered Special Environments but have properties that may override weather conditions; see the Unique Environmental Shifts section for more information.
For player convenience, major cities (the City of Mondstadt, etc.) are usually always sunny/clear unless there is a story circumstance that temporarily changes the weather, such as in the Archon Quest Dragon Storm. (This is not an in-universe phenomenon.)[1]
When the weather changes or when the player enters an area with different weather conditions from the area they were previously in, the active character’s corresponding voice-over line will play if applicable.
Regular Weather Conditions
Sunny/Clear/Cloudy
Default state for most areas. It has no special properties.
Rain
- Characters and opponents get Wet.
- Some fires such as campfires and torches are doused.
- Dendro objects such as grass cannot be burned during rain.
- In extremely rare circumstances, a double rainbow may appear during or after rain.
- Wildlife will not appear, even in sheltered areas (e.g. inside a cave)
- Cannot occur in city areas, even if the surrounding area is raining.
Thunderstorm
- All rain conditions apply.
- Players, allies, enemies, wildlife, and the environment can be struck by lightning.
- Grants the «Wrath of the Gods» achievement if the lightning strikes the player.
- Player may gain Electro particles, as result of lightning striking the ground.
- There are three climate regions with perpetual Thunderstorms, each of which can be «disabled» upon meeting specific requirements:
- A Nation Closed by Thunder, found around the entirety of Inazuma
- Will be lifted after completion of Transient Dreams
- The Tatarigami, unique to Yashiori Island
- Will be lifted after completion of Orobashi’s Legacy
- Amakumo Peak of Seirai Island
- Will be lifted after completion of Seirai Stormchasers: Part IV
- A Nation Closed by Thunder, found around the entirety of Inazuma
Special Weather Conditions
The following weather conditions are found in Special Environment areas.
Snowy
Snowy weather is only encountered in Subzero Climate, which currently affects only Dragonspine.
While in snowy areas, Sheer Cold will accumulate.
Snowstorm
Snowstorms are only encountered in Subzero Climate, which currently affects only Dragonspine.
The base Sheer Cold accumulation rate is 2.5× higher. Goulash also has no effect during Snowstorms; it is unknown whether this is a bug or a feature.
Fog
Fog is a temporary phenomena that reduces visibility. It appears in Golden Apple Archipelago. Sailing too far into the fog while on the Waverider will cause one to respawn at the last activated Glimmering Beacon. Once all the Teleport Waypoints are activated, the fog disappears.
Fog also appears in Tsurumi Island. Players who venture too far or for too long into the fog will be teleported away. Once the Through the Mists quest series is completed, the fog will be lifted.
Sandstorm
Sandstorms are encountered in Sandstorm in the Desert of Hadramaveth, which currently affects only the Desert of Hadramaveth.
It is a phenomena that causes intermittent sandstorms to occur which can cause visibility to be sharply reduced. The closer the player is to the heart of the sandstorm, the more significant the loss in visibility will be.
Unique Environmental Shifts

This page is in need of information.
Can you help out? Click here to add more.
many missing shifts: pyro regisvine? cryo regisvine? starglow cavern (also different?)? nameless island; tsurumi island prior to dispelling the fog; thunder sakura roots, especially prior to cleansing them in Sacred Sakura Cleansing Ritual; and more
«Unique environmental shifts» (unofficial term) refers to observable phenomena during which the environment, and usually the sky in particular, abruptly changes within a few seconds upon entering the vicinity of a certain area. These effects dispel upon reaching a certain distance from the area or by completing certain actions, although the range required to dispel the effect is typically wider than the area in which the effect is applied. (For example, the gray sky at Cuijue Slope is applied upon entering the vicinity of the Nine Pillars. However, from the Nine Pillars, one has to move further away from the area before the sky will begin returning to normal.)
Most areas with unique environmental shifts do not distinguish between daytime and nighttime. Sometimes, they will apply a Special Environment climate or will otherwise override regular weather conditions (for example, Andrius’ arena will never experience rain while the shift is in place, even if it is raining in Wolvendom). In some cases, particularly when there is no observable difference between daytime and nighttime, the moon is not visible.
Mondstadt
| Location | Appearance | Has Day/Night | Overrides Weather | Moon Visibility | Notes |
|---|---|---|---|---|---|
| Dragonspine | Snowy | ✔ | ✔ | ✘ | Considered a Special Environment (see Snowy and Snowstorm sections above). |
| Cryo Hypostasis arena | Blue haze, obscures more visibility | ✘ | ✘ | ✘ | Activates when reaching the inner half of the arena, deactivates when reaching the Seelie Court near the closest Teleport Waypoint. |
| Wolf of the North Challenge arena | Blue haze, blue particles floating in air | ✘ | ✔ | ✘ | Dispels upon defeating Andrius. |
Liyue
| Location | Appearance | Has Day/Night | Overrides Weather | Moon Visibility | Notes |
|---|---|---|---|---|---|
| Cuijue Slope | Gray, cloudy skies | ✘ | ? | ✘ | Entering the area removes the sky effect; effect returns as you approach the entrance. |
| Primo Geovishap cave | Brightness lowered, blueness in environment lowered, sky turned completely white with a bloom effect during daytime, cave entrances affected by a blue haze which slightly obscures visbility during nighttime | ✔ | ? | ✘ | |
| Rhodeia of Loch arena | Gray cloudy sky, constant rain, teal ground effect | ✘ | ✔ | ✘ | From the nearby Teleport Waypoint, activates upon reaching the water leading to the arena. Dispels upon reaching the torch past the waypoint. Also dispels after defeating Rhodeia of Loch. |
| Wuwang Hill | Hazy, with blue particles in the air | ✘ | ✔ | ? | |
| Eastern Yaoguang Shoal | Gray haze | ✔ | ✘ | ✘ | Thick fog that will appear and reappear over time. Takes effect after entering Yaoguang Shoal via the middle of the beach through the rocky underpass towards the north.[verification needed] Also dispels after reaching the rocky underpass to the north. |
Inazuma
| Location | Appearance | Has Day/Night | Overrides Weather | Moon Visibility | Notes |
|---|---|---|---|---|---|
| Chinju Forest | Blue haze and constant night. | ? | ? | ? | |
| Hakushin Lands (Base of Mt. Yougou) |
Blue haze | ? | ? | ✘ | Area is enveloped by purple haze from above, not visible while inside the area. (Need to check if sky effect is applied at a certain height, or if it applies at all altitudes.) |
| Mikage Furnace | Sky is overcast and tinted a purplish pink | ✘ | ? | ? | Covers a little more area than the area affected by Balethunder |
| Tatarasuna | Skies are blanketed by storm clouds, foggy and misty ground | ✔ | ✔ | ✘ | |
| Maguu Kenki arena on Yashiori Island | Blue haze, reduced visibility, mist effect at night | ✔ | ? | ✘ | Overrides sky appearance from Tatarigami |
| Seirai Island except Asase Shrine | Skies are very dark and overcast with a purple tint; there is a bright orange light at the south horizon | ✘ | ? | ✘ | |
| Asase Shrine at night | Skies are a medium blue similar to daytime or Chinju Forest; blue fog hinders long-range visibility (not present during the day) | N/A | ? | ✔ | |
| Thunder Manifestation arena | Extremely dark skies below the bright vortex above the area | ✘ | ✔ | ✘ | |
| Ocean around Seirai Island (close enough to see true vortex model) | Foggy; skies are a dark, solid gray | ✘ | ? | ✘ | |
| Ocean around Seirai Island (far enough to see the «from afar» vortex model) | Foggy; skies are cloudy | ✔ | ? | ✘ | |
| «Heart of Watatsumi» and Hydro Hypostasis cave | Brightness lowered | ✘ | ? | N/A |
Other
| Location | Appearance | Has Day/Night | Overrides Weather | Moon Visibility | Notes |
|---|---|---|---|---|---|
| Maguu Kenki arena, Golden Apple Archipelago | ? | ? | ✔ | ? | Dispels after defeating Maguu Kenki Same visual effects and music as Sea Fog but is technically not the climate. |
| Islands north of Broken Isle, Golden Apple Archipelago | ? | ? | ? | ? | Dispels after completing Who Wields the Wild Wind? Same visual effects and music as Sea Fog but is technically not the climate. |
Character Unique Weather
During certain characters’ abilities, the environment will have unique visual effects:
| Character | Talent | Effect Duration (Seconds) | Transition Duration (Seconds) | Notes |
|---|---|---|---|---|
 Albedo Albedo |
 Rite of Progeniture: Tectonic Tide Rite of Progeniture: Tectonic Tide |
1.12 | 0.3 | |
 Aloy Aloy |
 Prophecies of Dawn Prophecies of Dawn |
2.5 | 0.6 | |
 Arataki Itto Arataki Itto |
 Royal Descent: Behold, Itto the Evil! Royal Descent: Behold, Itto the Evil! |
1.5 (Cast) 16 (After Cast) |
0.2 | Cast effect darkens the sky and is only visible if the cutscene fails to play; After cast effect darkens the sky with a red tint. |
 Barbara Barbara |
 Shining Miracle♪ Shining Miracle♪ |
2.5 | 0.5 | |
 Beidou Beidou |
 Tidecaller Tidecaller |
1 | 0.3 | When a perfect parry is achieved, or when achieving max DMG Bonus; Effect is identical to Noelle’s Sweeping Time. |
| Beidou |
 Stormbreaker Stormbreaker |
1 | 0.4 | |
 Chongyun Chongyun |
 Spirit Blade: Cloud-Parting Star Spirit Blade: Cloud-Parting Star |
1.4 1.75 (  C2) C2) |
0.7 | |
 Cyno Cyno |
 Sacred Rite: Wolf’s Swiftness Sacred Rite: Wolf’s Swiftness |
1.5 (Cast) 20 (After Cast) |
0.3 (Cast) 0.2 (After Cast) |
|
 Diluc Diluc |
 Dawn Dawn |
2 | 1 | |
 Eula Eula |
 Glacial Illumination Glacial Illumination |
2 | 0.7 | |
 Fischl Fischl |
 Midnight Phantasmagoria Midnight Phantasmagoria |
0.35 | ||
 Ganyu Ganyu |
 Celestial Shower Celestial Shower |
2 (Cast) 20 (After Cast) |
0.5 (Cast) 0.2 (After Cast) |
Darkens the sky. |
 Gorou Gorou |
 Juuga: Forward Unto Victory Juuga: Forward Unto Victory |
1.55 | 0.3 | |
 Hu Tao Hu Tao |
 Spirit Soother Spirit Soother |
1.6 | 0.7 | Effect is identical to Tartaglia’s Havoc: Obliteration (melee). |
 Jean Jean |
 Dandelion Breeze Dandelion Breeze |
1 | 0.3 | |
 Kaedehara Kazuha Kaedehara Kazuha |
 Kazuha Slash Kazuha Slash |
1.5 | 0.3 | Effect is identical to Traveler’s Parry. |
 Kaeya Kaeya |
 Glacial Waltz Glacial Waltz |
0.5 | 0.2 | |
 Kamisato Ayaka Kamisato Ayaka |
 Kamisato Art: Soumetsu Kamisato Art: Soumetsu |
1.4 | 0.7 | |
 Kamisato Ayato Kamisato Ayato |
 Kamisato Art: Suiyuu Kamisato Art: Suiyuu |
3 (Cast) 18 (After Cast) |
0.05 (Cast) 1 (After Cast) |
Darkens the sky. |
 Keqing Keqing |
 Starward Sword Starward Sword |
4 | 0.3 | |
 Klee Klee |
 Sparks ‘n’ Splash Sparks ‘n’ Splash |
3 | 1 | |
 Kujou Sara Kujou Sara |
 Subjugation: Koukou Sendou Subjugation: Koukou Sendou |
1.2 | 0.5 | Effect is identical to Kuki Shinobu’s Gyoei Narukami Kariyama Rite |
 Kuki Shinobu Kuki Shinobu |
 Gyoei Narukami Kariyama Rite Gyoei Narukami Kariyama Rite |
2 | 0.5 | Effect is identical to Kujou Sara’s Subjugation: Koukou Sendou |
 Layla Layla |
 Dream of the Star-Stream Shaker Dream of the Star-Stream Shaker |
13 | 1 | |
 Lisa Lisa |
 Violet Arc (Hold) Violet Arc (Hold) |
5 | 1.5 | Darkens the sky to purple; Effect is identical to Razor’s Claw and Thunder (hold). |
 Mona Mona |
 Stellaris Phantasm Stellaris Phantasm |
2.5 | 0.6 | |
 Nahida Nahida |
 Illusory Heart Illusory Heart |
1.5 | 0.3 | |
 Nilou Nilou |
 Dance of Abzendegi: Distant Dreams, Listening Spring Dance of Abzendegi: Distant Dreams, Listening Spring |
2.75 | 0.3 | |
 Noelle Noelle |
 Sweeping Time Sweeping Time |
1.5 | 0.3 | Effect is identical to Beidou’s Tidecaller. |
 Qiqi Qiqi |
 Adeptus Art: Preserver of Fortune Adeptus Art: Preserver of Fortune |
4 | 1 | |
 Raiden Shogun Raiden Shogun |
 Secret Art: Musou Shinsetsu Secret Art: Musou Shinsetsu |
16 | 0.3 | |
 Razor Razor |
 Claw and Thunder (Hold) Claw and Thunder (Hold) |
Darkens the sky to purple; Effect is identical to Lisa’s Violet Arc (hold). | ||
| Razor |
 Lightning Fang Lightning Fang |
0.5 | 0.1 | |
 Sangonomiya Kokomi Sangonomiya Kokomi |
 Nereid’s Ascension Nereid’s Ascension |
1.2 (Cast) 11 (After Cast) |
0.5 (Cast) 0.3 (After Cast) |
Darkens the sky. |
 Shenhe Shenhe |
 Divine Maiden’s Deliverance Divine Maiden’s Deliverance |
1.55 | 0.3 | |
 Tartaglia Tartaglia |
 Havoc: Obliteration Havoc: Obliteration |
1.6 (Melee) 1.8 (Ranged) |
0.7 | Melee effect is identical to Hu Tao’s Spirit Soother. |
 Traveler Traveler |
 Bellowing Thunder Bellowing Thunder |
2 | 1 | |
| Traveler |
 Parry Parry |
0.5 | 0.1 | Perfect Parry against strong attacks only; Effect is identical to Kaedehara Kazuha’s Kazuha Slash. |
 Venti Venti |
 Wind’s Grand Ode Wind’s Grand Ode |
1.5 | 0.8 | |
 Xiao Xiao |
 Bane of All Evil Bane of All Evil |
1.5 (Cast) Until State Ends (After Cast) |
0.3 (Cast) | Darkens the sky. |
 Xinyan Xinyan |
 Riff Revolution Riff Revolution |
4 | 0.2 | |
 Yae Miko Yae Miko |
 Great Secret Art: Tenko Kenshin Great Secret Art: Tenko Kenshin |
2.5 | 0.5 | Only visible if cutscene fails to play. |
 Yanfei Yanfei |
 Done Deal Done Deal |
1.5 | 0.3 | |
 Yelan Yelan |
 Lingering Lifeline Lingering Lifeline |
Until State Ends | 0.3 | |
 Depth-Clarion Dice Depth-Clarion Dice |
1.5 | 0.3 | ||
 Yoimiya Yoimiya |
 Ryuukin Saxifrage Ryuukin Saxifrage |
3 | 0.3 | |
 Yun Jin Yun Jin |
 Opening Flourish (Charge Level 2) Opening Flourish (Charge Level 2) |
0.7 | 0.2 | |
 Zhongli Zhongli |
 Planet Befall Planet Befall |
4 | 0.2 |
Trivia
- As of Version 1.5, when the weather changes (excluding fog), the active character in the player’s party will immediately say their voice-over that corresponds to the new weather if it is available. This happens regardless of whether or not the weather change is due to teleporting or otherwise moving to a new area.
- The entire Dragonspine region except for Starglow Cavern is considered to have snowy weather.
- When changing the time via the Paimon Menu within an area with a unique environmental shift where daytime and nighttime cannot be distinguished, the camera will not pan to the sky. When shifting between daytime and nighttime hours, there may be a momentary change in the sky color before returning to normal.
- Like cities, realms in the Serenitea Pot always have clear skies with no weather. However, unlike cities, this is an in-universe phenomenon.[2]
Gallery

Kamisato Ayato’s Brightness Effect

Xiao’s Brightness Effect

Raiden Shogun’s Brightness Effect

Sangonomiya Kokomi’s Brightness Effect

Arataki Itto’s Brightness Effect
Change History
Version 2.2
- Reduced the camera shake caused by storms and lightning in the open world and optimizes the gaming experience when thunderstorms are in high frequency.
Version 2.0
- Characters’ «When Thunder Strikes» lines play in the open world.
Version 1.5
- Characters’ weather voice-overs play in the open world when the weather changes. Exceptions are the «When Thunder Strikes» (temporarily removed due to a bug), «When the Wind Blows,» and «When It’s Windy» (no conditions found for the latter two).
Version 1.2
- Snowy weather and snowstorms were added with the release of Dragonspine.
- Lightning strikes were added to thunderstorms.
Version 1.0
- Different Weather conditions were available since the game launched.
References
- ↑ Archon Quest, Chapter I, Act III — A New Star Approaches, Part 6: The Fond Farewell
Zhongli: Until one drizzly day, as I was strolling along the harbor […] - ↑ NPC Dialogue: Tubby/Lore
Tubby: This Realm Within has clear and sunny skies all year round. It’s not that it can’t reproduce the weather outside, I simply enjoy dozing off in the sun.
Navigation
| Exploration | |||||||||||||
|---|---|---|---|---|---|---|---|---|---|---|---|---|---|
|
|||||||||||||
|
|||||||||||||
|
|||||||||||||
|
|||||||||||||
|