| description | ms.assetid | title | author | ms.author | manager | ms.date | ms.topic |
|---|---|---|---|---|---|---|---|
|
Learn more about: Replication error 1753 There are no more endpoints available from the endpoint mapper |
0f21951c-b1bf-43bb-a329-bbb40c58c876 |
Replication error 1753 There are no more endpoints available from the endpoint mapper |
iainfoulds |
daveba |
daveba |
05/31/2017 |
article |
Replication error 1753 There are no more endpoints available from the endpoint mapper
Applies to: Windows Server 2022, Windows Server 2019, Windows Server
This article describes symptoms, cause and resolution steps for Active Directory operations that fail with Win32 error 1753: «There are no more endpoints available from the endpoint mapper.»
DCDIAG reports that the Connectivity test, Active Directory Replications test or KnowsOfRoleHolders test has failed with error 1753: «There are no more endpoints available from the endpoint mapper.»
Testing server: <site><DC Name>
Starting test: Connectivity
* Active Directory LDAP Services Check
* Active Directory RPC Services Check
[<DC Name>] DsBindWithSpnEx() failed with error 1753,
There are no more endpoints available from the endpoint mapper..
Printing RPC Extended Error Info:
Error Record 1, ProcessID is <process ID> (DcDiag)
System Time is: <date> <time>
Generating component is 2 (RPC runtime)
Status is 1753: There are no more endpoints available from the endpoint mapper. Detection location is 500
NumberOfParameters is 4
Unicode string: ncacn_ip_tcp
Unicode string: <source DC object GUID>._msdcs.contoso.com
Long val: -481213899
Long val: 65537
Error Record 2, ProcessID is 700 (DcDiag)
System Time is: <date> <time>
Generating component is 2 (RPC runtime)
Status is 1753: There are no more endpoints available from the endpoint mapper.
NumberOfParameters is 1
Unicode string: 1025
[Replications Check,<DC Name>] A recent replication attempt failed:
From <source DC> to <destination DC>
Naming Context: <DN path of directory partition>
The replication generated an error (1753):
There are no more endpoints available from the endpoint mapper.
The failure occurred at <date> <time>.
The last success occurred at <date> <time>.
3 failures have occurred since the last success.
The directory on <DC name> is in the process.
of starting up or shutting down, and is not available.
Verify machine is not hung during boot.
REPADMIN.EXE reports that replication attempt has failed with status 1753.
REPADMIN commands that commonly cite the 1753 status include but are not limited to:
- REPADMIN /REPLSUM
- REPADMIN /SHOWREPL
- REPADMIN /SHOWREPS
- REPADMIN /SYNCALL
Sample output from «REPADMIN /SHOWREPS» depicting inbound replication from CONTOSO-DC2 to CONTOSO-DC1 failing with the «replication access was denied» error is shown below:
Default-First-Site-NameCONTOSO-DC1
DSA Options: IS_GC
Site Options: (none)
DSA object GUID: b6dc8589-7e00-4a5d-b688-045aef63ec01
DSA invocationID: b6dc8589-7e00-4a5d-b688-045aef63ec01
==== INBOUND NEIGHBORS ======================================
DC=contoso,DC=com
Default-First-Site-NameCONTOSO-DC2 via RPC
DSA object GUID: 74fbe06c-932c-46b5-831b-af9e31f496b2
Last attempt @ <date> <time> failed, result 1753 (0x6d9):
There are no more endpoints available from the endpoint mapper.
<#> consecutive failure(s).
Last success @ <date> <time>.
The Check Replication Topology command in Active Directory Sites and Services returns «There are no more endpoints available from the endpoint mapper.»
Right-clicking on the connection object from a source DC and choosing Check Replication Topology fails with «There are no more endpoints available from the endpoint mapper.» The on-screen error message is shown below:
Dialog title text: Check Replication Topology
Dialog message text:
The following error occurred during the attempt to contact the domain controller: There are no more endpoints available from the endpoint mapper.
The Replicate now command in Active Directory Sites and Services returns «there are no more endpoints available from the endpoint mapper.»
Right-clicking on the connection object from a source DC and choosing Replicate now fails with «There are no more endpoints available from the endpoint mapper.»
The on-screen error message is shown below:
Dialog title text: Replicate Now
Dialog message text: The following error occurred during the attempt to synchronize naming context <%directory partition name%> from Domain Controller <Source DC> to Domain Controller <Destination DC>:
There are no more endpoints available from the endpoint mapper.
The operation will not continue
NTDS KCC, NTDS General or Microsoft-Windows-ActiveDirectory_DomainService events with the -2146893022 status are logged in the Directory Services log in Event Viewer.
Active Directory events that commonly cite the -2146893022 status include but are not limited to:
| Event ID | Event Source | Event String |
|---|---|---|
| 1655 | NTDS General | Active Directory attempted to communicate with the following global catalog and the attempts were unsuccessful. |
| 1925 | NTDS KCC | The attempt to establish a replication link for the following writable directory partition failed. |
| 1265 | NTDS KCC | An attempt by the Knowledge Consistency Checker (KCC) to add a replication agreement for the following directory partition and source domain controller failed. |
Cause
The steps below shows the RPC workflow starting with the registration of the server application with the RPC Endpoint Mapper (EPM) in step 1 to the passing of data from the RPC client to the client application in step 7.
ADDS RPC Workflow
- Server app registers its endpoints with the RPC Endpoint Mapper (EPM)
- Client makes an RPC call (on behalf of a user, OS or application initiated operation)
- Client side RPC contacts the target computers EPM and ask for the endpoint to complete the client call
- Server Machine’s EPM responds with an endpoint
- Client side RPC contacts the server app
- Server app executes the call, returns the result to the client RPC
- Client side RPC passes the result back to the client app
Failure 1753 is generated by a failure between steps #3 and #4. Specifically, error 1753 means that the RPC client (destination DC) was able to contact the RPC Server (source DC) over port 135 but the EPM on the RPC Server (source DC) was unable to locate the RPC application of interest and returned server side error 1753. The presence of the 1753 error indicates that the RPC client (destination DC) received the server side error response from the RPC Server (AD replication source DC) over the network.
Specific root causes for the 1753 error include:
- The server app never started (i.e. Step #1 in the «more information» diagram located above was never attempted).
- The server app started but there was some failure during initialization that prevented it from registering with the RPC Endpoint Mapper (i.e. Step #1 in the «more information» diagram above was attempted but failed).
- The server app started but subsequently died. (i.e. Step #1 in the «more information» diagram above was completed successfully, but was undone later because the server died).
- The server app manually unregistered its endpoints (similar to 3 but intentional. Not likely but included for completeness.)
- The RPC client (destination DC) contacted a different RPC server than the intended one due to a Name to IP mapping error in DNS, WINS or host/Lmhosts file.
Error 1753 is NOT caused by:
- A lack of network connectivity between the RPC client (destination DC) and RPC Server (source DC) over port 135
- A lack of network connectivity between the RPC server (source DC) using port 135 and the RPC client (destination DC) over the ephemeral port.
- A password mismatch or the inability by the source DC to decrypt a Kerberos encrypted packet
Resolutions
Verify that the service registering its service with the endpoint mapper has started
- For Windows 2000 and Windows Server 2003 DCs: Ensure that the source DC is booted into normal mode.
- For Windows Server 2008 or Windows Server 2008 R2: From the console of the source DC, start Services Manager (services.msc) and verify that the Active Directory Domain Services service is running.
Verify that RPC client (destination DC) connected to the intended RPC Server (source DC)
All DCs in a common Active Directory forest register a domain controller CNAME record in the _msdcs. <forest root domain> DNS zone regardless of what domain they reside in within the forest. The DC CNAME record is derived from the objectGUID attribute of the NTDS Settings object for each domain controller.
When performing replication-based operations, a destination DC queries DNS for the source DCs CNAME record. The CNAME record contains the source DC fully qualified computer name which is used to derive the source DCs IP address via DNS client cache lookup, Host / LMHost file lookup, host A / AAAA record in DNS, or WINS.
Stale NTDS Settings objects and bad name-to-IP mappings in DNS, WINS, Host and LMHOST files may cause the RPC client (destination DC) to connect to the wrong RPC Server (Source DC). Furthermore, the bad name-to-IP mapping may cause the RPC client (destination DC) to connect to a computer that does not even have the RPC Server Application of interest (the Active Directory role in this case) installed. (Example: a stale host record for DC2 contains the IP address of DC3 or a member computer).
Verify that the objectGUID for the source DC that exists in the destination DCs copy of Active Directory matches the source DC objectGUID stored in the source DCs copy of Active Directory. If there is a discrepancy, use repadmin /showobjmeta on the ntds settings object to see which one corresponds to last promotion of the source DC (hint: compare date stamps for the NTDS Settings object create date from /showobjmeta against the last promotion date in the source DCs dcpromo.log file. You may have to use the last modify / create date of the DCPROMO.LOG file itself). If the object GUIDs are not identical, the destination DC likely has a stale NTDS Settings object for the source DC whose CNAME record refers to a host record with a bad name to IP mapping.
On the destination DC, run IPCONFIG /ALL to determine which DNS Servers the destination DC is using for name resolution:
On the destination DC, run NSLOOKUP against the source DCs fully qualified DC CNAME record:
c:>nslookup -type=cname <fully qualified cname of source DC> <destination DCs primary DNS Server IP >
c:>nslookup -type=cname <fully qualified cname of source DC> <destination DCs secondary DNS Server IP>
Verify that the IP address returned by NSLOOKUP «owns» the host name / security identity of the source DC:
C:>NBTSTAT -A <IP address returned by NSLOOKUP in the step above>
Log onto the console of the source DC, run «IPCONFIG» from the CMD prompt and verify that the source DC owns the IP address returned by the NSLOOKUP command above
Check for stale / duplicate host to IP mappings in DNS
NSLOOKUP -type=hostname <single label hostname of source DC> <primary DNS Server IP on destination DC>
NSLOOKUP -type=hostname <single label hostname of source DC> <secondary DNS Server IP on destination DC>

NSLOOKUP -type=hostname <fully qualified computer name of source DC> <primary DNS Server IP on destination DC>
NSLOOKUP -type=hostname <fully qualified computer name of source DC> <secondary DNS Server IP on dest. DC>
If invalid IP addresses exist in host records, investigate whether DNS scavenging is enabled and properly configured.
If the tests above or a network trace doesn’t show a name query returning an invalid IP address, consider stale entries in HOST files, LMHOSTS files and WINS Servers. Note that DNS Servers can also be configured to perform WINS fallback name resolution.
- Verify that the server application (Active Directory et al) has registered with the endpoint mapper on the RPC server (source DC)
- Active Directory uses a mix of well-known and dynamically registered ports. This table lists well known ports and protocols used by Active Directory domain controllers.
| RPC Server Application | Port | TCP | UDP |
|---|---|---|---|
| DNS server | 53 | X | X |
| Kerberos | 88 | X | X |
| LDAP server | 389 | X | X |
| Microsoft-DS | 445 | X | X |
| LDAP SSL | 636 | X | X |
| Global Catalog Server | 3268 | X | |
| Global Catalog Server | 3269 | X |
Well-known ports are NOT registered with the endpoint mapper.
Active Directory and other applications also register services that receive dynamically assigned ports in the RPC ephemeral port range. Such RPC server applications are dynamically assigned TCP ports between 1024 and 5000 on Windows 2000 and Windows Server 2003 computers and ports between 49152 and 65535 range on Windows Server 2008 and Windows Server 2008 R2 computers. The RPC port used by replication can be hard-coded in the registry using the steps documented in KB article 224196. Active Directory continues to register with the EPM when configured to use a hard coded port.
Verify that the RPC Server application of interest has registered itself with the RPC endpoint mapper on the RPC Server (the source DC in the case of AD replication).
There are a number of ways to accomplish this task but one is to install and run PORTQRY from an admin privileged CMD prompt on the console of the source DC using the syntax:
portquery -n <source DC> -e 135 > file.txt
In the portqry output, note the port numbers dynamically registered by the «MS NT Directory DRS Interface» (UUID = 351…) for the ncacn_ip_tcp protocol. The snippet below shows sample portquery output from a Windows Server 2008 R2 DC:
UUID: e3514235-4b06-11d1-ab04-00c04fc2dcd2 MS NT Directory DRS Interface
ncacn_np:CONTOSO-DC01[pipelsass]
UUID: e3514235-4b06-11d1-ab04-00c04fc2dcd2 MS NT Directory DRS Interface
ncacn_np:CONTOSO-DC01[PIPEprotected_storage]
UUID: e3514235-4b06-11d1-ab04-00c04fc2dcd2 MS NT Directory DRS Interface
ncacn_ip_tcp:CONTOSO-DC01[49156]
UUID: e3514235-4b06-11d1-ab04-00c04fc2dcd2 MS NT Directory DRS Interface
ncacn_http:CONTOSO-DC01[49157]
UUID: e3514235-4b06-11d1-ab04-00c04fc2dcd2 MS NT Directory DRS Interface
ncacn_http:CONTOSO-DC01[6004]
Other possible ways to resolve this error:
-
Verify that the source DC is booted in normal mode and that the OS and DC role on the source DC have fully started.
-
Verify that the Active Directory Domain Service is running. If the service is currently stopped or was not configured with default startup values, reset the default startup values, reboot the modified DC then retry the operation.
-
Verify that the startup value and service status for RPC service and RPC Locator is correct for OS version of the RPC Client (destination DC) and RPC Server (source DC). If the service is currently stopped or was not configured with default startup values, reset the default startup values, reboot the modified DC then retry the operation.
-
In addition, ensure that the service context matches default settings listed in the following table.
Service Default status (Startup type) in Windows Server 2003 and later Default status (Startup type) in Windows Server 2000 Remote Procedure Call Started (Automatic) Started (Automatic) Remote Procedure Call Locator Null or Stopped (Manual) Started (Automatic)
-
-
Verify that the size of the dynamic port range has not been constrained. The Windows Server 2008 and Windows Server 2008 R2 NETSH syntax to enumerate the RPC port range is shown below:
netsh int ipv4 show dynamicport tcp netsh int ipv4 show dynamicport udp netsh int ipv6 show dynamicport tcp netsh int ipv6 show dynamicport udp -
Verify that hard coded port definitions defined in KB 224196 fall within the dynamic port range for source DCs OS version. Review KB article 224196 and ensure that the hard coded port falls within the ephemeral port range for the source DC’s operating system version.
-
Verify that the ClientProtocols key exists under HKLMSoftwareMicrosoftRpc and contains the following 5 default values:
ncacn_http REG_SZ rpcrt4.dll
ncacn_ip_tcp REG_SZ rpcrt4.dll
ncacn_nb_tcp REG_SZ rpcrt4.dll
ncacn_np REG_SZ rpcrt4.dll
ncacn_ip_udp REG_SZ rpcrt4.dll
More information
Example of a bad name to IP mapping causing RPC error 1753 vs. -2146893022: the target principal name is incorrect
The contoso.com domain consists of DC1 and DC2 with IP addresses x.x.1.1 and x.x.1.2. The host «A» / «AAAA» records for DC2 are correctly registered on all of the DNS Servers configured for DC1. In addition, the HOSTS file on DC1 contains an entry mapping DC2s fully qualified hostname to IP address x.x.1.2. Later, DC2’s IP address changes from X.X.1.2 to X.X.1.3 and a new member computer is joined to the domain with IP address x.x.1.2. AD Replication attempts triggered by the Replicate now command in Active Directory Sites and Services snap-in fails with error 1753 as shown in the trace below:
F# SRC    DEST    Operation
1 x.x.1.1 x.x.1.2 ARP:Request, x.x.1.1 asks for x.x.1.2
2 x.x.1.2 x.x.1.1 ARP:Response, x.x.1.2 at 00-13-72-28-C8-5E
3 x.x.1.1 x.x.1.2 TCP:Flags=......S., SrcPort=50206, DstPort=DCE endpoint resolution(135)
4 x.x.1.2 x.x.1.1 ARP:Request, x.x.1.2 asks for x.x.1.1
5 x.x.1.1 x.x.1.2 ARP:Response, x.x.1.1 at 00-15-5D-42-2E-00
6 x.x.1.2 x.x.1.1 TCP:Flags=...A..S., SrcPort=DCE endpoint resolution(135)
7 x.x.1.1 x.x.1.2 TCP:Flags=...A...., SrcPort=50206, DstPort=DCE endpoint resolution(135)
8 x.x.1.1 x.x.1.2 MSRPC:c/o Bind: UUID{E1AF8308-5D1F-11C9-91A4-08002B14A0FA} EPT(EPMP)
9 x.x.1.2 x.x.1.1 MSRPC:c/o Bind Ack: Call=0x2 Assoc Grp=0x5E68 Xmit=0x16D0 Recv=0x16D0
10 x.x.1.1 x.x.1.2 EPM:Request: ept_map: NDR, DRSR(DRSR) {E3514235-4B06-11D1-AB04-00C04FC2DCD2} [DCE endpoint resolution(135)]
11 x.x.1.2 x.x.1.1 EPM:Response: ept_map: 0x16C9A0D6 - EP_S_NOT_REGISTERED
At frame 10, the destination DC queries the source DCs end point mapper over port 135 for the Active Directory replication service class UUID E351…
In frame 11, the source DC, in this case a member computer that does not yet host the DC role and therefore has not registered the E351… UUID for the Replication service with its local EPM responds with symbolic error EP_S_NOT_REGISTERED which maps to decimal error 1753, hex error 0x6d9 and friendly error «there are no more endpoints available from the endpoint mapper».
Later, the member computer with IP address x.x.1.2 gets promoted as a replica «MayberryDC» in the contoso.com domain. Again, the Replicate now command is used to trigger replication but this time fails with the on-screen error «The target principal name is incorrect.» The computer whose network adapter is assigned the IP address x.x.1.2 is a domain controller, is currently booted into normal mode and has registered the E351… replication service UUID with its local EPM but it does not own the name or security identity of DC2 and cannot decrypt the Kerberos request from DC1 so the request now fails with error «The target principal name is incorrect.» The error maps to decimal error -2146893022 / hex error 0x80090322.
Such invalid host-to-IP mappings could be caused by stale entries in host / lmhost files, host A / AAAA registrations in DNS, or WINS.
Summary: This example failed because an invalid host-to-IP mapping (in the HOST file in this case) caused the destination DC to resolve to a «source» DC that did not have the Active Directory Domain Services service running (or even installed for that matter) so the replication SPN was not yet registered and the source DC returned error 1753. In the second case, an invalid host-to-IP mapping (again in the HOST file) caused the destination DC to connect to a DC that had registered the E351… replication SPN but that source had a different hostname and security identity than the intended source DC so the attempts failed with error -2146893022: The target principal name is incorrect.
Related Topics
- Troubleshooting Active Directory operations that fail with error 1753: There are no more endpoints available from the endpoint mapper.
- KB article 839880 Troubleshooting RPC Endpoint Mapper errors using the Windows Server 2003 Support Tools from the product CD
- KB article 832017 Service overview and network port requirements for the Windows Server system
- KB article 224196 Restricting Active Directory replication traffic and client RPC traffic to a specific port
- KB article 154596 How to configure RPC dynamic port allocation to work with firewalls
- How RPC Works
- How the Server Prepares for a Connection
- How the Client Establishes a Connection
- Registering the Interface
- Making the Server Available on the Network
- Registering Endpoints
- Listening for Client Calls
- How the Client Establishes a Connection
- Restricting Active Directory replication traffic and client RPC traffic to a specific port
- SPN for a Target DC in AD DS
- Remove From My Forums
-
Question
-
Hello Everyone,
I am having an issue with my primary domain controller. The issue i am having is that the secondary domain controller is not replicating to the primary domain controller. There is an error when forcing replication that the server displays stating that there
are no more endpoints available from the endpoint mapper. My primary domain controller is also my federation server that syncs with Azure for directory sync with office 365. I have run through all troubleshooting steps listed on every site i can find with
RPC 1753 errors. And all i can find is a way to verify that i am having the error which i am most certainly having. But nowhere has an answer as to how to fix the issue with the endpoint mapper. I cant seem to find a solution as to how to fix the RPC error.
I have verified that the RPC service is running and set to automatic and the the endpoint mapper is also working correctly running and automatic. All the changes have been made to the secondary server and are not appearing on the primary server. Both of them
are GC’s so I am not having any issue with logging in or connecting to the servers. But any time a change is made to an account or computer is added to the domain. It only shows up on the secondary domain controller. DNS is working correctly and the port 135
is listening on the problem server so it does not appear to be a firewall issue as the firewalls are turned of on the servers while i am troubleshooting this. So it is not a firewall error or port error. Both services are running so it is not a stopped service.
I can not change any of the options for the rpc services though which i don’t know if that is correct or not. I am really looking for a solution and not another way to figure out if i am having the problem because as you can see I am having the problem but
have no solution. Please let me know what logs i can send or info i can supply to help resolve this issue. I could of course erase everything and start over from scratch but i really really don’t want to do that because of all the specific installations and
files i have on the server along with accounts and password of my company. If that is the only solution then so be it but i want to try everything possible before reimaging. Please let me know what further information you may need or anything i can try to
correct this error. Thank you very much in advanced for all your help!
Содержание
- Replication error 1753 There are no more endpoints available from the endpoint mapper
- Cause
- ADDS RPC Workflow
- Resolutions
- More information
Replication error 1753 There are no more endpoints available from the endpoint mapper
Applies to: Windows Server 2022, Windows Server 2019, Windows Server
This article describes symptoms, cause and resolution steps for Active Directory operations that fail with Win32 error 1753: «There are no more endpoints available from the endpoint mapper.»
DCDIAG reports that the Connectivity test, Active Directory Replications test or KnowsOfRoleHolders test has failed with error 1753: «There are no more endpoints available from the endpoint mapper.»
REPADMIN.EXE reports that replication attempt has failed with status 1753. REPADMIN commands that commonly cite the 1753 status include but are not limited to:
- REPADMIN /REPLSUM
- REPADMIN /SHOWREPL
- REPADMIN /SHOWREPS
- REPADMIN /SYNCALL
Sample output from «REPADMIN /SHOWREPS» depicting inbound replication from CONTOSO-DC2 to CONTOSO-DC1 failing with the «replication access was denied» error is shown below:
The Check Replication Topology command in Active Directory Sites and Services returns «There are no more endpoints available from the endpoint mapper.»
Right-clicking on the connection object from a source DC and choosing Check Replication Topology fails with «There are no more endpoints available from the endpoint mapper.» The on-screen error message is shown below:
Dialog title text: Check Replication Topology Dialog message text: The following error occurred during the attempt to contact the domain controller: There are no more endpoints available from the endpoint mapper.
The Replicate now command in Active Directory Sites and Services returns «there are no more endpoints available from the endpoint mapper.» Right-clicking on the connection object from a source DC and choosing Replicate now fails with «There are no more endpoints available from the endpoint mapper.» The on-screen error message is shown below:
Dialog title text: Replicate Now Dialog message text: The following error occurred during the attempt to synchronize naming context from Domain Controller to Domain Controller :
There are no more endpoints available from the endpoint mapper. The operation will not continue
NTDS KCC, NTDS General or Microsoft-Windows-ActiveDirectory_DomainService events with the -2146893022 status are logged in the Directory Services log in Event Viewer.
Active Directory events that commonly cite the -2146893022 status include but are not limited to:
| Event ID | Event Source | Event String |
|---|---|---|
| 1655 | NTDS General | Active Directory attempted to communicate with the following global catalog and the attempts were unsuccessful. |
| 1925 | NTDS KCC | The attempt to establish a replication link for the following writable directory partition failed. |
| 1265 | NTDS KCC | An attempt by the Knowledge Consistency Checker (KCC) to add a replication agreement for the following directory partition and source domain controller failed. |
Cause
The steps below shows the RPC workflow starting with the registration of the server application with the RPC Endpoint Mapper (EPM) in step 1 to the passing of data from the RPC client to the client application in step 7.
ADDS RPC Workflow
- Server app registers its endpoints with the RPC Endpoint Mapper (EPM)
- Client makes an RPC call (on behalf of a user, OS or application initiated operation)
- Client side RPC contacts the target computers EPM and ask for the endpoint to complete the client call
- Server Machine’s EPM responds with an endpoint
- Client side RPC contacts the server app
- Server app executes the call, returns the result to the client RPC
- Client side RPC passes the result back to the client app
Failure 1753 is generated by a failure between steps #3 and #4. Specifically, error 1753 means that the RPC client (destination DC) was able to contact the RPC Server (source DC) over port 135 but the EPM on the RPC Server (source DC) was unable to locate the RPC application of interest and returned server side error 1753. The presence of the 1753 error indicates that the RPC client (destination DC) received the server side error response from the RPC Server (AD replication source DC) over the network.
Specific root causes for the 1753 error include:
- The server app never started (i.e. Step #1 in the «more information» diagram located above was never attempted).
- The server app started but there was some failure during initialization that prevented it from registering with the RPC Endpoint Mapper (i.e. Step #1 in the «more information» diagram above was attempted but failed).
- The server app started but subsequently died. (i.e. Step #1 in the «more information» diagram above was completed successfully, but was undone later because the server died).
- The server app manually unregistered its endpoints (similar to 3 but intentional. Not likely but included for completeness.)
- The RPC client (destination DC) contacted a different RPC server than the intended one due to a Name to IP mapping error in DNS, WINS or host/Lmhosts file.
Error 1753 is NOT caused by:
- A lack of network connectivity between the RPC client (destination DC) and RPC Server (source DC) over port 135
- A lack of network connectivity between the RPC server (source DC) using port 135 and the RPC client (destination DC) over the ephemeral port.
- A password mismatch or the inability by the source DC to decrypt a Kerberos encrypted packet
Resolutions
Verify that the service registering its service with the endpoint mapper has started
- For Windows 2000 and Windows Server 2003 DCs: Ensure that the source DC is booted into normal mode.
- For Windows Server 2008 or Windows Server 2008 R2: From the console of the source DC, start Services Manager (services.msc) and verify that the Active Directory Domain Services service is running.
Verify that RPC client (destination DC) connected to the intended RPC Server (source DC)
All DCs in a common Active Directory forest register a domain controller CNAME record in the _msdcs. DNS zone regardless of what domain they reside in within the forest. The DC CNAME record is derived from the objectGUID attribute of the NTDS Settings object for each domain controller.
When performing replication-based operations, a destination DC queries DNS for the source DCs CNAME record. The CNAME record contains the source DC fully qualified computer name which is used to derive the source DCs IP address via DNS client cache lookup, Host / LMHost file lookup, host A / AAAA record in DNS, or WINS.
Stale NTDS Settings objects and bad name-to-IP mappings in DNS, WINS, Host and LMHOST files may cause the RPC client (destination DC) to connect to the wrong RPC Server (Source DC). Furthermore, the bad name-to-IP mapping may cause the RPC client (destination DC) to connect to a computer that does not even have the RPC Server Application of interest (the Active Directory role in this case) installed. (Example: a stale host record for DC2 contains the IP address of DC3 or a member computer).
Verify that the objectGUID for the source DC that exists in the destination DCs copy of Active Directory matches the source DC objectGUID stored in the source DCs copy of Active Directory. If there is a discrepancy, use repadmin /showobjmeta on the ntds settings object to see which one corresponds to last promotion of the source DC (hint: compare date stamps for the NTDS Settings object create date from /showobjmeta against the last promotion date in the source DCs dcpromo.log file. You may have to use the last modify / create date of the DCPROMO.LOG file itself). If the object GUIDs are not identical, the destination DC likely has a stale NTDS Settings object for the source DC whose CNAME record refers to a host record with a bad name to IP mapping.
On the destination DC, run IPCONFIG /ALL to determine which DNS Servers the destination DC is using for name resolution:
On the destination DC, run NSLOOKUP against the source DCs fully qualified DC CNAME record:
Verify that the IP address returned by NSLOOKUP «owns» the host name / security identity of the source DC:
Log onto the console of the source DC, run «IPCONFIG» from the CMD prompt and verify that the source DC owns the IP address returned by the NSLOOKUP command above
Check for stale / duplicate host to IP mappings in DNS
If invalid IP addresses exist in host records, investigate whether DNS scavenging is enabled and properly configured.
If the tests above or a network trace doesn’t show a name query returning an invalid IP address, consider stale entries in HOST files, LMHOSTS files and WINS Servers. Note that DNS Servers can also be configured to perform WINS fallback name resolution.
- Verify that the server application (Active Directory et al) has registered with the endpoint mapper on the RPC server (source DC)
- Active Directory uses a mix of well-known and dynamically registered ports. This table lists well known ports and protocols used by Active Directory domain controllers.
| RPC Server Application | Port | TCP | UDP |
|---|---|---|---|
| DNS server | 53 | X | X |
| Kerberos | 88 | X | X |
| LDAP server | 389 | X | X |
| Microsoft-DS | 445 | X | X |
| LDAP SSL | 636 | X | X |
| Global Catalog Server | 3268 | X | |
| Global Catalog Server | 3269 | X |
Well-known ports are NOT registered with the endpoint mapper.
Active Directory and other applications also register services that receive dynamically assigned ports in the RPC ephemeral port range. Such RPC server applications are dynamically assigned TCP ports between 1024 and 5000 on Windows 2000 and Windows Server 2003 computers and ports between 49152 and 65535 range on Windows Server 2008 and Windows Server 2008 R2 computers. The RPC port used by replication can be hard-coded in the registry using the steps documented in KB article 224196. Active Directory continues to register with the EPM when configured to use a hard coded port.
Verify that the RPC Server application of interest has registered itself with the RPC endpoint mapper on the RPC Server (the source DC in the case of AD replication).
There are a number of ways to accomplish this task but one is to install and run PORTQRY from an admin privileged CMD prompt on the console of the source DC using the syntax:
In the portqry output, note the port numbers dynamically registered by the «MS NT Directory DRS Interface» (UUID = 351. ) for the ncacn_ip_tcp protocol. The snippet below shows sample portquery output from a Windows Server 2008 R2 DC:
Other possible ways to resolve this error:
Verify that the source DC is booted in normal mode and that the OS and DC role on the source DC have fully started.
Verify that the Active Directory Domain Service is running. If the service is currently stopped or was not configured with default startup values, reset the default startup values, reboot the modified DC then retry the operation.
Verify that the startup value and service status for RPC service and RPC Locator is correct for OS version of the RPC Client (destination DC) and RPC Server (source DC). If the service is currently stopped or was not configured with default startup values, reset the default startup values, reboot the modified DC then retry the operation.
In addition, ensure that the service context matches default settings listed in the following table.
| Service | Default status (Startup type) in Windows Server 2003 and later | Default status (Startup type) in Windows Server 2000 |
|---|---|---|
| Remote Procedure Call | Started (Automatic) | Started (Automatic) |
| Remote Procedure Call Locator | Null or Stopped (Manual) | Started (Automatic) |
Verify that the size of the dynamic port range has not been constrained. The Windows Server 2008 and Windows Server 2008 R2 NETSH syntax to enumerate the RPC port range is shown below:
Verify that hard coded port definitions defined in KB 224196 fall within the dynamic port range for source DCs OS version. Review KB article 224196 and ensure that the hard coded port falls within the ephemeral port range for the source DC’s operating system version.
Verify that the ClientProtocols key exists under HKLMSoftwareMicrosoftRpc and contains the following 5 default values:
More information
Example of a bad name to IP mapping causing RPC error 1753 vs. -2146893022: the target principal name is incorrect
The contoso.com domain consists of DC1 and DC2 with IP addresses x.x.1.1 and x.x.1.2. The host «A» / «AAAA» records for DC2 are correctly registered on all of the DNS Servers configured for DC1. In addition, the HOSTS file on DC1 contains an entry mapping DC2s fully qualified hostname to IP address x.x.1.2. Later, DC2’s IP address changes from X.X.1.2 to X.X.1.3 and a new member computer is joined to the domain with IP address x.x.1.2. AD Replication attempts triggered by the Replicate now command in Active Directory Sites and Services snap-in fails with error 1753 as shown in the trace below:
At frame 10, the destination DC queries the source DCs end point mapper over port 135 for the Active Directory replication service class UUID E351.
In frame 11, the source DC, in this case a member computer that does not yet host the DC role and therefore has not registered the E351. UUID for the Replication service with its local EPM responds with symbolic error EP_S_NOT_REGISTERED which maps to decimal error 1753, hex error 0x6d9 and friendly error «there are no more endpoints available from the endpoint mapper».
Later, the member computer with IP address x.x.1.2 gets promoted as a replica «MayberryDC» in the contoso.com domain. Again, the Replicate now command is used to trigger replication but this time fails with the on-screen error «The target principal name is incorrect.» The computer whose network adapter is assigned the IP address x.x.1.2 is a domain controller, is currently booted into normal mode and has registered the E351. replication service UUID with its local EPM but it does not own the name or security identity of DC2 and cannot decrypt the Kerberos request from DC1 so the request now fails with error «The target principal name is incorrect.» The error maps to decimal error -2146893022 / hex error 0x80090322.
Such invalid host-to-IP mappings could be caused by stale entries in host / lmhost files, host A / AAAA registrations in DNS, or WINS.
Summary: This example failed because an invalid host-to-IP mapping (in the HOST file in this case) caused the destination DC to resolve to a «source» DC that did not have the Active Directory Domain Services service running (or even installed for that matter) so the replication SPN was not yet registered and the source DC returned error 1753. In the second case, an invalid host-to-IP mapping (again in the HOST file) caused the destination DC to connect to a DC that had registered the E351. replication SPN but that source had a different hostname and security identity than the intended source DC so the attempts failed with error -2146893022: The target principal name is incorrect.
Источник

Fix There are no more endpoints available from the endpoint mapper: If you’re facing this error then this means either you are trying to install a printer or you’re sharing your drive within your network. Generally ‘No More Endpoints Available’ error occur when you try to join a domain but the Windows services are corrupted and therefore, conflicting with other services which won’t let you join that particular domain and ultimately causing the error. Anyway, this error is very annoying and that’s why troubleshooter is here to fix this error via the following troubleshooting steps.
When attempting to join a client to an Active Directory domain, you may receive the following error:
The following error occurred attempting to join the domain <domain>:
There are no more endpoints available from the endpoint mapper.
Error 1753: There are no more endpoints available from the endpoint mapper.

Contents
- There are no more endpoints available from the endpoint mapper [SOLVED]
- Method 1: Delete the Internet key to remove RPC restriction
- Method 3: Temporary Disable Antivirus and Firewall
- Method 4: Run Print Troubleshooter
- Method 5: Change advanced sharing settings
- Method 6: Registry fix for Sharing error
- Method 7: Run System File Checker (SFC) and Check Disk (CHKDSK)
- Method 8: Run DISM (Deployment Image Servicing and Management)
Make sure to create a restore point just in case something goes wrong.
Method 1: Delete the Internet key to remove RPC restriction
1.Press Windows Key + R then type regedit and hit Enter to open Registry Editor.

2.Navigate to the following registry key:
ComputerHKEY_LOCAL_MACHINESoftwareMicrosoftRpcInternet
3.Right-click on the Internet key and select Delete.

4.Reboot your PC to save changes.
Method 2: Verify that Remote Procedure Call (RPC) Services are Started
1.Press Windows Key + R then type services.msc and hit Enter.

2.Locate the following services:
Remote Procedure Call
Remote Procedure Call Locator
ByProcessManager
If you are trouble adding a printer then make sure following services are also running:
Print Spooler
DCOM Server Process Launcher
RPC Endpoint Mapper
3.Right-click and select Properties for above services.

4.Next, make sure the Startup type is Automatic and the services are running.

5.If the above services are stopped make sure to Run them from properties window.
6.Reboot your PC to save changes and the error “There are no more endpoints available from the endpoint mapper” may be resolved.
Method 3: Temporary Disable Antivirus and Firewall
Sometimes the Antivirus program can cause “There are no more endpoints available from the endpoint mapper” and in order to verify this is not the case here, you need to disable your antivirus for a limited time so that you can check if the error still appears when the antivirus is off.
1.Right-click on the Antivirus Program icon from the system tray and select Disable.

2.Next, select the time frame for which the Antivirus will remain disabled.

Note: Choose the smallest amount of time possible for example 15 minutes or 30 minutes.
3.Once done, again try to connect to the WiFi network and check if the error resolves or not.
4.Press Windows Key + I then select Control Panel.

5.Next, click on System and Security.
6.Then click on Windows Firewall.

7.Now from the left window pane click on Turn Windows Firewall on or off.

8.Select Turn off Windows Firewall and restart your PC. Again try to connect to the WiFi network and see if the issue is resolved or not.
If the above method doesn’t work make sure to follow the exact same steps to turn on your Firewall again.
Method 4: Run Print Troubleshooter
1.Type “troubleshooting” in Windows Search bar and click on Troubleshooting.
2.Next, from the left window pane select View all.
3.Then from the Troubleshoot computer problems list select Printer.
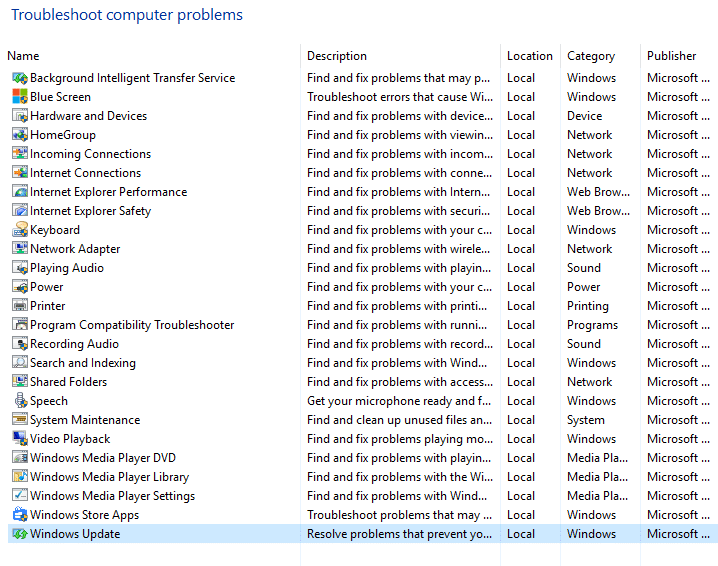
4.Follow on-screen instruction and let the Printer Troubleshooter run.
5.Restart your PC and the error “There are no more endpoints available from the endpoint mapper” may be resolved.
Method 5: Change advanced sharing settings
1.Right-click on Wireless icon on system tray and click on Open Network and Sharing Center.

2.Click on Change advanced sharing settings in the left-hand window.

3.Enable the Network discovery, File and printer sharing and Public folder.

4.Click Save changes and close everything. Reboot your PC to save changes.
Method 6: Registry fix for Sharing error
1.Download MpsSvc.reg and BFE.reg files. Double-click on them to run and to add these files to the registry.
2.Reboot your PC to save changes.
3.Press Windows Key + R then type regedit and hit Enter to open Registry Editor.
4.Next, navigate to the following registry key:
ComputerHKEY_LOCAL_MACHINESYSTEMCurrentControlSetServicesBFE
5.Right-click the BFE key and select Permissions.

6.In the next window that opens, click the Add button.

7.Type “Everyone” (without quotes) under the field Enter the object names to select and then click on Check Names.

8.Now once the name is verified click OK.
9.Everyone should be now added to the Group or user names section.
10.Make sure to select Everyone from the list and check mark Full Control option in Allow column.

11.Click Apply followed by OK.
12.Press Windows Key + R then type services.msc and hit Enter.
13.Find the below services and right-click on them then select Properties:
Filtering Engine
Windows Firewall
14.Enable them both in the Properties window (click on Start) and make sure their Startup type is set to Automatic.

15.That’s it you may have Fix There are no more endpoints available from the endpoint mapper but if not then run SFC and CHKDSK in the next step.
Method 7: Run System File Checker (SFC) and Check Disk (CHKDSK)
1.Press Windows Key + X then click on Command Prompt(Admin).

2.Now type the following in the cmd and hit enter:
Sfc /scannow
sfc /scannow /offbootdir=c: /offwindir=c:windows

3.Wait for the above process to finish and once done restart your PC.
4.Next, run CHKDSK from here Fix File System Errors with Check Disk Utility(CHKDSK).
5.Let the above process complete and again reboot your PC to save changes.
Method 8: Run DISM (Deployment Image Servicing and Management)
1.Press Windows Key + X then select Command Prompt(Admin).

2.Enter the following command in cmd and hit enter:
Important: When you DISM you need to have Windows Installation Media ready.
DISM.exe /Online /Cleanup-Image /RestoreHealth /Source:C:RepairSourceWindows /LimitAccess
Note: Replace the C:RepairSourceWindows with the location of your repair source

2.Press enter to run the above command and wait for the process to complete, usually, it takes 15-20 minutes.
NOTE: If the above command doesn't work then try on the below:
Dism /Image:C:offline /Cleanup-Image /RestoreHealth /Source:c:testmountwindows
Dism /Online /Cleanup-Image /RestoreHealth /Source:c:testmountwindows /LimitAccess
3.After the DISM process if complete, type the following in the cmd and hit Enter: sfc /scannow
4.Let System File Checker run and once it’s complete, restart your PC. Check if the Windows 10 Slow Shutdown problem is resolved or not.
Recommended for you:
- Fix Program links and icons open Word Document
- How to Fix Internet Explorer 11 Not Responding
- Fix The file is too large for the destination file system
- How to change Auto-save time in Word
That’s it you have successfully Fix There are no more endpoints available from the endpoint mapper but if you still have any queries regarding this post feel free to ask them in the comment’s section.
When you see Error 1753: no more endpoints in AD Replication, the common mistake is to think about firewall or TCP/IP connectivity issues. The message “Error 1753: There are no more endpoints available from the endpoint mapper” does not mean that you cannot connect at all.
It is quite the opposite: it means that in fact the RPC client could connect to the RPC server using the TCP port 135. But that the RPC server replied with an error. The RPC server is basically telling the client that it could not find an endpoint for the specific service the client requested.
By the “service”, we must understand the (authenticated server,service) pair. It means that we must check that the client is talking to the correct server it thinks it has contacted and that the service exists on that server.
For Active Directory Service, checking that the server is really the one it claims to be means:
- the GUID, IP and the names in the various DNS records for _msdcs.forest.local are OK. Typically you may encounter issues if you have changed IP addresses before or after promotion and the information has not replicated yet. It can also happen if you swapped Domain Controller IP Addresses, or if you reinstalled a Domain Controller from scratch (Like installing a newer OS version)
- On the DC where you have the 1753 errors, you may want to check:
|
nslookup —type=cname <name of source DC you are not replicating with> <DNS Server Used by the DC you are on> |
To check that the service is running, check that
- Active Directory Domain Services is running
- you have something which listens on port 135/tcp
- To know if the service has registered its RPC UUID is more complex, the simplest way to do it is to use portqry and query for the Endpoint Mapper by using:
portqry —n <targetIP> —e 135
- Juniper has a list of the most common UUID you can compare with. The one you’re interested in is MS NT Directory DRS interface
Error 1753 — What is it?
Error 1753 is an RPC endpoint mapper error code. This code is typically displayed as «EPT_S_NOT_REGISTERED» or sometimes as the hexadecimal value 0x6D9. Error 1735 indicates that there are no more endpoints available from the endpoint mapper.
To understand this better, basically, RPC is an inter-process communication (IPC) method.
This is used by clients and servers for communication purposes. RPC is used by programs to execute programs on a server computer. The perfect example of this is Microsoft Outlook. You communicate with Microsoft Exchange Server using RPC.
This enables you to send and receive emails. When you use Microsoft Outlook to send emails, your computer sends a message to the server computer in an obscure coding.
The server responds to your computer with another message that contains the results of the executed program. This is all being carried at the backend of the running program.
Integral to this is the endpoint. The endpoint includes the name, port, or a group of ports on a computer that is monitored by the server for incoming client requests. This is a network-specific address to be precise.
The endpoint mapper is the part of the RPC subsystem that is responsible for dynamically assigning endpoints to the server. When this function fails it leads to error 1753 message display. It shows that RPC service is not available.
Solution
 Error Causes
 Error Causes
The error code 1753 indicating RPC endpoint mapper service failure is triggered due to multiple reasons. These include:
- Windows registry damage and corruption
- Malfunctioning of the hardware
- Spyware intrusion or viral infections
- Device driver conflicts
Further Information and Manual Repair
This error code may cause a great deal of inconvenience to execute programs that are dependent on the server. It can lower your productivity and performance. To avoid the hassle, it is advisable to repair the error 1753 immediately.
The best way to resolve this error 1753 in seconds is to download Restoro. By using this repair tool, you can fix the error right away for free without paying hundreds of dollars to a professional expert.
Restoro is a new and innovative PC fixer integrated with an automated algorithm and intuitive technology that enables users to sit back and relax while Restoro runs on the system and detects all PC-related issues in the shortest time.
In just a few clicks you can resolve even the mightiest PC issues like the error code 1753 RPC endpoint mapper problem and resume back to the program in no time.
Why Restoro
It is efficient and user-friendly. Restoro can be used by users of all levels so even if this is your first experience using a repair tool, you don’t have to worry. To operate it, you don’t have to be a computer programmer or have sound technical expertise.
It is simple and very easy to use. The layout is simple and neat complimented nicely with easy navigation and a sophisticated user interface.
Restoro is a high and multi-functional error tool embedded with powerful, performance-driven, and value-adding utilities, all in one.
So, whether the error code 1753 is triggered due to a viral infection on your system or registry corruption, you don’t have to look for different tools to resolve the error, simply run Restoro to fix the issue right away.
Restoro includes a dynamic registry cleaner that detects all registry issues and wipes out the clutter from the hard disk like junk files, internet history, and invalid entries which is by the way the number cause for registry corruption leading to error 1753.
It clears up disk space and RAM and repairs the misconfigured system files and corrupt registry in seconds thus resolving error 1753.
Restoro also functions as a system optimizer thus boosting the speed and performance of your PC massively and reducing boot time.
In addition to this, it also has a backup feature. This tool is embedded for safety purposes. This feature enables you to create backup files on your PC before you start system repair. This helps you recover data in the event of data loss during system repair.
To get started:
- Click here to download and install Restoro on your system
- After installation, run it to scan for errors like 1753
- Now press the repair tab to resolve
Advanced System Repair Pro
One-click automated PC repair solution
![]()
With Advanced System Repair Pro you can easily
DOWNLOAD
Advanced System Repair Pro is compatible with all versions of Microsoft Windows including Windows 11
Share this article:
You might also like
Error Code 0xc004f050 – What is it?
Error code 0xc004f050 refers to a problem with activating the Windows key. The problem appears when you try to activate a copy of Windows by using Windows Activation wizard. This happens when the system becomes unstable and critical system files start missing. Though Windows 10 is a free upgrade for Windows 7/Windows 8/Windows 8.1 users, the activation error is still an issue. If you already had Windows 7/Windows 8/Windows 8.1 activated and did an upgrade successfully, then there should be no problem. This Problem Occurs only when you do a clean install.
Symptoms
When you try to activate a copy of Windows Vista or Windows 7 by using the Windows Activation wizard, you receive an error similar to the one below:
An error has occurred
Code:
0xC004F050Description:
The Software Licensing Service reported that the product key is invalid
Solution
Error Causes
- This causes due to an invalid product key.
- This problem may occur if the license validity interval has expired, or if the license is not signed correctly.
- Error Code 0xc004f050 occurs when the system becomes unstable and critical system files start missing.
- Improper way of installing, deletion of some very important system files, misconfigured system files, etc. may also cause this error.
- When you do a clean install, it wipes everything from the Primary Drive and after the install, windows can’t find the Hardware ID which is used to verify your license.
- For Windows 7, Windows Server 2008, and Windows Vista-based computers, this error may occur if you have entered the key for a beta version of the operating system while using the released version of the operating system.
Further Information and Manual Repair
This error is not something that can be fixed in seconds but will require some time and technical knowledge.
Method 1:
Re-insert the product key by using the Change Product Key tool:
- Click Start, click Computer, and then click System properties on the toolbar.
- In the Windows activation section, click Change product key.
- If you are prompted for an administrator password, type the password or click Continue.
- In the Product key box, type the product key, and then click Next.
- Follow the steps in the Windows Activation Wizard to complete the activation process.
Method 2:
Activate Windows by using the automated telephone system:
- Click Start, and then click Computer.
- Click System properties on the toolbar, and then click Click here to activate Windows now in the Windows activation
- If you are prompted for an administrative password, type it and click Continue.
- Click Show me other ways to Activate.
- Click Use the automated phone system and follow the instructions.
Method 3:
- Clean install Windows 7/Windows 8/Windows 8.1 using the installation disk and activate your copy.
- Now, download all the updates to see the Windows 10 Upgrade notification or download Windows Media Creation Tool and use the option Upgrade this PC to get Windows 10 right away.
- Once the upgrade is done, check the Activation Status. It will be fully activated as it should be. The Error code 0xc004f050 should not appear anymore.
If you want to get rid of the old Windows installation folder, then use the Windows Media Creation Tool to create a Flash Drive. Clean Install Windows 10. Now, every time when it asks for a product key, skip it. After installation is complete, Windows will automatically identify and activate your Copy.
NOTE: Clean Install will make Sure you cannot roll back to your previous Windows 7 or Windows 8. So do it only if you are confident of using Windows 10 from here on.
To verify the Windows activation status, follow these steps:
- Click the Start button, and then click Computer.
- Click System properties on the toolbar, and then view the activation status in the Windows activation section.
Read More
If you are trying to run Windows Upgrade on your Windows 10 computer but suddenly interrupted by the error 0x800F081E – 0x20003, worry not for this post will guide you on how you can fix this Windows Upgrade error.
This particular Windows Upgrade error is a Windows status code for CBS_E_NOT_APPLICABLE which indicates that some of the update requirements are missing or the files that are installed are already of a higher version compared to the ones that are still pending. In most cases, this error occurs when you try to upgrade to earlier versions of the Windows 10 N edition to a later version.
Here’s the full content of the error message:
“0x800f081E-0x20003, The installation failed in the SECOND_BOOT phase with an error during BOOT operation”
In case you don’t know, Microsoft distributes special “N” editions of Windows in Europe and the “KN” editions in Korea. These editions are the same as the standard editions of Windows except that they do not have the Windows Media Player as well as the multimedia playback features. Thus, when the Windows Upgrade fails with the error code and error message and it doesn’t provide much information as to why the update couldn’t be installed, there is something you can do about it to fix the error. Since Windows uses generic error codes and so if you see the error code 0x800f081e, you have to check the error log first. For more details, follow the instructions laid out below.
Step_1: You need to navigate to C:$WINDOWS.~BTSourcesPanther and from there look for the text file named “setuperr.log” and open it with a text viewer/editor program like Notepad.
Step_2: After opening the setuperr.log file, you should see content that’s similar to this:
C:WINDOWSSoftwareDistributionDownload80b2677d6e15a2a206625bb25a7124feamd64_Microsoft-Windows-MediaPlayer-Package~~AMD64~~10.0.17134.1. Error: 0x800F081E
2019-09-10 20:26:57, Error SP Operation failed: Add [1] package C:WINDOWSSoftwareDistributionDownload80b2677d6e15a2a206625bb25a7124feamd64_Microsoft-Windows-MediaPlayer-Package~~AMD64~~10.0.17134.1. Error: 0x800F081E[gle=0x000000b7]
Note: From the content above, it is clear that the Windows Upgrade failed due to complete due to the Windows Media Player. It could be that the log file may contain other error messages and other error codes and if you see the error code 0x800f081e from the list, then you need to uninstall the Media Feature Pack.
Step_3: You have to uninstall the Media Feature Pack.
- Tap the Win + R keys to launch the Run dialog box and type “optionalfeatures.exe” in the field and hit Enter to open the Windows Features wizard.
- Next, you need to wait until the list of Windows Features populates and then click on the + sign to collapse the folder of the Media Features.
- After that, uncheck the “Windows Media Player” option from the Media Features folder.
- Now click on the Yes and OK buttons to save the changes made and then close the Windows Features dialog box.
- Restart your computer and boot, try to run the Windows Upgrade process again, and check if the error is fixed or not.
Note: If the installation has been successfully completed, you have to go back to the Windows Features and enable the Windows Media Player again. And if you are using the Windows 10 N Edition, then you can just download and install the latest version of the Media Feature Pack for your Windows 10 N edition. On the other hand, running the built-in Windows Update troubleshooter could also help you resolve any Windows Update-related problems, including the error 0x800F081E – 0x20003. To run it, go to Settings and then select Troubleshoot from the options. From there, click on Windows Update and then click the “Run the troubleshooter” button.
Read More
Error Fmod.dll — What is it?
This is a type of DLL error code. DLL is the abbreviation of Dynamic Link Library. DLL files contain small programs which are similar to executable files. One DLL file may be used to load and run several programs.
Fmod.dll is created by Electronic Arts Inc. and associated with Crysis. This file is developed for the Windows OS. This error code occurs when you are unable to access, run and load programs supported by Crysis on your PC.
Fmod.dll error code message is displayed in different formats such as:
- «Fmod_event.dll not found.»
- «The file fmod_event.dll is missing.»
- «This application failed to start because fmod_event.dll was not found. Re-installing the application may fix this problem.»
- «Cannot start Crysis. A required component is missing: fmod_event.dll. Please install Crysis again.»
- «Fmod_event.dll Access Violation.»
- «Cannot register fmod_event.dll.»
- «Cannot find C:WindowsSystem32fmod_event.dll.»
Error Fmod.dll may pop up when you start-up or shut down the PC or even during the installation of a program.
Solution
Error Causes
Narrowing down to one cause for Fmod.dll error code is impossible virtually because this error may result due to different reasons on your system. Some of the common causes associated with this error code are:
- Viral Infection
- Hardware failure
- Missing, Corrupt, or Deleted Fmod.dll file
- Improper program installation
- Registry issues
No matter what the underlying cause of the reason may be, it is recommended to resolve the issue immediately to avoid serious PC threats.
Further Information and Manual Repair
To resolve this error on your system, try the methods discussed below:
Method 1 — Check the Recycle Bin
As mentioned above, Fmod.dll is a DLL file that is used to run and load a variety of programs on your system. There is a possibility that you uninstalled a program that was supported by the Fmod.dll file and accidentally deleted it.
In such a scenario, the easiest way to resolve the Fmod.dll error code is to re-install the deleted file from the recycle bin. For this, go to the recycle bin and search for the file. If you find it reinstall if you can’t then simply download the Fmod.dll file from a reliable website.
Method 2 — Scan for Malware
Malware usually enters through phishing emails and downloads. These malicious programs then hide in your system disguising as either DLL or EXE files.
The occurrence of fmod.dll file error may be due to malicious programs hiding in your system. Therefore scan your entire PC with a powerful anti-virus. An antivirus detects and removes all malicious software programs such as viruses, malware, Trojans, spyware, and adware.
Try this, to resolve error code Fmod.dll and see the results.
Method 3 — Fix Hardware Problems
Fmod.dll file error may also pop on your screen due to hardware failure. If this is the reason, then we advise you to use the Device Manager an in-built tool in Windows 7 and 8 to fix hardware failures.
For this go to the start menu then control panel. Now click on the ‘hardware and sound link’ and then click on the Device Manager. If you find any devices in red exclamation point, then this means this device is problematic.
Uninstall the driver for that hardware device and then update the driver. Install the latest version to resolve. Remember, hardware problems are mostly related to outdated drivers.
Method 4 — Restore Points
Use System Restore, an in-built utility also known as the recovery tool, to restore points and ensure your PC is back to its previous working condition before the error code occurred.
Simply put, it helps undo recent changes. You can find the System Restore tool in the System Tools folder.
Method 5 — Clean and Repair the Registry
The registry is that part of your PC that stores all the information, activities performed, and files including the junk files, invalid keys, bad entries, and cookies.
When these files accumulate on your PC, they take up all the registry space and corrupt the important system and DLL files also stored in the registry, thereby generating such errors. Now you can clean the registry manually.
But this process can be time-consuming and slightly technical, hence we advise you to download Restoro. This is a PC Fixer integrated with a registry cleaner.
It is easy to use deployed with an intuitive interface. The registry cleaner scans the entire PC and removes all registry errors. It wipes out all the obsolete files and repairs the damaged DLL and system files.
Click here to download Restoro.
Read More
Gaming on the computer has become one of the most used past-time activities among people of all ages. And since we are still in pandemic it has only risen as activity. People can acquire a lot of games at various discounts on various platforms and enjoy them at the leisure of their home.
Among many game platforms and stores, Electronic art’s Origin is one of the bigger ones, and having some titles that could not be found anywhere else coupled with the ability to have access to almost the whole game catalog with one monthly subscription make it one of the most used clients.
Sadly as with every piece of software Origin’s client is not perfect by any means and it can behave strangely from time to time.
Hello everyone and welcome to errortools.com, today we will fix Origin error code 10 which oddly enough can appear out of nowhere and can even appear on the very end of installation for the chosen game. If you have managed to come by this error you are in luck to be here because we have a couple of fixes for it.
I know that you might be excited to play the game so let’s go and do some fixing
Check Server status
Before diving into technicality and before we start deleting files and fixing things you should check the Server status. This seems maybe like something you should not do but if the server has experienced some kind of downtime or it is in maintenance Origin will throw this error in the client. Unexpected situations can cause various server issues all of a sudden and the first thing is to check are servers online and working. There are various ways to check server status from official origin website to Electronic arts twitter channel to Reddit and many more online server status websites. If it turns out that the server is to be blamed for this error then sit back and wait for EA to resolve the issue, there is not much you can do anyway.
Delete OriginThinSetupInternal.exe
- After some research, it has come to light that originthinsetupinternal.exe can cause this specific error. The best solution is to delete the file and then run Origin as administrator so the file is remade new.
- First, make sure that Origin is fully closed, check the taskbar and if it lurks there right-click on it and click on quit
- Run file explorer and go into the folder where Origin is installed, by default it is C:Program Files (x86)Origin
- Locate OriginThinSetupInternal.exe and delete it
- Then locate origin.exe and right-click on it and then click on Run as administrator
Reinstall Origin client
If the previous solution has not solved the issue then Origin might have some corrupted files inside it. It is known that the Origin client can produce some bad files if the installation has been forcefully canceled. The best thing is to reinstall the completely whole client.
- Press ⊞ WINDOWS + R to open the run dialog
- Inside run dialog type in Control panel and press ENTER
- In the control panel locate programs and features group and double click on it
- Locate Origin, click to select it, and on top click on uninstall
- After uninstall process is completed start file explorer and go to the folder where Origin was installed, by default it is C:Program Files (x86). Locate the Origin folder and delete it.
- Go to the official origin website and download the new client installation.
- After the download is finished double click on it and follow onscreen instructions.
Disable antivirus
If every solution so far has not been able to remove error then obviously something else is interfering with the origin client and installation functioning. Altho not advisable, turn OFF your security suite including both firewall and antivirus and try installing the game again. There is the possibility that the origin client or some game file has been marked as false positive by security software thus preventing it from executing properly.
Read More
In today’s modern world many households have internet access, most of the connection nowadays is done via Wi-Fi or wireless but there is a high probability that you have also a few devices connected via cable. There are of course many disadvantages and advantages between cable connection and wireless connection.

The main advantages of a hard cable connection are of course faster speed and stability compared to Wi-Fi. But if we look into the cables themselves there is also a big difference between them. Not all cables are the same and quality as well as speed vary a lot between them. Choosing the right cable is essential in order to make a maximum of your internet and we have some great tips and explanations of what cables do so you can make the right choice and enjoy your full internet potential.
Not all cables are the same
Cheap cables and expensive ones are not the same no matter what everyone tells you. The old proverb you get what you pay is true and more expensive cables will be made from better materials and will have a higher transfer rate.
Quality network cables are separated into different categories with proper markings and when buying one you should always look for these markings on the cables themselves, do not buy cables that do not have markings since they will often provide lower transfer rates or will not be shielded from outside influences resulting in packet drops and instability in a network.
Categories and what they mean are:
- Cat-5 with a maximum speed of 100Mbps, typically unshielded.
- Cat-5e with a maximum speed of 1Gbps, available in both shielded and unshielded varieties.
- Cat-6 with a maximum speed of 10Gbps for runs under 55 meters (around 180ft), available in both shielded and unshielded varieties.
- Cat-6a with a maximum speed of 10Gbps, shielded.
- Cat-7 uses a proprietary GG45 connector rather than the standard RJ-45 connector seen on other cables for speeds of 10Gbps, shielded.
- Cat-8 with a maximum speed of 25Gbps (Cat-8.1) or 40Gbps (Cat-8.2) at a distance of around 30 meters (around 100ft), shielded.
Unless stated, these standards are typically rated at their quoted speeds for a run of around 100 meters (around 330 ft) and use a standard RJ-45 Ethernet connector. Each generation of cable is designed to be compatible with the generations that came before it, so it’s possible (for example) to use a Cat-6a cable with a router that only supports speeds of 1Gbps.
Shielded cables
When purchasing higher quality cable you might not be able to choose if you have shielding or not since some standards like Cat-6a, Cat-7, and Cat-8 are always shielded. But if you do not have the need for these and you are satisfied with Cat-5e for example you can choose.
Shielded cables are a little more expensive but they will provide you with a coating that will eliminate interference from outside waves making cables more reliable. Of course, if the cable will go through a room that does not have many radio waves or some other interferences then buying a shielded cable is a waste of money.
Cable platings
Usually, there are two types of connector platings on connectors, silver, and gold, and people usually think that gold is much better but there are major differences between silver and gold platings and truth to be told there is no better one, both are different and should be considered depending on your need.
Silver plating will provide you with faster speed since its conductivity is larger than gold, but gold is slower on the oxidation front so its life span is longer. On the other hand, if your cables are always connecting and disconnecting gold will be first to be scrubbed off from the surface since the gold coating is much thinner.
Overall if you would only connect cable once and have slower internet than cable capacity gold is the way to go, in another case if you would use the cable as always connecting and switching and your internet plan is the same as cable transfer capacity you might want to go with silver one.
Cable material quality
Network cables are made from copper, your standard conduction material but even here there are differences in quality and therefore the chance of pocket losses over it. More quality less loss and more stable connection and this will depend on the purity of copper that is used in the cable itself. More purity in copper, more stability, simple as that.
Conclusion
So as you can see, there are a lot of different things that will influence your pick of proper network cable but the overall best advice is to get one that will fit well into your needs and setup. pair it up with your router and your internet plan since just simply buying something that you can not use is really a waste of money.
Read More
In 2014 Proton mail started as an end-to-end encrypted email service offering secure and private email services. Proton mail is still live and going with the same dedication to privacy and security but the company has expanded its offering into cloud storage drive services.
Starting as a public beta at the end of 2020, Proton Drive is keeping its privacy and security policy philosophy with the new service. Proton Drive is the newest service besides Proton Calendar, Proton VPN, and Proton Mail.

Drive has end-to-end encryption for everything on it including files themselves, filenames, folder structure, folder names, extensions, and file sizes. This means that you and only you can access your files. Servers are located in Geneva, Switzerland and they are under Swiss privacy laws making sure that your files are protected. Proton services in general are all open source so anyone can take a look at them to be sure that nothing is lurking under the hood. For now, sync is done either via the android app or web interface but the desktop client will come soon since currently, it is under development.
Sadly free plan of Proton Drive will give you only 1GB of storage which is much less than other services and sadly payments plans are also not so jaw-dropping going for $4 USD per month for a 200GB plan or with Proton ultimate subscription that will set you $10 behind but you will get 500GB of drive storage. Of course, if you value privacy for your files these options are good but if you do not mind that part other services have much better options.
All in all Proton Drive is a great cloud storage solution if you need privacy and well worth the investment. With the ultimate subscription, you will get enough space for most people and company needs with other services and guaranteed privacy and security, on the other hand, if you just need a large amount of cloud storage not caring too much about privacy other options are better.
Read More
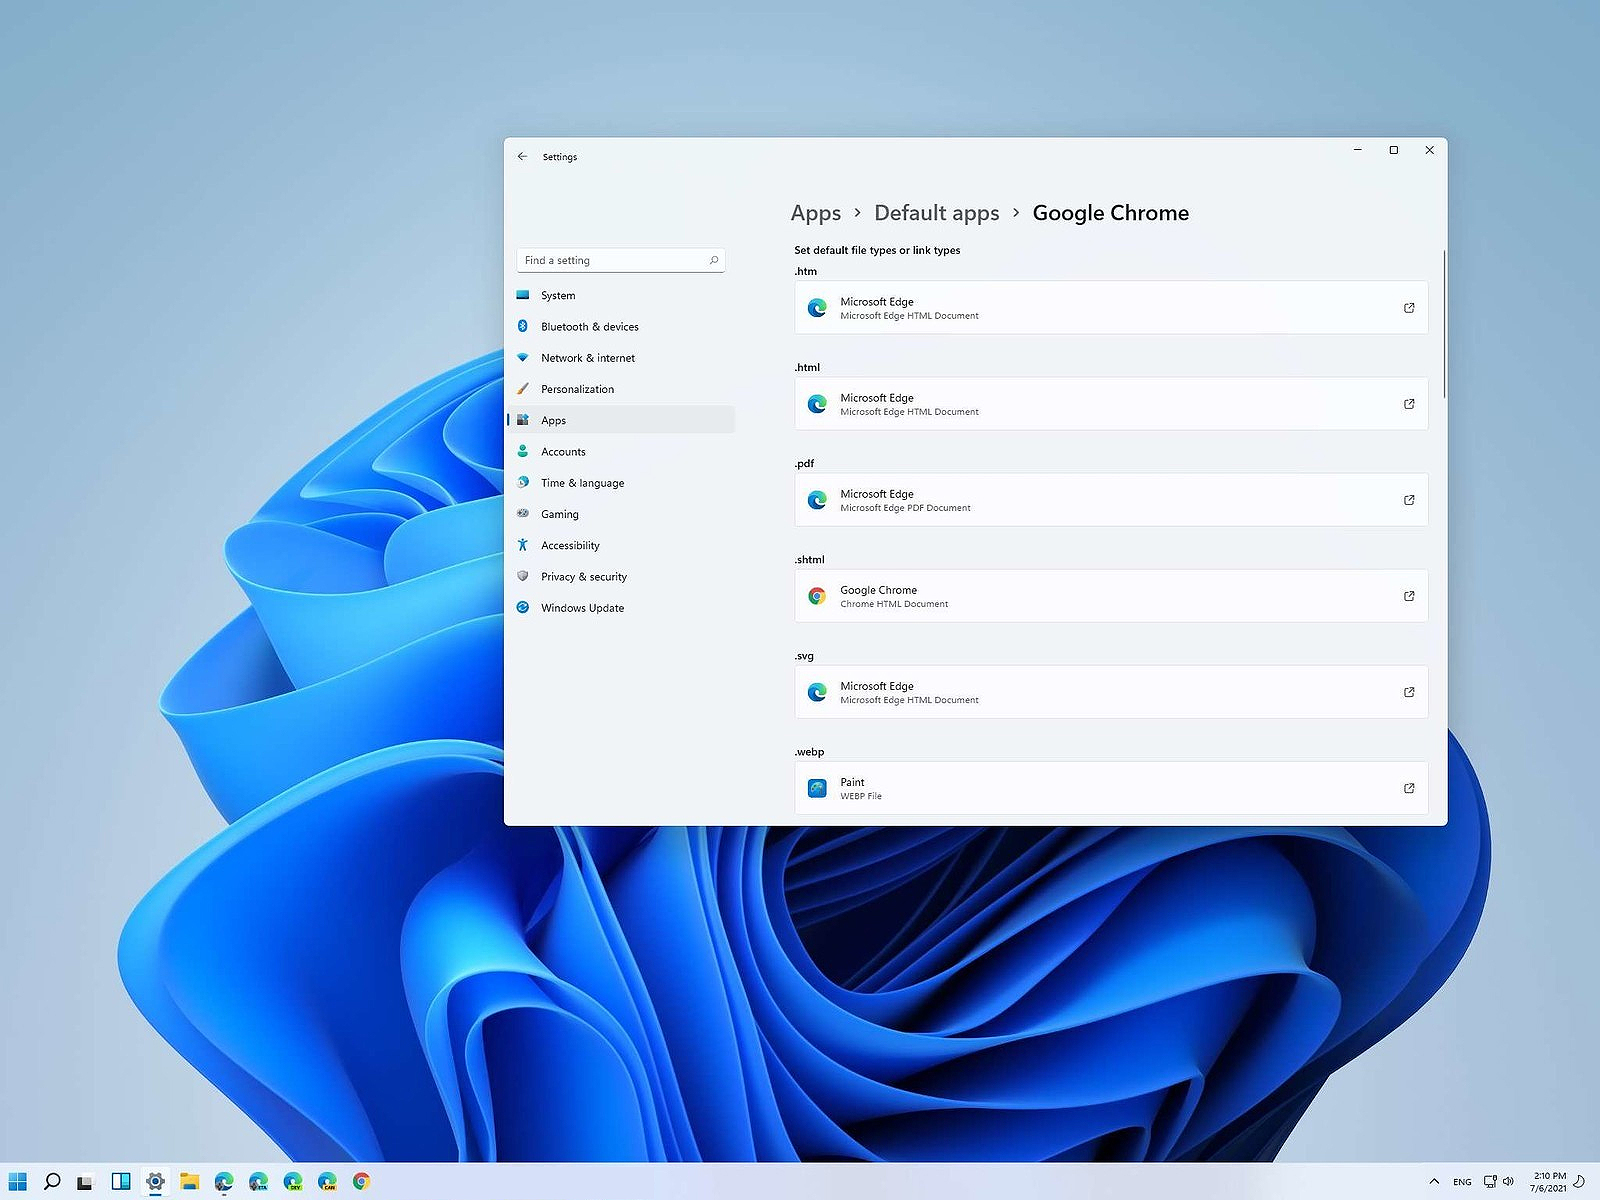 Same as in previous Windows versions, Windows 11 will also use certain applications as default ones for opening certain file types and file extensions. And yes, same as in previous versions it will come preconfigured for certain file types and associated applications like for example photos for pictures.
Of course, users usually have their own favorite applications for certain file types and much more prefer to open them inside the application of their choice instead of the default one.
We can change the default application like in previous Windows versions but this time there are two ways and overall more control of this process. Windows 11 has settings for choosing default file type applications and default file extension applications giving you more control of this process.
The opening setting for apps
Whatever you wish to change default application or default extension application you will need to open settings for default application. Follow steps to quickly go into it.
- Press ⊞ WINDOWS + I to open settings
- Select Apps on left
- On the right part select Default Apps
Now you are in settings for choosing default applications
Choosing default application by file type extension
This is considering by Microsoft as a typical way to set default applications inside Windows 11. Once you are inside the settings app there is a box labeled Enter a file type or link type. Inside the search box, type in file extension that you wish to associate the application with like .JPG, .TXT, or other.
If the file extension is not associated with any application you will be presented with a Choose a Default button, if however, the file extension is already associated with the app, you will need to click on the app box itself.
In any case, a pop-up will appear and ask How do you want to open YOUR FILE EXTENSION files from now on? Choose Application from the list of presented ones and click on OK.
Choosing default file type
Another method is to select the default application by file type selecting application for it. In the settings screen, under the search box, you will have a list of installed applications. Choose the application that you would like to associate a file type with and click on it. On the next details screen scroll down and select the file type that you want to associate with the selected application and click on OK.
Other/third method
There is also the third method for choosing the default application for file type but it includes some surfing on your hard drive and it can be more time-consuming for first-time settings. But it is fairly quick when you need to only use it once on some new file type (for example you have a new application installed and want to switch just one file type extension to that application).
Locate the file that you want to associate with the application and right-click on it. Select Open With from the menu and then Choose Another App. Pop up will appear, select the application that you would like to use, and check the box beside Always use this app to open CHOOSEN EXTENSION files followed by clicking on the OK button.
Read More
Error Code 8024402C – What is it?
When upgrading to Microsoft Windows 10, some users may encounter Error Code 8024402C. This error, while attempting to update, is a result of five possible issues. The error code itself is not a critical concern, yet while the error is occurring, users will not be able to upgrade their Windows software. As with any Microsoft error code, even if it is not critical, it is recommended that the error be addressed sooner rather than later. An insignificant error now could lead to a larger, more catastrophic error later on.
Common symptoms include:
- A dialog box appears with the Error Code 8024402C when attempting to upgrade to Microsoft Windows 10.
- Your current version of Windows is unable to recognize the need for an update to Microsoft Windows 10.
Solution
Error Causes
As previously stated, there are five major reasons why error code 8024402C occurs.
- An erroneous character in the proxy override settings
- A wrongly configured firewall is preventing the update from taking place.
- Attempting to access the Windows 10 update through a VPN (Virtual Private Network) connection.
- Workstations that operate behind a corporate ISA server.
- A corporate network system that does not have auto proxy enabled.
The sooner these known causes are addressed, the sooner you will be able to successfully upgrade to Microsoft Windows 10.
Further Information and Manual Repair
Microsoft Support posits four different resolutions to these known error code 8024402C issues. Some of these methods will be more comfortable for at-home users than others. If you are experiencing this issue in a corporate or business setting, it may be better to have your IT tech or department attempt the methods.
Method 1: When your firewall is causing the issue.
- Access your firewall software.
- Specifically, look into the settings associated with your firewall.
- Make sure that the following three websites are listed as exceptions to your firewall or proxy.
- https://*.windowsupdate.microsoft.com
- http://download.windowsupdate.com
- http://*.windowsupdate.microsoft.com
- If any of these websites are missing from your firewall list, add them to the list.
- Restart your Microsoft Windows 10 update.
Method 2: For an erroneous character in the proxy override settings.
- Open internet explorer, if you use another program to access the internet, you will still need to use internet explorer for this solution.
- Open your internet explorer tools window.
- Click on internet options.
- Choose the connections tab.
- Select LAN settings.
- Choose the Advanced option.
- Delete anything that appears in the exceptions section.
- Closeout of internet explorer.
- Click on your start button.
- Select RUN and type CMD into the field, press ENTER.
- This will access the command prompt screen. Type “proxycfg -d” and press ENTER.
- Type the command “net stop wuauserv” and press ENTER.
- Finally, type “net start wuauserv” and press ENTER.
- Now you have cleared your proxy cache. Access the Microsoft Windows 10 update again to download.
Method 3: If a VPN connection is causing error code 8024402C.
- Disconnect from your VPN connection, thus connecting directly to the internet without a proxy or network.
- Retry the Microsoft Windows 10 update.
- After the update is successful, reconnect to the VPN network.
Method 4: Use this is an ISA server is in place at your networked business site.
- Access the ISA firewall client option. From here your goal is to initiate the ISA server automatic detection feature.
- From the control panel, select the firewall client option.
- Choose the configure option.
- Check the box next to “automatically detect firewall server”.
- Select the “update now” button.
- Click the OK button.
- Restart your Microsoft Windows 10 update.
Again, not all of these methods are meant for computer users who do not usually explore and change software settings of this nature. If you do not feel comfortable with any of these methods, you can opt to download and install a powerful automated tool to repair Windows error code 8024402C.
Read More
There are instances when instead of fixing problems the Windows Update brings you problems on your Windows 10 computer. You might even see some pending Windows Updates which for some reason, refuse to install no matter what you do. The good thing is you won’t have to deal with those failed and pending updates that are incompletely downloaded to your PC as you can actually delete them.
Follow the instructions prepared below to delete the failed and pending Windows Updates.
Step 1: The first thing you have to do is delete all the contents in the Temporary folder
- Tap the Win + R keys to open the Run dialog box.
- Next, type in “%temp%” in the field and hit Enter or click OK to open the Temporary folder.
- From there, select all the folders and files within the Temporary folder and then delete them all.
Note: %temp% is one of the many environment variables in Windows that could open the designated folder by Windows as the Temporary folder which is usually located at C:Users[username]AppDataLocalTemp.
Step 2: Next, remove the pending.xml file
- Go to the C:Windows WinSxS folder.
- Once you’ve opened the folder, look for a file named “pending.xml” file and right-click on it and you can either rename it or delete it.
- After that, the Windows Update should delete the pending tasks and build a fresh new update.
Step 3: Delete all the contents of the SoftwareDistribution folder
The Software Distribution folder in the Windows operating system is a folder that can be found in the Windows directory and is used to store files temporarily which might be required to install the Windows Update on your PC. Thus, it is required by the Windows Update and maintained by WUAgent. Aside from that, it also contains all the Windows Update History files and once you delete them, you will most likely lose the Update history. As a result, the next time you run the Windows Update, it may result in a longer detection time.
- Open the WinX Menu.
- From there, open Command Prompt as admin.
- Then type in the following command – don’t forget to hit Enter right after typing each one of them.
net stop wuauserv
net stop bits
- After entering these commands, it will stop the Windows Update Service and the Background Intelligent Transfer Service.
- Next, got to the C:WindowsSoftwareDistribution folder and get rid of all the folders and files thereby tapping the Ctrl + A keys to select them all and then click on Delete. Note that if the files are in use, you won’t be able to delete them.
- Once all the contents in the Software Distribution folder are deleted, restart your PC and then go back to Command Prompt and input the following commands again.
net start wuauserv
net start bits
Since the folder has already been flushed, it will be populated afresh the instant your restart your computer and open Windows Update.
Step 4: Try resetting the catroot2 folder
You can also try resetting the catroort2 folder as it is known to fix tons of Windows Update issues. Both the Catroot and catroot2 are Windows operating system folders that are required for the Windows update process. So when you run the Windows Update, the catroort2 folders stores the signatures of the Windows Update package and helps it in the installation. It makes use of the “%windir%System32catroot2edb.log” file in the updating process. Afterward, the updates are stored in the SoftwareDistribution folder which is used then by the Automatic Updates in order to execute the updating process. Keep in mind that you must not rename or delete the Catroot folder. Although the Catroot2 folder is recreated automatically by Windows, the Catroot folder isn’t.
Read More
Corefoundation.dll Error — What is it?
Corefoundation.dll error is a DLL error code associated with Apple software such as iTunes, MobileMe, QuickTime and etc. To understand this error better, first you need to understand what corefoundation.dll file is.
Corefoundation.dll is a Dynamic Link Library file that is used by Apple software products. This file is created by Apple computer Inc and is designed to help open up some of the media files that you might have on your PC.
DLLs help promote modularization of code, efficient memory usage, code reuse and reduced disk space allowing the operating system and the programs to load and run faster and take less disk space on the computer.
Error Messages
This error pops on the screen when there is an issue related to Apple software products on your system. Corefoundation.dll error is displayed on the computer screen in any one of the following formats:
“The program can not start because corefoundation.dll is missing from your computer. Try reinstalling the program to fix this problem”.
«This application has failed to start because CoreFoundation.dll was not found. Re-installing the application may fix this problem.»
“The procedure entry point_CFBundleCopyFileTypeForFileData could not be located in the dynamic link library corefoundation.dll.”
«MobileMe Control Panel cannot continue as Apple Application Support is missing or outdated. Please uninstall and reinstall the latest version of iTunes and MobileMe Control Panel to fix this issue.”
Though this error code is not fatal but if it is not fixed immediately it will hamper your ability to load and run Apple programs on your system.
Solution
Error Causes
Corefoundation.dll error can be triggered due to several reasons. Here are some of the most common corefoundation.dll error causes:
- Outdated PC drivers
- Viral infection
- Damaged Windows registry files
- Corrupted corefoundation.dll file
- Missing corefoundation.dll file
- Incorrectly installed third-party software
Further Information and Manual Repair
To fix this issue on your computer here are some of the best, easy and quick do it yourself methods that you can try:
Method 1: Download the Original Corefoundation.dll File
If the underlying reason for corefoundation.dll error is file corruption or it goes missing, then the best way to resolve is to download the original corefoundation.dll file. Once you download it, paste it to its exact location.
DLL files are normally located in the following location C:WindowsSystem32. Once you paste it, register the file by typing ‘regsvr corefoundation.dll’ at the command prompt. When the process is complete, restart your PC to activate changes.
Alternatively, you can uninstall and re-install any Apple Software you may have on your Windows Computer. To do that, Open the Control Panel, navigate to «Install/Uninstall a Program», search for Apple software, and uninstall them.
Method 2: Update Window Drivers
If the error code is related to outdated drivers, then it is recommended that you update them promptly to resolve the corefoundation.dll error on your PC.
This can be done by using a driver update wizard from within Device Manager. The driver update wizard walks you through the entire drive update process, making updating a hassle-free process.
Method 3: Download Restoro
If the error still persists, then try method 3. Sometimes the cause of corefoundation.dll can be viral infection or registry issues. Viruses may enter your PC unknowingly through phishing emails and downloads which can corrupt and damage your dll files.
Also, if you don’t clean your registry frequently, unnecessary and obsolete files may accumulate in the registry like cookies, junk files, internet history and temporary files. These files take up a lot of disk space corrupt DLL files and lead to disk fragmentation.
Regardless of what the issue is, Restoro is your one-stop PC Fixer. It is a multi-functional and user-friendly repair tool embedded with 6 different scanners including a registry cleaner and an antivirus. It scans and removes all types of viruses and cleans and restores the registry too.
Click here to download Restoro and resolve the corefoundation.dll error today!
Read More
![]()
Copyright © 2022, ErrorTools. All Rights Reserved
Trademarks: Microsoft Windows logos are registered trademarks of Microsoft. Disclaimer: ErrorTools.com is not affiliated with Microsoft, nor claim direct affiliation.
The information on this page is provided for information purposes only.
![]()
Repair your PC with one click
Please be aware that our software needs to be installed on a PC system with Windows on it, Open this website on a desktop PC and download the software for easy and quick elimination of your issues.
by Milan Stanojevic
Milan has been enthusiastic about technology ever since his childhood days, and this led him to take interest in all PC-related technologies. He’s a PC enthusiast and he… read more
Updated on December 30, 2021
- The No more endpoints available from the endpoint mapper error can appear in all sorts of different situations.
- The error can interfere with file sharing, printer setup, or with your antivirus tool.
- Our Windows 10 section is full of interesting tips and guides so it’s worth taking a look.
- We have a dedicated Troubleshooting Hub to help you fix any other PC problems.

XINSTALL BY CLICKING THE DOWNLOAD FILE
This software will repair common computer errors, protect you from file loss, malware, hardware failure and optimize your PC for maximum performance. Fix PC issues and remove viruses now in 3 easy steps:
- Download Restoro PC Repair Tool that comes with Patented Technologies (patent available here).
- Click Start Scan to find Windows issues that could be causing PC problems.
- Click Repair All to fix issues affecting your computer’s security and performance
- Restoro has been downloaded by 0 readers this month.
Computer errors are somewhat common, and while some errors can be generated by Windows 10, some can be caused by third-party applications.
Users reported There are no more endpoints available from the endpoint mapper error, and this error can appear in all sorts of different situations.
Since this error can be rather annoying, today we’re going to show you how to fix it.
How can I fix the No more endpoints available error?
- How do I fix the no more endpoints available error?
- Reset the credentials for Enterprise Single Sign-On service
- Restart the byProcessManager and RPC Server services
- How do I fix the no more endpoints available printer error?
- Turn on the Firewall
- Update the printer drivers
- Make sure that Print Spooler service is running
- Check the Print Spooler dependencies
- Run the Print Troubleshooter
- Change the Print Spooler recovery options
- How do I fix the no more endpoints available sharing error?
- Add the registry keys to your registry and change the permissions
- Run the SFC and DISM scans
- How do I fix the no more endpoints available Avast error?
- Download the latest update file for Avast
- Repair the Avast installation
- Reinstall Avast
- How do I fix the no more endpoints available Exchange error?
- Make sure that firewall service is running
- Delete the Watermark and Action keys
- Make sure that the necessary services are running
How do I fix the no more endpoints available error?
1. Reset the credentials for Enterprise Single Sign On service
- Open the Services window.
- Locate the Enterprise Single Sign On service and make sure that it’s running.
- Specify which user will run this service by double click the service to open its properties.
- Go to the Log on tab and select This account. Enter your account username and password and click Apply and OK to save changes. Alternatively, you can click the Browse button and search for your account.

- Restart the service and check if the problem is resolved.
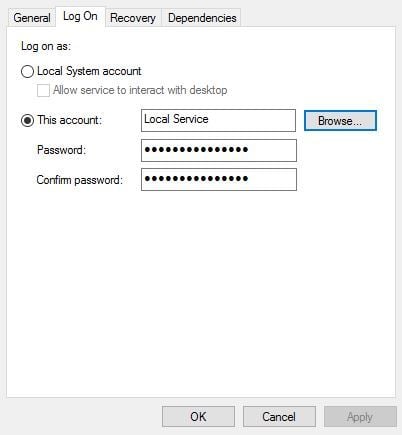
2. Restart the byProcessManager and RPC Server services
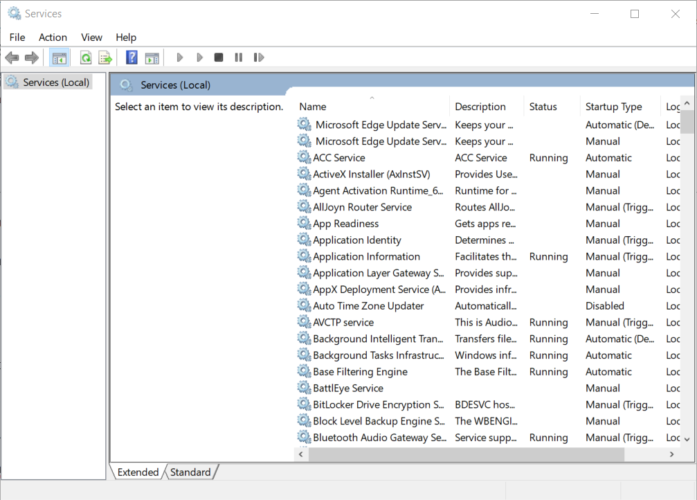
- Open the Services window.
- Locate byProcessManager and RPC Server services. Right-click each of these services and choose the Restart option.
How do I fix the no more endpoints available printer error?
1. Turn on the Firewall
- Press Windows Key + R, enter services.msc and press Enter.

- Locate the Windows Firewall service, right-click it, and choose Start from the menu.

- Close the Services window.
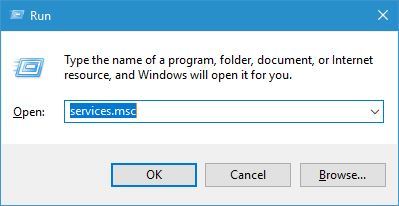

Note: For some unknown reason it seems that the printer installation process is related to the status of the Windows Firewall, and in order to successfully install a printer, you’ll have to turn this service on.
After starting the Windows Firewall service, the error should be fixed and you’ll be able to install your printer without any problems.
If your default printer keeps changing in Windows 10, check out this step-by-step guide to fix the issue.
2. Update the printer driver
This error can also be caused by a malfunctioning or old printer driver so you need to make sure that you have the latest drivers installed.
You can do that manually by using Device Manager or using the media included by the manufacturer in the box. Another option is to go to the manufacturer’s website and download it.
All these solutions are fine, but they don’t guarantee to provide the correct driver.
The easiest and safest way of making sure that you end up with a perfect running driver is to use specialized software like DriverFix.
If you’re not familiar with it, it’s an excellent tool that updates your drivers in just a few seconds automatically.
First, you need to download and install DriverFix. The app will start automatically after the installation and will begin searching for driver issues on your PC.
When the process ends, you receive a list of drivers recommended for installation.
The only thing left to do is to decide whether you install all of them of just a few. For the first option, you just need to click the Update All button from the top.
If you want to install them separately, you need to check their corresponding boxes from their left and then hit the Update button from their right.
⇒ Get DriverFix
3. Make sure the Print Spooler service is running
- Make sure that your printer is connected and turned on.
- Open the Services window and locate Print Spooler service.

- Check the status of the service. If the service isn’t running, right-click it and choose Start from the menu.
- Close the Services window and check if the problem is resolved.
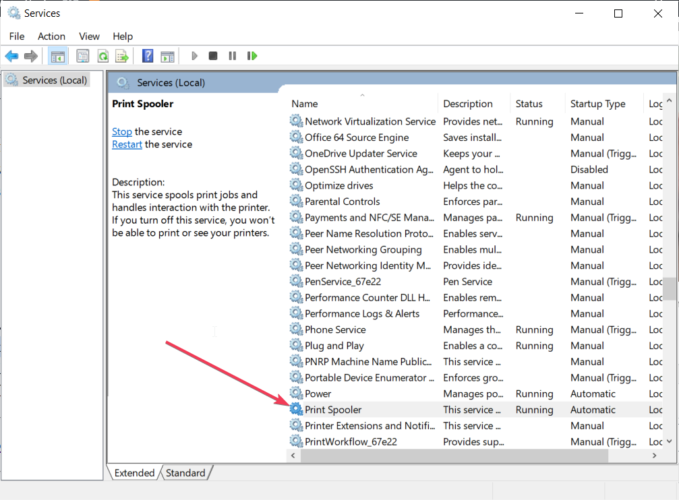
4. Check the Print Spooler dependencies
- Open the Services window, locate the PrintSpooler service , and double click it.
- When Print Spooler properties window opens, navigate to the Dependencies tab.

- In the This service depends on the following… expand all services.
- Go back to the Services window and a look for the services that you got in the previous step. In our case, those were DCOM Server Process Launcher and RPC Endpoint Mapper services (you might get different results on your PC).
- Locate those services, double click them, and set their Startup type to Automatic. If any of the services isn’t running, click the Start button to start it.

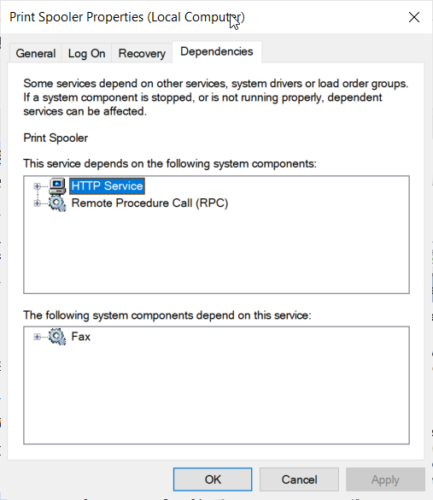
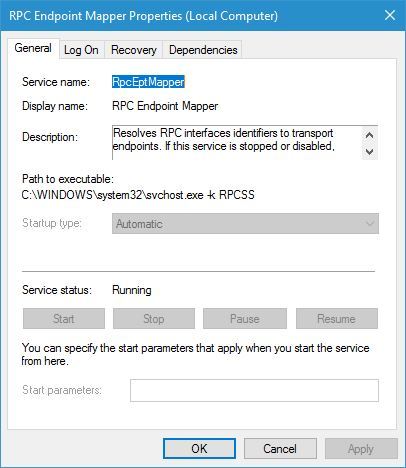
5. Run the Print Troubleshooter
- Open Control Panel.
- Navigate to the Hardware and Sound, and then to the Device and Printers section.
- Right-click your printer and choose Troubleshoot from the menu.

- Follow the instructions and wait for the Troubleshoot to fix your problem.

6. Change the Print Spooler recovery options
- Open the Services window and double click the Print Spooler service to open its properties.
- Go to the Recovery tab.
- Set First failure, Second failure, and Subsequent failures to Restart the Service. Set Reset fail count after and Restart service after to 1.
- Click Apply and OK to save the changes.
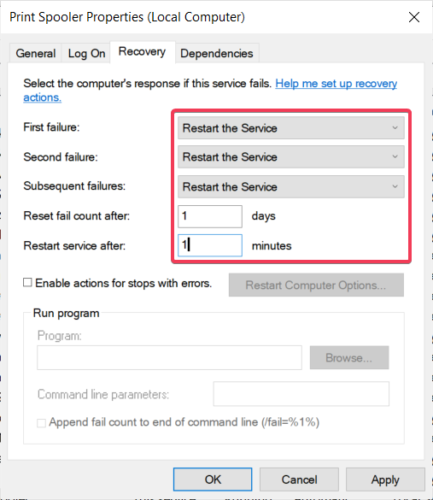
Note: By changing these options, the Print Spooler service will automatically start whenever it crashes or if it suddenly stops for any reason.
Some PC issues are hard to tackle, especially when it comes to corrupted repositories or missing Windows files. If you are having troubles fixing an error, your system may be partially broken.
We recommend installing Restoro, a tool that will scan your machine and identify what the fault is.
Click here to download and start repairing.
If the Print Spooler service keeps stopping on Windows 10, follow the steps in this comprehensive guide, and solve the problem in no time.
How do I fix the no more endpoints available sharing error?
1. Add the registry keys to your registry and change the permissions
- Download the MpsSvc.reg and BFE.reg files and add them to your registry simply by double-clicking both files.
- Restart your PC.
- Press Windows Key + R, type regedit and press Enter or click OK.
- Go to the following key from the left pane:
HKEY_LOCAL_MACHINESYSTEMCurrentControlSetServicesBFE - Right-click the BFE key and choose Permissions from the menu.

- Click the Add button.

- In the Enter the object names to select field enter Everyone. Click Check Names and OK.

- Everyone should be now added to the Group or user names section.
- Select Everyone from the list and check the Full Control option in the Allow column. Click Apply and OK to save changes.
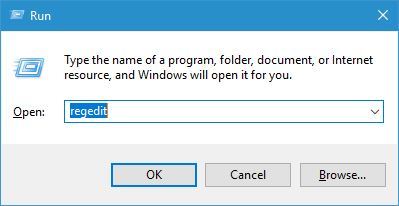
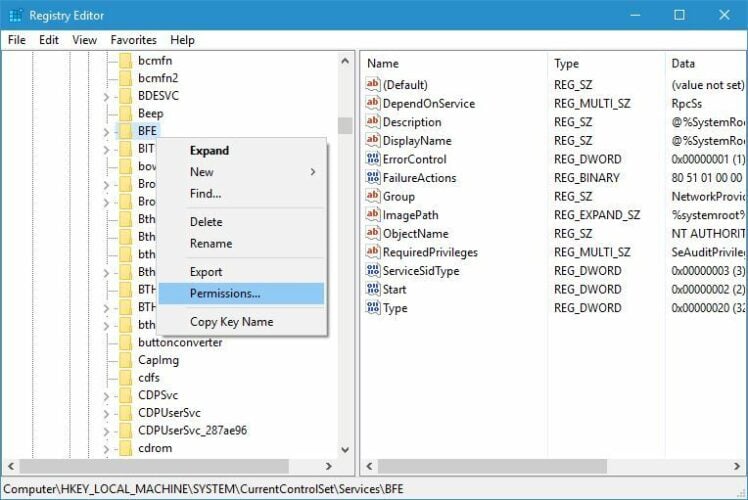
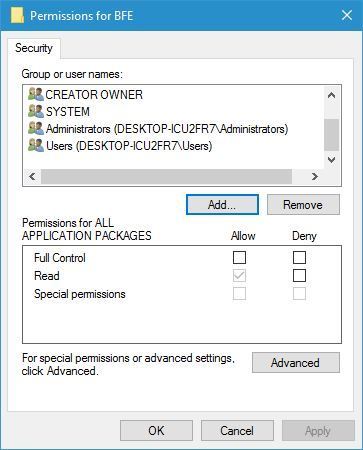
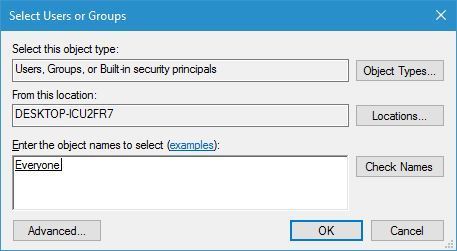
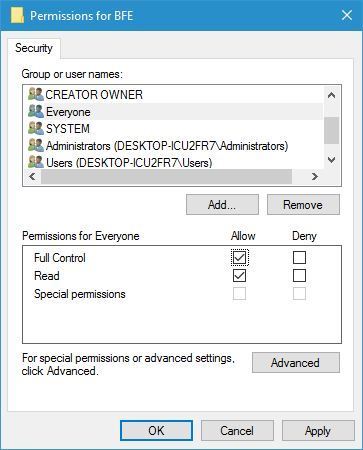
Note: This solution is a bit advanced and it involves changing your registry.
Before making any changes, we strongly suggest that you create a backup so you can easily restore it if anything goes wrong.
Disclaimer: This is an unofficial download mirror for the MpsSvc.reg and BFE.reg files. WindowsReport is not responsible for the download or the installer package.
Restart the Base Filtering Engine and Windows Firewall services
- Open the Services window.
- Locate the Base Filtering Engine and Windows Firewall services and enable them both.
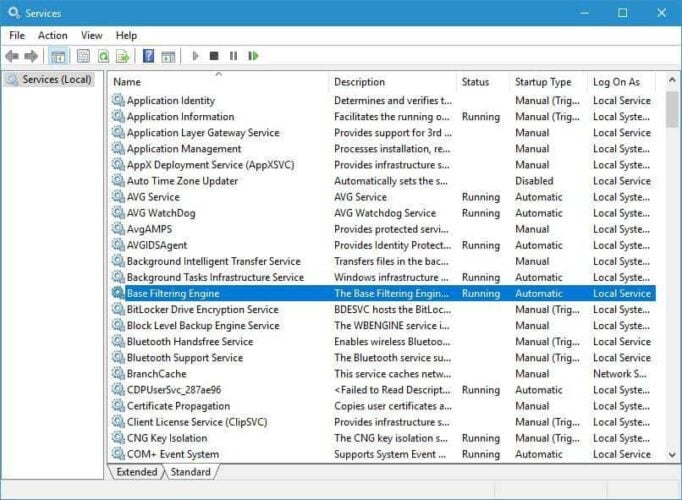
2. Run the SFC and DISM scans
- Search for cmd and click on Run as administrator to start Command Prompt.

- Enter sfc /scannow and press Enter.
- After the scan is completed, enter the following command and press Enter to run it:
Dism /Online /Cleanup-Image /RestoreHealth - After the DISM scan is completed, close Command Prompt.
- Restart your PC and check if the problem is resolved.
If the DISM scan fails, check out this quick guide and get rid of the worries. Also, if the SFC scan has stopped before the process finished, check out this easy fix.
How do I fix the no more endpoints available Avast error?
1. Download the latest update file for Avast
You can fix this problem simply by downloading the latest update file for your version of Avast.
To do that, simply go to Avast’s download section and download the necessary files. Install the download files and restart your computer.
When your computer restarts, open Avast and click on Fix Now button. The software will attempt to fix the problem.
2. Repair the Avast installation
- Search for control panel and click on Control Panel from the results.
- Select the Uninstall a program option.

- Select Avast and choose the Repair or Change options from the menu (you can also right-click the application from the list and choose the desired option).

- Follow the instructions on the screen to complete the repair process.
- After you complete the repair, restart your computer and check if that fixes the problem.

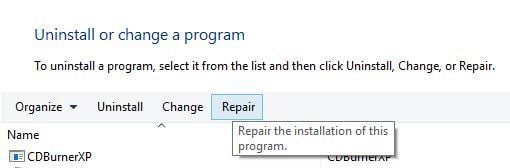
3. Reinstall Avast
If this problem still persists, you might want to try reinstalling Avast. To do that, first, you need to uninstall Avast. Uninstalling Avast isn’t usually enough, and you’ll have to remove all files and registry entries associated with it.
You can easily do that by downloading and running Avast Uninstall Utility. After you remove all Avast files from your PC, restart your computer. When your PC restarts, download the latest version of Avast and install it.
After you install Avast again, the problem should be resolved.
How do I fix the no more endpoints available Exchange error?
1. Make sure that firewall service is running
Users reported that one of the simplest ways to fix this problem is to enable the Microsoft Firewall service.
We already explained how to enable Microsoft Firewall service in one of our previous solutions, so be sure to check it out.
2. Delete the Watermark and Action keys
- Open Registry Editor.
- Navigate to the following key and expand it:
HKEY_LOCAL_MACHINESOFTWAREMicrosoftExchangeServerv14HubTransportRole - You should see the Watermark and Action keys available. Delete them both.
- Close Registry Editor and check if the problem is resolved.
Note: Deleting registry keys can lead to system instability, therefore we recommend creating a backup of your registry before proceeding. To delete the problematic keys, do the following:
If you can’t edit your Windows 10’s registry, read this handy guide and find the quickest solutions to the issue.
3. Make sure that necessary services are running
- Open Services window.
- Locate Microsoft Exchange Search Indexer, Microsoft Exchange RPC Client Access server, and Microsoft Exchange System Attendant services and make sure that all are running.
- After starting them, close the Services window and check if the problem is resolved.
There are no more endpoints available from the endpoint mapper error can interfere with file sharing, printer setup, or with your antivirus tool, and in most cases, you can fix this problem by checking your services and changing your settings.
In case that none of our solutions work for you, you might want to consider performing a clean install of Windows 10.
If you have any other questions, don’t hesitate to leave them in the comments section below and we’ll be sure to check them out.
Still having issues? Fix them with this tool:
SPONSORED
If the advices above haven’t solved your issue, your PC may experience deeper Windows problems. We recommend downloading this PC Repair tool (rated Great on TrustPilot.com) to easily address them. After installation, simply click the Start Scan button and then press on Repair All.
![]()