Are you getting the following error when trying to login to the MySQL root on an Ubuntu system or other Linux distribution? We’ll show you how to clear it up in a matter of seconds.
ERROR 1698 (28000): Access denied for user 'root'@'localhost'
This error is caused by the auth_socket plugin. The simplest solution is to just disable the plugin. Here are the commands to do it:
1. Login to MySQL as root (sudo will bypass password prompt)
$ sudo mysql -u root
2. Change to the mysql database and set the plugin to mysql_native_password for the root user.
mysql> USE mysql;
mysql> UPDATE user SET plugin='mysql_native_password' WHERE User='root';
mysql> FLUSH PRIVILEGES;
3. You have to change the root password for this to work. Even just specifying the current password is fine too, but this command must be executed:
mysql> ALTER USER 'root'@'localhost' IDENTIFIED BY 'new_password_here';
mysql> exit;
4. Lastly, restart MySQL for the changes to take effect.
$ sudo systemctl restart mysql
5. You can now login to MySQL root as normal, and will no longer encounter the error.
$ mysql -u root -p
When I try to login to MySQL database, I get some error message like “error 1698 (28000)”. Please help!
That was a recent support ticket received at our Server Support department where we resolve support queries for web hosts.
Website owners often face this error when they access the MySQL database as root user.
So, what’s the reason behind this? And, how to resolve this?
Today, we’ll discuss the reason for this error and how our Server Supported Engineers fix it.
‘error 1698’ MySQL error – What this means?
Before we move on to the reasons, let’s first get an idea of MySQL error ‘error 1698′.
Website owners face this error when MySQL disallows the root user to access the database.
For instance, users see the complete error message like this:
ERROR 1698 (28000): Access denied for user 'root'@'localhost'
In addition to that, website owners will not be able to connect to the database via a terminal, PHPmyadmin or MySQL client.
In our experience managing websites, majority of such complaints are raised by customers on a Ubuntu machine.
‘error 1698’ Mysql error – Causes and solutions
First, let’s see the main cause of this error identified by our Support Engineers during our debugging process.
Some systems like Ubuntu don’t use root password, instead Mysql root account is configured to use the auth_socket or unix_socket plugin for authentication.
mysql> USE mysql;
mysql> SELECT User, Host, plugin FROM mysql.user;

+------------------+-----------------------+
| User | plugin |
+------------------+-----------------------+
| root | auth_socket |
+------------------+-----------------------+
This plugin allows the user to use Operating System credentials when connecting to the database.
In other words, this plugin doesn’t care for password. It checks if the user is connecting via UNIX socket and then compares the username.
For example, a user authenticate to the Ubuntu system as test, so MySQL won’t trust the user when he login as root user, because this user is different from the system user test.
Result is ‘error 1698‘ Mysql error.
How we fix?
Now, let’s see how our Support Engineers fix this error.
1) Set root user to use ‘mysql_native_password‘ plugin
‘mysql_native_password’ implements authentication against mysql.user table using the native password authentication method.
So, the first solution our Hosting Engineers use, is to update the root user password and change the root user’s authentication plugin to ‘mysql_native_password’.
For example, we use the following command to change the root user’s authentication plugin to mysql_native_password.
user mysql;
update user set plugin='mysql_native_password' where User = 'root';
And, in order for the changes to reflect, and the privileges to be saved, we use the below command.
FLUSH PRIVILEGES;[Need assistance in fixing MySQL errors in your website? Our MySQL experts can assist you. We are available 24/7.]
2) Add the system user to the MySQL ‘user’ table
Basically, mysql_native_password is the traditional method of authentication, but it isn’t secure, because it uses just a hash of the password.
So, the safe option that our Security Engineers always recommend is to add the system user to the MySQL user table with auth_socket plugin enabled.
For example, we use the following command to add the system user testing to the MySQL user table with the auth_socket plugin.
USE mysql;
CREATE USER 'testing'@'localhost' IDENTIFIED BY '';+
UPDATE user SET plugin='auth_socket' WHERE User='testing';
After that, we grant all privileges to this user, and flush the privileges for the changes to take effect.
Now, the user can login to MySQL with this system user.
3) Disable UNIX_socket authentication
Another simple solution to this problem is to disable UNIX socket authentication.
Our Hosting Engineers disable unix_socket authentication for root user using the following command.
use mysql;
update user set plugin='' where User='root';
Now, the root user can login with standard password authentication.
We’ve discussed 3 different ways to resolve this error.
Considering the security aspect, our MySQL experts always suggest server owners to follow the second step.
Because, it’s always good practice to create a new user and leave the root user there.
[Need a Mysql expert to look at this error? Our Dedicated Support Engineers can fix this for you within minutes.]
Conclusion
In short, ‘error 1698‘ Mysql error occurs due to the incorrect authentication plugin enabled for the root user. Today, we’ve discussed the 3 easy methods to solve this error and the most reliable solution suggested by our Server Support Engineers.
PREVENT YOUR SERVER FROM CRASHING!
Never again lose customers to poor server speed! Let us help you.
Our server experts will monitor & maintain your server 24/7 so that it remains lightning fast and secure.
SEE SERVER ADMIN PLANS
var google_conversion_label = «owonCMyG5nEQ0aD71QM»;
Introduction
Most MySQL users encountered the ERROR 1698 (28000): Access denied for user ‘root’@’localhost’. This error message usually appears for new installations of MySQL when you try to connect to MySQL with the root user.
This guide will show you how to quickly resolve the access denied for user root on localhost. The outlined instructions apply to both MySQL and MariaDB. There will be no need to modify any tables or to perform complex configuration.
Prerequisites
- Access to a command line or terminal window
- MySQL or MariaDB installed
- User with sudo or root privileges
When you install MySQL and try to access it on the local machine with the root user, the command you use is:
mysql -u root -pIn most cases, you will receive the error message Access denied for user ‘root’@’localhost’.

You can enable access for root using one MySQL command.
Solve Access Denied for User Root Error
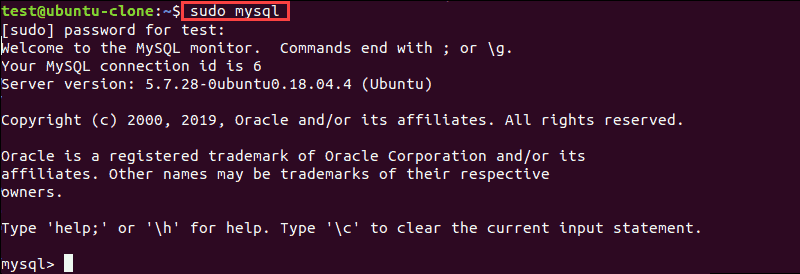
To be able to log into MySQL as root, first use sudo to modify the root user:
sudo mysqlEnter your password at the prompt. A MySQL shell loads.
Use the ALTER USER command and change the authentication method to log into MySQL as root:
ALTER USER 'root'@'localhost' IDENTIFIED WITH mysql_native_password BY 'insert_password';
This command changes the password for the user root and sets the authentication method to mysql_native_password. This is a traditional method for authentication, and it is not as secure as auth_plugin. In the example above, we set “root” as the password, but we encourage you to set a stronger password.
Test Root User MySQL Access
After you run the commands listed above, exit the MySQL shell by pressing CTRL + D on your keyboard or type exit; and hit enter. There is no need to restart the mysqld service to log in.
Now try again to access MySQL with root. In the terminal, type in:
mysql -u root -pEnter the password you used with the ALTER USER command. Do not type in the system password to access MySQL as it will not work. If everything worked fine, you should see the MySQL welcome message.
NOTE: The ALTER USER command may not work for MySQL and MariaDB versions older than 5.7.6 and 10.1.20 respectively.
Conclusion
Now you know how to bypass the MySQL ERROR 1698 (28000): Access denied for user ‘root’@’localhost’.
There are different ways to approach this issue, but we selected the easiest and fastest method. Make sure to enter the commands as listed in the article to avoid errors in SQL syntax.
MySQL servers may encounter different errors during usage. The “ERROR 1698 (28000): Access denied for user ‘root’@’localhost’” error is one of the most common errors which occurs during command-line connection to the MySQL server shell. This error can be a bit different according to the command like “Access denied for user ‘root’@’localhost’ (using password: YES)“. In this tutorial, we will examine this error, its causes, and solutions to prevent it again.
This error is related to MySQL access restrictions. MySQL uses access rules in order to make things more secure and generally prevents root access to the MySQL shell. This error means the root user access to the localhost MySQL shell has been denied. The localhost means we try to access the MySQL shell over the network.
$ mysql -u root -pOr we can get this error without providing the -p option like below.
$ mysql -u root
Alternatively, this error may be produced when we try to use the mysqladmin with the -u root and -p option. We can provide the password via the command line with the -p option or enter it interactively.
$ mysqladmin -u root -p“Access denied for user ‘root’@’localhost’” Error Solution
As this error is mainly related to that we can not access the MySQL shell via a network by using the root user. This root user is the MySQL installation root user, not the Linux system. So if we can not access via network we will access using a local MySQL pipe. We will use the following command which will provide us with the MySQL shell with root user privileges.
$ sudo mysql
Now we will change the access rules where enable the root user access via the network from the localhost or the same system with the following ALTER command.
ALTER USER 'root'@'localhost' IDENTIFIED WITH mysql_native_password BY 'mypass123*.!';If The Root User Password Is Unknown
Sometimes we do not have the root user password. When we enter the wrong password we may get this error. So first we should disable the MySQL service password and login into the MySQL server with the mysql command and then set the password.
In order to disable the password, open the /etc/my.cnf or /etc/mysql/my.cnf configuration file and add the skip-grant-tables lines under the [mysqld] section. Then restart the MySQL server to activate the passwordless login configuration.
$ sudo systemctl mysql restartThen run the following SQL query to set the new root password.
ALTER USER 'root'@'localhost' IDENTIFIED WITH mysql_native_password BY 'mypass123*.!';The last steps are removing the skip-grant-table from the my.conf configuration file and restarting the MySQL service like below.
$ sudo systemctl mysql restartLogin MySQL Shell
We have configured the MySQL root access from localhost properly. We will use the following command which will log in into the MySQL shell properly. Keep in mind that we have set the root user password as mypass123 and used this password for the root login.
$ mysql -u root -p