I’m running several instances of a certain Python script on a Windows machine, each from a different directory and using a separate shell windows. Unfortunately Windows gives each of these shell windows the same name:
<User>: C:Windowssystem32cmd.exe - <script.py>
Is it possible to set this name to something else through a Python command?
![]()
asked Sep 12, 2011 at 11:40
![]()
Jonathan LivniJonathan Livni
98.5k103 gold badges260 silver badges355 bronze badges
1
On Windows, a simple console command will suffice:
from os import system
system("title " + myCoolTitle)
Nice and easy.
![]()
answered Apr 19, 2012 at 13:50
![]()
4
This works for Python2.7 under Windows.
>>> import ctypes
>>> ctypes.windll.kernel32.SetConsoleTitleA("My New Title")
answered Sep 27, 2012 at 16:56
![]()
4
Due to not enough rep I cannot add a comment to the above post — so as a new post.
In Python 3 you can use:
import ctypes
ctypes.windll.kernel32.SetConsoleTitleW("My New Title")
I edited this answer: please remark, that it now uses SetConsoleTitleW, which is the Unicode version of the SetConsoleTitle function.
This way you can use unicode and no longer have to encode the string/variable to a byte object. You can just replace the argument with the string variable.
answered Jan 1, 2014 at 1:33
![]()
user136036user136036
10.5k6 gold badges45 silver badges46 bronze badges
2
Since you’re only going to be running this on Windows (IOW, there’s not a cross-platform way to do this):
- Download & install the Win32 extensions for python
-
Inside of your script, you can change the title of the console with the function
win32console.SetConsoleTitle("My Awesome App")
answered Sep 12, 2011 at 13:04
![]()
bgporterbgporter
34.4k8 gold badges60 silver badges65 bronze badges
Comparison of the posted system() & windll-based methods
tying to add a small quantitative comparison of latency overheads associated with two of the posted methods:
|>>> from zmq import Stopwatch
|>>> aSWX = Stopwatch()

|>>> from os import system
|>>> aSWX.start();system( 'TITLE os_SHELL_CMD_TITLE_TXT');aSWX.stop()  15149L [us]
|>>> aSWX.start();system( 'TITLE os_SHELL_CMD_TITLE_TXT');aSWX.stop()  15347L [us]
|>>> aSWX.start();system( 'TITLE os_SHELL_CMD_TITLE_TXT');aSWX.stop()  15000L [us]
|>>> aSWX.start();system( 'TITLE os_SHELL_CMD_TITLE_TXT');aSWX.stop()  14674L [us]
|>>> aSWX.start();system( 'TITLE os_SHELL_CMD_TITLE_TXT');aSWX.stop()  14774L [us]
|>>> aSWX.start();system( 'TITLE os_SHELL_CMD_TITLE_TXT');aSWX.stop()  14551L [us]
|>>> aSWX.start();system( 'TITLE os_SHELL_CMD_TITLE_TXT');aSWX.stop()  14633L [us]
|>>> aSWX.start();system( 'TITLE os_SHELL_CMD_TITLE_TXT');aSWX.stop()  15202L [us]
|>>> aSWX.start();system( 'TITLE os_SHELL_CMD_TITLE_TXT');aSWX.stop()  14889L [us]

|>>> from ctypes import windll
|>>> aSWX.start();windll.kernel32.SetConsoleTitleA('DLL');aSWX.stop()   5767L [us]
|>>> aSWX.start();windll.kernel32.SetConsoleTitleA('DLL');aSWX.stop()    643L [us]
|>>> aSWX.start();windll.kernel32.SetConsoleTitleA('DLL');aSWX.stop()    573L [us]
|>>> aSWX.start();windll.kernel32.SetConsoleTitleA('DLL');aSWX.stop()    749L [us]
|>>> aSWX.start();windll.kernel32.SetConsoleTitleA('DLL');aSWX.stop()    689L [us]
|>>> aSWX.start();windll.kernel32.SetConsoleTitleA('DLL');aSWX.stop()    651L [us]
In cases, where one might spend about a half of millisecond ( but not some tens of that ) the windll.kernel32 method seems promising and may serve better for an alternative display of a WatchDOG / StateVARs / ProgressLOG / auto-self-diagnostic messages, being efficiently displayed in a soft real-time need, during long running processes.
answered Oct 11, 2015 at 1:13
![]()
I am not aware of a way to change the cmd window title from within the script.
However, you can set the title when launching the script if you use the start command.
answered Sep 12, 2011 at 11:53
![]()
NPENPE
479k105 gold badges940 silver badges1006 bronze badges
1
If starting the Idle-shell is an option instead of the cmd shell:
idle.py [-c command] [-d] [-e] [-s] [-t title] [arg] ...

-c command  run this command
-d          enable debugger
-e          edit mode; arguments are files to be edited
-s          run $IDLESTARTUP or $PYTHONSTARTUP first
-t title    set title of shell window
answered Sep 12, 2011 at 11:54
![]()
RemiRemi
20.2k8 gold badges55 silver badges41 bronze badges
Use:
import ctypes
ctypes.windll.kernel32.SetConsoleTitleW('new title')
Or:
import os
os.system('title new title')
answered Dec 6, 2021 at 6:37
![]()
1
It is now possible to change the window title from within any language via outputting a standard escape sequence to the console (stdout). Here’s a working example from a batch file Change command prompt to only show current directory name however just printing ESC close-bracket 2 semicolon your-title-here BEL (control-G) will do it. Also an easily adapted PHP example:
function windowTitle($title)
  {printf("33]2;%s07", $title);}
answered Oct 9, 2018 at 22:30
![]()
2
Using OS module To interact with the terminal
- Import the library —
import os - Interact with the terminal to change title —
os.system('title your_tile')
Explanation:
So if you open your terminal and type title your_title is will change the terminal title to your_title

In Python the OS.system() is used to type into the terminal
This is how you will change title of terminal with Python
answered Jun 21, 2022 at 17:45
![]()
I’m running several instances of a certain Python script on a Windows machine, each from a different directory and using a separate shell windows. Unfortunately Windows gives each of these shell windows the same name:
<User>: C:Windowssystem32cmd.exe - <script.py>
Is it possible to set this name to something else through a Python command?
![]()
asked Sep 12, 2011 at 11:40
![]()
Jonathan LivniJonathan Livni
98.5k103 gold badges260 silver badges355 bronze badges
1
On Windows, a simple console command will suffice:
from os import system
system("title " + myCoolTitle)
Nice and easy.
![]()
answered Apr 19, 2012 at 13:50
![]()
4
This works for Python2.7 under Windows.
>>> import ctypes
>>> ctypes.windll.kernel32.SetConsoleTitleA("My New Title")
answered Sep 27, 2012 at 16:56
![]()
4
Due to not enough rep I cannot add a comment to the above post — so as a new post.
In Python 3 you can use:
import ctypes
ctypes.windll.kernel32.SetConsoleTitleW("My New Title")
I edited this answer: please remark, that it now uses SetConsoleTitleW, which is the Unicode version of the SetConsoleTitle function.
This way you can use unicode and no longer have to encode the string/variable to a byte object. You can just replace the argument with the string variable.
answered Jan 1, 2014 at 1:33
![]()
user136036user136036
10.5k6 gold badges45 silver badges46 bronze badges
2
Since you’re only going to be running this on Windows (IOW, there’s not a cross-platform way to do this):
- Download & install the Win32 extensions for python
-
Inside of your script, you can change the title of the console with the function
win32console.SetConsoleTitle("My Awesome App")
answered Sep 12, 2011 at 13:04
![]()
bgporterbgporter
34.4k8 gold badges60 silver badges65 bronze badges
Comparison of the posted system() & windll-based methods
tying to add a small quantitative comparison of latency overheads associated with two of the posted methods:
|>>> from zmq import Stopwatch
|>>> aSWX = Stopwatch()

|>>> from os import system
|>>> aSWX.start();system( 'TITLE os_SHELL_CMD_TITLE_TXT');aSWX.stop()  15149L [us]
|>>> aSWX.start();system( 'TITLE os_SHELL_CMD_TITLE_TXT');aSWX.stop()  15347L [us]
|>>> aSWX.start();system( 'TITLE os_SHELL_CMD_TITLE_TXT');aSWX.stop()  15000L [us]
|>>> aSWX.start();system( 'TITLE os_SHELL_CMD_TITLE_TXT');aSWX.stop()  14674L [us]
|>>> aSWX.start();system( 'TITLE os_SHELL_CMD_TITLE_TXT');aSWX.stop()  14774L [us]
|>>> aSWX.start();system( 'TITLE os_SHELL_CMD_TITLE_TXT');aSWX.stop()  14551L [us]
|>>> aSWX.start();system( 'TITLE os_SHELL_CMD_TITLE_TXT');aSWX.stop()  14633L [us]
|>>> aSWX.start();system( 'TITLE os_SHELL_CMD_TITLE_TXT');aSWX.stop()  15202L [us]
|>>> aSWX.start();system( 'TITLE os_SHELL_CMD_TITLE_TXT');aSWX.stop()  14889L [us]

|>>> from ctypes import windll
|>>> aSWX.start();windll.kernel32.SetConsoleTitleA('DLL');aSWX.stop()   5767L [us]
|>>> aSWX.start();windll.kernel32.SetConsoleTitleA('DLL');aSWX.stop()    643L [us]
|>>> aSWX.start();windll.kernel32.SetConsoleTitleA('DLL');aSWX.stop()    573L [us]
|>>> aSWX.start();windll.kernel32.SetConsoleTitleA('DLL');aSWX.stop()    749L [us]
|>>> aSWX.start();windll.kernel32.SetConsoleTitleA('DLL');aSWX.stop()    689L [us]
|>>> aSWX.start();windll.kernel32.SetConsoleTitleA('DLL');aSWX.stop()    651L [us]
In cases, where one might spend about a half of millisecond ( but not some tens of that ) the windll.kernel32 method seems promising and may serve better for an alternative display of a WatchDOG / StateVARs / ProgressLOG / auto-self-diagnostic messages, being efficiently displayed in a soft real-time need, during long running processes.
answered Oct 11, 2015 at 1:13
![]()
I am not aware of a way to change the cmd window title from within the script.
However, you can set the title when launching the script if you use the start command.
answered Sep 12, 2011 at 11:53
![]()
NPENPE
479k105 gold badges940 silver badges1006 bronze badges
1
If starting the Idle-shell is an option instead of the cmd shell:
idle.py [-c command] [-d] [-e] [-s] [-t title] [arg] ...

-c command  run this command
-d          enable debugger
-e          edit mode; arguments are files to be edited
-s          run $IDLESTARTUP or $PYTHONSTARTUP first
-t title    set title of shell window
answered Sep 12, 2011 at 11:54
![]()
RemiRemi
20.2k8 gold badges55 silver badges41 bronze badges
Use:
import ctypes
ctypes.windll.kernel32.SetConsoleTitleW('new title')
Or:
import os
os.system('title new title')
answered Dec 6, 2021 at 6:37
![]()
1
It is now possible to change the window title from within any language via outputting a standard escape sequence to the console (stdout). Here’s a working example from a batch file Change command prompt to only show current directory name however just printing ESC close-bracket 2 semicolon your-title-here BEL (control-G) will do it. Also an easily adapted PHP example:
function windowTitle($title)
  {printf("33]2;%s07", $title);}
answered Oct 9, 2018 at 22:30
![]()
2
Using OS module To interact with the terminal
- Import the library —
import os - Interact with the terminal to change title —
os.system('title your_tile')
Explanation:
So if you open your terminal and type title your_title is will change the terminal title to your_title
In Python the OS.system() is used to type into the terminal
This is how you will change title of terminal with Python
answered Jun 21, 2022 at 17:45
![]()
Окно приложения
Последнее обновление: 10.09.2022
Основным компонентом графических программ является окно. Затем в окно добавляются все остальные компоненты графического интерфейса. В Tkinter окно представлено классом Tk.
Например, создание окна:
root = Tk()
Для отображения окна и взаимодействия с пользователем у окна вызывается метод mainloop()
from tkinter import *

root = Tk()
root.mainloop()
Класс Tk обладает рядом методов и атрибутов, которые позволяют установить различные аспекты окна. Некоторые из них.
Размеры и начальная позиция окна
По умолчанию окно имеет некоторые стандартные размеры. Для установки размеров используется метод geometry(). Например, определение окна с шириной в 300 единиц и высотой 250 единиц:
from tkinter import *

root = Tk()
root.geometry("300x250")

root.mainloop()
По умолчанию окно позиционируется в верхний левый угол экрана с небольшим смещением. Но мы можем изменить его положение, передав нужные значения в метод geometry():
from tkinter import *

root = Tk()
root.geometry("300x250+400+200")

root.mainloop()
Теперь строка в методе geometry имеет следующий формат: «Ширина x Высота + координатаX + координатаY». То есть при запуске окно шириной в 300 единиц и высотой 250 единиц будет находиться на 400 пикселей вправо и на 200 пикселей вниз от верхнего левого угла экрана.
Для получения данных о размере и позиции также можно использовать метод geometry(), который возвращает данные значения в виде строки в формате «widthxheight+x+y»:
from tkinter import *

root = Tk()
root.geometry("300x250+400+200")

root.update_idletasks()
print(root.geometry())    # "300x250+400+200"

root.mainloop()
Чтобы приложение еще до метода mainloop() принименило для окна переданные ему значения по ширине, высоте и позиции, вызывается метод root.update_idletasks().
В итоге вызов root.geometry() возвратить строку «300×250+400+200»
По умолчанию мы можем изменять размеры окна. Тем не менее иногда может потребоваться сделать размер окна фиксированным. В этом случае мы можем
использовать метод resizable(). Его первый параметр указывает, может ли пользователь растягивать окно по ширине, а второй параметр — можно ли растягивать по высоте.
Чтобы запретить растягивание по какой-либо стороне, необходимо для соответствующего параметра передать значение False.
Например, запретим какое-либо изменение размеров:
from tkinter import *

root = Tk()
root.geometry("300x250")

root.resizable(False, False)

root.mainloop()
Также можно установить минимальные и максимальные размеры окна:
root.minsize(200,150)   # минимальные размеры: ширина - 200, высота - 150
root.maxsize(400,300)   # максимальные размеры: ширина - 400, высота - 300
Установка заголовка
По умолчанию заголовок окна — «tk». Для установки заголовка применяется метод title(), в который передается текст заголовка:
from tkinter import *

root = Tk()
root.title("Hello METANIT.COM")
root.geometry("300x250")
root.mainloop()
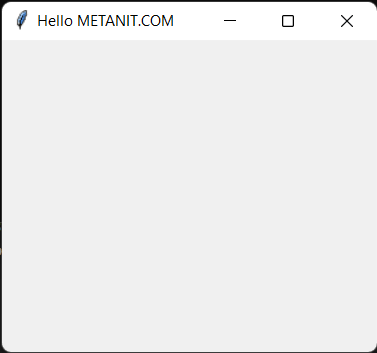
Установка иконки
Перед заголовком отображается иконка. По умолчанию это иконка пера. С помощью метода iconbitmap() можно задать любую другую иконку.
Например, определим в одной папке с файлом приложения какой-нибудь файл с иконкой, допустип, он называется «favicon.ico» и используем его для установки иконки:
from tkinter import *

root = Tk()
root.title("Hello METANIT.COM")
root.iconbitmap(default="favicon.ico")
root.geometry("300x250")
root.mainloop()
через параметр default в метод iconbitmap передается путь к иконки. В данном случае файл иконки располагается с файлом приложения в одной папке, поэтому в качестве пути
указывается просто имя файла.
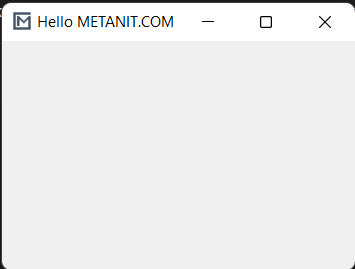
В качестве альтернативы для установки иконки также можно было бы использовать метод iconphoto()
from tkinter import *

root = Tk()
root.geometry("250x200")

root.title("Hello METANIT.COM")
icon = PhotoImage(file = "icon2.png")
root.iconphoto(False, icon)

root.mainloop()
Первый параметр метода iconphoto() указывает, надо ли использовать иконку по умолчанию для всех окон приложения. Второй параметр — объект PhotoImage, который собственно
и устанавливает файл изображения (здесь файл «icon2.png)
Однако что, если мы хотим, чтобы окно вообще не имело иконки? В этом случае можно определить прозрачную иконку и также ее подключать. Можно это сделать также динамически без наличия реального файла:
from tkinter import *
import tempfile, base64, zlib

ICON = zlib.decompress(base64.b64decode("eJxjYGAEQgEBBiDJwZDBysAgxsDAoAHEQCEGBQaIOAg4sDIgACMUj4JRMApGwQgF/ykEAFXxQRc="))

_, ICON_PATH = tempfile.mkstemp()
with open(ICON_PATH, "wb") as icon_file:
    icon_file.write(ICON)

root = Tk()
root.title("Hello METANIT.COM")
root.geometry("300x250")

root.iconbitmap(default=ICON_PATH)

root.mainloop()
В данном случае создается временный файл иконки в памяти.
Перехват закрытия окна
from tkinter import *

def finish():
    root.destroy()  # ручное закрытие окна и всего приложения
    print("Закрытие приложения")

root = Tk()
root.geometry("250x200")

root.title("Hello METANIT.COM")
root.protocol("WM_DELETE_WINDOW", finish)

root.mainloop()
Первый параметр метода protocol() представляет имя события, в данном случае это «WM_DELETE_WINDO». Второй параметр представляет функцию, которая вызывается при
возникновении события. Здесь эта функция finish(), в котором с помощью метода destroy() вручную вызываем закрытие окна (а с ним и всего приложения),
а затем выводим на консоль некоторое сообщение.
Атрибуты окна
С помощью специального метода attributes() можно установать отдельные атрибуты окна, для которых нет специальных методов. В качестве первого параметра
метод принимает название атрибута, которое предваряется дефисом. А второй параметр — значение для этого атрибута. Например, растяжение окна на весь экран:
root.attributes("-fullscreen", True)
Здесь атрибуту fullscreen передается значение True, благодаря чему устанавливается полноэкранный режим.
Другой пример — установка прозрачности с помощью атрибута alpha:
root.attributes("-alpha", 0.5)
Значение 0.5 указывает на полупрозрачность.
Третий пример — отключение верхней панели окна (за исключением заголовка и крестика для закрытия):
root.attributes("-toolwindow", True)
Окна
В этом уроке рассмотрим основные настройки окон, в которых располагаются виджеты. Обычные окна в Tkinter порождаются не только от класса Tk, но и Toplevel. От Tk принято создавать главное окно. Если создается многооконное приложение, то остальные окна создаются от Toplevel. Методы обоих классов схожи.
Размер и положение окна
По умолчанию окно приложения появляется в верхнем левом углу экрана. Его размер (ширина и высота) определяется совокупностью размеров расположенных в нем виджетов. В случае если окно пустое, то tkinter устанавливает его размер в 200 на 200 пикселей.
С помощью метода geometry можно изменить как размер окна, так и его положение. Метод принимает строку определенного формата.
from tkinter import *

root = Tk()

root.geometry('600x400+200+100')

root.mainloop()
Первые два числа в строке-аргументе geometry задают ширину и высоту окна. Вторая пара чисел обозначает смещение на экране по осям x и y. В примере окно размерностью 600 на 400 будет смещено от верхней левой точки экрана на 200 пикселей вправо и на 100 пикселей вниз.
Если перед обоими смещениями вместо плюса указывается минус, то расчет происходит от нижних правых углов экрана и окна. Так выражение root.geometry('600x400-0-0') заставит окно появиться в нижнем правом углу.
В аргументе метода geometry можно не указывать либо размер, либо смещение. Например, чтобы сместить окно, но не менять его размер, следует написать root.geometry('+200+100').
Бывает удобно, чтобы окно появлялось в центре экрана. Методы winfo_screenwidth и winfo_screenheight возвращают количество пикселей экрана, на котором появляется окно. Рассмотрим, как поместить окно в центр, если размер окна известен:
…
w = root.winfo_screenwidth()
h = root.winfo_screenheight()
w = w//2 # середина экрана
h = h//2
w = w - 200 # смещение от середины
h = h - 200
root.geometry('400x400+{}+{}'.format(w, h))
…
Здесь мы вычитаем половину ширины и высоты окна (по 200 пикселей). Иначе в центре экрана окажется верхний левый угол окна, а не его середина.
Если размер окна неизвестен, то его можно получить с помощью того же метода geometry, но без аргументов. В этом случае метод возвращает строку, содержащую сведения о размерах и смещении, из которой можно извлечь ширину и высоту окна.
from tkinter import *
root = Tk()

Button(text="Button", width=20).pack()
Label(text="Label", width=20, height=3).pack()
Button(text="Button", width=20).pack()

root.update_idletasks()
s = root.geometry()
s = s.split('+')
s = s[0].split('x')
width_root = int(s[0])
height_root = int(s[1])

w = root.winfo_screenwidth()
h = root.winfo_screenheight()
w = w // 2
h = h // 2
w = w - width_root // 2
h = h - height_root // 2
root.geometry('+{}+{}'.format(w, h))

root.mainloop()
Метод update_idletasks позволяет перезагрузить данные об окне после размещения на нем виджетов. Иначе geometry вернет строку, где ширина и высота равняются по одному пикселю. Видимо таковы параметры на момент запуска приложения.
По умолчанию пользователь может разворачивать окно на весь экран, а также изменять его размер, раздвигая границы. Эти возможности можно отключить с помощью метода resizable. Так root.resizable(False, False) запретит изменение размеров главного окна как по горизонтали, так и вертикали. Развернуть на весь экран его также будет невозможно, при этом соответствующая кнопка разворота исчезает.
Заголовок окна
По умолчанию с стоке заголовка окна находится надпись «tk». Для установки собственного названия используется метод title.
…
root.title("Главное окно")
…
Если необходимо, заголовок окна можно вообще убрать. В программе ниже второе окно (Toplevel) открывается при клике на кнопку, оно не имеет заголовка, так как к нему был применен метод overrideredirect с аргументом True. Через пять секунд данное окно закрывается методом destroy.
from tkinter import *


def about():
    a = Toplevel()
    a.geometry('200x150')
    a['bg'] = 'grey'
    a.overrideredirect(True)
    Label(a, text="About this")
        .pack(expand=1)
    a.after(5000, lambda: a.destroy())


root = Tk()
root.title("Главное окно")
Button(text="Button", width=20).pack()
Label(text="Label", width=20, height=3)
    .pack()
Button(text="About", width=20, command=about)
    .pack()

root.mainloop()
Практическая работа
Напишите программу, в которой на главном окне находятся холст и кнопка «Добавить фигуру». Кнопка открывает второе окно, включающее четыре поля для ввода координат и две радиокнопки для выбора, рисовать ли на холсте прямоугольник или овал. Здесь же находится кнопка «Нарисовать», при клике на которую соответствующая фигура добавляется на холст, а второе окно закрывается. Проверку корректности ввода в поля можно опустить.
Курс с примерами решений практических работ:
pdf-версия,
android-приложение.
In this Python tutorial, we will learn everything about Python Tkinter Title. This blog is going to be an exploratory blog wherein we will answer the frequently asked questions. Also, we will cover these topics.
- Python Tkinter title
- How to change Python Tkinter title font size
- Python Tkinter title bar color
- Python Tkinter title bar text
- Python Tkinter title center
- Python Tkinter title color
- Python Tkinter frame title
- How to remove title bar in Python Tkinter
If you are new to Python TKinter or GUI programming, check out, Python GUI Programming.
- Python Tkinter ‘title‘ refers to the name provided to the window. It appears on the top of the window & mostly found on the top left or center of the screen.
- In the below picture you can notice that ‘PythonGuides’ is a title for the application.
- It set the title of this widget

Syntax:
Here is the syntax of Python Tkinter ‘Title’.
wm_title(string=None)Code Snippet:
Here is the simple code to create title of the window. ws.title('PythonGuides')
from tkinter import *

ws = Tk()
ws.title('PythonGuides')
ws.geometry('400x300')

ws.mainloop()
Output:
In this output, PythonGuides is displayed as the title of the screen. If you are windows you will see it on the left side of the window.
The above code we can use to set a title in Python Tkinter.
Read: Python Tkinter Autocomplete
Python tkinter title font size
- Python Tkinter ‘Title’ does not allow to change the font size of the window. The solo purpose of ‘title’ is to provide a name or short description of the window.
- This is a frequently asked question so we went through the official documentation & various other websites to find if there is any possibility to do that.
- The official website provides no function to change the font size. Other websites are showing label as title.
- This error we received while experimenting with font on the title.

Python tkinter title bar color
- Title function offers one function that is to set a string on the top of the window. There is no official documentation to support the color implementation on the title bar.
- Since this is a frequently asked question so we performed various experiments to discover tip for the user but none worked..
- code on other website displays the placement & modification on widgets. They do no work on title bar that is on the top of the window.
- type
help(ws.title)to read the official documentation. Here ws is the name of the window.
Python tkinter title bar text
Title bar is used to set the name or description of the window. In this section we will learn how to set the title of the window in python tkinter.
Syntax:
Here is the syntax for adding title to the window.
ws.title(string=None)Code Snippet:
Here is the code to add title to the application window.
from tkinter import *
ws = Tk()
ws.title('PythonGuides')

ws.mainloop()
Output:
Here is the output of the above code. You can notice ‘PythonGuides’ as the title.
Python tkinter title center
- There is no official way of setting the title of application window to the center. But if you are a linux or mac os user then text will automatically appear in center of the title bar.
- Windows user can apply some extra space to bring text to the center.
Python tkinter title color
- Python tkinter title bar do not provide any option to set the color. Neither foreground color nor background color can be added.
- Look and feel on Linux, Mac, and Windows may vary from each other.
Python Tkinter frame title
- In this section, we will learn how to set title on the Tkinter frame. Also, we will share the common error messages & their fix.
- Tkinter has provided two types of frame
- Frame
- LabelFrame
- LabelFrame adds text or title to the window whereas Frame do not title to the frame window. Apart from this difference rest both have similar functionalities.
- In case you are seeing error:
_tkinter.TclError: unknown option "-text"that means you have used Frame instead of LabelFrame.

The right way of adding title to the frame is by using Label Frame. Here is the demonstration.
Code Snippet:
Here is the code snippet to add title on the LabelFrame. You can notice in the output ‘PythonGuides’ is the title for the frame.
from tkinter import *
ws = Tk()
ws.title(string='')
ws.geometry('400x300')

frame = LabelFrame(
    ws,
    text='PythonGuides',
    bg='#f0f0f0',
    font=(20)
)
frame.pack(expand=True, fill=BOTH)

Button(
    frame,
    text='Submit'
).pack()

ws.mainloop()
Output:
Here is the output of the above code snippet. You can notice there is PythonGuides written as the title of the frame.

Python tkinter remove title bar
To remove title bar all you need to do is either delete the line ws.title(‘Any title’) or You can simply remove the text ‘Any title’. Here, any title is the title of the window.
You may like the following Python Tkinter tutorials:
- How to Set Background to be an Image in Python Tkinter
- Python Tkinter to Display Data in Textboxes
- How to Create Countdown Timer using Python Tkinter
- Upload a File in Python Tkinter
- Python Tkinter drag and drop
In this tutorial, we have learned everything about Python Tkinter Title. Also, we have covered these topics.
- python tkinter title
- python tkinter title font size
- python tkinter title bar color
- python tkinter title bar text
- python tkinter title center
- python tkinter title color
- python tkinter frame title
- python tkinter remove title bar

Python is one of the most popular languages in the United States of America. I have been working with Python for a long time and I have expertise in working with various libraries on Tkinter, Pandas, NumPy, Turtle, Django, Matplotlib, Tensorflow, Scipy, Scikit-Learn, etc… I have experience in working with various clients in countries like United States, Canada, United Kingdom, Australia, New Zealand, etc. Check out my profile.
|
3 / 3 / 0 Регистрация: 04.04.2015 Сообщений: 141 |
|
|
1 |
|
|
25.03.2017, 20:36. Показов 14081. Ответов 6
Каким образом задаётся заголовок окна и цвет шрифта для консольной программы (python 3.4.4 win32)?
__________________
0 |

|
Garry Galler
5403 / 3827 / 1214 Регистрация: 28.10.2013 Сообщений: 9,554 Записей в блоге: 1 |
||||
|
26.03.2017, 00:16 |
2 |
|||
|
Решение
заголовок окна Платформо(
)зависимым способом? Для windows через WinAPI:
Для расцвечивания вывода в консоль пользуюсь модулем colorama.
2 |
 Сообщение было отмечено watersoda как решение

|
4606 / 2027 / 359 Регистрация: 17.03.2012 Сообщений: 10,081 Записей в блоге: 6 |
|
|
27.03.2017, 11:27 |
3 |
|
В Линуксе есть специальные коды, чтобы расцветить вывод. А кроссплатформенно — сторонние библиотеки.
0 |
|
3 / 3 / 0 Регистрация: 04.04.2015 Сообщений: 141 |
|
|
27.03.2017, 21:13 [ТС] |
4 |
|
Хотелось бы получить небольшие уточнения: 1) colorama нужно отдельно устанавливать? 2) использование colorama является платформонезависимым способом задать цвет шрифта?
0 |
|
5403 / 3827 / 1214 Регистрация: 28.10.2013 Сообщений: 9,554 Записей в блоге: 1 |
|
|
27.03.2017, 22:29 |
5 |
|
watersoda,
0 |
|
3 / 3 / 0 Регистрация: 04.04.2015 Сообщений: 141 |
|
|
29.03.2017, 20:12 [ТС] |
6 |
|
А есть ли способ раскрасить шрифты, работающий и под win, и под lin?
0 |
|
Garry Galler
5403 / 3827 / 1214 Регистрация: 28.10.2013 Сообщений: 9,554 Записей в блоге: 1 |
||||||||
|
29.03.2017, 22:44 |
7 |
|||||||
|
А есть ли способ раскрасить шрифты, работающий и под win, и под lin? colorama
То что я был не уверен, не означало что не будет работать — просто возьмите и проверьте. На странице загрузки написано, что тестировалось на Windows XP (CMD, Console2), Ubuntu (gnome-terminal, xterm), and OS X.
А чтобы работало кроссплатформенно в справке написано, что нужно делать так:
0 |