Некоторым пользователям необходимо поменять курсор мыши на своем компьютере, работающем на операционной системе Windows, чтобы изменить привычный интерфейс внешнего вида системы. В этом случае, одним пользователям нужен красивый курсор мыши, другим необходимо изменить размер, цвет или форму указателя мыши.
Курсор, указатель мыши — элемент графического интерфейса операционной системы, указывающий на объект, с которым будет выполняться взаимодействие устройств для управления компьютером. В ОС Windows установлен стандартный вид указателя, подходящий для большинства пользователей.
Содержание:
- Как изменить курсор мыши на Windows 10
- Выбор схемы: изменяем курсор мыши в ее свойствах
- Настройка указателя мыши
- Сброс настроек указателя мыши
- Как изменить курсор мыши на Windows с помощью сторонних наборов файлов
- Выводы статьи
Но, для части пользователей актуален вопрос о том, как изменить указатель мыши на компьютере. Если вам потребовалось персонализировать внешний вид операционной системы, вы можете изменить в том числе и отображение на экране для указателя ручного манипулятора своего ПК.
В параметрах Windows имеются разные виды курсоров мыши, которые можно использовать вместо стандартного варианта по умолчанию.
В этой статье мы рассмотрим несколько способов, как изменить курсор мыши на компьютере, работающем в операционной системе Windows. Мы сделаем изменения в параметрах при помощи системных инструментов, а также расскажем, как поменять курсор мыши на Windows, используя готовые сторонние наборы файлов указателей мыши из интернета.
Как изменить курсор мыши на Windows 10
Сначала посмотрим, как поменять курсор мыши на Windows 10 из настроек операционной системы. В параметрах ОС находятся опции, с помощью которых можно настроить манипулятор своего ПК, в том числе его внешний вид на экране.
Для доступа к настройкам курсора, пройдите шаги:
- Запустите приложение «Параметры» из меню «Пуск».
- Откройте «Специальные возможности».
- Перейдите во вкладку «Указатель мыши».
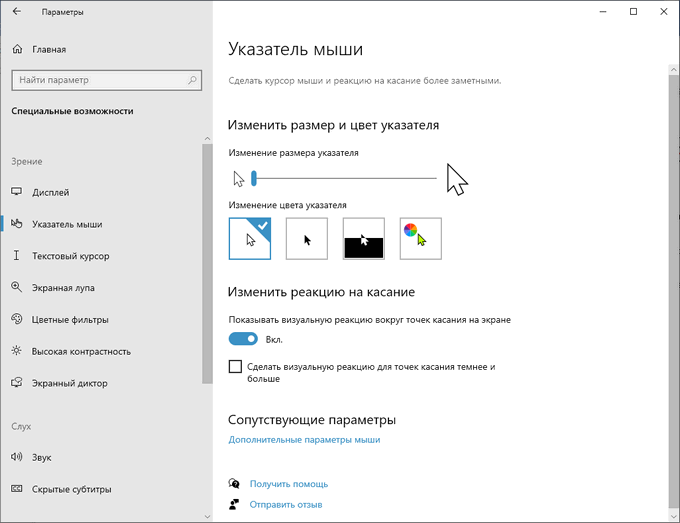
Сначала настроим визуальные параметры в разделе «Изменить размер и цвет указателя».
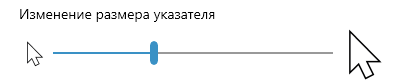
Чтобы изменить размер курсора мыши, передвиньте ползунок на шкале «Изменение размера указателя» до подходящего предела.
Чтобы поменять цвет курсора мыши, перейдите к опции «Изменение цвета указателя». Подберите подходящий вариант из предложенных, например, из рекомендуемых цветов указателей.

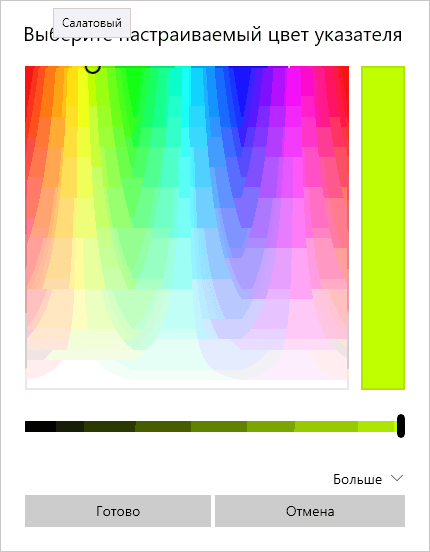
Если вы хотите установить свой цвет для курсора мыши, нажмите на опцию «Выберите настраиваемый цвет указателя». В открывшемся окне подберите подходящий цвет с помощью палитры.
Задайте подходящие настройки в разделе «Изменить реакцию на касание» по своим предпочтениям.
В разделе «Сопутствующие параметры» нажмите на ссылку «Дополнительные параметры мыши».
В открытом окне можно выбрать основную кнопку, скорость курсора, параметры прокрутки колесика мыши.
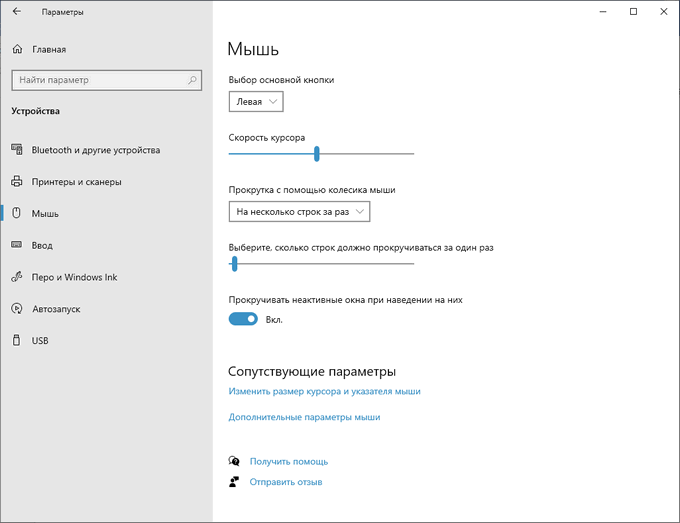
Чтобы перейти к более тонким настройкам, в разделе «Сопутствующие параметры» нажмите на «Дополнительные параметры мыши».
Выбор схемы: изменяем курсор мыши в ее свойствах
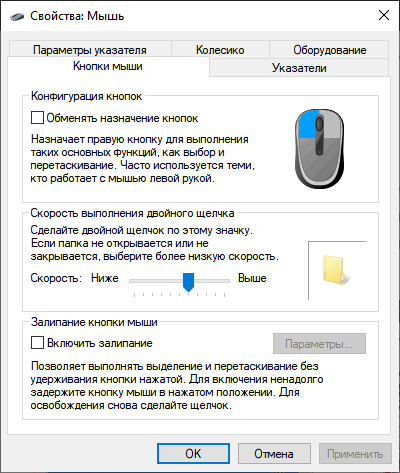
После перехода к свойствам мыши, откроется окно с параметрами манипулятора. Здесь можно поменять назначение кнопок, скорость выполнения двойного щелчка, включить залипание, изменить опции перемещения курсора и прокрутки колесика мыши.
В Windows имеются опции для установки пользовательской схемы набора указателей мыши. Доступно несколько вариантов системных схем, в каждую из которых входит 17 типов указателей, отображающихся в разных ситуациях при наведении курсора на объекты, находящиеся на экране компьютера.
Выполните следующие действия:
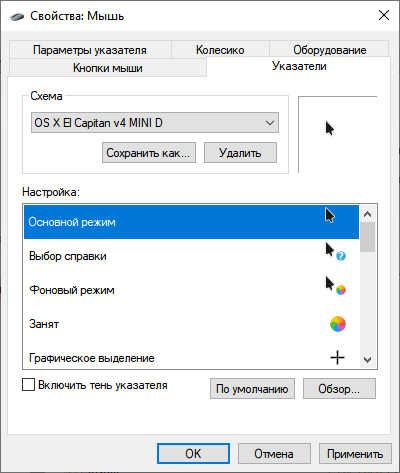
- Откройте вкладку «Указатели».
- В разделе «Схема» подберите подходящий вариант.

- В окне свойств мыши отобразится новый вид указателя, например, черный курсор мыши, а в разделе «Настройка» показаны виды указателей мыши в разных режимах работы на компьютере в выбранной схеме.
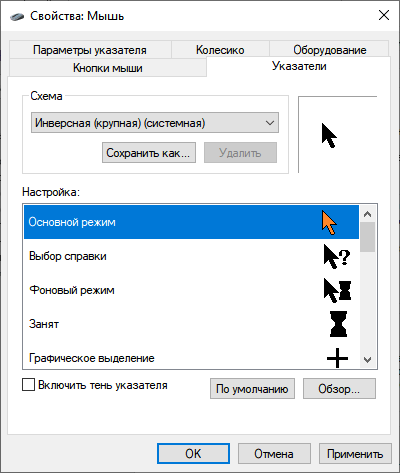
- Если схема вам подошла, то в разделе «Схема» нажмите на кнопку «Сохранить как…».
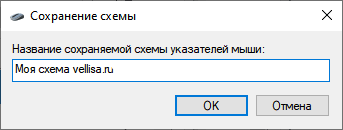
- В окне сохранение схемы выберите любое имя для вашей схемы, нажмите на кнопку «ОК».
- Для применения всех выбранных настроек, в окне «Свойства: Мышь» нажмите на кнопку «ОК».
Настройка указателя мыши
Пользователь может установить указатель мыши для конкретных режимов работы на ПК, в зависимости от своих предпочтений.
Сделайте следующее:
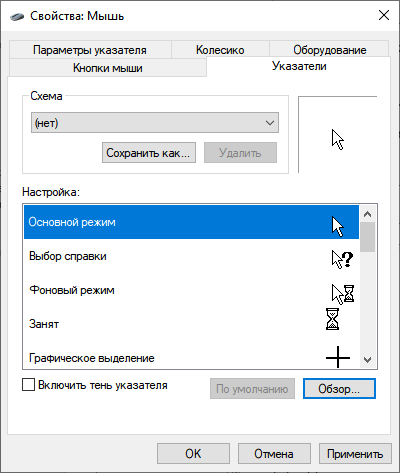
- В окне свойств мыши, во вкладке «Указатели», в разделе «Настройка» выберите соответствующий режим отображения.
- Нажмите на кнопку «Обзор».
- Откроется папка с файлами курсоров, из которых потребуется выбрать подходящий файл с расширениями «*.ani» или «*.cur», соответствующий определенному режиму использования отображения.
- Нажмите на кнопку «Открыть».

- Сохраните выбранные опции для курсора нажатием на кнопку «ОК».
Сброс настроек указателя мыши
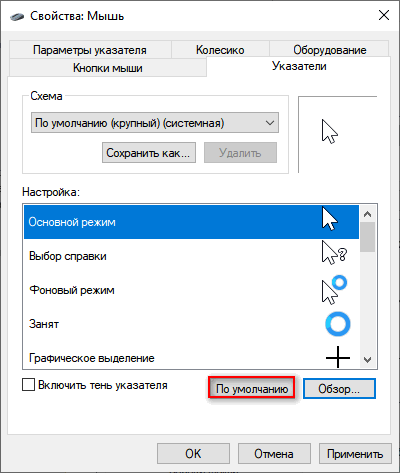
Если измененные параметры отображения указателя мыши вам не подошли, вы можете вернуться к стандартным настройкам. Для этого, во вкладке «Указатели» окна свойств мыши сначала нажмите на кнопку «По умолчанию», а затем на кнопку «ОК».
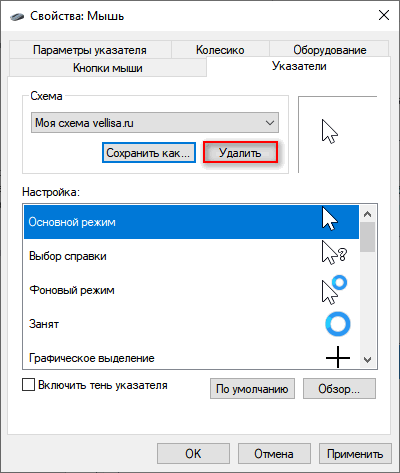
Чтобы удалить текущую схему использования мыши, выберите схему из списка, а затем нажмите на кнопку «Удалить». Далее в окне «Свойства: Мышь» нажмите на кнопку «ОК».
Сейчас мы узнали, как поменять курсор мыши на Виндовс встроенными инструментами операционной системы. Но, существуют и другие способы, об одном из которых мы поговорим ниже.
Как изменить курсор мыши на Windows с помощью сторонних наборов файлов
Очень требовательному пользователю могут не подойти предлагаемые системные курсоры мыши. В этом случае можно воспользоваться помощью стороннего программного обеспечения, установив на компьютер соответствующую программу, в функции которой входит настройка указателя мыши.
Мы воспользуемся другим вариантом: скачаем курсор мыши для Windows из интернета. Мы не станем устанавливать дополнительную программу на свой ПК, а только добавим новые файлы курсоров мыши к уже имеющимся в операционной системе по умолчанию. При добавлении новых курсоров будут использованы только стандартные средства для Windows.
Теперь, давайте посмотрим, как установить курсор мыши предложенным методом.
Пройдите последовательные шаги:
- Запустите браузер на компьютере.
- Перейдите по ссылке на сайт 7themes.su.
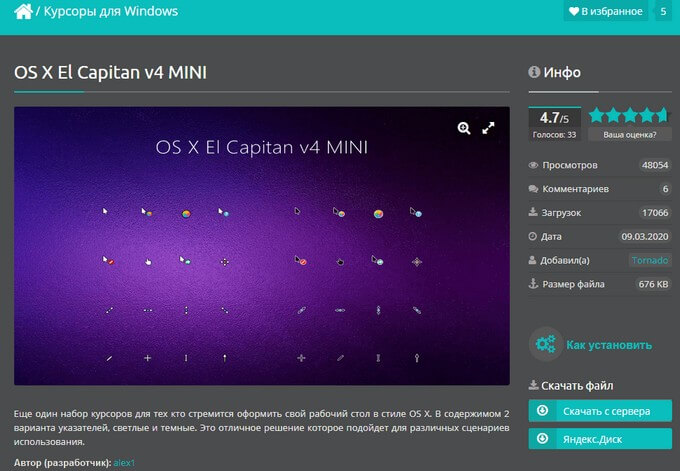
- На главной странице сайта выберите понравившуюся тему для курсоров из числа предложенных. На выбор представлено большое количество различных наборов с темами оформления указателей мыши, подходящих для Windows 10, Windows 8, Windows
- На странице темы нажмите на одну из кнопок: «Скачать с сервера» или «Яндекс.Диск», в зависимости от того, откуда вам проще загрузить курсоры на свой компьютер.
- Распакуйте архив на ПК с помощью программы-архиватора.
- В состав архива входят папка или несколько папок выбранной темы с курсорами.
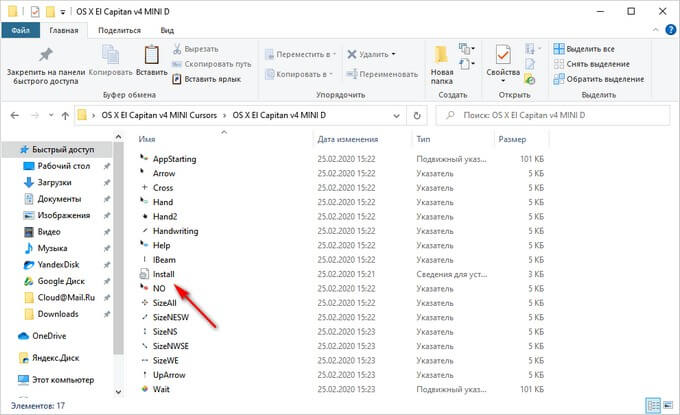
- Откройте папку в Проводнике.
- В папке находятся файлы указателей мыши с расширениями «.ani» и «.cur».
- Щелкните правой кнопкой мыши по файлу «Install» с расширением «.inf».
- В контекстном меню выберите «Установить».
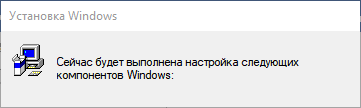
- В окне «Установка Windows» выполняется настройка компонентов указателя мыши.
- Открывается окно «Свойства: Мышь», в котором нужно выбрать схему, а затем нажать на кнопку «ОК».
На компьютере используется новая схема с указателями мыши.
Если в архиве нет файла «Install.inf» вы можете самостоятельно добавить курсоры вручную в папку «Cursor», которая находится по пути:
C:WindowsCursors
Проделайте следующие действия:
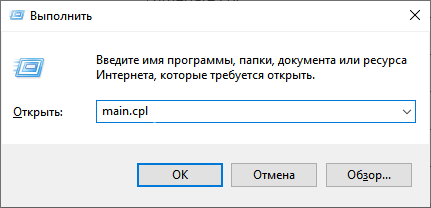
- Нажмите на клавиши «Win» + «R».
- В окне диалогового окна «Выполнить» введите команду «main.cpl».
- Нажмите на клавишу «Enter».
- В окне свойств мыши откройте вкладку «Указатели».
- Нажмите на кнопку «Обзор…».
- При помощи Проводника выберите все скачанные файлы из набора с курсорами для добавления в системную папку «Cursors».
- Нажмите на кнопку «Сохранить как…», чтобы присвоить имя для новой схемы с указателями мыши.
В дальнейшем вы можете снова выбрать дефолтное отображение курсоров мыши, если вам надоест новое оформление указателей. Обратную операцию проделать можно таким образом:
- В свойствах мыши войдите во вкладку «Указатели».
- Удалите ненужную схему.
- Выберите новую схему для указателя мыши.
Выводы статьи
Если часть пользователей желает изменить некоторые параметры интерфейса в операционной системе Windows, в частности внешний вид указателя мыши, они могут поменять настройки системными методами или с помощью установки на компьютер нового набора курсоров. В результате, на экране ПК изменится отображение указателя мыши, используемого в разных режимах работы ОС.
Похожие публикации:
- Как убрать размытие экрана в Windows 10 — 3 способа
- Включение или отключение компонентов Windows: таблица
- Как убрать надпись активация Windows — 3 способа
- Как убрать значки с Рабочего стола Windows — 3 способа
- Прозрачная панель задач Windows 10 разными способами

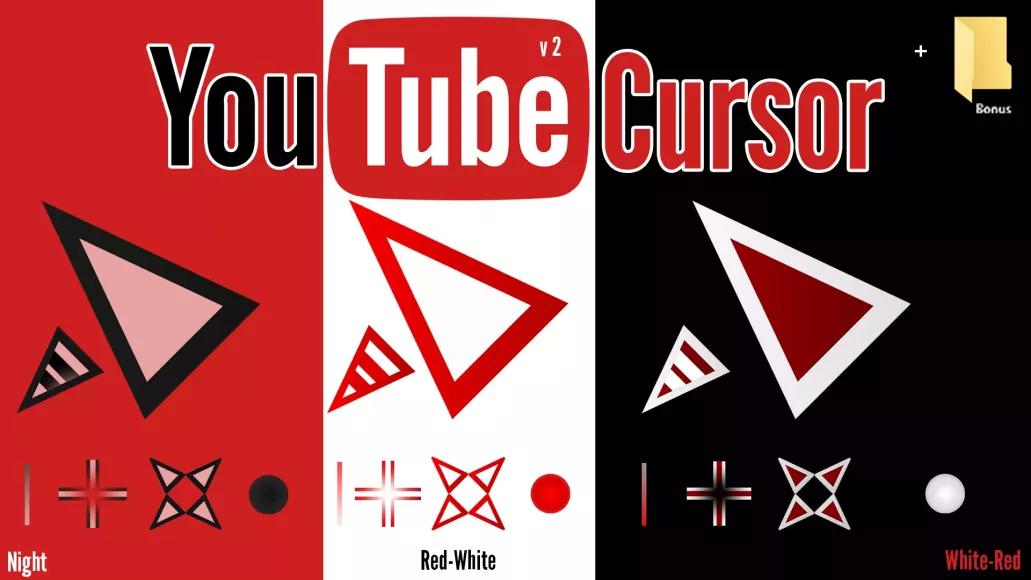
«YouTube Cursor v.2», в отличии от «YouTube Cursor», имеет более качественную картинку, а так же 3 разные расцветки: Ночной, Красно-Белый, Бело-Красный. Так же я не забыл оставить и улучшить некоторые виды курсоров, которые расположились в папке Bonus.
Автор (разработчик): TheJacksonGamer

Смотрите еще
14 комментариев
Порядок вывода комментариев:

0
ValikProd
(Пользователь)
04.02.2022 в 12:46
№ 13
А можно просто белый, прошу весь инет перерыл.
0
Єлена Зайковал
(Гость)
30.10.2020 в 21:31
№ 12
ryxa510 какая программа

0
ryxa510
(Пользователь)
22.01.2019 в 07:58
№ 10
Посмотрел этот набор через одну программку (правда, чуть позже заметил это и здесь, рядом с фото есть характеристики этого набора) и увидел сразу, что разрешение здесь очень большое — 256х256.
С помощью этой же программы взял и уменьшил до 32. Пиксели пропали — края гладкие. Просто у самой Винды такая особенность — она может показывать курсоры только 32х32.

0
0
-1
23lerry
(Новичок)
15.08.2018 в 22:12
№ 8
А как скачать?

0
Logggin
(Пользователь)
16.08.2018 в 13:41
№ 9
Справа колонка: Скачать с сервера / Яндекс.Диск

0
GrayWolf
(Пользователь)
10.08.2018 в 17:58
№ 2
За труды респект, оригинально по своему,
кому как конечно, по мне так не очень  ! имхо
0
Спасибо за критику, но можно ли узнать что по-вашему мнению не хватает (не в данном курсоре, а впринципе), дабы исправиться в будующем?!
0
DudosikW7
(Пользователь)
10.08.2018 в 23:07
№ 4
Сделайте что-то в стиле DIM курсора ;3
А так хорошо что какие та курсоры на сайте выходят 
0
GrayWolf
(Пользователь)
10.08.2018 в 23:53
№ 5
Броская пиксельность, может такова была задумка,
но такой стиль отрисовки использовался лет 10 назад.
Сейчас в тренде очень тонкая четкость. 
В приоритете стоит Breeze-Obsidian сейчас у меня,
есть на форуме, посмотри, плавность в деле.
0
Logggin
(Пользователь)
11.08.2018 в 18:46
№ 6
Как только Numix не переделывали уже и не переименовывали)
0
GrayWolf
(Пользователь)
11.08.2018 в 21:43
№ 7
Возможно, все может быть !
0
Infrcted
(Гость)
10.08.2018 в 14:59
№ 1
Качество по прежнему не очень, слишком уж он пиксельнный
- Добавлен
- 19 мая 2022
- Просмотров
-
528
- Лайков
-
0
Указатели в стиле ютуба. А если быть ещё точнее, то это вторая версия набора курсоров по подобной тематике. В отличии от своей старой, первой версии обладает улучшенным внешним видом (картинка стала более качественной в принципе), и в качестве дополнения, дабы это не выглядело как мизерное обновление, внесены сразу три новые расцветки. А точнее:
1)Ночная
2)Красно-белая
3)Бело-красная
Это было сделано как небольшой бонус для тех, кому оригинальная версия курсоров уже наскучила окончательно, что вполне вероятно.

uiuiui
- Размер 1.09 Mb
- Скачали 26
- Добавлен 19.05.2022
- Загрузил @qiwioner
- SizeAll.cur264.06 Kb
- SizeNESW.cur264.06 Kb
- SizeNS.cur264.06 Kb
- SizeNWSE.cur264.06 Kb
- SizeWE.cur264.06 Kb
- UpArrow.cur264.06 Kb
- Wait.ani14.44 Mb
- (Installer).inf2.93 Kb
- AppStarting.ani18.83 Mb
- Arrow.cur264.06 Kb
- Cross.cur264.06 Kb
- Hand.cur264.06 Kb
- Handwriting.cur264.06 Kb
- Help.cur264.06 Kb
- IBeam.cur264.06 Kb
- NO.ani2.58 Mb
- Person.cur264.06 Kb
- Pin.cur264.06 Kb
uiuiui
- Размер 1.01 Mb
- Скачали 13
- Добавлен 19.05.2022
- Загрузил @qiwioner
- Person.cur264.06 Kb
- Pin.cur264.06 Kb
- SizeAll.cur264.06 Kb
- SizeNESW.cur264.06 Kb
- SizeNS.cur264.06 Kb
- SizeNWSE.cur264.06 Kb
- SizeWE.cur264.06 Kb
- UpArrow.cur264.06 Kb
- Wait.ani14.44 Mb
- (Installer).inf2.93 Kb
- AppStarting.ani18.83 Mb
- Arrow.cur264.06 Kb
- Cross.cur264.06 Kb
- Hand.cur264.06 Kb
- Handwriting.cur264.06 Kb
- Help.cur264.06 Kb
- IBeam.cur264.06 Kb
- NO.ani2.58 Mb
uiuiui
- Размер 1.02 Mb
- Скачали 13
- Добавлен 19.05.2022
- Загрузил @qiwioner
Понравился файл?
Мы платим за добавление контента. Вы можете получать до 50₽ за каждую публикацию.
Узнать больше
Похожие файлы
![]()
Download Article
![]()
Download Article
This wikiHow teaches you how to adjust your computer’s cursor properties, and customize your pointer for your personal needs. If you’re a PC user, Windows allows you to choose from a selection of stock cursor sizes, colors, and schemes. On Mac, you can natively change your cursor’s size, but not it’s color or shape. If you’re not satisfied with your computer’s stock cursor sets, you can download custom cursors online, and add them to your computer. While Windows makes it easier to add custom cursors in the Mouse Properties menu, Mac users will need to use a third-party app to apply custom pointers and cursors.
-
1
Open the
Start menu on your computer. This button looks like the Windows icon in the lower-left corner of your screen. It will open your Start menu.
-
2
Click the
gear icon on the bottom-left. This is your Settings button in the lower-left corner of the Start menu. It will open your PC Settings in a new window.
- On some older versions of Windows, you can open Control Center from the Start menu, select Ease of Access here, and click Change how your mouse works. This will give you the same options as here.
Advertisement
-
3
Click Ease of Access in the Settings window. This will open your accessibility options on a new menu.
-
4
Click Mouse on the left-menu. You will find a navigation menu on the left-hand side of the Ease of Access menu. Select Mouse here to see your mouse and cursor options.
-
5
Select the size of pointer you want to use under «Pointer size.« Click one of the three options here to change your cursor’s size.
- You can select a small, medium or large cursor here.
-
6
Select a color for your cursor under «Pointer color.« Just click the option you want to use under this heading to change your cursor’s color. You can select a:
- White pointer, which will always be white.
- Black pointer, which will always be black.
- Inverting pointer, which will automatically adapt to the background color to look white on darker backgrounds, and black on lighter backgrounds.


Advertisement
-
1
Open the
Start menu on your computer. This button looks like the Windows icon in the lower-left corner of your screen. It will open your Start menu.
- Alternatively, you can click the search or Cortana button next to the Start menu icon.
-
2
Type Mouse on your keyboard. This will search your system, and show the matching results on the menu.
-
3
Click the Mouse Settings (Win 10) or Mouse option at the top. Your mouse settings should be the top result in the search.
-
4
Click Additional mouse options (Win 10 only) at the bottom. This is a blue link at the bottom of the Mouse Settings window on Windows 10. It will open Mouse Properties.
- You can skip this step if you’re using an older version of Windows.
-
5
Click the Pointers tab at the top of Mouse Properties. This button is next to Buttons at the top of the Mouse Properties window.
-
6
Click the drop-down menu below «Scheme.« This will open all your cursor options in a drop-down menu.
-
7
-
8
Check the
«Enable pointer shadow» box (optional). This option is in the lower-left corner of the pop-up window. When it’s checked, your cursor will always have a tiny shadow beneath the cursor icon.
-
9
Click the Apply button. This button is in the lower-right corner of the pop-up window. It will apply your new settings, and change your cursor to the selected scheme.


Advertisement
-
1
Open the
Apple menu on the menu bar. This button is in the upper-left corner of your screen. It will open a drop-down menu.
- MacOS only allows you to change the cursor size; it does not offer custom cursor designs. However, you can download and use third-party cursor icons.
-
2
Click System Preferences on the menu. This will open your Mac’s settings panel in a new window.
-
3
Click the Accessibility option in System Preferences. This option looks like a white human icon in a blue circle. You can find it on the fourth row of options.
- On older Mac versions, this option may be named Universal Access.
-
4
Click the Display option on the left-menu. In the Accessibility menu, find and click the Display option on the sidebar on the left-hand side.
-
5
Click and drag the Cursor size slider. This slider allows you to manually adjust your cursor’s size to your liking.
- Your new settings will be saved automatically. You can close System Preferences when you’re done adjusting.
-
6
Check the
«Shake mouse pointer to locate» option (optional). You can find this option below the «Cursor size» slider.
- When this option is enabled, you can quickly shake your mouse to temporarily make it bigger, and easily find its location on your screen.


Advertisement
-
1
Open http://www.rw-designer.com/gallery in your internet browser. Type or paste this URL into your browser’s address bar, and press ⏎ Return to open the RW-Designer cursor gallery.
- This is an online, community-driven cursor gallery. You can find and download a variety of popular cursor icons here.
- Alternatively, you can check out other websites and online galleries to find different cursor icons.
-
2
Click a cursor to see its details. When you find a cursor pack you like, click on it to see the pack details on a new page.
-
3
Scroll down and click the cursor you want to download. You can download and use any cursor that ends with the «.cur» format extension.
- Make sure to select a «.cur» cursor here. Animated cursor designs with the «.ani» format will not work on Mac.
-
4
Click the Download button. This will download the selected cursor design to your Downloads folder.
- You will now have to use a third-party app to apply this custom design to your cursor.
- You can use Mousecape — a tiny, free, open-source app to use these custom cursor images on Mac. You can check out the following methods to find out how.


Advertisement
-
1
-
2
Click Mousecape_0.0.6b2.zip under the «Assets» heading. You can find it at the bottom. This will download the Mousecape app to your computer in a compressed ZIP file.
- If you don’t see anything under «Assets», click the
drop-down icon to expand the «Assets» list.
- If you don’t see anything under «Assets», click the
-
3
Open the «Mousecape_0.0.6b2.zip» file in your Downloads folder. This will extract the Mousecape app to your computer.
-
4
Double-click the Mousecape app. After extracting the downloaded ZIP file, open the Mousecape app to use it on your Mac.
-
5
Click the File tab on the menu bar. After opening the Mousecape app, click this button on the menu bar in the upper-left corner of your screen.
-
6
Click New Cape on the «File» menu. This will create a new «Unnamed» entry in the Mousecape window.
-
7
Right-click the new «Unnamed» entry in Mousecape. This will open your right-click options.
-
8
Click Edit on the right-click menu. This will open the new entry’s properties in a dialogue box.
- This will open a new window to customize this new cursor cape.
- Make sure to check out the following methods in order to find out how to customize and use new cursors with Mousecape on Mac.


Advertisement
-
1
Enter a name for your new cursor in the «Name» field. In the editing window, you can delete «Unnamed» in the Name box, and give a custom name to your new cursor.
-
2
Click the + button on the bottom-left. This will add an «Unknown» cursor to this entry on the left menu.
-
3
Click Unknown on the left menu. You can add your custom cursor design here.
-
4
Click the Type drop-down. This will open a list of all the different cursor types and functions you can customize.
-
5
Select Arrow in the drop-down. When this option is selected, you can change your pointer cursor arrow’s design.
-
6
Drag and drop your downloaded «.cur» cursor design to the «1x» box. Find the «.cur» custom cursor you downloaded on your computer, and drag it to the «1x» box at the bottom of the Mousecape editing window.
- The new cursor design will now show up in the «1x» box here.
- Optionally, you can change the numbers in the «Size» box here, and adjust your custom cursor’s size.
-
7
Click the red close button on the top-left of the editing window. You will be asked if you want to save changes to your new design.
-
8
Click Save in the pop-up. This will save your new cursor design to Mousecape.
- You can now apply this new cursor, and start using it any time you want.


Advertisement
-
1
Find the cursor you want to use in the Mousecape window. All your custom cursors are saved and listed here.
- Once you create a custom cursor design, it’s saved in Mousecape. You can always go back and switch between different cursors any time you want.
-
2
Right-click a cursor entry in the Mousecape window. You will see your right-click options on a drop-down menu.
-
3
Click Apply on the right-click menu. This will instantly change your cursor to the selected design.
-
4
Click File on the menu bar. This will open a drop-down menu.
-
5
Click New Cape on menu. This will create a new, blank «Unnamed» entry in the Mousecape window.
-
6
Right-click the new «Unnamed» cursor entry. This will open your options on a right-click menu.
-
7
Click Apply on the right-click menu. This will switch your cursor to Mac’s default design.
- You can also right-click a cursor entry here, and select Remove to delete the selected design from your computer.


Advertisement
Add New Question
-
Question
I couldn’t find the cursor folder. Any ideas?

Click the Windows Start button, then click Run. Type in «Windows» then click enter and you will be in the «Windows» folder. The cursor folder should be somewhere in there.
-
Question
I changed my cursor with Custom Crust and now I can’t get it back. How do I set my cursor back to default?
In Mousecape, make a new cape with no picture. Use that and don’t change it.
-
Question
When I click away, why does the cursor go away?
Make sure that you right-clicked the cape and pressed apply. That should work.
Ask a Question
200 characters left
Include your email address to get a message when this question is answered.
Submit
Advertisement
Thanks for submitting a tip for review!
-
Avoid any banner ads or pop-ups that advertise cursors. These are often gateways for adware. Stick to trusted cursor libraries on reputable sites.
Advertisement
About This Article
Article SummaryX
1. Open the Start menu.
2. Click the gear or Settings button.
3. Click Ease of Access.
4. Click Mouse on the left-menu.
5. Select a cursor size.
6. Select a pointer color.
Did this summary help you?
Thanks to all authors for creating a page that has been read 167,325 times.
Is this article up to date?
![]()
Download Article
![]()
Download Article
This wikiHow teaches you how to adjust your computer’s cursor properties, and customize your pointer for your personal needs. If you’re a PC user, Windows allows you to choose from a selection of stock cursor sizes, colors, and schemes. On Mac, you can natively change your cursor’s size, but not it’s color or shape. If you’re not satisfied with your computer’s stock cursor sets, you can download custom cursors online, and add them to your computer. While Windows makes it easier to add custom cursors in the Mouse Properties menu, Mac users will need to use a third-party app to apply custom pointers and cursors.
-
1
Open the
Start menu on your computer. This button looks like the Windows icon in the lower-left corner of your screen. It will open your Start menu.
-
2
Click the
gear icon on the bottom-left. This is your Settings button in the lower-left corner of the Start menu. It will open your PC Settings in a new window.
- On some older versions of Windows, you can open Control Center from the Start menu, select Ease of Access here, and click Change how your mouse works. This will give you the same options as here.
Advertisement
-
3
Click Ease of Access in the Settings window. This will open your accessibility options on a new menu.
-
4
Click Mouse on the left-menu. You will find a navigation menu on the left-hand side of the Ease of Access menu. Select Mouse here to see your mouse and cursor options.
-
5
Select the size of pointer you want to use under «Pointer size.« Click one of the three options here to change your cursor’s size.
- You can select a small, medium or large cursor here.
-
6
Select a color for your cursor under «Pointer color.« Just click the option you want to use under this heading to change your cursor’s color. You can select a:
- White pointer, which will always be white.
- Black pointer, which will always be black.
- Inverting pointer, which will automatically adapt to the background color to look white on darker backgrounds, and black on lighter backgrounds.
Advertisement
-
1
Open the
Start menu on your computer. This button looks like the Windows icon in the lower-left corner of your screen. It will open your Start menu.
- Alternatively, you can click the search or Cortana button next to the Start menu icon.
-
2
Type Mouse on your keyboard. This will search your system, and show the matching results on the menu.
-
3
Click the Mouse Settings (Win 10) or Mouse option at the top. Your mouse settings should be the top result in the search.
-
4
Click Additional mouse options (Win 10 only) at the bottom. This is a blue link at the bottom of the Mouse Settings window on Windows 10. It will open Mouse Properties.
- You can skip this step if you’re using an older version of Windows.
-
5
Click the Pointers tab at the top of Mouse Properties. This button is next to Buttons at the top of the Mouse Properties window.
-
6
Click the drop-down menu below «Scheme.« This will open all your cursor options in a drop-down menu.
-
7
-
8
Check the
«Enable pointer shadow» box (optional). This option is in the lower-left corner of the pop-up window. When it’s checked, your cursor will always have a tiny shadow beneath the cursor icon.
-
9
Click the Apply button. This button is in the lower-right corner of the pop-up window. It will apply your new settings, and change your cursor to the selected scheme.
Advertisement
-
1
Open the
Apple menu on the menu bar. This button is in the upper-left corner of your screen. It will open a drop-down menu.
- MacOS only allows you to change the cursor size; it does not offer custom cursor designs. However, you can download and use third-party cursor icons.
-
2
Click System Preferences on the menu. This will open your Mac’s settings panel in a new window.
-
3
Click the Accessibility option in System Preferences. This option looks like a white human icon in a blue circle. You can find it on the fourth row of options.
- On older Mac versions, this option may be named Universal Access.
-
4
Click the Display option on the left-menu. In the Accessibility menu, find and click the Display option on the sidebar on the left-hand side.
-
5
Click and drag the Cursor size slider. This slider allows you to manually adjust your cursor’s size to your liking.
- Your new settings will be saved automatically. You can close System Preferences when you’re done adjusting.
-
6
Check the
«Shake mouse pointer to locate» option (optional). You can find this option below the «Cursor size» slider.
- When this option is enabled, you can quickly shake your mouse to temporarily make it bigger, and easily find its location on your screen.
Advertisement
-
1
Open http://www.rw-designer.com/gallery in your internet browser. Type or paste this URL into your browser’s address bar, and press ⏎ Return to open the RW-Designer cursor gallery.
- This is an online, community-driven cursor gallery. You can find and download a variety of popular cursor icons here.
- Alternatively, you can check out other websites and online galleries to find different cursor icons.
-
2
Click a cursor to see its details. When you find a cursor pack you like, click on it to see the pack details on a new page.
-
3
Scroll down and click the cursor you want to download. You can download and use any cursor that ends with the «.cur» format extension.
- Make sure to select a «.cur» cursor here. Animated cursor designs with the «.ani» format will not work on Mac.
-
4
Click the Download button. This will download the selected cursor design to your Downloads folder.
- You will now have to use a third-party app to apply this custom design to your cursor.
- You can use Mousecape — a tiny, free, open-source app to use these custom cursor images on Mac. You can check out the following methods to find out how.
Advertisement
-
1
-
2
Click Mousecape_0.0.6b2.zip under the «Assets» heading. You can find it at the bottom. This will download the Mousecape app to your computer in a compressed ZIP file.
- If you don’t see anything under «Assets», click the
drop-down icon to expand the «Assets» list.
- If you don’t see anything under «Assets», click the
-
3
Open the «Mousecape_0.0.6b2.zip» file in your Downloads folder. This will extract the Mousecape app to your computer.
-
4
Double-click the Mousecape app. After extracting the downloaded ZIP file, open the Mousecape app to use it on your Mac.
-
5
Click the File tab on the menu bar. After opening the Mousecape app, click this button on the menu bar in the upper-left corner of your screen.
-
6
Click New Cape on the «File» menu. This will create a new «Unnamed» entry in the Mousecape window.
-
7
Right-click the new «Unnamed» entry in Mousecape. This will open your right-click options.
-
8
Click Edit on the right-click menu. This will open the new entry’s properties in a dialogue box.
- This will open a new window to customize this new cursor cape.
- Make sure to check out the following methods in order to find out how to customize and use new cursors with Mousecape on Mac.
Advertisement
-
1
Enter a name for your new cursor in the «Name» field. In the editing window, you can delete «Unnamed» in the Name box, and give a custom name to your new cursor.
-
2
Click the + button on the bottom-left. This will add an «Unknown» cursor to this entry on the left menu.
-
3
Click Unknown on the left menu. You can add your custom cursor design here.
-
4
Click the Type drop-down. This will open a list of all the different cursor types and functions you can customize.
-
5
Select Arrow in the drop-down. When this option is selected, you can change your pointer cursor arrow’s design.
-
6
Drag and drop your downloaded «.cur» cursor design to the «1x» box. Find the «.cur» custom cursor you downloaded on your computer, and drag it to the «1x» box at the bottom of the Mousecape editing window.
- The new cursor design will now show up in the «1x» box here.
- Optionally, you can change the numbers in the «Size» box here, and adjust your custom cursor’s size.
-
7
Click the red close button on the top-left of the editing window. You will be asked if you want to save changes to your new design.
-
8
Click Save in the pop-up. This will save your new cursor design to Mousecape.
- You can now apply this new cursor, and start using it any time you want.
Advertisement
-
1
Find the cursor you want to use in the Mousecape window. All your custom cursors are saved and listed here.
- Once you create a custom cursor design, it’s saved in Mousecape. You can always go back and switch between different cursors any time you want.
-
2
Right-click a cursor entry in the Mousecape window. You will see your right-click options on a drop-down menu.
-
3
Click Apply on the right-click menu. This will instantly change your cursor to the selected design.
-
4
Click File on the menu bar. This will open a drop-down menu.
-
5
Click New Cape on menu. This will create a new, blank «Unnamed» entry in the Mousecape window.
-
6
Right-click the new «Unnamed» cursor entry. This will open your options on a right-click menu.
-
7
Click Apply on the right-click menu. This will switch your cursor to Mac’s default design.
- You can also right-click a cursor entry here, and select Remove to delete the selected design from your computer.
Advertisement
Add New Question
-
Question
I couldn’t find the cursor folder. Any ideas?
Click the Windows Start button, then click Run. Type in «Windows» then click enter and you will be in the «Windows» folder. The cursor folder should be somewhere in there.
-
Question
I changed my cursor with Custom Crust and now I can’t get it back. How do I set my cursor back to default?
In Mousecape, make a new cape with no picture. Use that and don’t change it.
-
Question
When I click away, why does the cursor go away?
Make sure that you right-clicked the cape and pressed apply. That should work.
Ask a Question
200 characters left
Include your email address to get a message when this question is answered.
Submit
Advertisement
Thanks for submitting a tip for review!
-
Avoid any banner ads or pop-ups that advertise cursors. These are often gateways for adware. Stick to trusted cursor libraries on reputable sites.
Advertisement
About This Article
Article SummaryX
1. Open the Start menu.
2. Click the gear or Settings button.
3. Click Ease of Access.
4. Click Mouse on the left-menu.
5. Select a cursor size.
6. Select a pointer color.
Did this summary help you?
Thanks to all authors for creating a page that has been read 167,325 times.