Содержание
- Error 2 in system call createfile не удается найти указанный файл
- Сбой CreateFile с кодом ошибки 2, пока файл существует
- Решение
- Другие решения
- tftp boot на windows
Error 2 in system call createfile не удается найти указанный файл

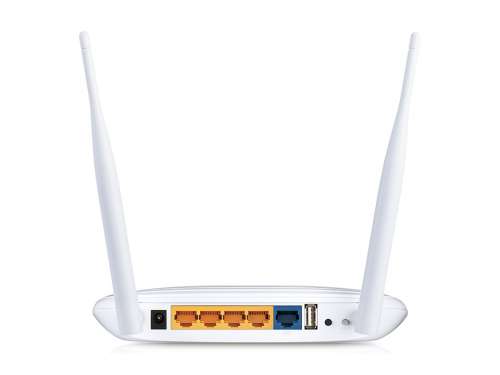
- Скорость Wi-Fi — до 300 Мбит/с
- Стандарты беспроводной связи — IEEE 802.11n/g/b
- Диапазон частот — 2,400 — 2,4835 ГГц
- Интерфейсы — 4 порта LAN 10/100 Мбит/с, 1 порт WAN 10/100 Мбит/с, 1 порт USB 2.0
- Кнопки Кнопка — WPS/Reset (функция WPS/сброс настроек), кнопка Wi-Fi ON/OFF (вкл./выкл. беспроводного вещания)
- Антенны — 2 съёмные всенаправленные антенны с усилением 5 дБи
- Функции USB — Хранилище данных/FTP/Медиа/Принт-сервер/3G/4G подключение
- Защита беспроводной сети — Шифрование WEP, WPA/WPA2, WPA-PSK/WPA2-PSK, фильтрация MAC-адресов
- Дополнительные функции — NAT (преобразование сетевых адресов), пропуск трафика VPN (PPTP / L2TP / IPSec), межсетевой экран SPI, контроль доступа, 5 туннелей IPsec VPN, гостевая сеть
- Питание — 12 В пост. тока /1 A
- Размеры — 192 x 130 x 33 мм
- 1. Если при переходе с официальной на альтернативную прошивку проблем у пользователей не возникает, то попытка заменить одну альтернативную прошивку на другую может вызвать трудности. Например, если вы хотите заменить OpenWRT на DD-WRT (и прочие комбинации), вам понадобится предварительно откатиться обратно на заводское ПО из веб интерфейса и только затем обновиться на желаемое.
- 2. Данный роутер практически не убиваем (в плане экспериментов с ПО), но может возникнуть ситуация когда необходимо восстановить работоспособность, а доступа к веб интерфейсу нет. Тогда делаем так (пример для ревизии v2, следовательно файлы подставляем соответствующие вашей ревизии): раз, два, три. Прошивка для восстановления через tftpd ревизии 3.
- 3. Способы замены ПО роутера
Сообщение отредактировал stp101 — 27.01.22, 22:26
Привет всем, нужна помощь роутер TP-LINK TL-WR842ND V2, установил прошивку OpenWrt Wiki,
скажите пожалуйста как вернуть родную прошивку TL-WR842ND V2.
Сообщение отредактировал ctich — 19.06.15, 11:38
Прошивать роутер оригинальным образом после OpenWRT можно с помощью tftp или MTD метода, но ни в коем случае НЕ ПРОШИВАЙТЕ ЧЕРЕЗ Web-интерфейс. Иначе Вы рискуете получить «кирпич» вместо роутера. Название прошивки НЕ должно содержать слово «boot» Ищите прошивку без «boot» или обрежте boot. Метод возврата аналогичен TP-LINK TL-MR3220
 arbi79,
Измени название темы добавив TL-WR842ND.
arbi79,
прошивка для отката, она же восст здесь http://ofmodemsandmen.…tml#factory,переименуй так wr842v2_tp_recovery.bin и шей чем хочешь, можно и через веб интерфейс если он имеется и никогда не кого не слушай ,если веба нет то через tftpd
Сообщение отредактировал virtual13 — 16.06.15, 12:22
Сообщение отредактировал koordinator — 18.06.15, 10:02
Все получилось, спасибо вам ребята,
Подключил сетевую карту ПК в LAN порт роутера и приписал ip 192.168.0.66 Запустил файл tftpd32.exe,
На выключенном роутере зажимаем reset, не отжимая его, включаем роутер, держим ресет пока не загорится светодиод lock(крайний правый)
Если всё сделали правильно уведите полосу загрузки. Ждем пока роутер перезагрузится. и все
Архив tftpd32.exe, и готовый прошивка TL-WR842ND_V2
Сообщение отредактировал arbi79 — 17.06.15, 21:28
Источник
Сбой CreateFile с кодом ошибки 2, пока файл существует
Я пытаюсь открыть существующий файл через CreateFile, но он всегда терпит неудачу с errorcode 2 — Как файл не существует, но он существует — он находится в папке с исполняемым файлом.
это не удастся, даже если я заменю argv[1] с жестко закодированной строкой имени файла.
приложение работает в качестве администратора.
Решение
Код ошибки является точным. Файл не найден Возможные объяснения включают в себя:
- Вы использовали неправильное имя файла.
- Вы использовали относительный путь, и рабочий каталог процесса не соответствует ожидаемому.
Если вы хотите интерпретировать имя файла как относительное к каталогу, в котором находится исполняемый файл, сделайте это. Сформируйте абсолютный путь из каталога, содержащего исполняемый файл и указанное имя файла.
Нет никаких оснований ожидать, что рабочий каталог процесса будет каталогом, в котором находится исполняемый файл.
Другие решения
Вы пытаетесь открыть файл, используя относительный путь. Относительные пути относительно текущего рабочего каталога (см. GetCurrentDirectory ). Текущий рабочий каталог не обязательно является каталогом, в котором находится исполняемый образ. Он может отличаться по ряду причин, например:
- Приложение было запущено с помощью ярлыка, который явно устанавливает рабочий каталог.
- Приложение называется SetCurrentDirectory .
- Приложение было запущено через интерпретатор команд из каталога, отличного от каталога исполняемого файла.
Если вы хотите открыть файл, расположенный относительно исполняемого образа приложения, вам необходимо создать полное имя пути, основанное на расположении исполняемого файла и желаемом имени файла. Следующий код извлекает каталог исполняемого файла 1) :
Это можно использовать следующим образом:
1) Код, ориентированный на Windows 8 и более поздние версии, должен использовать PathCchRemoveFileSpec а также PathCchAddBackslash вместо.
Источник
tftp boot на windows
Все новые темы
| Автор | ||||||||||
|---|---|---|---|---|---|---|---|---|---|---|
| Cognos Активный участник Зарегистрирован: 24.06.2011
|
|
|||||||||
| Вернуться к началу |
|
|||||||||
| Зарегистрируйтесь и реклама исчезнет!
|
||||||||||
| 3zh1k Активный участник
Зарегистрирован: 31.08.2010
|
|
|||||||||
| Вернуться к началу |
|
|||||||||
| Cognos Активный участник Зарегистрирован: 24.06.2011
|
|
|||||||||
| Вернуться к началу |
|
|||||||||
| Cognos Активный участник Зарегистрирован: 24.06.2011
|
|
|||||||||
| Вернуться к началу |
|
|||||||||
| 3zh1k Активный участник
Зарегистрирован: 31.08.2010
|
|
|||||||||
| Вернуться к началу |
|
|||||||||
| Cognos Активный участник Зарегистрирован: 24.06.2011
|
|
|||||||||
| Вернуться к началу |
|
|||||||||
| 3zh1k Активный участник
Зарегистрирован: 31.08.2010
|
|
|||||||||
| Вернуться к началу |
|
|||||||||
| Cognos Активный участник Зарегистрирован: 24.06.2011 Источник Adblock |


| Автор | Сообщение | ||||
|---|---|---|---|---|---|
|
Заголовок сообщения: Не могу залить новую прошивку на DVG-2032S
|
|||||
|
|
всем привет! Появился проблема, шлюз ВМП-2032S периодически стал подвисать, решил обновить прошивку на нём! Скачал последнюю прошивку от 25.02.2014 Там один файл ixpsipg-242.pack , его я положил в папку C:Tftpd64 и приступил к обновлению! Шлюз и комп в одной подсети! Пишет Operation Failed В чём проблема не могу понять… Directory и пустым оставлял в логах tftpd64 тогда пишет, что не может найти файл.
|
||||
| Вернуться наверх |
|
||||
|
Alexey Motkov |
Заголовок сообщения: Re: Не могу залить новую прошивку на DVG-2032S
|
|
|
У Вас другая аппаратная версия шлюза. |
| Вернуться наверх |
|
|
rda_irk |
Заголовок сообщения: Re: Не могу залить новую прошивку на DVG-2032S
|
|
|
Alexey Motkov писал(а): У Вас другая аппаратная версия шлюза. у меня такая же проблема. и как теперь быть ? какую прошивку ставить ? Hardware Platform PNP1632-32 VD |
| Вернуться наверх |
|
|
rda_irk |
Заголовок сообщения: Re: Не могу залить новую прошивку на DVG-2032S
|
|
|
у меня такое в логах: Connection received from 192.168.5.11 on port 69 [24/11 22:12:12.904] |
| Вернуться наверх |
|
|
Evgeniy Ryzhov |
Заголовок сообщения: Re: Не могу залить новую прошивку на DVG-2032S
|
|
|
|
| Вернуться наверх |
|
|
rda_irk |
Заголовок сообщения: Re: Не могу залить новую прошивку на DVG-2032S
|
||
|
|
Спасибо, обновился. Как у шлюза выставить шлюз по умолчанию для сети LAN ? Через «слеш» не хватает знаков
|
||
| Вернуться наверх |
|
||
|
Evgeniy Ryzhov |
Заголовок сообщения: Re: Не могу залить новую прошивку на DVG-2032S
|
|
|
Чере слеш указывается пояснение, что он же является шлюзом для локальных устройств. |
| Вернуться наверх |
|
|
rda_irk |
Заголовок сообщения: Re: Не могу залить новую прошивку на DVG-2032S
|
|
|
настроил по следующей схеме сервер астериск к нему цепляются два шлюза 2032 и 5008, с внутренними номерами 101-132 и 201-208 соответсвеннно, с каждого шлюза есть выход в город, на каждом шлюзе можно совершать внутренние звонки в рамках своего шлюза, а на другой звонки не проходят, т.е. с 101 можно позвонить на 102, но нельзя на 201 и наоборот с 201-го можно на 202, но на 101 нет. где я что упустил ? |
| Вернуться наверх |
|
|
Evgeniy Ryzhov |
Заголовок сообщения: Re: Не могу залить новую прошивку на DVG-2032S
|
|
|
Снимите логи slmon в момент внутреннего звонка и выложите скриншоты настроек. |
| Вернуться наверх |
|
#1
![]()
Tecnet Solutions
-

- Members
- 2 posts

-
Australia

Posted 27 May 2008 — 08:34 AM
I have installed TFTPD32 V3.25 on a Microsoft Small Business Server R2 server. I wish to use TFTPD to provide the PING imaging software to PXE capable clients.
When a client computer boots using F12 I can see the TFTPD log allocate an IP address to the client and the client computer also displays the IP address. However no boot file is downloaded to the client (pxelinux.0) and the client receives a TFTP File Not Found message. The TFTPD32 server log displays a «File <pxelinux.0> : error 2 in system call CreateFile The system cannot find the file specified. [23/05 08:42:03.171] message.
I configured the TFTPD server per the PING website doco (http://ping.windowsd…g/download.html).
Can anyone shed light on why the TFTPD server is unable to find the specified boot file?
- Back to top
#2
![]()
d4vr0s
d4vr0s
-
-
Advanced user
-
- 38 posts
Member

- Location:The greatest computer in the universe of time and space, designed by Deep Thought
-
United States

Posted 27 May 2008 — 11:40 AM
Is the pxelinux.0 in the tftp root?
- Back to top
#3
![]()
Tecnet Solutions
Tecnet Solutions
-
- Members
- 2 posts
-
Australia
Posted 28 May 2008 — 07:13 AM
thanks for the info d4vr0s, as soon as the file was placed in the TFTPD32 directory it worked fine. I presume this therefore means the PING doco is incorrect as it advises the pxe files to be placed in a separate directory. Thanks again for the tip.
- Back to top
#4
![]()
d4vr0s
d4vr0s
-
-
Advanced user
-
- 38 posts
Member
- Location:The greatest computer in the universe of time and space, designed by Deep Thought
-
United States
Posted 28 May 2008 — 12:26 PM
Glad to be of help 
- Back to top
#5
![]()
Anaxagoras1986
Anaxagoras1986
-
- Validating
- 9 posts

- Location:USA
-
United States
Posted 29 September 2008 — 01:59 PM
I am having a similar problem. I tried putting the pxelinux.0 in the root of the TFTPD32 server directory but my clinet is still complaining about how it cannot find a large number of files. Does anyone have any siggestions?
Attached Files
-
Log.txt 5.1KB
1293 downloads

- Back to top
#6
![]()
tubalcain
tubalcain
-
- Members
- 4 posts

-
United States
Posted 21 December 2008 — 05:32 PM
I noticed this to. I think that is the reason that I cannot connect to the SMB share, has anyone found a solution?
- Back to top
#7
![]()
tubalcain
tubalcain
-
- Members
- 4 posts
-
United States
Posted 12 January 2009 — 04:12 PM
Ok, Happy New Year. I finally figured everything out and those errors in TFTPD32 are normal. I successfully installed Windows XP SP3 via PXE on a Dell Latitude C400 (no floppy or cd drive) using the steps outlined in http://www.lockstock…e-boot-windows/. If you previously screwed around too much with XP network and file permissions, I suggest you do a fresh install of XP on your host machine as a fresh starting point. I do think that the main thing to get right is the «IP pool starting address» in TFTPD32 which is never actually explained correctly in various tutorials. Example my «IP pool starting address» is 192.168.1.6, my «Server interfaces» IP is 192.168.1.4, I had set the size of pool to 10. DNS and subnet mask settings are self explanatory. After getting that right TFTPD32 on my host machine communicated flawlessly with my laptop and installed pretty fast too. The errors in TFTPD32 are pretty much the same, what they mean I have the slightest clue but that was the only thing I could think of that was holding me back. I hope this may be able to help someone in the future who is having problems. 
- Back to top
#8
![]()
smokeAR
smokeAR
-
- Members
- 1 posts

-
Canada

Posted 14 January 2009 — 04:34 PM
I’m having a similar problem. I’m trying to repair a Cisco wireless access point that messed up during an update. The only way to repair this is through Tftp32. I read and did exactly as the guide says. I’m running Windows 2000 Server with a linksys switch. The file is in the same folder as tftp32 and it’s shared. I see the dhcp hand out an ip address the I get the error 2 … Has anyone worked with these Cisco devices before? Any help would be greatly appreciated
- Back to top
- Remove From My Forums
-
Question
-
I receive the following error when I attempt to PXE boot 64-bit Windows PE 3.0 with my own BCD (the error has been simplified)…
Windows Boot Manager
Windows failed to start.
File: BootBCD
Status: 0xc00000001
Info: An error occurred while attempting to read the boot configuration data.
If, however, I use an older BCD which I found online and which was generated to boot Windows PE 2.0 (32-bit, but I don’t think that matters for a data file) then I can boot 64-bit Windows PE 3.0.
My BCD, on the other hand was generated from the following script which is based around the (buggy!) Windows AIK walk-through and some scripts I found online…
rem Windows PE 3.0 Boot Builder
rem WARNING: This script is not ready for prime-time! Use at your own risk!

rem TODO: Add parameters for architecture and destination work folder (don't assume C:Temp)
rem plus a means of defining path to bcdedit.exe.

rem NOTE: Must change %a to %%a in rem actual script! (Currently it must be pasted
rem into a command-prompt!)

rem The odd indentation is to help me identify newly added lines (the older a line the
rem more it is indented).

rem Generate Boot...
cd d C:
cd C:Temp
rem NOTE: Include /q on the following when happy!
rmdir Boot /s
 call copype.cmd amd64 C:TempBoot
 del /q etfsboot.com
 move ISObootboot.sdi boot.sdi
 mkdir fonts
 move ISObootfontswgl4_boot.ttf fontswgl4_boot.ttf
 rmdir /s /q ISO
 imagex /mount winpe.wim 1 mount
 copy mountWindowsBootPXEpxeboot.n12 pxeboot.n12
 copy mountWindowsBootPXEbootmgr.exe bootmgr.exe
 imagex /unmount mount
 rmdir /q mount

REM Generate BCD...
rem Note that the BCD is created under the root of X: as the source path is written to
rem the BCD header and all BCD files I have seen have had X: in their header (they all
rem actually read X:BCD representing the path of the BCD file itself).
cd ..
subst X: C:Temp
cd /d X:
rem Don't use host's version of bcdedit!
rem copy mountWindowsSystem32bcdedit.exe bcdedit.exe
copy bcdedit32.exe bcdedit.exe
 bcdedit -createstore BCD
 set BCDEDIT=bcdedit -store BCD
 %BCDEDIT% -create {ramdiskoptions} -d "Ramdisk options"
 %BCDEDIT% -set {ramdiskoptions} ramdisksdidevice boot
 %BCDEDIT% -set {ramdiskoptions} ramdisksdipath Bootboot.sdi
 for /f "tokens=3" %a in ('%BCDEDIT% -create -d "Windows PE 3.0 amd64" -application osloader') do set GUID=%a
 %BCDEDIT% -set %GUID% systemroot Windows
 %BCDEDIT% -set %GUID% detecthal Yes
 %BCDEDIT% -set %GUID% winpe Yes
 %BCDEDIT% -set %GUID% osdevice ramdisk=[boot]Bootwinpe.wim,{ramdiskoptions}
 %BCDEDIT% -set %GUID% device ramdisk=[boot]Bootwinpe.wim,{ramdiskoptions}
 %BCDEDIT% -create {bootmgr} -d "Windows Boot Manager"
 %BCDEDIT% -set {bootmgr} timeout 30
 %BCDEDIT% -set {bootmgr} displayorder %GUID%
rem The following file is from an older version!
rem del /q Bootbcdedit.com
del /q bcdedit.exe
rem WHY are the following log files being created?!!
del /q /ah BCD.LO*
cd /d c:
subst /d X:
Note that the TFTP server is configured to send pxeboot.n12 as the initial PXE boot file instead of the pxeboot.com or wdsnbp.com. This works OK when I use the old BCD.
OK, so I can PXE boot but I’m not happy that I can’t build and boot using my own BCD as I plan to customise this.
My BCD was generated using 32-bit version 6.1.7600.16385 (Windows 7 version) of bcdedit.exe under 32-bit Vista. Could this combination be my source of errors? I have tried using the 32-bit version that is on my Vista system, but that hasn’t made any difference.
What am I doing wrong?-Andreas
P.S. The following is the TFTP log of the communication up to the point of failure when using my BCD. This process is identical to the successful boot with the old BCD file.
Rcvd DHCP Discover Msg for IP 0.0.0.0, Mac XX:XX:XX:XX:XX:XX [30/04 02:18:12.499]
DHCP: proposed address 192.168.0.10 [30/04 02:18:12.500]
2080 Request 2 not processed [30/04 02:18:12.552]
Rcvd DHCP Rqst Msg for IP 0.0.0.0, Mac XX:XX:XX:XX:XX:XX [30/04 02:18:14.520]
Previously allocated address 192.168.0.10 acked [30/04 02:18:14.521]
Connection received from 192.168.0.10 on port 2070 [30/04 02:18:14.529]
Read request for file <Bootpxeboot.n12>. Mode octet [30/04 02:18:14.531]
Using local port 65393 [30/04 02:18:14.532]
2080 Request 2 not processed [30/04 02:18:14.573]
<Bootpxeboot.n12>: sent 51 blks, 25772 bytes in 0 s. 0 blk resent [30/04 02:18:14.636]
Connection received from 192.168.0.10 on port 2071 [30/04 02:18:14.640]
Read request for file <Bootbootmgr.exe>. Mode octet [30/04 02:18:14.641]
Using local port 65394 [30/04 02:18:14.643]
<Bootbootmgr.exe>: sent 1023 blks, 523328 bytes in 0 s. 0 blk resent [30/04 02:18:14.954]
Connection received from 192.168.0.10 on port 6272 [30/04 02:18:15.805]
Read request for file <BootFontswgl4_boot.ttf>. Mode octet [30/04 02:18:15.807]
OACK: <tsize=46484,> [30/04 02:18:15.809]
Using local port 59074 [30/04 02:18:15.810]
Connection received from 192.168.0.10 on port 6273 [30/04 02:18:15.862]
Peer returns ERROR <TFTP Aborted> -> aborting transfer [30/04 02:18:15.867]
Read request for file <BootFontswgl4_boot.ttf>. Mode octet [30/04 02:18:15.871]
OACK: <tsize=46484,> [30/04 02:18:15.873]
Using local port 59075 [30/04 02:18:15.875]
Peer returns ERROR <> -> aborting transfer [30/04 02:18:15.972]
Connection received from 192.168.0.10 on port 6274 [30/04 02:18:16.104]
Read request for file <Bootboot.ini>. Mode octet [30/04 02:18:16.106]
File <Bootboot.ini> : error 2 in system call CreateFile The system cannot find the file specified. [30/0402:18:16.108]
Connection received from 192.168.0.10 on port 6275 [30/04 02:18:31.785]
Read request for file <BootBCD>. Mode octet [30/04 02:18:31.786]
OACK: <tsize=12288,> [30/04 02:18:31.787]
Using local port 49302 [30/04 02:18:31.787]
Connection received from 192.168.0.10 on port 6276 [30/04 02:18:31.838]
Peer returns ERROR <TFTP Aborted> -> aborting transfer [30/04 02:18:31.844]
Read request for file <BootBCD>. Mode octet [30/04 02:18:31.845]
OACK: <tsize=12288,> [30/04 02:18:31.846]
Using local port 49303 [30/04 02:18:31.847]
Peer returns ERROR <> -> aborting transfer [30/04 02:18:31.948]
Connection received from 192.168.0.10 on port 6277 [30/04 02:18:31.948]
Read request for file <BootFontswgl4_boot.ttf>. Mode octet [30/04 02:18:31.954]
OACK: <tsize=46484,> [30/04 02:18:31.955]
Using local port 49304 [30/04 02:18:31.956]
Peer returns ERROR <TFTP Aborted> -> aborting transfer [30/04 02:18:32.051]
Connection received from 192.168.0.10 on port 6278 [30/04 02:18:32.052]
Read request for file <BootFontswgl4_boot.ttf>. Mode octet [30/04 02:18:32.058]
OACK: <tsize=46484,> [30/04 02:18:32.059]
Using local port 49305 [30/04 02:18:32.060]
Peer returns ERROR <> -> aborting transfer [30/04 02:18:32.156]
Answers
-
My workaround was to use
http://www.plop.at/en/bootmanager.html , i.e., I’m no longer PXE booting to Windows PE 3.0 x64 but booting the PLoP Boot Manager (version 5.0) from CD (the drive is actually a DVD-writer, but, for some strange reason, Windows 7 refuses to install from it)
and, using PLoP, I then boot the Windows 7 x64 installation media from a USB key (which otherwise this PC would not boot from even though the BIOS suggest that it supports booting from USB devices).It’s a bit ironic that I ended up having to resort to a Linux-based solution to get Windows to install on the PC in question. I would have preferred to have used PXE instead as I could see me installing all my PCs over PXE (they all support it, so why not).
I haven’t yet revealed that, although I originally managed to get Windows PE 3.0 to boot using the old BCD file, Windows PE 3.0 x64 refused to run the Windows 7 installation. This is why I wanted to ensure I used the correct BCD for the version of Windows
PE that I was using. However, as we’ve seen, this proved more difficult than it was worth. Luckily Linux came to the rescue and saved the day.-
Marked as answer by
Wednesday, June 23, 2010 10:06 AM
-
Marked as answer by
Модератор: april22
Re: Autoprovising Granstream 1625
ded писал(а):Я ссылку на мануал от производителя приводил выше, не пробовали по мануалу то?
Да, в конфиг файле указал параметры Р192, Р194, Р237
xml файл создался с указанными параметрами, но толку нет
- pogreb
- Сообщений: 50
- Зарегистрирован: 08 июл 2015, 14:09
Re: Autoprovising Granstream 1625
![]() pogreb » 10 июл 2015, 17:33
pogreb » 10 июл 2015, 17:33
Убрал из xml параметра Р192, Р194, Р237
В телефоне после перезагрузки прописывается адрес прошивки и конфига, но не загружает
- Вложения
-
- Логи TFTP сервера
-
- Сделал настройки в опции 66 (см скрин)
- dhcp2.jpg (21.32 KIB) Просмотров: 8042
- pogreb
- Сообщений: 50
- Зарегистрирован: 08 июл 2015, 14:09
Re: Autoprovising Granstream 1625
![]() SolarW » 10 июл 2015, 17:52
SolarW » 10 июл 2015, 17:52
Ладно, пятница, рабочий день движется к закату — будем считать повелся на «А вам слабО?»
— достаю из коробки свежекупленный 1610
— качаю под него свежую прошивку
— запускаю у себя на компе tftpd (мой адрес 192.168.0.69)
— бросаю файл с прошивкой в каталог с tftp
— прописываю на DHCP-сервере опции 43 и 66 (у меня DHCP на Mikrotik’е) в виде
- Код: выделить все
'tftp://192.168.0.69'
— телефон радостно при загрузке радостно кидается качать конфиги/прошивку
- Код: выделить все
Connection received from 192.168.0.72 on port 38588 [10/07 16:42:43.315]
Read request for file <cfg000b8276b944>. Mode octet [10/07 16:42:43.316]
File <cfg000b8276b944> : error 2 in system call CreateFile Не удается найти указанный файл. [10/07 16:42:43.318]
Connection received from 192.168.0.72 on port 35133 [10/07 16:42:43.322]
Read request for file <cfg000b8276b944>. Mode octet [10/07 16:42:43.323]
File <cfg000b8276b944> : error 2 in system call CreateFile Не удается найти указанный файл. [10/07 16:42:43.323]
Connection received from 192.168.0.72 on port 54819 [10/07 16:42:43.327]
Read request for file <cfg000b8276b944>. Mode octet [10/07 16:42:43.327]
File <cfg000b8276b944> : error 2 in system call CreateFile Не удается найти указанный файл. [10/07 16:42:43.328]
Connection received from 192.168.0.72 on port 37059 [10/07 16:42:43.345]
Read request for file <cfg000b8276b944.xml>. Mode octet [10/07 16:42:43.345]
File <cfg000b8276b944.xml> : error 2 in system call CreateFile Не удается найти указанный файл. [10/07 16:42:43.346]
Connection received from 192.168.0.72 on port 54520 [10/07 16:42:43.351]
Read request for file <cfg000b8276b944.xml>. Mode octet [10/07 16:42:43.351]
File <cfg000b8276b944.xml> : error 2 in system call CreateFile Не удается найти указанный файл. [10/07 16:42:43.352]
Connection received from 192.168.0.72 on port 53177 [10/07 16:42:43.357]
Read request for file <cfg000b8276b944.xml>. Mode octet [10/07 16:42:43.357]
File <cfg000b8276b944.xml> : error 2 in system call CreateFile Не удается найти указанный файл. [10/07 16:42:43.358]
Connection received from 192.168.0.72 on port 58569 [10/07 16:42:43.377]
Read request for file <cfg.xml>. Mode octet [10/07 16:42:43.378]
File <cfg.xml> : error 2 in system call CreateFile Не удается найти указанный файл. [10/07 16:42:43.378]
Connection received from 192.168.0.72 on port 42990 [10/07 16:42:43.383]
Read request for file <cfg.xml>. Mode octet [10/07 16:42:43.383]
File <cfg.xml> : error 2 in system call CreateFile Не удается найти указанный файл. [10/07 16:42:43.384]
Connection received from 192.168.0.72 on port 51683 [10/07 16:42:43.388]
Read request for file <cfg.xml>. Mode octet [10/07 16:42:43.389]
File <cfg.xml> : error 2 in system call CreateFile Не удается найти указанный файл. [10/07 16:42:43.389]
Connection received from 192.168.0.72 on port 52317 [10/07 16:42:45.251]
Read request for file <gxp1600fw.bin>. Mode octet [10/07 16:42:45.251]
OACK: <tsize=11981520,blksize=512,timeout=5,> [10/07 16:42:45.252]
Using local port 53780 [10/07 16:42:45.253]
Peer returns ERROR <ize> -> aborting transfer [10/07 16:42:45.260]
Connection received from 192.168.0.72 on port 37968 [10/07 16:43:03.753]
Read request for file <gxp1600fw.bin>. Mode octet [10/07 16:43:03.754]
OACK: <tsize=11981520,blksize=512,timeout=5,> [10/07 16:43:03.755]
Using local port 53781 [10/07 16:43:03.756]
Peer returns ERROR <ize> -> aborting transfer [10/07 16:43:15.094]
Connection received from 192.168.0.72 on port 45122 [10/07 16:44:08.107]
Read request for file <ring1.bin>. Mode octet [10/07 16:44:08.107]
File <ring1.bin> : error 2 in system call CreateFile Не удается найти указанный файл. [10/07 16:44:08.108]
Connection received from 192.168.0.72 on port 42266 [10/07 16:44:08.115]
Read request for file <ring1.bin>. Mode octet [10/07 16:44:08.115]
File <ring1.bin> : error 2 in system call CreateFile Не удается найти указанный файл. [10/07 16:44:08.116]
Connection received from 192.168.0.72 on port 39747 [10/07 16:44:08.121]
Read request for file <ring1.bin>. Mode octet [10/07 16:44:08.121]
File <ring1.bin> : error 2 in system call CreateFile Не удается найти указанный файл. [10/07 16:44:08.122]
Connection received from 192.168.0.72 on port 48651 [10/07 16:44:08.139]
Read request for file <ring2.bin>. Mode octet [10/07 16:44:08.141]
File <ring2.bin> : error 2 in system call CreateFile Не удается найти указанный файл. [10/07 16:44:08.142]
Connection received from 192.168.0.72 on port 57475 [10/07 16:44:08.147]
Read request for file <ring2.bin>. Mode octet [10/07 16:44:08.148]
File <ring2.bin> : error 2 in system call CreateFile Не удается найти указанный файл. [10/07 16:44:08.149]
Connection received from 192.168.0.72 on port 59497 [10/07 16:44:08.153]
Read request for file <ring2.bin>. Mode octet [10/07 16:44:08.154]
File <ring2.bin> : error 2 in system call CreateFile Не удается найти указанный файл. [10/07 16:44:08.155]
Connection received from 192.168.0.72 on port 39673 [10/07 16:44:08.177]
Read request for file <ring3.bin>. Mode octet [10/07 16:44:08.179]
File <ring3.bin> : error 2 in system call CreateFile Не удается найти указанный файл. [10/07 16:44:08.180]
Connection received from 192.168.0.72 on port 59766 [10/07 16:44:08.184]
Read request for file <ring3.bin>. Mode octet [10/07 16:44:08.184]
File <ring3.bin> : error 2 in system call CreateFile Не удается найти указанный файл. [10/07 16:44:08.185]
Connection received from 192.168.0.72 on port 60501 [10/07 16:44:08.189]
Read request for file <ring3.bin>. Mode octet [10/07 16:44:08.189]
File <ring3.bin> : error 2 in system call CreateFile Не удается найти указанный файл. [10/07 16:44:08.192]
ЧЯДНТ?
-

SolarW - Сообщений: 1331
- Зарегистрирован: 01 сен 2010, 14:21
- Откуда: Днепропетровск, Украина

Re: Autoprovising Granstream 1625
![]() pogreb » 10 июл 2015, 18:01
pogreb » 10 июл 2015, 18:01
Прописал
tftp://10.43.4.97
(от былды)
- Вложения
-
- лог
- dhcp5.jpg (32.26 KIB) Просмотров: 8035
-
- 66
- dhcp2.jpg (22.35 KIB) Просмотров: 8037
- pogreb
- Сообщений: 50
- Зарегистрирован: 08 июл 2015, 14:09
Re: Autoprovising Granstream 1625
![]() SolarW » 10 июл 2015, 18:11
SolarW » 10 июл 2015, 18:11
Добился такого же эффекта как и у вас — запрашивается language.txt и на этом все.
Какая у вас версия прошивки на подопытном телефоне?
-
SolarW - Сообщений: 1331
- Зарегистрирован: 01 сен 2010, 14:21
- Откуда: Днепропетровск, Украина
Re: Autoprovising Granstream 1625
![]() pogreb » 10 июл 2015, 18:12
pogreb » 10 июл 2015, 18:12
SolarW писал(а):Добился такого же эффекта как и у вас — запрашивается language.txt и на этом все.
Какая у вас версия прошивки на подопытном телефоне?
1.0.0.38
- pogreb
- Сообщений: 50
- Зарегистрирован: 08 июл 2015, 14:09
Re: Autoprovising Granstream 1625
![]() SolarW » 10 июл 2015, 18:18
SolarW » 10 июл 2015, 18:18
Аналогично. Похоже в ней бок какой-то.
Прописал через веб-морду вручную тип загрузки TFTP, адреса прошивки и конфигурации.
Телефон при загрузке обратился к TFTP-серверу но файлы по прежнему не качает.
Проблема заинтересовала, копаю дальше.
-
SolarW - Сообщений: 1331
- Зарегистрирован: 01 сен 2010, 14:21
- Откуда: Днепропетровск, Украина
Re: Autoprovising Granstream 1625
![]() pogreb » 10 июл 2015, 18:20
pogreb » 10 июл 2015, 18:20
Все именно так
Я прошил один тел до 1.0.2.4 результат был такой же
сейчас на сайте появилась 1.0.2.13 beta, попробую с ней покавырять
- pogreb
- Сообщений: 50
- Зарегистрирован: 08 июл 2015, 14:09
Re: Autoprovising Granstream 1625
![]() SolarW » 10 июл 2015, 18:28
SolarW » 10 июл 2015, 18:28
Сейчас вспомнил более подробно — прошлую пачку 1610 я настраивал на работу с АТС UMC6102 того же производителя.
С нее прошивку и конфигурацию телефоны «глотали» нормально.
-
SolarW - Сообщений: 1331
- Зарегистрирован: 01 сен 2010, 14:21
- Откуда: Днепропетровск, Украина
Re: Autoprovising Granstream 1625
![]() pogreb » 10 июл 2015, 18:29
pogreb » 10 июл 2015, 18:29
В моем случае Asterisk на CentOS + веб интерфейс welltime
- pogreb
- Сообщений: 50
- Зарегистрирован: 08 июл 2015, 14:09
Вернуться в Конфигурация и настройка Asterisk
Кто сейчас на форуме
Сейчас этот форум просматривают: нет зарегистрированных пользователей и гости: 9
Вставлю свои 5 копеек
аппарат Cisco 8941. Сип провайдер (sipnet.ru)
Заливал разные прошивки и пока заработал только на одной прошивке
Конфиг телефона
Spoiler
<device>
<fullConfig>true</fullConfig>
<deviceProtocol>SIP</deviceProtocol>
<devicePool>
<dateTimeSetting>
<dateTemplate>D.M.Y</dateTemplate>
<timeZone>Saudi Arabia Standard Time</timeZone>
<ntps>
<ntp>
<name>89.109.251.21</name>
<ntpMode>Unicast</ntpMode>
</ntp>
</ntps>
</dateTimeSetting>
<callManagerGroup>
<tftpDefault>true</tftpDefault>
<members>
<member priority=»0″>
<callManager>
<name>Sipnet</name>
<description>CallManager 5.0</description>
<ports>
<ethernetPhonePort>2000</ethernetPhonePort>
<sipPort>5060</sipPort>
<securedSipPort>5061</securedSipPort>
</ports>
<processNodeName>212.53.40.40</processNodeName>
</callManager>
</member>
</members>
</callManagerGroup>
</devicePool>
<commonProfile>
<phonePassword></phonePassword>
<backgroundImageAccess>true</backgroundImageAccess>
<callLogBlfEnabled>3</callLogBlfEnabled>
</commonProfile>
<loadInformation>SIP894x.9-2-3-5</loadInformation>
<vendorConfig>
<disableSpeaker>false</disableSpeaker>
<disableSpeakerAndHeadset>false</disableSpeakerAndHeadset>
<pcPort>0</pcPort>
<settingsAccess>1</settingsAccess>
<garp>0</garp>
<voiceVlanAccess>0</voiceVlanAccess>
<videoCapability>1</videoCapability>
<autoSelectLineEnable>0</autoSelectLineEnable>
<webAccess>0</webAccess>
<g722CodecSupport>0</g722CodecSupport>
<daysDisplayNotActive>1,7</daysDisplayNotActive>
<displayOnTime>08:30</displayOnTime>
<displayOnDuration>09:30</displayOnDuration>
<displayIdleTimeout>00:30</displayIdleTimeout>
<displayOnWhenIncomingCall>0</displayOnWhenIncomingCall>
<spanToPCPort>1</spanToPCPort>
<loggingDisplay>1</loggingDisplay>
<loadServer></loadServer>
</vendorConfig>
<userLocale>
<name>Russian_Russian_Federation</name>
<uid></uid>
<langCode>ru_RU</langCode>
<version>9.3.4.1000-1</version>
<winCharSet>utf-8</winCharSet>
</userLocale>
<networkLocale>Russian_Federation</networkLocale>
<networkLocaleInfo>
<name>Russian_Federation</name>
<uid></uid>
<version>9.3.4.1000-1</version>
</networkLocaleInfo>
<deviceSecurityMode>1</deviceSecurityMode>
<idleTimeout>0</idleTimeout>
<directoryURL></directoryURL>
<idleURL></idleURL>
<informationURL></informationURL>
<messagesURL></messagesURL>
<proxyServerURL></proxyServerURL>
<servicesURL></servicesURL>
<dscpForSCCPPhoneConfig>96</dscpForSCCPPhoneConfig>
<dscpForSCCPPhoneServices>0</dscpForSCCPPhoneServices>
<dscpForCm2Dvce>96</dscpForCm2Dvce>
<transportLayerProtocol>1</transportLayerProtocol>
<capfAuthMode>0</capfAuthMode>
<capfList>
<capf>
<phonePort>3804</phonePort>
</capf>
</capfList>
<certHash></certHash>
<encrConfig>false</encrConfig>
<sipProfile>
<sipProxies>
<backupProxy></backupProxy>
<backupProxyPort>5060</backupProxyPort>
<emergencyProxy></emergencyProxy>
<emergencyProxyPort>5060</emergencyProxyPort>
<outboundProxy></outboundProxy>
<outboundProxyPort>5060</outboundProxyPort>
<registerWithProxy>true</registerWithProxy>
</sipProxies>
<sipCallFeatures>
<cnfJoinEnabled>true</cnfJoinEnabled>
<rfc2543Hold>false</rfc2543Hold>
<callHoldRingback>2</callHoldRingback>
<localCfwdEnable>true</localCfwdEnable>
<semiAttendedTransfer>true</semiAttendedTransfer>
<anonymousCallBlock>2</anonymousCallBlock>
<callerIdBlocking>2</callerIdBlocking>
<dndControl>0</dndControl>
<remoteCcEnable>true</remoteCcEnable>
</sipCallFeatures>
<sipStack>
<sipInviteRetx>6</sipInviteRetx>
<sipRetx>10</sipRetx>
<timerInviteExpires>600</timerInviteExpires>
<timerRegisterExpires>600</timerRegisterExpires>
<timerRegisterDelta>5</timerRegisterDelta>
<timerKeepAliveExpires>120</timerKeepAliveExpires>
<timerSubscribeExpires>120</timerSubscribeExpires>
<timerSubscribeDelta>5</timerSubscribeDelta>
<timerT1>500</timerT1>
<timerT2>4000</timerT2>
<maxRedirects>70</maxRedirects>
<remotePartyID>false</remotePartyID>
<userInfo>None</userInfo>
</sipStack>
<autoAnswerTimer>1</autoAnswerTimer>
<autoAnswerAltBehavior>false</autoAnswerAltBehavior>
<autoAnswerOverride>true</autoAnswerOverride>
<transferOnhookEnabled>false</transferOnhookEnabled>
<enableVad>false</enableVad>
<preferredCodec>g711ulaw</preferredCodec>
<dtmfAvtPayload>101</dtmfAvtPayload>
<dtmfDbLevel>3</dtmfDbLevel>
<dtmfOutofBand>avt</dtmfOutofBand>
<alwaysUsePrimeLine>false</alwaysUsePrimeLine>
<alwaysUsePrimeLineVoiceMail>false</alwaysUsePrimeLineVoiceMail>
<kpml>3</kpml>
<stutterMsgWaiting>1</stutterMsgWaiting>
<callStats>true</callStats>
<silentPeriodBetweenCallWaitingBursts>10</silentPeriodBetweenCallWaitingBursts>
<disableLocalSpeedDialConfig>true</disableLocalSpeedDialConfig>
<startMediaPort>10000</startMediaPort>
<stopMediaPort>10300</stopMediaPort>
<voipControlPort>5060</voipControlPort>
<dscpForAudio>184</dscpForAudio>
<ringSettingBusyStationPolicy>0</ringSettingBusyStationPolicy>
<softKeyFile>softkey.xml</softKeyFile>
<dialTemplate>dialplan.xml</dialTemplate>
<phoneLabel>Art_I_Shock</phoneLabel>
<natReceivedProcessing>false</natReceivedProcessing>
<natEnabled>false</natEnabled>
<natAddress></natAddress>
<sipLines>
<line button=»1″>
<featureID>9</featureID>
<featureLabel>3001515_200</featureLabel>
<name>NAme</name>
<displayName>Artishock</displayName>
<proxy>USECALLMANAGER</proxy>
<port>5060</port>
<autoAnswer>
<autoAnswerEnabled>2</autoAnswerEnabled>
</autoAnswer>
<callWaiting>3</callWaiting>
<authName>authname</authName>
<authPassword>XXXXXXXX</authPassword>
<sharedLine>false</sharedLine>
<messageWaitingLampPolicy>3</messageWaitingLampPolicy>
<messagesNumber></messagesNumber>
<ringSettingIdle>4</ringSettingIdle>
<ringSettingActive>5</ringSettingActive>
<contact>000000000</contact>
<forwardCallInfoDisplay>
<callerName>true</callerName>
<callerNumber>false</callerNumber>
<redirectedNumber>false</redirectedNumber>
<dialedNumber>true</dialedNumber>
</forwardCallInfoDisplay>
</line>
</sipLines>
</sipProfile>
</device>
9-2-3-5 — получилось подключить, но сервер пришлось задавать IP адресом (иначе телефон серевер не находит)
9-3-1-18 — происходит перезагрузка,
9-3-2SR1 — происходит перезагрузка,
9-3-4-17 авторизация на сервисе происходит, но телефон не подключен (провайдер показывает подключенное оборудование)
9-4-1 — авторизация на сервисе происходит, но телефон не подключен (провайдер показывает подключенное оборудование)
9-4-2SR3 — авторизация на сервисе происходит, но телефон не подключен (провайдер показывает подключенное оборудование)
Сможет кто-нибудь ответить?
Почему на 9.2.3(5) не ресолвится имя?
и почему начиная с 9.3.4(17) телефон не может корректно авторизоваться?
Изменено 1 декабря, 2018 пользователем artishock