
- Mark as New
- Bookmark
- Subscribe
- Subscribe to RSS Feed
- Permalink
- Report Inappropriate Content
Re: An Unexpected Error Occurred In The Print Driver. 001:000:0355
Hello sdrennan,
If you try this today, are you still having the same issue?
Thanks,
CathyO-Xerox
Community Manager
Be sure to click
Kudos for those who have helped you.
Select Accept as Solution for posts that have helped to solve your issue(s)!

- Mark as New
- Bookmark
- Subscribe
- Subscribe to RSS Feed
- Permalink
- Report Inappropriate Content
An Unexpected Error Occurred In The Print Driver. 001:000:0355
Product Name: AltaLink C8030 / C8035 / C8045 / C8055 / C8070 Color Multifunction Printer
Operating System: Windows 7
This error happens primarily on windows 7 (both x86/x64) but we’ve seen it on windows 10 before. It pops up dozens of times and it is possible to end the process in task viewer but still impedes printing. We have tried installing drivers from the printer’s utility (XeroxSmart Start) with the same issue. We have tried universal pcl and ps drivers. We are pushing some drivers through gpo but even the manually installed ones do this for these users. Any tips would be awesome! Thank you in advance!

В последнее время довольно много пользователей Windows сообщают о том, что Ваш принтер столкнулся с непредвиденной проблемой конфигурации ошибка. Что происходит, так это то, что их принтер ничего не печатает, и появляется сообщение с такими кодами, как 0x80070002, 0x80040154 . Если вы тоже столкнетесь с такой ситуацией, не волнуйтесь — часто ее совсем несложно исправить …
Как исправить ваш принтер столкнулся с неожиданной проблемой конфигурации
Вот 5 исправлений, которые помогли другим пользователям решить проблему Ваш принтер столкнулся с непредвиденной проблемой конфигурации вопрос. Возможно, вам не придется пробовать их все; просто продвигайтесь вниз по списку, пока не найдете тот, который вам подходит.
- Снова добавьте свой принтер
- Сделайте принтер общим
- Обновите драйвер вашего принтера
- Очистить файлы диспетчера очереди печати
- Запустите средство устранения неполадок Windows
Исправление 1. Добавьте принтер снова.
Эта ошибка может возникать из-за сбоя записи принтера. Таким образом, вы можете добавить свой принтер еще раз, чтобы проверить, правильно ли он печатает.
Вот как это сделать:
1) На клавиатуре нажмите клавиша с логотипом Windows  и р в то же время, затем введите ms-settings: принтеры и нажмите Войти .
2) Нажмите значок + рядом Добавить принтер или сканер . Затем подождите, пока снова не появится ваш принтер, и щелкните по нему.
3) Теперь, когда вы повторно добавили свой принтер, проверьте его, чтобы убедиться, что вы можете запустить его без ошибок. Если да, то поздравляю! Если ошибка все еще появляется, попробуйте Исправить 2 , ниже.
Исправление 2: сделайте принтер общим
Вы можете столкнуться с этой ошибкой, если принтер, который вы используете, не используется в сети. Поэтому обязательно поделитесь им, чтобы увидеть, решит ли он проблему.
Вот как сделать ваш принтер общедоступным:
1) На клавиатуре нажмите клавиша с логотипом Windows и р в то же время, затем введите управлять принтерами и нажмите Войти .
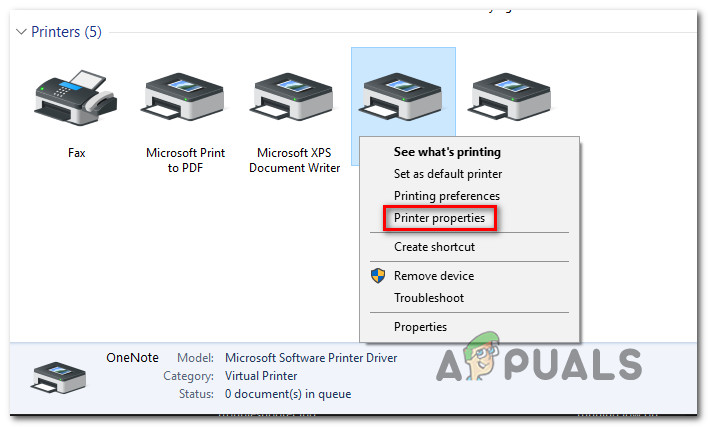
2) Когда в Устройство и принтеры экран, прокрутите вниз до Принтеры раздел. Затем щелкните правой кнопкой мыши на принтер, который выдает ошибку и нажмите Свойства принтера .
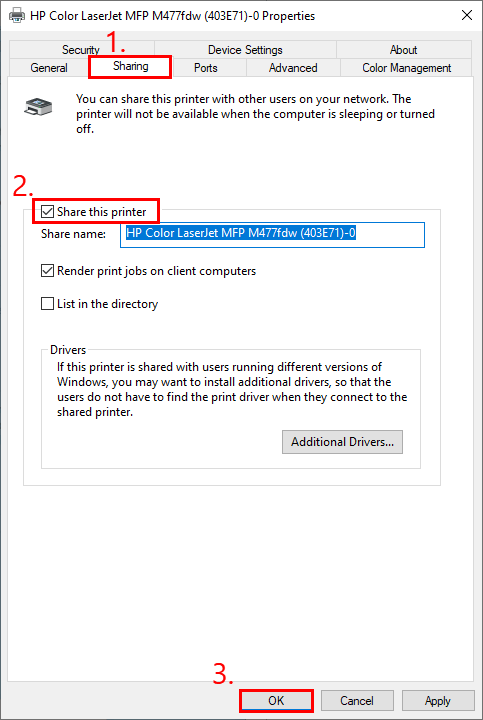
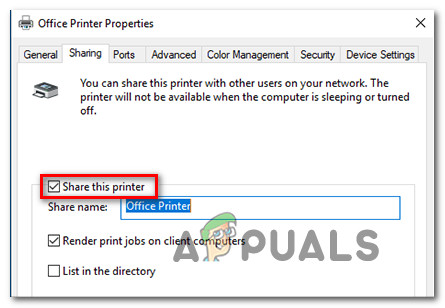
3) Щелкните значок Совместное использование вкладку и убедитесь, что поле для Поделиться этим принтером стоит галочка. Затем нажмите Хорошо чтобы применить изменения.
4) Попробуйте распечатать что-нибудь и посмотрите, появляется ли ошибка по-прежнему. Если ошибка больше не возникает, значит, вы решили проблему! Если ошибка все еще появляется, попробуйте Исправить 3 , ниже.
Исправление 3. Обновите драйвер принтера.
Эта проблема может возникнуть, если вы используете неправильный драйвер принтера или он устарел. Итак, вам следует обновить свой принтер драйвер, чтобы увидеть, решит ли он вашу проблему. Если у вас нет времени, терпения или навыков для обновления драйвера вручную, вы можете сделать это автоматически с помощью Водитель Easy .
Driver Easy автоматически распознает вашу систему и найдет для нее подходящие драйверы. Вам не нужно точно знать, в какой системе работает ваш компьютер, вам не нужно беспокоиться о неправильном драйвере, который вы будете загружать, и вам не нужно беспокоиться об ошибке при установке. Driver Easy справится со всем этим.
Вы можете автоматически обновлять драйверы с помощью СВОБОДНЫЙ или Pro версия Driver Easy. Но с версией Pro требуется всего 2 шага (и вы получаете полную поддержку и 30-дневную гарантию возврата денег):
1) Скачать и установите Driver Easy.
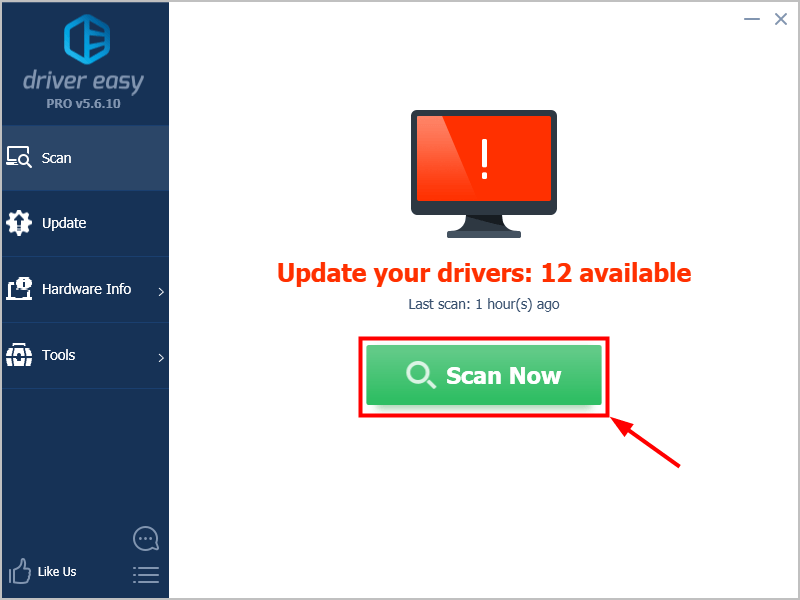
2) Запустите Driver Easy и нажмите Сканировать сейчас кнопка. Затем Driver Easy просканирует ваш компьютер и обнаружит проблемы с драйверами.
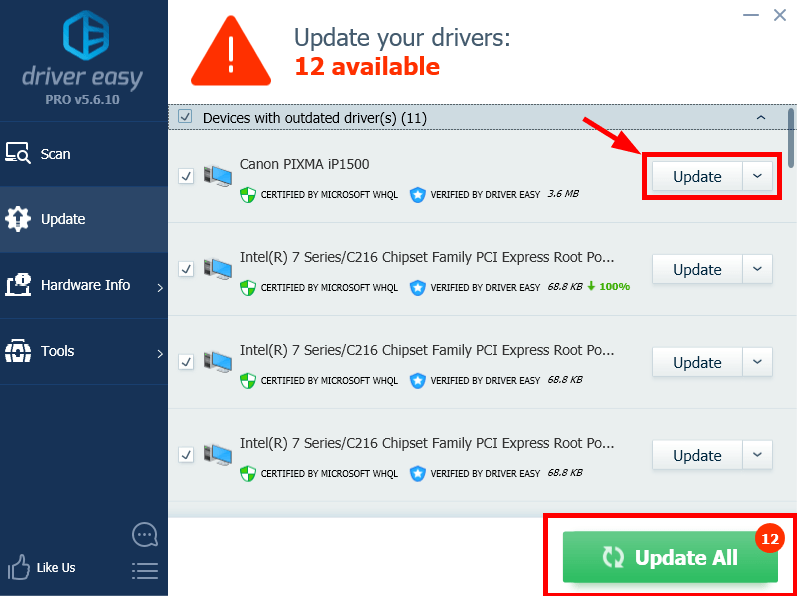
3) Нажмите Обновить все для автоматической загрузки и установки правильной версии все драйверы, которые отсутствуют или устарели в вашей системе (для этого требуется Pro версия Pro версия Pro версия — вам будет предложено выполнить обновление, когда вы нажмете Обновить все ).
4) Перезагрузите компьютер, чтобы изменения вступили в силу.
5) Опять же, распечатайте документ на принтере, чтобы проверить, Ваш принтер столкнулся с непредвиденной проблемой конфигурации ошибка устранена. Если да, то отлично! Если ошибка не исчезла, попробуйте Исправить 4 , ниже.
Исправление 4: очистить файлы диспетчера очереди печати
Диспетчер очереди печати — это программа в Windows, которая управляет заданиями печати, отправляемыми на принтер. Если с вашим принтером что-то происходит, вы можете очистить старые файлы и перезапустить службу.
Вот шаги:
Остановить службу диспетчера очереди печати
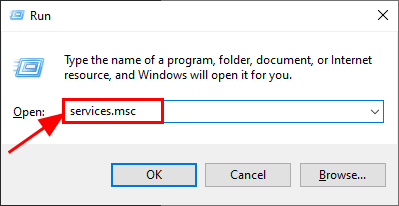
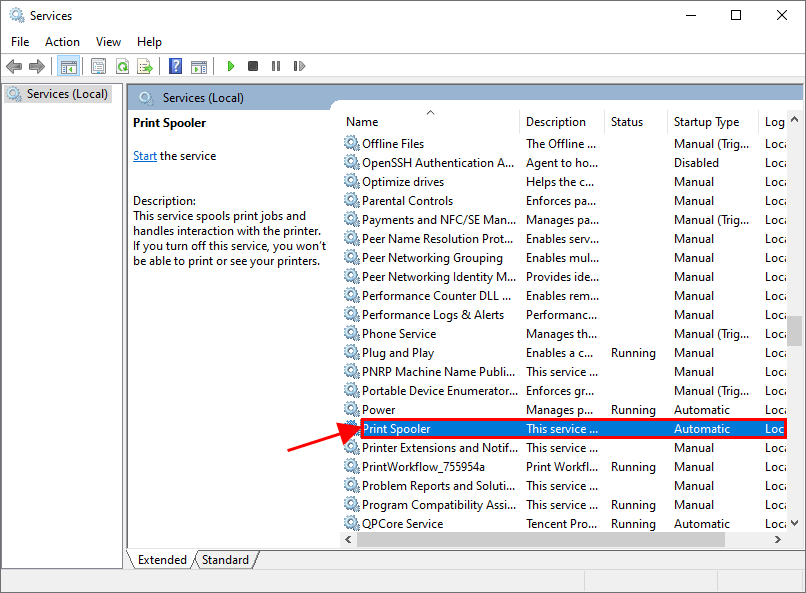
1) На клавиатуре нажмите кнопку Windows logo key и р в то же время, затем введите services.msc и нажмите Войти .
2) В Сервисы окно, прокрутите вниз, пока не найдете Диспетчер очереди печати , затем щелкните его правой кнопкой мыши и выберите Стоп .

Не закрывайте окно «Службы» и выполните следующие действия.
Очистить файлы диспетчера очереди печати
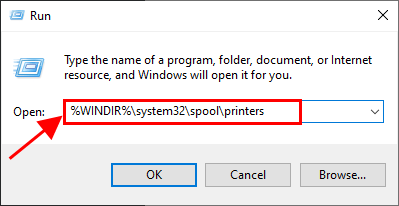
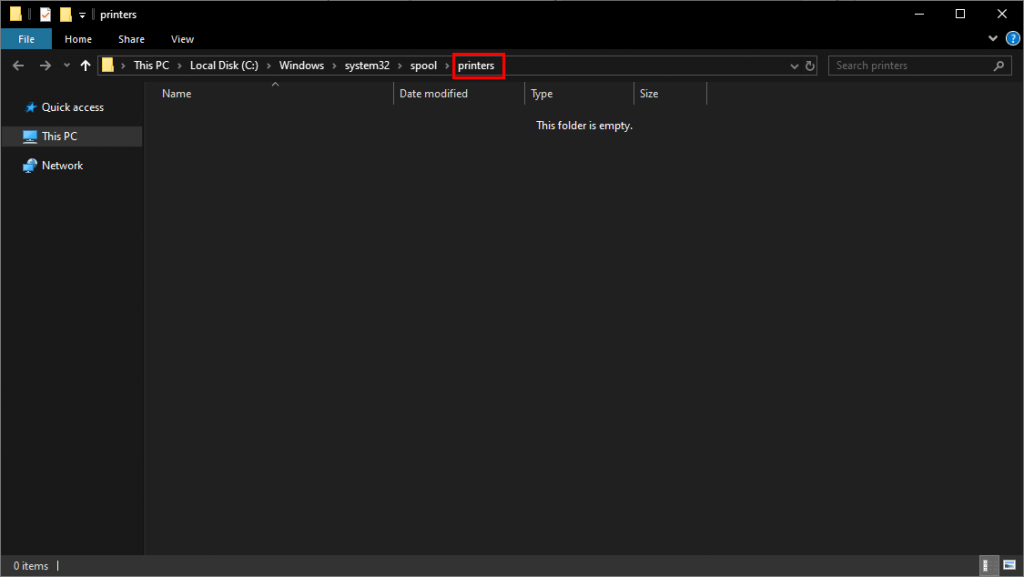
1) На клавиатуре нажмите кнопку Windows logo key и р в то же время, затем введите % WINDIR% system32 spool printers и нажмите Войти .
2) В Принтеры папку, выберите ВСЕ файлы и удалите их.
Запустить диспетчер очереди печати
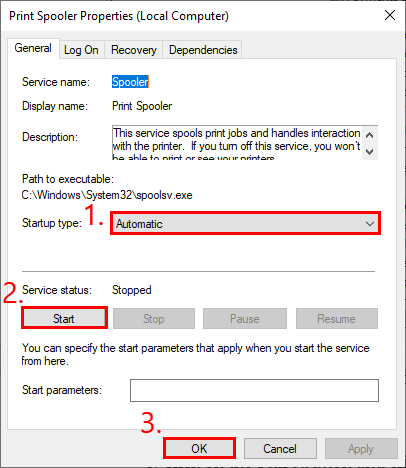
1) Вернуться к обслуживание окно, дважды щелкните Диспетчер очереди печати .
2) В Тип запуска , Выбрать Автоматический и нажмите Начало . Затем нажмите Хорошо чтобы применить изменения.
3) Перезагрузите компьютер и проверьте, исправлена ли ошибка.
Все еще нет радости? Пожалуйста, попробуй Исправить 5 , ниже.
Исправление 5: Запустите средство устранения неполадок Windows
Windows поставляется с рядом «средств устранения неполадок», которые предназначены для обнаружения аппаратных компонентов на вашем компьютере и решения проблем за вас. Таким образом, вы можете запустить средство устранения неполадок принтера, чтобы проверить, может ли оно обнаружить проблему и, надеюсь, решить ее.
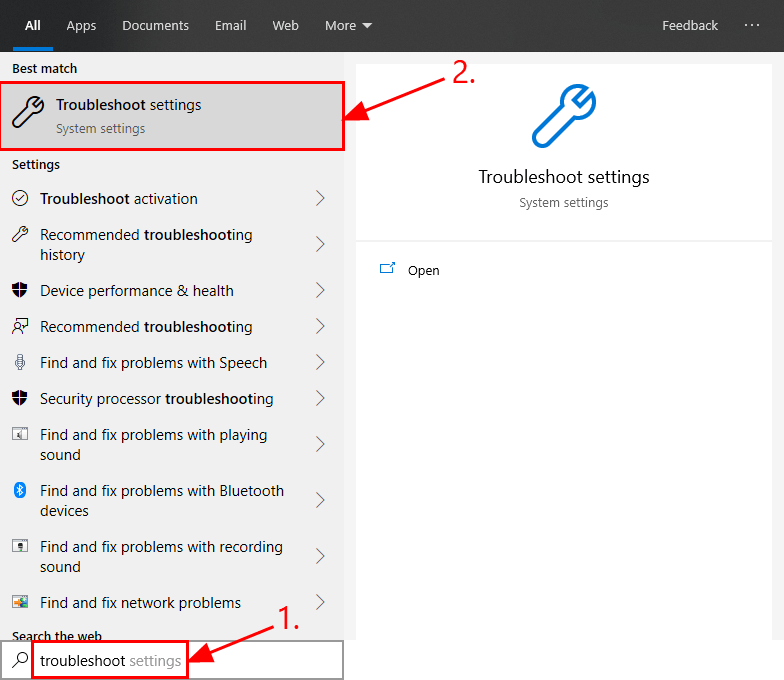
1) На клавиатуре нажмите клавиша с логотипом Windows и введите устранение неполадок t, затем нажмите Устранение неполадок с настройками как только он появляется в результате поиска.
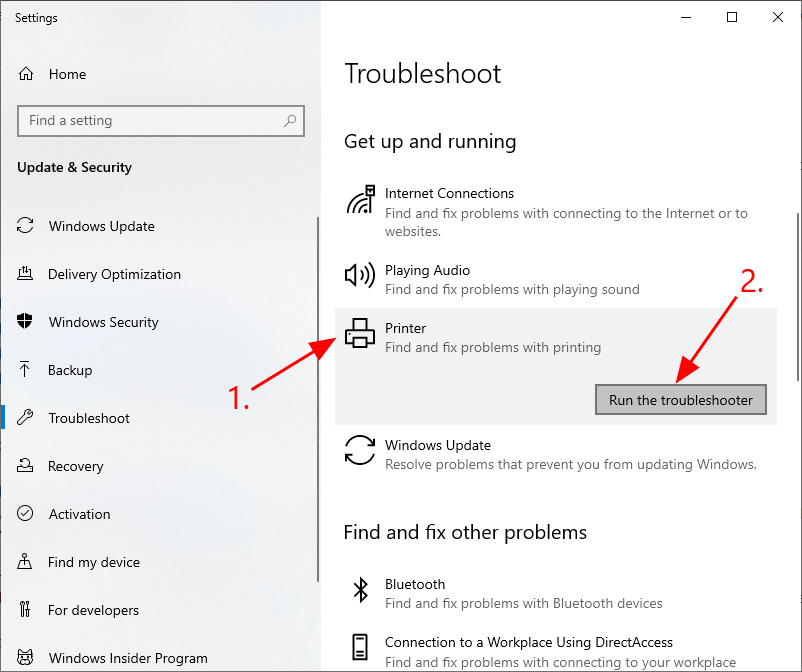
2) В Устранение неполадок окно, прокрутите вниз до Вставай и работай раздел, нажмите на Принтер > Запустите средство устранения неполадок .
3) Подождите, пока Windows диагностирует проблему, и следуйте инструкциям на экране, чтобы устранить Ваш принтер столкнулся с непредвиденной проблемой конфигурации ошибка.
Надеюсь, статья указала вам правильное направление в решении Ваш принтер столкнулся с непредвиденной проблемой конфигурации вопрос. Если у вас есть вопросы, идеи или предложения, дайте мне знать в комментариях. Спасибо за прочтение!
- Remove From My Forums

Installing Print Drivers on Server 2008 R2 cluster — Failing with error 0x000000006be
-
Question
-
Hello,
I’m currently working with a client that has a Cluster that has 24 servers with 84 resources. This cluster is dedicated to printing only. They have multiple types of printer brands and various different models of each brand. The problem is when they try
to install a Xerox GPD PS, PCL, PCL6 3.3 driver which is the newest driver it has issues with the install with«An unexpected error occurred in the print driver. Close the current driver window and retry the operation»
The other errror is
«Unable to install printer. Operation could not be completed (error 0x00006be)»
This happens on all of the clusters and physical machines. What can i do to look and find where the problem lies?
Answers
-
The hdmp file will be in this directory. The process that the driver is loaded in is terminating. That’s better than killing the spooler. I’d like the hdmp file though. I hit an issue once with a Xerox driver on a
cluster but the issue did not reproduce on a different cluster and Xerox was never able to reproduce the issue with their configuration.Attached files:
These files may be available here:
C:ProgramDataMicrosoftWindowsWERReportQueueAppCrash_PrintIsolationHo_e4795317f6faacc7b641e8555e562e8adea4f1_13a9d52b
Alan Morris Windows Printing Team
-
Marked as answer by
Thursday, July 17, 2014 1:53 AM
-
Marked as answer by
-
I’m not with support. I just put 2 and 2 together sometimes. I do not have a site to upload the files. Use OneDrive and share the link. If you are working directly with Xerox on this send them the dmp files. That’s all I was
going to do anyway. I can’t debug their stuff without matching symbol files.Nearly 4 years ago I had one cluster that had one driver version, then installed the Global driver and that one took down the spooler. On another cluster where the Xerox drivers had not been installed, the Global driver worked fine. Xerox
determined where the driver fault on the one cluster was but they were never able to reproduce the issue.
Alan Morris Windows Printing Team
-
Marked as answer by
Justin Gu
Thursday, July 17, 2014 1:53 AM
-
Marked as answer by
This post will show you how to fix Your Printer has experienced an unexpected configuration problem with error code 0x800700c1, 0x80070002, 0x80040154, or 0x8000ffff on Windows computers.

Printers have a lot of use in our work life. When we see errors while printing the documents on our Windows, it disturbs the flow. There are various reasons why the error Your Printer has experienced an unexpected configuration problem has occurred. It might have occurred due to outdated drivers, glitched entries of the print, third-party programs interfering with the printing program, or the printer not being set up properly in the network. The reasons for the error to occur might differ from one another. But the solutions are a few that works with every user. Let’s see what they are and how we can fix the error.

How do I fix Printer configuration errors?
The Printer configuration error 0x8007007e, 0x800706b5, 0x80040003, 0x80004005 and other similar error codes can be fixed easily by running the Printer troubleshooter, updating the drivers, and reconnecting the printer.
The following fixes are the best possible ways to resolve the Printer configuration error 0x800700c1, 0x80070002, 0x80040154, 0x8007007e or 0x8000ffff on your Windows 11/10 PC.
- Run the Printer Troubleshooter
- Update your Printer Driver
- Reconnect the Printer
- Disable Print Spooler Temporarily
- Share the Printer on the Network
Let’s get into the details of each method and see how they are done.
Fix Printer configuration errors 0x800700c1, 0x80070002, 0x80040154, 0x8000ffff
1] Run the Printer Troubleshooter
Troubleshooters are great features to resolve issues on Windows. There are various troubleshooters that let you resolve issues we face. Running the Printer Troubleshooter will find the errors that occurred will try to fix the issues easily. Run it and see if it has resolved the problem.
Read: How to reset Printer to default factory settings.
2] Update your Printer Driver
There is a possibility that the outdated drivers are causing the error. The better solution to fix it, in that case, is to update the printer driver. You can do it via settings or manually. Update the drivers and check if the problem is resolved.
Alternatively, you download the driver from the manufacturer’s website and install it.
3] Reconnect the Printer
Unplug the printer and remove all its entries on your PC. Reconnect the printer and set it up afresh. All the default settings you have saved will be gone, but it is one way to fix the issues with the printer.
4] Disable Print Spooler Temporarily
Print Spooler on your PC stores the data of all the print jobs you have created. Disable the print spooler temporarily and enable it again.
Try using the printer again and check if it has fixed the issue.
5] Share the Printer on the Network
If you are trying to print the documents via a printer that is connected to the network which is not shared or configured properly, you might see the error Your Printer has experienced an unexpected configuration problem (0x800700c1). Turn the printer sharing off and turn on it again. This should resolve the issue.
This is how you can fix the issue Your Printer has experienced an unexpected configuration problem with error code 0x800700c1, 0x80070002, 0x80070077, 0x80040154, 0x8007007e, 0x8000ffff or 0x80004003 easily.
How do I fix my printer that experienced an unexpected configuration problem?
If you are seeing an unexpected configuration problem with your printer, try setting up the printer again, clear the print spooler, and update drivers. These should help you fix the configuration errors with your printer.
Related read: Fix Wireless Printer not responding on Windows 11/10.
Several Windows users are reporting that they are getting the “Your printer has experienced an unexpected configuration problem” error every time they try to print something on their locally connected printer. In some cases, these error codes might appear alongside the message: 0x80070002, 0x80040154. The issue is not exclusive to a certain Windows version as it’s reported to appear on Windows 7, Windows 8 and Windows 10.

What is causing the ‘Unexpected Configuration Problem’ error with some printers?
We investigated this particular issue by looking at various user reports and the repair strategies that were commonly used to troubleshoot and resolve the issue by users finding themselves in a similar situation. Based on our investigations, there are several different scenarios that are known to trigger this particular error message:
- Printer entry is glitched – On Windows 10 and Windows 8.1, there’s a chance that the issue is caused by a case of a glitched printer. Whenever this happens, you will be unable to print anything, even though the printer will show up as operational inside Printer & scanners. In this case, you can resolve the issue by using the Windows Printer Troubleshooter or by re-adding the printer inside the Printer & scanners menu.
- The printer driver is outdated – Another potential case in which this error occurs is when you’re using a severely outdated driver. Several users finding themselves in a similar situation have reported that they managed to resolve the issue after using Windows Update to update to the latest version or after updating the driver manually.
- The printer is not shared across the network – As it turns out, this issue can also occur if the device you’re trying to print from is not shared across the network. If this scenario is applicable, you can resolve the issue by making the printer sharable from the Printer’s properties menu.
- 3rd party app or Windows update is interfering with the printing sequence – In some case, system file corruption can be responsible for this particular error. Since both bad Windows updates and some 3rd party software can interfere with the printing sequence, one cure-all fix is to use a System Restore point to restore your machine to a healthy state.
If you’re actively looking for ways to resolve this exact error message that is keeping you from using your printer, this article will provide you with a list of quality troubleshooting steps. Down below, you’ll discover a collection of methods that other affected users have successfully used to fix this particular problem.
The potential fixes below are ordered by efficiency and severity, so please follow them in the order that they are presented. One of the methods below is bound to fix the problem, regardless of the culprit that’s triggering it.
Method 1: Running the Printer Troubleshooter
As some users have reported, this built-in utility has the potential of resolving the issue automatically if the problem is covered by one of the many automated repair strategies covered by the Printer Troubleshooter.
As soon as you start the Printer Troubleshooter, the utility will analyze your current situation and determine if any of the predetermined repair strategies are applicable in this situation. If one is a match, you will be prompted to apply the fix. If everything goes well, this will end up resolving the issue with minimal hassle.
Here’s a quick guide on running the Printer Troubleshooter:
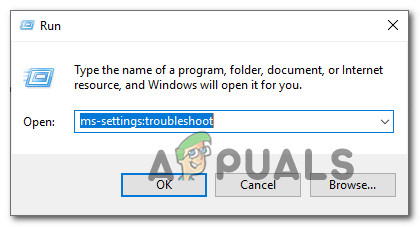
- Press Windows key + R to open up a Run dialog box. Then, type” ms-settings:troubleshoot” and press Enter to open up the Troubleshoot tab of the Settings app.

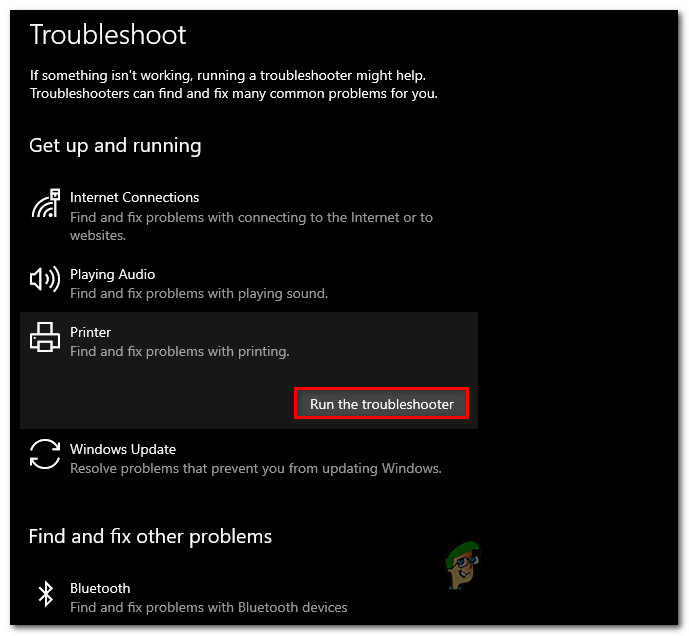
Accessing the Activation troubleshooter - Inside the Troubleshooting tab, go to the Get up and running tab and click on Printer. Then, click on the Run the troubleshooter button.

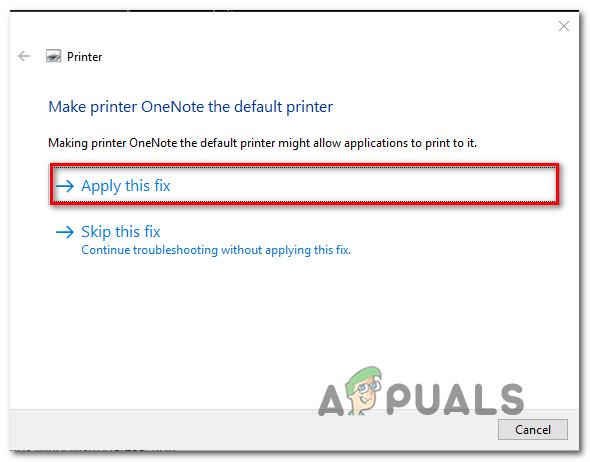
Running the Printer Troubleshooter - Wait until the initial scanning period is complete, then click on Apply this fix if a repair strategy is recommended.

Applying the recommended Printer fix - Once the operation is complete, close the troubleshooting window and see if you’re still encountering the same error message when trying to print something from your default printer.
If the same issue is still persisting, move down to the next method below.
Method 2: Adding the same printer again inside Printer & scanners
Some affected users have managed to resolve the issue by adding the same printer again inside the Printers & scanners menu. All users that have resulted to this fix have reported that this doesn’t create any sort of conflict – the only minor inconvenience is that you will have your printer listed twice under Printers & scanners.
Here’s a quick guide on how to do this:
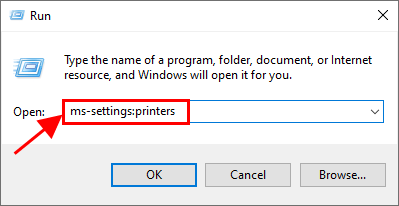
- Press Windows key + R to open up a Run dialog box. Then, type “ms-settings:printers” and press Enter to open the Printers & scanners tab of the Settings app.

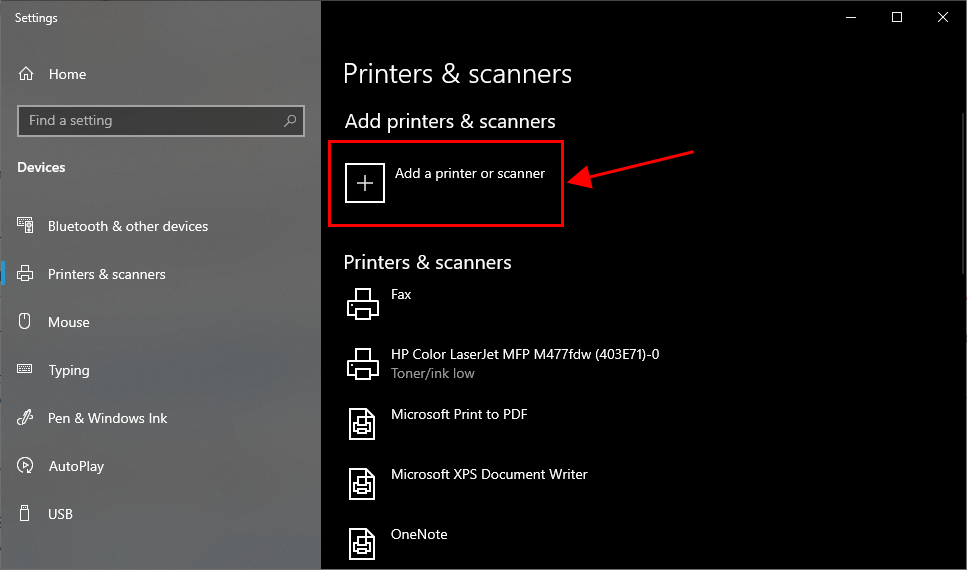
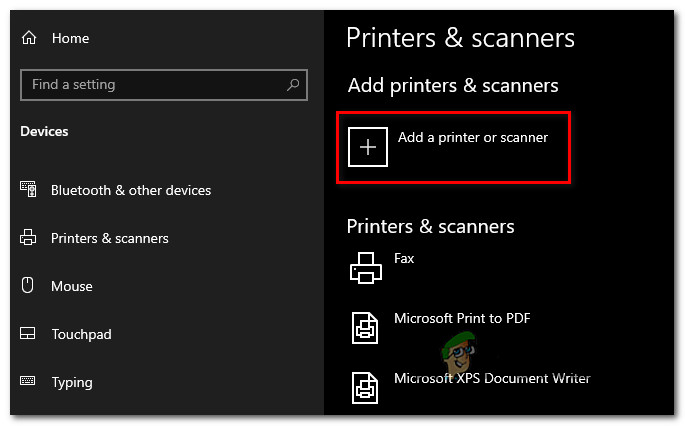
Opening the Printers & scanners tab - Once you get the Printers & scanners to click on the ‘+‘ icon under Add printers & scanners. Wait until your printer is identified again, then click on it to finish setting it up again.

Adding the printer once again - Once you manage to add your printer once again, restart your computer and see if the issue has been resolved at the next startup.

If you’re still encountering the “Your printer has experienced an unexpected configuration problem” error, move down to the next method below.
Method 3: Updating your printer driver using Windows Update
As it turns out, one reason that might trigger the “Your printer has experienced an unexpected configuration problem” error is a severely outdated printer driver. Several affected users have reported that the issue was no longer occurring after the used Windows Update to find and install an updated version of the printer driver.
Here’s a quick guide on updating your drivers using Windows Update:
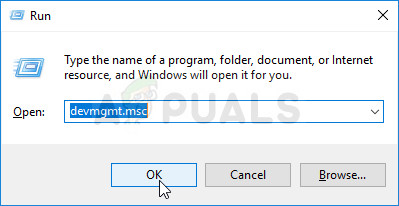
- Press Windows key + R to open up a Run dialog box. Then, type “devmgmt.msc” and press Enter to open up Device Manager. If prompted by the UAC (User Account Control), click Yes to grant administrative privileges.

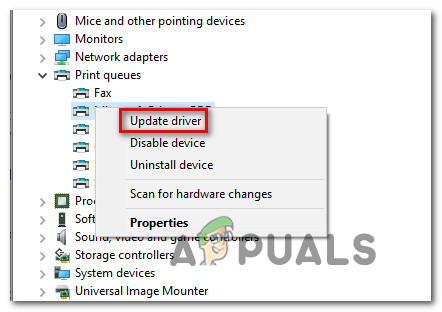
Running Device Manager - Inside Device Manager, scroll through the list of devices and expand the Printers (Print queues) drop-down menu.
- Right-click on the printer that you’re having issues with and choose Update driver.

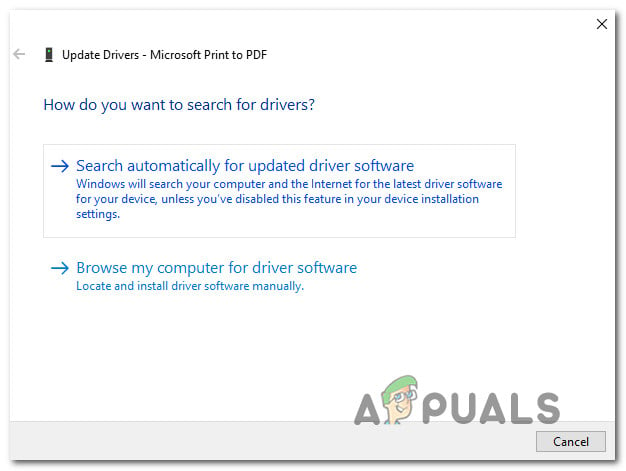
Updating the printer driver - From the next screen, click on Search automatically for updated driver software to let Windows Update to scan and download the newer driver version for your printer.

Updating the Printer driver using Windows Updates - Once the newer printer driver is installed, restart your computer and see if the issue is resolved at the next startup.
If the same “Your printer has experienced an unexpected configuration problem” error is occurring even after you’ve updated the driver or Windows Update wasn’t able to find a newer version, move down to the next method below.
Method 4: Updating the Printer’s driver manually
If Windows Update wasn’t able to update the driver automatically, you can also download and install the driver by yourself. Chances are that your printer already came with software capable of updating the driver.
But since not all manufacturers will include an auto-updating software, the most generic way to update your printer’s driver automatically is to uninstall the current one and then download the latest version from the manufacturer’s website.
Here’s a quick guide on how to do this:
- Press Windows key + R to open up a Run dialog box. Then, type “devmgmt.msc” and press Enter to open up Device Manager.
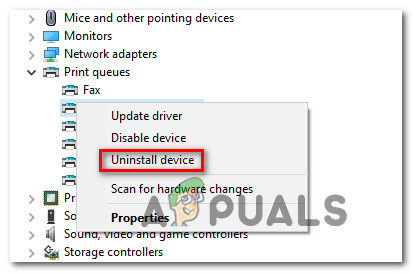
Running Device Manager - Expand the drop-down menu associated with Printers (or Print Queues). Then, right-click on the printer that you’re having issues with and choose Uninstall device. You’ll need to confirm once again before the driver is uninstalled.

Uninstalling the Printer Driver Note: It’s very important to avoid restarting your computer during this time. Doing this will trigger Windows Update to search and install a generic version of the driver at the next startup, which will likely end up producing the same error.
- Once you manage to remove your printer’s driver open your browser and search online for your manufacturer’s website. The latest printer driver versions are often available in the support section.
- When you locate and download the latest driver version, open it and follow the on-screen prompts to install it on your system. Almost all printer drivers are self-installing – meaning that they only require you to double-click them and accept the UAC prompt for them to install.
- Once the newer printer driver is installed, restart your computer and see if the issue is resolved once the next startup is complete.
If you’re still encountering the same “Your printer has experienced an unexpected configuration problem” error, move down to the next method below.
Method 5: Making the Printer Sharable
Some affected users have managed to resolve the issue by making the printer sharable on Windows 10. As it turns out, you might get the “Your printer has experienced an unexpected configuration problem” error if you want to trigger the printing sequence from a different computer and the printer in question is not shared across the network.
If this particular scenario applies, you can resolve the issue very easily by making the printer sharable. Here’s a quick guide on how to do this:
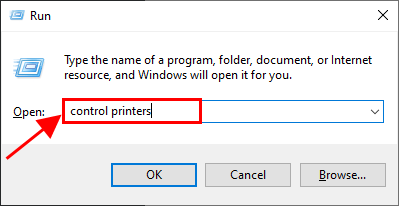
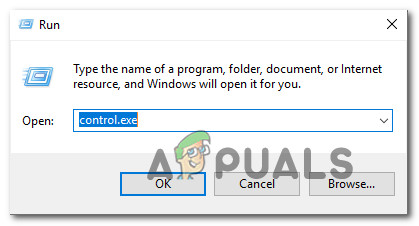
- Press Windows key + R to open up a Run dialog box. Then, type “control.exe” and press Enter to open up Control Panel.

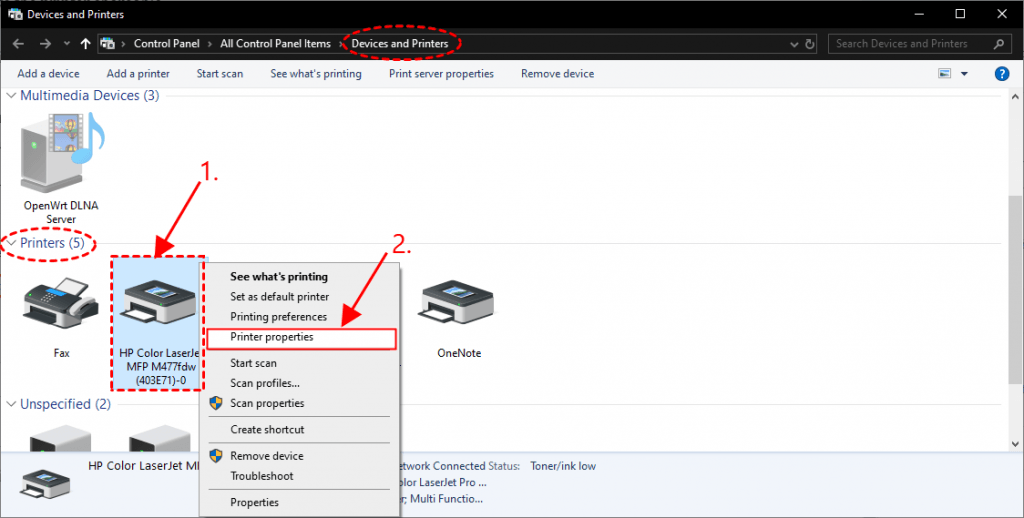
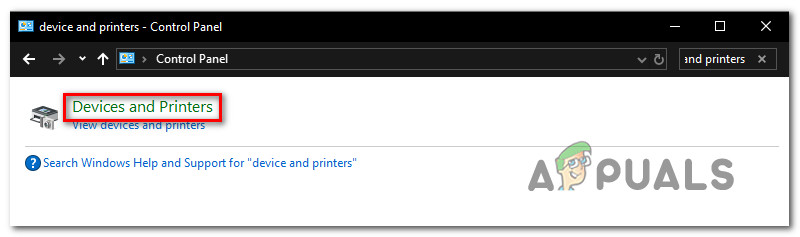
Accessing the Control Panel using Run Command - Inside Control Panel, use the search function (top-right corner) to search for “device & printers“. Then, click on Device and Printers from the search results.

Accessing the Device & Printers screen - Inside the Device and Printers screen, right-click on the printer that you’re having issues with and choose Printer Properties.

Accessing the Printer Properties menu - Inside your printer’s Properties screen, go to the Sharing tab.
- Inside the Sharing tab, start by checking the box associated with Share this printer and then set a name for it.

Sharing the printer - Click Apply to save the changes, then try to print something and see if the “Your printer has experienced an unexpected configuration problem” error has been resolved.
If the issue is still occurring, move down to the next method below.
Method 6: Manually Installing the DLL file
It’s possible that you don’t have the DLL file installed on your computer properly. The DLL that’s responsible for running your Printer properly. Follow the steps to fix this issue:-
- Head over to this location on File Explorer: C:WindowsWinSxS
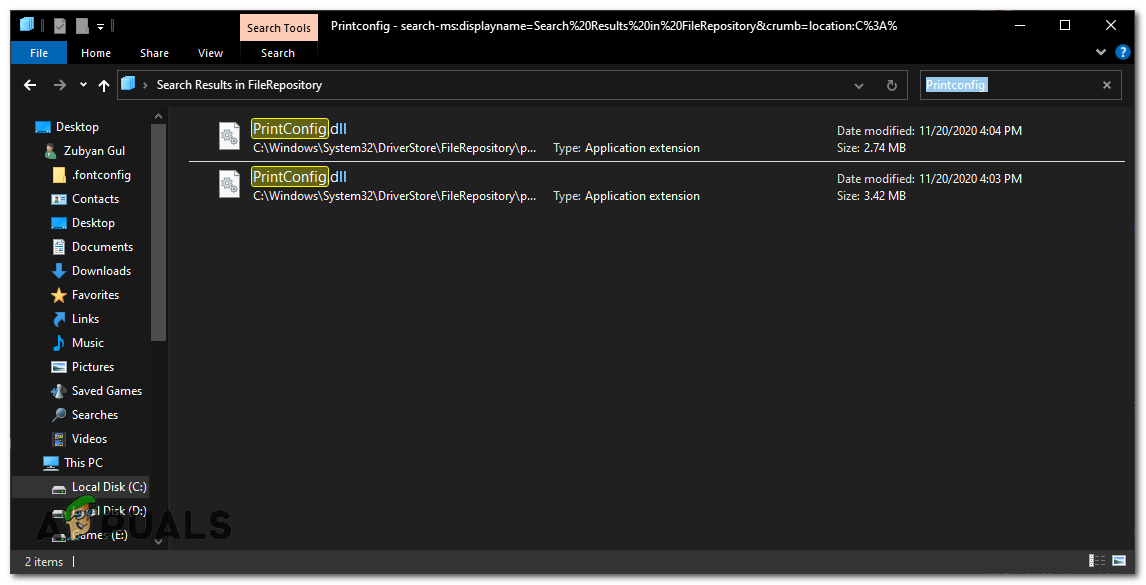
- Once you are there click on the Search button and search for “Printconfig.dll”.
- Once you find it right-click on it and click copy.

Searching for the DLL (If you can’t able to find the DLL file you can head over to this location and try to search for it: C:WindowsSystem32DriverStoreFileRepository)
- Once the file is copied head over to this location “C:WindowsSystem32spooldriversx643″ and paste the file you just copied.
- Restart your computer and your printer.
- Check to see if the issue persists.
Method 7: Performing a System Restore
If your printer was functioning normally until now, chances are an update or some 3rd party application that you might have installed might have disrupted it. If this particular scenario is applicable, you will most likely be able to resolve the issue by returning your machine to a fully working state.
The quickest and most non-destructive way to do this is by using System Restore. This utility will return your machine state to a previous point in time. If you’re lucky enough to have a restore point dated before the apparition of this issue, then you’ll be able to resolve the “Your printer has experienced an unexpected configuration problem” error very easily.
Here’s what you need to do:
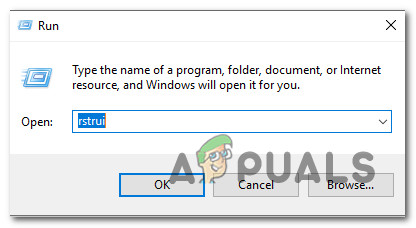
- Press Windows key + R to open up a Run dialog box. Then, type “rstrui” and press Enter to open up the System Restore Utility.

Opening the System Restore wizard via Run box - Inside the first System Restore screen, click on Next.
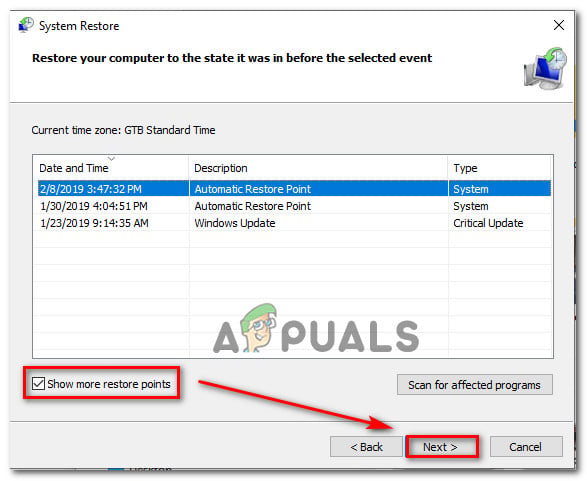
- At the next screen, make sure that the box associated with Show more restore points is checked. Then, select a restore point older than the apparition of this issue and hit the Next button once again.

Restoring your system to a previous point in time - Hit Finish to start the restoring procedure. Soon after you click the button, your computer will restart and the older state will be mounted.
- Once the next startup is complete, try to print something again and see if the “Your printer has experienced an unexpected configuration problem” error has been resolved.
If none of these methods have worked for you, it’s possible that the manufacturer has provided custom modified drivers that should be stable and compatible for your Printer specifically. Simply head over to the official support website of your printer and search for the drivers by using the model number.
Содержание
- Исправляем ошибку «Не удалось напечатать этот документ»
- Способ 1: Назначение принтера по умолчанию
- Способ 2: Отключение функции двустороннего обмена данными
- Способ 3: Перезапуск службы «Диспетчер печати»
- Способ 4: Настройка очереди печати (для сетевых принтеров)
- Способ 5: Отключение автономного режима
- Способ 6: Переустановка драйвера
- Способ 7: Использование средства устранения неполадок
- Способ 8: Извлечение застрявшей бумаги
- Способ 9: Проверка картриджей
- Вопросы и ответы
Некоторые пользователи периодически сталкиваются с различными проблемами при попытке отправить какой-либо файл в печать. Одной из распространенных ошибок является появление уведомления «Не удалось напечатать этот документ». В большинстве случаев такая трудность решается программными методами, однако не стоит исключать и аппаратные поломки. Далее мы хотим поговорить об известных причинах появления этой проблемы и вариантах их исправления, начав с самой банальной и часто встречающейся.
Исправляем ошибку «Не удалось напечатать этот документ»
В первую очередь нужно проверить подключенный к компьютеру кабель от принтера. Он должен плотно сидеть в обоих разъемах и не иметь внешних повреждений. Если есть такая возможность, попробуйте подключить его к другому компьютеру и убедиться в обнаружении устройства. В случае неисправности замените провод. Перед выполнением всех последующих инструкций рекомендуем сразу очистить очередь печати. Детальное руководство по осуществлению этой задачи вы найдете в другой нашей статье по следующей ссылке.
Подробнее: Очистка очереди печати в Windows
Способ 1: Назначение принтера по умолчанию
В большинстве случаев юзеры не смотрят на выбранный принтер в программе, через которую запускается печать, и сразу отправляют документ в обработку. Иногда это приводит к тому, что аппаратом по умолчанию выступает отключенное оборудование, поэтому и появляется рассматриваемая проблема. Во избежание подобных ошибок рекомендуется вручную указывать необходимый аппарат или назначить его основным в системе.
Подробнее: Назначение принтера по умолчанию в Windows
Способ 2: Отключение функции двустороннего обмена данными
Стандартная конфигурация принтера включает в себя активный параметр автоматической передачи настроек из системы в принтер, а называется этот пункт «Двусторонний обмен данными». Даже сами разработчики устройств указывают на то, что активный режим работы этого инструмента часто приводит к появлению неполадок с печатью. Поэтому мы предлагаем отключить его.
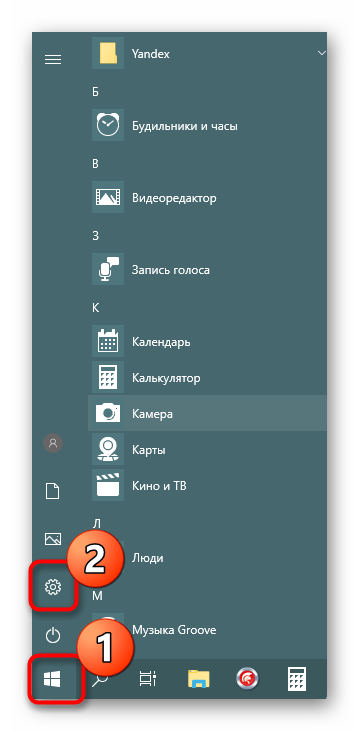
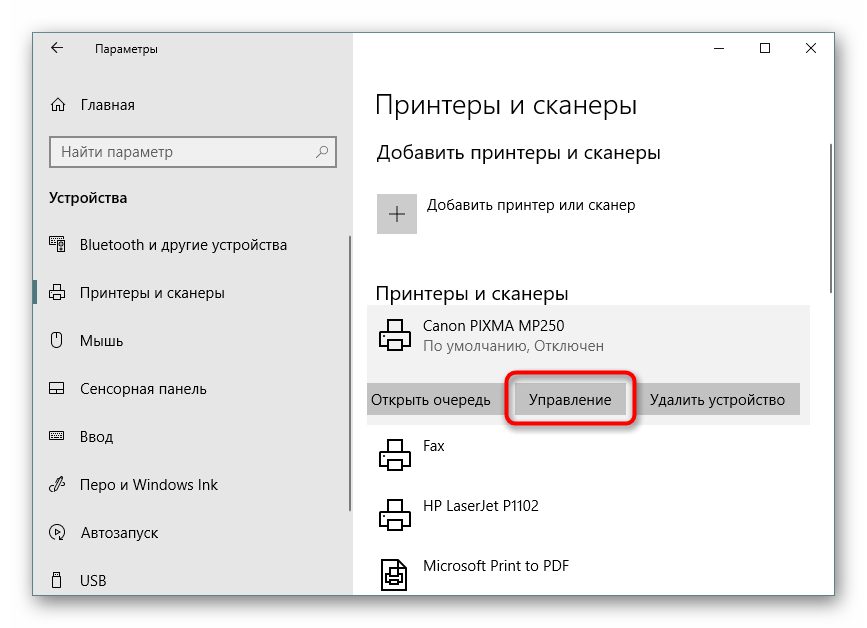
- Откройте «Пуск» и перейдите в «Параметры». В случае со старыми версиями Windows потребуется выбрать пункт «Устройства и принтеры».
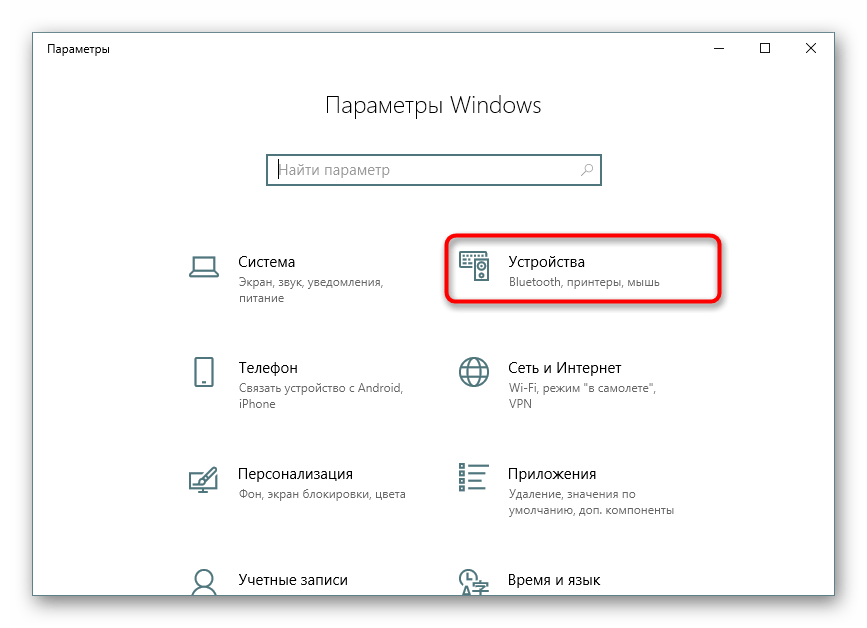
- Переместитесь в раздел «Устройства».
- На панели слева выберите категорию с печатающим оборудованием.
- В списке отыщите требуемый принтер и щелкните на нем ЛКМ.
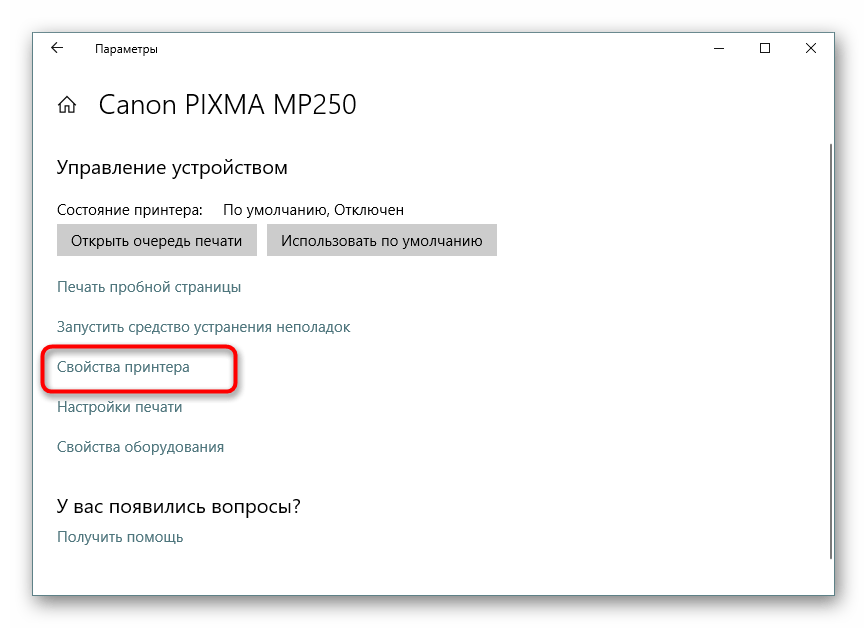
- Кликните по кнопке «Управление».
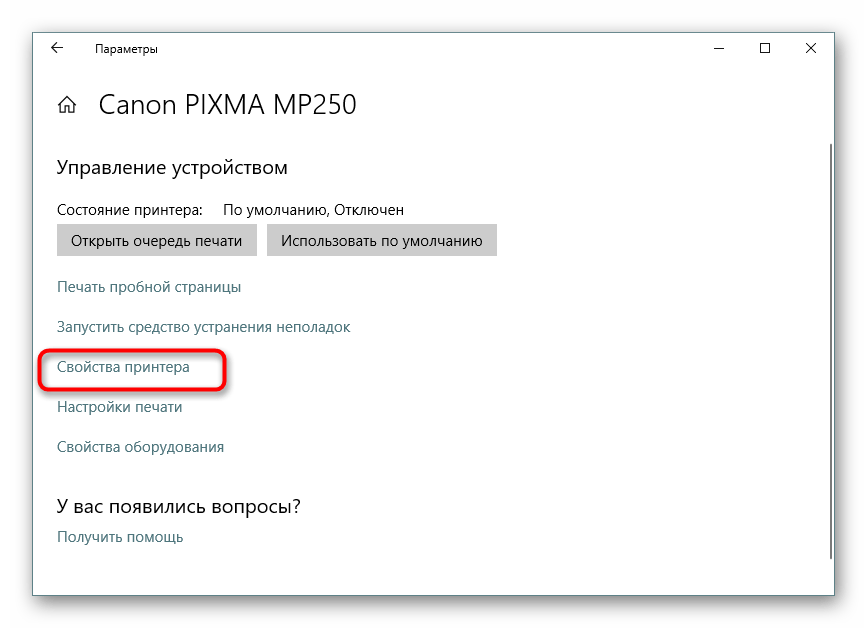
- Синим будет выделена надпись «Свойства принтера», нажмите на нее ЛКМ.
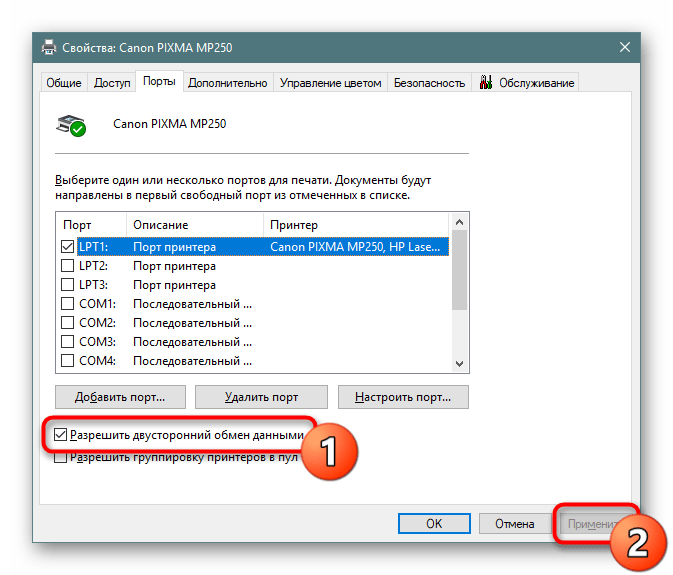
- Перейдите во вкладку «Порты».
- Снимите галочку с пункта «Разрешить двусторонний обмен данными» и примените изменения.


После выполнения указанных выше инструкций останется только перезапустить устройство, чтобы в силу вступили новые настройки, и попробовать отправить документ в печать заново.
Способ 3: Перезапуск службы «Диспетчер печати»
За корректное осуществление всех действий с принтером отвечает одна системная служба «Диспетчер печати». Из-за различных ошибок или сбоев в ОС она могла быть отключенной или перестать нормально функционировать. Поэтому мы советуем вручную перезапустить ее, что делается так:
- Откройте утилиту «Выполнить», зажав комбинацию клавиш Win + R. В поле введите
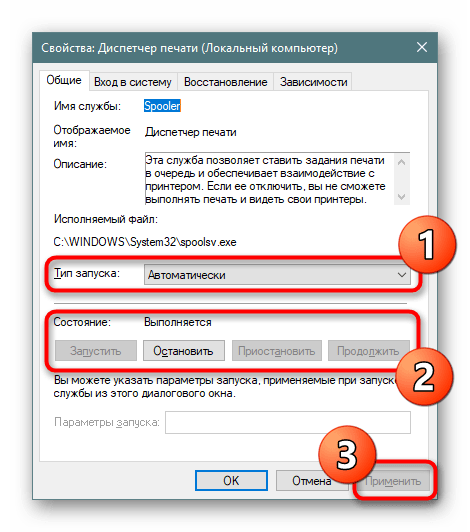
services.mscи щелкните на «ОК». - В списке отыщите строку «Диспетчер печати» и дважды нажмите на ней левой кнопкой мыши.
- Убедитесь в том, что тип запуска установлен в состояние «Автоматически», затем остановите службу и повторно запустите ее.


Иногда возникает ситуация, что «Диспетчер печати» отключается сам по себе спустя некоторое время работы. Связано это может быть с разными проблемами, для каждой из которых имеется отдельное решение. Развернутые руководства по исправлению этой трудности вы найдете в статье далее.
Читайте также: Исправление остановки службы печати в Windows
Способ 4: Настройка очереди печати (для сетевых принтеров)
Не все обладатели печатающих аппаратов имеют прямой доступ к ним, иногда они подключаются через локальную сеть с помощью домашней или корпоративной группы. Тогда в силу применяются стандартные параметры, отправляющие документ в очередь печати, а не сразу в принтер. Из-за этого возникает проблема с переходом файла в активный режим и отображается соответствующее уведомление. Настроить эти параметры можно на главном компьютере, воспользовавшись следующей инструкцией:
- Перейдите к списку устройств так, как это было показано в Способе 2, отыщите сетевое оборудование и откройте окно управления им.
- Здесь вам необходимо меню «Свойства принтера».
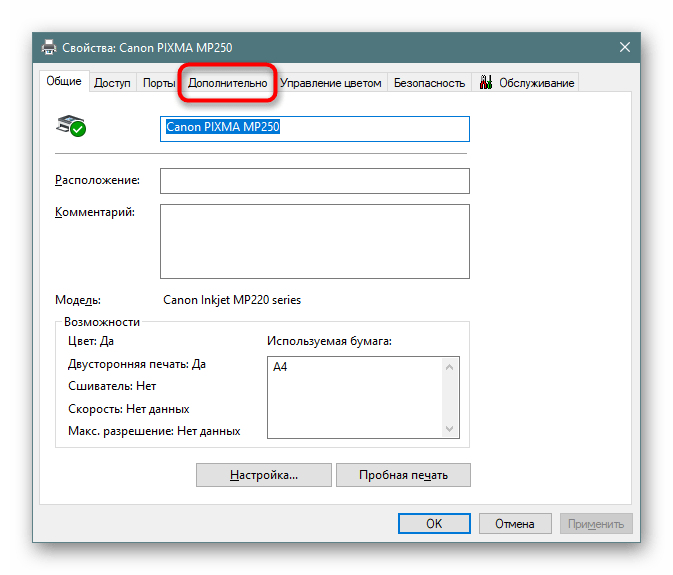
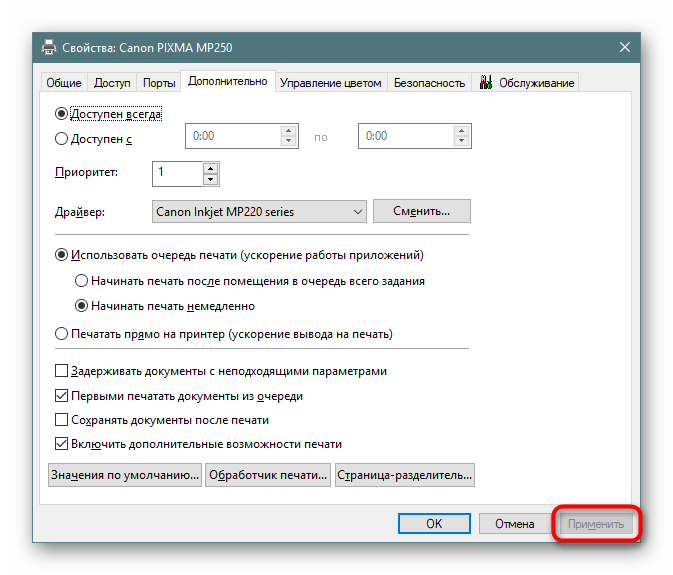
- Переместитесь во вкладку «Дополнительно».
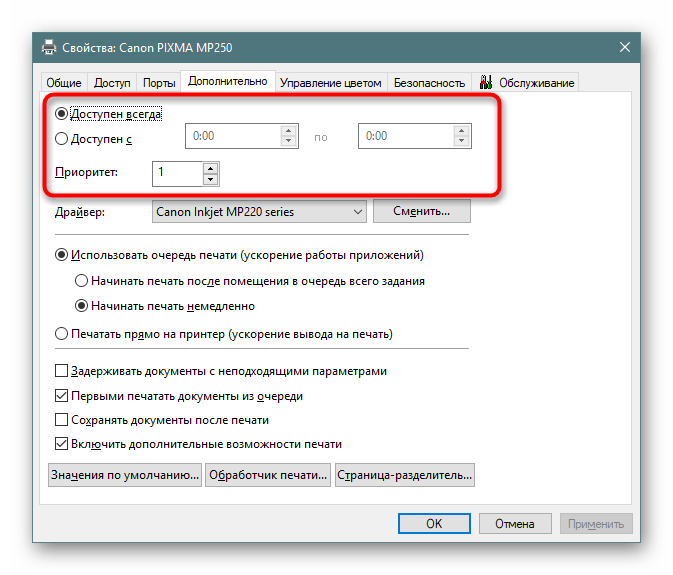
- Убедитесь в том, что нет ограничений на доступ к принтеру и не выставлен приоритет.
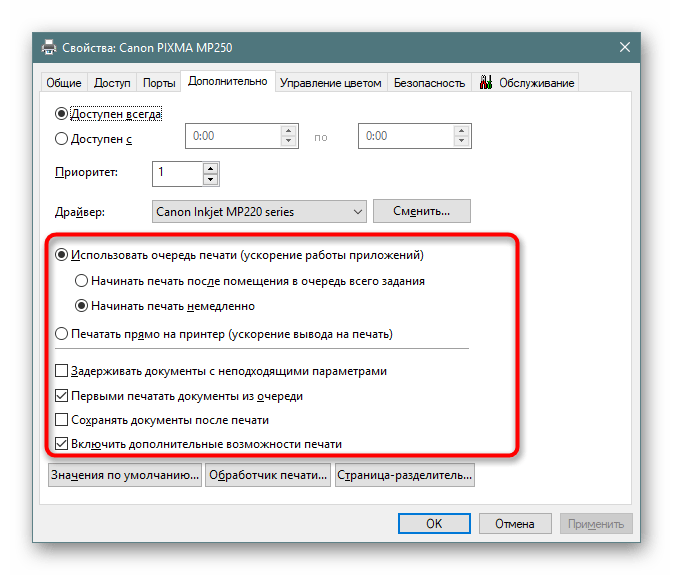
- Чуть ниже отметьте маркером пункт «Печатать прямо на принтер» и уберите галочки со всех пунктов, отвечающих за задержку печати (в разных моделях устройств их количество и функциональность отличаются).
- Не забудьте применить изменения.

После этих действий обязательно перезагрузите принтер, а также не забудьте очистить очередь. Если нет никаких
параметров, задерживающих печать, неполадка должна немедленно исчезнуть.
Способ 5: Отключение автономного режима
Иногда принтер переходит в автономный режим, что связано с системными ошибками или отключением кабеля. Почти всегда из него он выходит автоматически, но бывают и исключения, тогда при попытке печати на экране появляется уведомление «Работа принтера приостановлена», но на некоторых моделях срабатывает другой код и надпись меняется на «Не удалось напечатать этот документ». Мы советуем ознакомиться с представленным ниже материалом, чтобы понять, как самостоятельно перевести принтер в активный режим и исправить возникшую трудность.
Подробнее: Решение проблемы «Работа принтера приостановлена»
Способ 6: Переустановка драйвера
Драйвер принтера отвечает за нормальное функционирование его программной части. Неполадки с работой этого компонента или неправильная установка приводит к прекращению работоспособности. Поэтому мы рекомендуем полностью удалить старый драйвер так, как это показано в статье по следующей ссылке.
Подробнее: Удаление старого драйвера принтера
После этого останется только отыскать драйвер последней версии любым удобным методом, скачать его и инсталлировать. Приоритетным местом поиска является официальный сайт, идущий в комплекте лицензионный диск или утилита от разработчика.
Подробнее: Установка драйверов для принтера
Способ 7: Использование средства устранения неполадок
Выше мы рассмотрели все программные методы решения возникшей неполадки, которые не задевает стандартное системное средство устранения проблем. Если ничего из перечисленного ранее не принесло результата, запустите этот инструмент, чтобы он провел автоматическую диагностику.
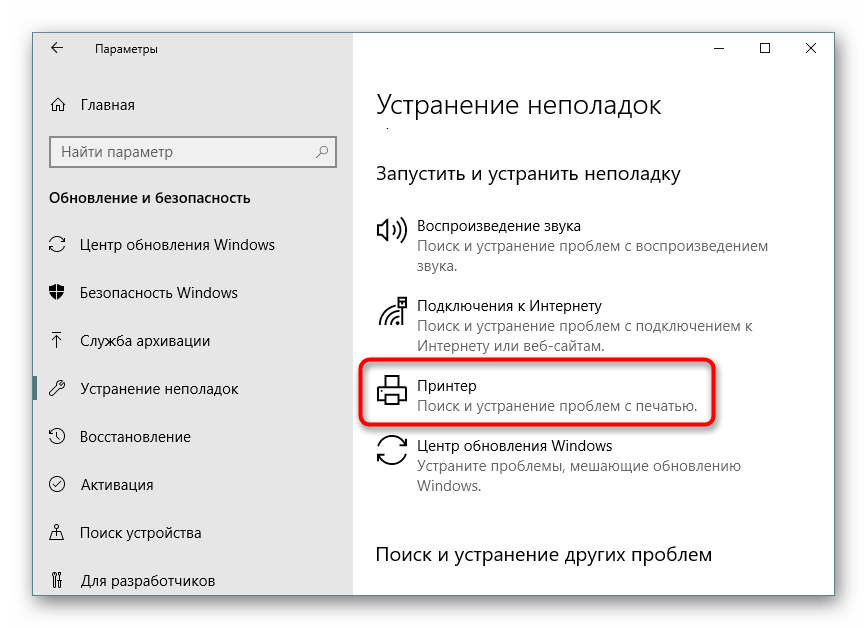
- Откройте меню «Параметры» через «Пуск» и перейдите в раздел «Обновление и безопасность».
- Через левую панель опуститесь в категорию «Устранение неполадок».
- Выберите пункт «Принтер».
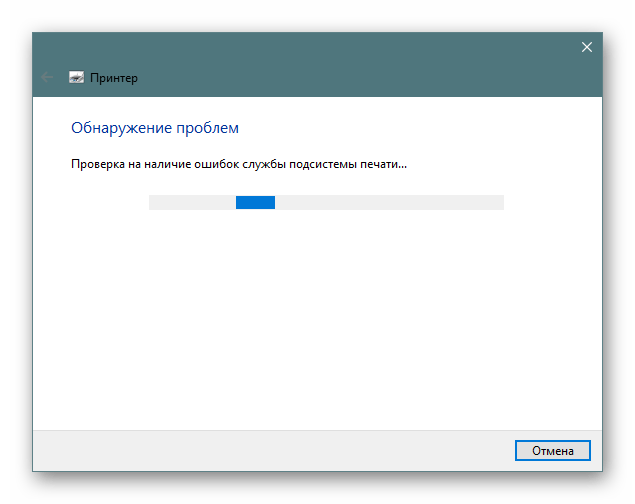
- Дождитесь, пока Мастер обнаружения проблем завершит сканирование. При отображении списка с принтерами выберите нерабочий и следуйте отобразившимся рекомендациям.


Способ 8: Извлечение застрявшей бумаги
Как уже было сказано ранее, не все модели печатающего оборудования отображают ошибки корректно, что бывает и при возникновении ситуации с застрявшей внутри бумагой. Ее клочки не позволяют ролику захвата взять новый лист или же уведомляют о наличии внутри посторонних предметов. В таком случае надо самостоятельно разобрать принтер и проверить его внутренности на наличие кусков бумаги или, например, скрепок. При обнаружении посторонних предметов их нужно аккуратно извлечь.
Подробнее:
Полная разборка принтеров
Решение проблемы с застрявшей в принтере бумагой
Решение проблем с захватом бумаги на принтере
Способ 9: Проверка картриджей
Если ни один из указанных выше методов не принес никого результата, проверять требуется картриджи. Не всегда программное обеспечение показывает уведомление о том, что краска кончается. Необходимо вручную достать чернильницы и проверить их содержимое. Кроме этого, иногда принтер вовсе не видит картридж, поэтому нужно предпринимать другие меры. Все необходимые сведения по работе с картриджами вы найдете в других наших статьях.
Читайте также:
Замена картриджей в принтерах
Исправление ошибки с обнаружением принтерного картриджа
Правильная чистка принтерного картриджа
Как заправить картридж принтера
Выше мы продемонстрировали все известные методы решения проблемы «Не удалось напечатать этот документ». Вам следует обязательно по очереди проверять каждый из них, чтобы выявить возникшую неполадку. Дополнительно попробуйте использовать другое приложение для печати или проверить другие файлы, возможно, неполадка заключается именно в этом, а не в работе принтера.
Читайте также:
Проверка принтера на качество печати
Решение проблем с распечаткой PDF-файлов