
В этой статье мы расскажем о причинах, с которыми может быть связано возникновение ошибки 403. В качестве примера мы покажем вам, как исправить подобную ошибку на WordPress-сайте. Тем не менее, на других CMS или статических сайтах действия, которые необходимо предпринять, будут почти аналогичными:
Причины возникновения ошибки 403 могут отличаться в зависимости от различных обстоятельств. Иногда эта ошибка может быть результатом изменений или обновлений, которые ваш хостинг произвел в своей системе.
Рассмотрим эту тему подробнее. Затем мы перечислим различные причины возникновения этой ошибки и пути решения.
Что понадобится
- Доступ к панели управления хостингом.
- Что такое ошибка доступа 403?
- Почему возникает ошибка доступа 403
- Что делать если возникла ошибка доступа 403
- Шаг 1 — Проверка файла .htaccess
- Откройте «Диспетчер файлов» в панели управления хостингом
- Шаг 2 — Работа с правами доступа
- Шаг 3 — Отключение плагинов WordPress
- Заключение

Прежде чем мы продолжим и попытаемся исправить код ошибки 403, давайте сначала поймем, что это на самом деле такое. Ошибка доступа 403 — это код состояния HTTP.
Вот примеры сообщений об ошибке, с которыми можно столкнуться:
Forbidden: You don't have permission to access [directory] on this server
	HTTP Error 403 – Forbidden
	403 forbidden request forbidden by administrative rules
	403 Forbidden
	Access Denied You don't have permission to access
Давайте выясним, что вызывает эти ошибки.
Получение сообщения об ошибке 403 в процессе разработки может оказаться тревожным сигналом. Причина может заключаться в том, что вы пытаетесь получить доступ к тому, к чему у вас нет прав. Ошибка доступа 403 — это способ, с помощью которого сайт заявляет, что у вас недостаточно прав.
Эта ошибка обусловлена следующим:
- Неверные права доступа к файлам или папкам;
- Неправильные настройки в файле .htaccess.
Кратко рассмотрим, как можно это исправить.
Теперь, когда мы знаем факторы, провоцирующие возникновение ошибки, пришло время рассмотреть то, как от нее избавиться.
Действия, перечисленные ниже, будут касаться исправления ошибки 403 на WordPress-сайте. Но их также можно использовать и на других платформах. Рассмотрим весь процесс обнаружения ошибки 403 доступ запрещен, и ее исправления по этапам.
Возможно, вы не знакомы с файлом .htaccess. Это потому, что файл часто остается скрытым в директории проекта. Но если вы используете Hostinger File Manager, вы видите .htaccess по умолчанию:

Если вы используете CPanel, можно найти этот файл, используя «Диспетчер файлов». Давайте рассмотрим, как это делается:
В папке public_html найдите файл .htaccess. Если вы не видите его в этой папке, можно нажать на кнопку «Настройки» и включить параметр «Показать скрытые файлы»:

.htaccess — это файл конфигурации сервера, который предназначен для изменения настроек веб-сервера Apache.
Файл .htaccess присутствует на всех WordPress-сайтах. В тех редких случаях, когда сайт не его или он был удален непреднамеренно, нужно создать этот файл вручную.
После того как вы нашли файл .htaccess, чтобы исправить ошибку 403 forbidden, нужно:
- Скачать файл .htaccess на компьютер, чтобы создать резервную копию;
- После этого удалить файл.

- Теперь попробуйте получить доступ к сайту;
- Если он работает нормально, это просто указывает на то, что файл .htaccess был поврежден;
- Чтобы создать новый файл .htaccess, войдите в панель управления WordPress и выберите пункт Настройки> Постоянные ссылки;
- Без внесения изменений нажмите на кнопку «Сохранить», расположенную в нижней части страницы.
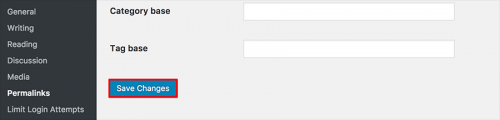
- Таким образом, для сайта будет создан новый файл .htaccess.
Если это не решит проблему, перейдите к следующему шагу.
Еще одна причина по которой возникает ошибка http 403 — это неверные права доступа к файлам или папкам. При создании файлов для них по умолчанию задаются определенные права доступа. Они указывают, как и кто может осуществлять их считывание, запись и выполнение. Но иногда нужно изменить права доступа по умолчанию.
Это можно сделать с помощью FTP-клиента или диспетчера файлов. FTP-клиент FileZilla предоставляет больше возможностей для изменения прав доступа к файлам и папкам. Поэтому мы рекомендуем использовать его, чтобы выполнить следующие действия:
- Зайдите на свой сайт через FTP;
- Перейдите в корневой каталог;
- Выберите основную папку, содержащую все файлы вашего сайта (обычно это public_html), кликните по ней правой кнопкой мыши и выберите пункт «Права доступа к файлам»:

- Установите флажок «Применить только к папкам», укажите права 755 в поле числового значения и нажмите кнопку «OK»;

- После того, как FileZilla изменит права доступа к папкам, повторите шаг 3, но на этот раз выберите параметр «Применить только для файлов» и введите 644:

- После этого попробуйте зайти на сайт и проверьте, не решена ли проблема.
Если ничего не изменилось, пришло время перейти к следующему шагу.
Высока вероятность того, что ошибка 403 была вызвана несовместимостью или некорректной работой плагина. На этом этапе мы отключим плагины, чтобы выяснить, не с ними ли связана ошибка 403. Лучше, конечно, отключить все плагины одновременно, а не каждый по отдельности. Так вы сможете обнаружить проблему и решить ее.
Вот, что нужно сделать:
- Перейдите на хостинг через FTP и найдите папку public_html (или папку, содержащую установочные файлы WordPress);
- Перейдите в папку wp-content;
- Перейдите в папку Plugins и переименуйте ее, например в «disabled-plugins«, чтобы ее было легче найти.

После отключения плагинов попробуйте снова зайти на сайт. Проблема исправлена? Если да, то причиной ошибки является некорректно работающий плагин. Попробуйте отключить плагины один за другим. Так вы сможете его обнаружить.
Затем можно попытаться обновить плагин. Если ни один из перечисленных способов не помог, то пришло время обратиться к своему хостинг-провайдеру.
Следуя приведенным выше рекомендациям, можно избавиться от ошибки 403 forbidden.
Apache web server is one of the most popular and widely used open-source web servers thanks to its stability and reliability. The web server commands a huge market, especially in the web hosting platforms.
Be that as it may, you may get a “Forbidden – You don’t have permission to access / on this server” error on your browser after setting up your website. It’s quite a common error and a good chunk of users have experienced it while testing their site. So what is this error?
Demystifying the Forbidden Error
Also referred to as the 403 Forbidden error, Apache’s ‘Forbidden Error’ is an error that is displayed on a web page when you are attempting to access a website that’s restricted or forbidden. It’s usually splashed on the browser as shown.
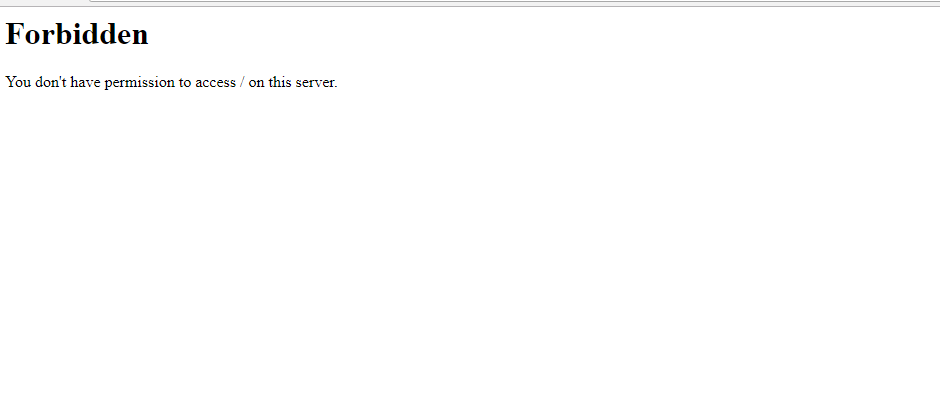
Additionally, the error can manifest in several ways on the browser as indicated below:
- HTTP Error 403 – Forbidden
- Forbidden: You don’t have permission to access [directory] on this server
- 403 Forbidden
- Access Denied You don’t have permission to access
- 403 forbidden requests forbidden by administrative rules
So what causes such errors?
The ‘403 Forbidden Error‘ occurs due to the following main reasons:
1. Incorrect File / Directory Permissions
This error can be triggered due to incorrect file/folder permissions on the webroot directory. If the default file permissions are not adjusted to grant users access to the website files, then the chances of this error popping on a web browser are high.
2. Misconfiguration of the Apache Configuration Files
This error can also be attributed to a misconfiguration of one of the Apache configuration files. It could be an incorrect parameter that has been included or missing directives in the configuration file.
Fixing the ‘403 Forbidden Error’
If you have encountered this error, here are a few steps that you can take to remedy this.
1. Adjust file permissions & ownership of the webroot directory
Incorrect file permissions & directory ownership are known to restrict access to website files. So, firstly, be sure to assign the file permissions recursively to the webroot directory as shown.
The webroot directory should always have EXECUTE permissions and the index.html file should have READ permissions.
$ sudo chmod -R 775 /path/to/webroot/directory
Additionally, adjust the directory ownership as shown:
$ sudo chown -R user:group /path/to/webroot/directory
Where the user is the regular logged-in user and the group is www-data or apache.
Finally, reload or restart the Apache webserver for the changes to take effect.
$ sudo systemctl restart apache2
OR
$ sudo systemctl restart httpd
If this does not resolve the issue, proceed to the next step:
2. Adjust directives in Apache main configuration file
If you are on Debian-based Linux, in Apache’s main configuration file /etc/apache2/apache2.conf, ensure that you have this block of code:
<Directory />
        Options FollowSymLinks
        AllowOverride None
        Require all denied
</Directory>

<Directory /usr/share>
        AllowOverride None
        Require all granted
</Directory>

<Directory /var/www/>
        Options Indexes FollowSymLinks
        AllowOverride None
        Require all granted
</Directory>
Save and exit and thereafter, restart the Apache.
If you are running Apache on RHEL-based distributions / CentOS systems, ensure that you relax access to the /var/www directory in the /etc/httpd/conf/httpd.conf main Apache configuration file.
<Directory "/var/www">
    AllowOverride None
    Require all granted
</Directory>
Then save all the changes and reload Apache.
If after trying all these steps you are still getting the error, then please check the configuration of your virtual host files. We have detailed articles on how you can configure the Apache Virtual host file on:
- How to Install Apache with Virtual Hosts on Debian
- How to Configure Apache Virtual Hosts on Rocky Linux
- How to Install Apache with Virtual Host on CentOS
I hope that the steps provided have helped you clear the 403 error.
If You Appreciate What We Do Here On TecMint, You Should Consider:
TecMint is the fastest growing and most trusted community site for any kind of Linux Articles, Guides and Books on the web. Millions of people visit TecMint! to search or browse the thousands of published articles available FREELY to all.
If you like what you are reading, please consider buying us a coffee ( or 2 ) as a token of appreciation.

We are thankful for your never ending support.
Forbidden from accessing your own WordPress website?
It’s frustrating and most of the time, you’ll find yourself trying out a number of solutions that don’t work. This is because the causes and solutions for the 403 error differ based on various circumstances.
In the meantime, your visitors see a broken website and you may find yourself locked out of your website.
Don’t worry. In this guide we’ll show you how to detect and fix the ‘403 forbidden request forbidden by administrative rules.’
Why Are You Seeing ‘403 Forbidden Request Forbidden By Administrative Rules’?
403 Forbidden Request error is one of many HTTP codes that indicate server or website problems. For example, there are HTTP 500 Internal Server Error and 404 Errors. Each code means something different.
So what is the 403 forbidden request error? It means that, when you are trying to access a page, you don’t have permission to access to do so. In more technical terms, it means your web server understands your request but refuses to serve you the page because it recognizes you as unauthorized.
But it’s your website, so why wouldn’t you have access?
There are two main reasons for this:
- Your web host has set up access permissions. Certain actions can trigger these permission settings. For instance, if you’ve logged in from multiple tabs on your browser, or if you’ve logged in too many times within a short span of time, your web host may have set up an automated system to flag this kind of activity as suspicious, since it could be a hacker or a bad bot. This will block your IP address and you will see a 403 error code.
- There may be a misconfiguration in your WordPress files.
In both cases, fixing the issue is easy, if you have clear instructions on how to do it. That’s what we give you in the next section.
PRO TIP: With the 403 Forbidden Request Error, it’s likely that the error appears only for you, while it may be fine for your visitors. Enter your site’s URL on downforeveryoneorjustme.com. You can see if your site is working as expected for your visitors or not.
How To Get Your WordPress Site Back To Normal Immediately?
There are a few tricks you can try to overcome the 403 Forbidden Request Error before you begin troubleshooting the problem:
1. Refresh the page
It seems so simple but, in most cases, it works. So the first step we recommend you take is to refresh your page. You can use the F5 key on your keyboard to refresh your browser’s page or hit the Refresh button.

2. Clear your cache
The next step we recommend trying is to delete your browser cookies and cache.
You can do this under the Settings tab in your browser. Under Clear History or Clear Browsing Data, make sure you select Cache and Cookies.

In case you’re using a caching plugin on your WordPress site, we suggest you clear your cache from the plugin as well.
This will sign you out of any accounts you’re logged into. It will also clear any saved data and give you a fresh start.
Now visit your WordPress site to see if the 403 Forbidden Request has disappeared. Follow our guide on how to clear your cache for more detailed information.
3. Try a different browser
This error can stem from conflict between different tabs or an issue with your browser’s settings. Try accessing the same URL using a different browser. You can use various browsers like Google Chrome, Mozilla Firefox, Safari, Opera, or Qwant.
4. Restore your backup
If you have a backup copy of your WordPress site, we recommend that you restore your backup. This is another step that will most likely work in resolving the ‘403 forbidden request forbidden by administrative rules’ immediately.
If you have a plugin like BlogVault installed on your site, you can restore your backup
from BlogVault’s independent dashboard. If you rely on your web host for backups, you can restore your backup from your web hosting account.
If this works, you would still need to understand what went wrong. You can do so by troubleshooting with the measures we’ve mentioned below.
5. Contact web host
Check with your web host if the error is from their end. If it’s an issue with a recent update to their server’s or their permissions, they’ll fix it for you.
If they come back to you saying it’s fine on their end, then you can follow the measures we’ve detailed below to fix the error on your WordPress site.
How To Fix The Error ‘403 Forbidden Request Forbidden By Administrative Rules’
CAUTION: Some of these steps require technical know-how. We strongly recommend taking a backup of your WordPress site before attempting to fix the error. If you have access to wp-admin, install a reliable backup plugin like BlogVault which will automatically take a backup for you. If you don’t have access to wp-admin, check with your host if they provide backups or follow our guide on manually backing up your website.
There are three ways you can fix the 403 error and we’ve listed them down in order of the most likely to work first.
1. Disable your .htaccess file
2. Disable your plugins
3. Check your WordPress file permissions
You can carry out all three measures easily using cPanel in your web hosting account. But if you’re using a managed WordPress host like FlyWheel or Kinsta, you won’t have access to cPanel. In these cases, you can use FTP or File Transfer Protocol.
We’ve detailed the measures for both cPanel and FTP below.
1. Using cPanel to Troubleshoot 403 Forbidden Request Error
A. Disable .htaccess file
Working with WordPress for over a decade, we’ve come across the 403 error a multitude of times.
In most cases, the error lies in the .htaccess file. So this is the first place to start.
Before you delete or disable this file, we must caution you that the .htaccess file is a sensitive file and is very critical to the functioning of your website.
So download a copy of the .htaccess file before you make any changes.
Step 1: To access the .htaccess file, log into your web hosting account. Go to cPanel > File Manager, and open a folder called public_html.

Step 2: Inside the public_html folder, you should see three other folders called wp-admin, wp-content, and wp-includes along with files like index.php and wp-config.php. You can also find the .htaccess file. In case you don’t see it, go to Settings and select Show Hidden Files. This will reveal the .htaccess file.

Step 3: Select and download the .htaccess file as a backup copy.
Step 4: Next, select and delete the .htaccess file.
Now access your website and see if the forbidden error message has been resolved. If it has, then it’s an issue with your .htaccess file.
To generate a new .htaccess file, login to your wp-admin dashboard. Go to Settings > Permalinks and simply click on Save Changes. This will automatically generate a new .htaccess file for you.
You may be interested in learning more about the .htaccess file.
B. Check file permissions
Every file and folder on your WordPress site has a set of permissions. This determines who can access these files and who can make changes.
There are three permission settings:
- Read – The user can only view the data and contents of a file or folder
- Write – The user can make modifications, add or delete files
- Execute – The user can run and execute files and perform functions and commands.
If these permissions are incorrectly configured, it could cause a number of errors including the 403 Forbidden Request.
To fix your WordPress file permissions, follow these steps:
Step 1: Go to cPanel > File Manager, and open a folder called public_html.
Step 2: Now, manually checking the file permissions for each file and folder would be exhausting. Instead, you can view your file permissions collectively first.
Inside the public_html folder, you’ll see the last column displays the file permissions which is a 3-digit number:

WordPress recommends the following file permissions:
- Files – 644 or 640
- Directories – 755 or 750
If you see that these permissions are incorrect, you can fix it by selecting the file or folder and then choosing Permissions.

A box will open up with the permission settings which is a three-digit code:

Next, you need to apply permissions to your WordPress files. Make sure you stick to the recommended file permissions, which are 644 or 640 for WordPress files and 755 or 750 for directories or folders.
You can learn more about permission settings in our in depth guide to WordPress File Permissions.
C. Disable plugins
Plugins offer cool functions and can enhance the performance and appearance of your site. But many times, a plugin can become incompatible with the WordPress core. This can happen especially if you haven’t updated your plugins for a while.
Step 1: Log into your hosting account and go to cPanel > File Manager.
Step 2: Open public_html and open the wp-contents folder.
Step 3: Find the folder called Plugins and rename it to Plugins_Disable.

Step 4: Now check if your website to see if the 403 error has been resolved. If it’s a plugin issue, then we recommend that you log into wp-admin.
Step 5: Next, activate your plugins one at a time. Each time you activate a plugin, reload your site to check if the error comes back. This will help you determine which plugin is causing the error.
You might need to update the plugin to fix the issue or contact the plugin developer to get the problem resolved. In case it’s a nulled plugin, we advise you to delete it from your site immediately and opt for a trusted alternative from the WordPress repository.
One of these steps should resolve the 403 Forbidden Request Error on your website. In case, you’re still facing the error, we’ve detailed a few options that you can use to get further help in a later section.
2. Using FTP to Troubleshoot 403 Forbidden Request Error
FTP or File Transfer Protocol is a network protocol used to transfer files from client to server, using a folder system. You can use it to connect with your web server to access your WordPress files and folders.
To use FTP, follow these steps:
1. You need to download an FTP client like FileZilla.
2. Once you install FileZilla, you need to enter your FTP credentials.

These credentials ensure only authorized users have access to your WordPress files and folders. You can get your FTP credentials from your web hosting account. Follow our guide on Finding FTP credentials for more details.
3. Once you enter the right credentials and click on Quickconnect, FileZilla will establish a connection with your web server. You’ll see four panels and on the right panel, folders will populate.
4. The left panel is your local computer and the right panel is your website’s directory. From the right panel, select the public_html folder.
Now you’re ready to troubleshoot the 403 Forbidden Request error on your site.
A. Disable your .htaccess file
Step 1: Inside the public_html folder, you can find the .htaccess file. In case you don’t see it, go to Server and select Force showing hidden files. This will reveal the .htaccess file.

Step 2: Select the .htaccess file, right-click and download it. This will serve as a backup copy.
Step 3: Next, right-click and delete the .htaccess file.
Now access your website and see if the error has been resolved. If it has, then it’s an issue with your .htaccess file.
Next, you need to generate a new .htaccess file. Login to your wp-admin dashboard and go to Settings > Permalinks. Here, click on Save Changes. You don’t need to do anything more. A new .htaccess file will automatically be generated.
If you want to learn more about .htaccess, follow our guide to the .htaccess file.
B. Check file permissions
Your WordPress files are protected with permission settings that dictate which users have access to read files, make changes, and execute commands on your site.
There are three file permission settings in WordPress:
- Read – The user can only view the data and contents of a file or folder
- Write – The user can make modifications, add or delete files
- Execute – The user can run and execute files and perform functions and commands
These permissions are represented by a 3-digit number.
If these permissions are incorrectly configured, it could cause a number of errors including the 403 Forbidden Request. To fix your WordPress file permissions, follow these steps:
Step 1: Inside the public_html, you can see the file permissions displayed for every file and folder.

Step 2: We recommend looking over your file permissions to see if they are set correctly.
The recommended WordPress File Permissions are:
- Files – 644 or 640
- Directories – 755 or 750
Step 3: If you see that these permissions are incorrect, you can fix it by selecting the file or folder and then choosing Permissions.

A box will open up with the permission settings:

Step 5: Next, you need to apply permissions to your WordPress files. Make sure you stick to the recommended file permissions which are 644 or 640 for WordPress files and 755 or 750 for directories or folders.
In FTP, you have the option to reset the permissions for all files and all folders. Set the file permission value and then select Recurse into subdirectories. Here, you can choose Apply to files only and Apply to directories only according to the permission you’re setting.
If you want to know more about permission settings and their meaning, refer to our in depth guide to WordPress File Permissions.
C. Disable plugins
On occasion, plugins can cause problems on your site if they become incompatible with the WordPress core or cause a conflict with your theme. If you haven’t updated your plugins in a while, it’s likely that a plugin is causing the error. You need to disable your plugins folder.
Step 1: Open public_html and open the wp-contents folder.
Step 2: Find the folder called Plugins and rename it to Plugins_Disable.

Step 3: Now check if your website to see if the 403 error has been resolved. If it’s a plugin issue, then we recommend that you log into wp-admin.
Next, activate your plugins one at a time. Each time you activate a plugin, reload your site to check if the error comes back. This will help you determine which plugin is causing the error.
You might need to update the plugin to fix the issue or contact the plugin developer to get the problem resolved. In case it’s a nulled plugin, we advise you to delete it from your site immediately and opt for a trusted alternative from the WordPress repository.
We’re confident that one of these measures has worked in resolving the 403 Forbidden Request error on your site. Your site should be back to normal now.
PRO TIP: Always take backups of your WordPress site to be prepared for situations like these. It’s advisable to use a reliable backup plugin like BlogVault that provides you with an independent dashboard. This way, even if you lose access to your wp-admin panel, you can still access your backup and restore your site.
Bonus Tips: 403 Forbidden Request Still Appears
In the rare occasion that you’re still seeing the 403 Forbidden Request on your WordPress site, here’s what you can do:
- Post your query on the WordPress Support Forum – WordPress has a Support Forum where fellow WordPress users post questions and help solve each other’s problems. Developers also answer queries and provide support for their themes and plugins. You can post details about the issue you’re facing and someone will help you figure it out.
- Check other popular forums – There are also a number of other forums you can try to ask for help such as Reddit, Quora, and StackExchange. Post the details of your problem and the solutions you’ve already tried.
What Next?
403 Forbidden Request is only one of the errors that can appear on your site. There’s a long list of HTTP errors that can appear on your WordPress site.
Each error has a bunch of different solutions. However, if you take regular backups of your WordPress site, you can be prepared for any error.
A backup acts as your safety net in such situations and it enables you to get your site back to normal in no time.
Bear in mind to use a plugin like BlogVault that has an independent dashboard. When things go wrong, you can restore your backup, even if you don’t have access to your wp-admin.
Backup Your Site With BlogVault’s Backup Plugin

Melinda is a WordPress enthusiast, and enjoys sharing their experience
with fellow enthusiasts. On the MalCare blog, Melinda distils the
wisdom gained from building plugins to solve security issues that
admins face.
- Ошибка 403. Что это?
- Причины появления
- Алгоритм по устранению ошибки 403 для пользователей
- Алгоритм по устранению ошибки 403 для администраторов и владельцев сайтов
Ошибка 403 (Forbidden/Доступ запрещён) возвращается клиенту сервером, когда доступ к указанному ресурсу ограничен.
Запрет может быть установлен:
- администратором сервера;
- разработчиком веб-приложения;
- интернет-провайдером;
- администратором сети, через которую производится доступ в интернет.
Также код 403 могут возвращать антивирусные средства.
Причины появления
При доступе к стороннему сайту ошибка с кодом 403 часто возникает в следующих случаях:
- установлено ограничение на доступ к запрошенной странице по IP-адресу или другим критериям (например, браузеру);
- гость пытается войти в раздел, предназначенный для зарегистрированных посетителей;
- страница недоступна временно на период проведения технических работ;
- пользователь заблокирован за спам, флуд, попытки взлома;
- доступ к ресурсу ограничен для подчиненных работодателем.
Ошибка 403 на собственном интернет-ресурсе может свидетельствовать о следующем:
- установлены неверные права доступа к файлам, каталогам сайта на хостинге;
- файлы сайта загружены не в корневую директорию;
- заданы те или иные ограничения в файле .htaccess;
- установлены ограничения со стороны хостинг-провайдера;
- возникли неполадки в работе используемых на вашем сайте скриптов.
Алгоритм по устранению ошибки 403 для пользователей
- Проверьте корректность URL сайта.
- Войдите на сайт под своей учетной записью или зарегистрируйтесь.
- Попробуйте получить доступ к странице повторно через некоторое время.
- Обратитесь к администратору сайта.
Алгоритм по устранению ошибки 403 для администраторов и владельцев сайтов
- Проверьте лог-файлы веб-сервера. Если запись об ошибке 403 есть в логе ошибок веб-сервера, в этом же файле будет указана её причина. Если записи об ошибке в логе ошибок нет, но упоминание кода 403 есть в логе доступа к сайту, это может означать, что код 403 выдаётся используемыми на сайте скриптами, и причину следует искать в логике их работы.
- Проверьте права доступа к файлам и каталогам сайта.
- Убедитесь, что файлы, которые должны использоваться для выдачи информации по запрошенному URL, действительно присутствуют. Если URL указывает на каталог сайта, то нужно убедиться, что в нём присутствует индексный файл.
- Проверьте корректность директив в файле .htaccess, особенно директив Deny, Require, Order, RewriteRule.
Для получения помощи и дополнительных рекомендаций всегда можно обратиться в службу технической поддержки.
Эта ошибка может быть вызвана из-за неправильных прав доступа к файлам/папкам в каталоге webroot.
Если права доступа к файлам по умолчанию не настроены для предоставления пользователям доступа к файлам веб-сайта, то вероятность появления этой ошибки в веб-браузере высока.
2. Неправильная настройка файлов конфигурации Apache
Эта ошибка также может быть связана с неправильной настройкой одного из файлов конфигурации Apache.
Это может быть неверный параметр, который был включен по ошибке, или отсутствующие директивы в файле конфигурации.
Фиксим ‘403 Forbidden Error’
Если вы столкнулись с этой ошибкой, вот несколько шагов, которые вы можете предпринять, чтобы исправить это.
1. Настройте права доступа к файлам и владение каталогом webroot
Известно, что неправильные права доступа к файлам и владение каталогами ограничивают доступ к файлам сайта.
Поэтому, во-первых, убедитесь, что права доступа к файлам рекурсивно назначены каталогу webroot, как показано далее.
Каталог webroot всегда должен иметь разрешения EXECUTE, а файл index.html должен иметь разрешения READ.