По мере прохождения сюжетной линии Starbound игроки могут дополнительно улучшить свой корабль. Улучшения корабля увеличивают размер корабля и увеличивают максимальное количество экипажа.
Улучшать корабль можно с помощью ![]() Модулей улучшения, но для начала его нужно починить.
Модулей улучшения, но для начала его нужно починить.
Починка корабля
Изначально корабль не может летать по звездной системе и вообще передвигаться по вселенной Starbound. Чтобы починить двигатели корабля нужно выполнить несколько начальных миссий, которые даёт К.С.И.И, Эстер Брайт и Капитан Пингвин Пит (Верфи) на Форпосте.
| Двигатели | Требуется материалов | Задание |
|---|---|---|
| Сверхсветовой привод |
Улучшение
Для улучшения корабля можно купить поддельную лицензию в пингвиньей бухте или набрать необходимое количество экипажа и улучшить корабль у Пигвина Пита на Форпосте за модули Улучшения.
Для получения экипажа, нужно выполнять задания в дружелюбных поселениях или у жителей, призываемых колонизатором. После выполнения нескольких квестов они могут попроситься в вашу команду.
Также в качестве членов экипажа можно нанять пингвинов за дублоны в баре Beakeasy под форпостом. Бар откроется после победы над боссом Ужаснокрыл. Задание на него выдается в этом же баре. Дублоны можно покупать за алмазы в баре
Чем выше уровень корабля, тем выше уровень предметов, продаваемых торговцами, которых вы призываете на корабль колонизатором. Они могут продавать оружие 7 или 8 уровня (хотя обычно максимальный уровень случайного оружия 6).
| Название | Нужно для лицензии | Нужно для улучшения | Открытие | |
|---|---|---|---|---|
| 1 | Sparrow (Воробей) | или 2 члена экипажа (Не считая игрока) |
После открытия магазина (магазин откроется после возвращения Нуру на форпост) | |
| 2 | Kestrel (Пустельга) | или 4 члена экипажа (Не считая игрока) |
В любое время после 1 улучшения | |
| 3 | Falcon (Сокол) | или 6 членов экипажа (Не считая игрока) |
В любое время после 2 улучшения | |
| 4 | Eagle (Орёл) | или 8 членов экипажа (Не считая игрока) |
В любое время после 3 улучшения | |
| 5 | Condor (Кондор) | или 10 членов экипажа (Не считая игрока) |
В любое время после 4 улучшения |
Результаты улучшения
- Путешествовать по звёздной системе было можно до версии 1.0 после починки досветовых двигателей (для этого нужно было 20 Фрагментов ядра. Теперь они нужны для активации Древних врат.) Теперь вам придется жить на одной планете, пока не почините сверхсветовой привод.
- Исследовательская станция до версии 1.0 была доступна после улучшения Пустельга. Все рабочие станции, которые крафтились на Исследовательской станции, теперь создаются на Столе архитектора.
Анимации улучшения
У Людей
У Авиан
У Апексов
У Флоран
У Хилотлов
У Глитчей
У Новакидов

Галерея
Quick Links
- Prerequisite For Ship Upgrades
- Ship Types For Different Races
- Recruiting A Crew
- Ship License
- Upgrade Modules
Starbound gives you an infinite amount of space to build amazing creations from massive colonies to personal bases. In addition to building on different planets throughout the universe, you will also get to decorate your ship and manage a crew. But ship maintenance goes beyond staff and aesthetics in Starbound.
There are 5 different ship upgrades in the game; each one will make your ship larger. This guide reviews everything you need to know about upgrading your ship in Starbound. But let’s start with the basics first.
Prerequisite For Ship Upgrades
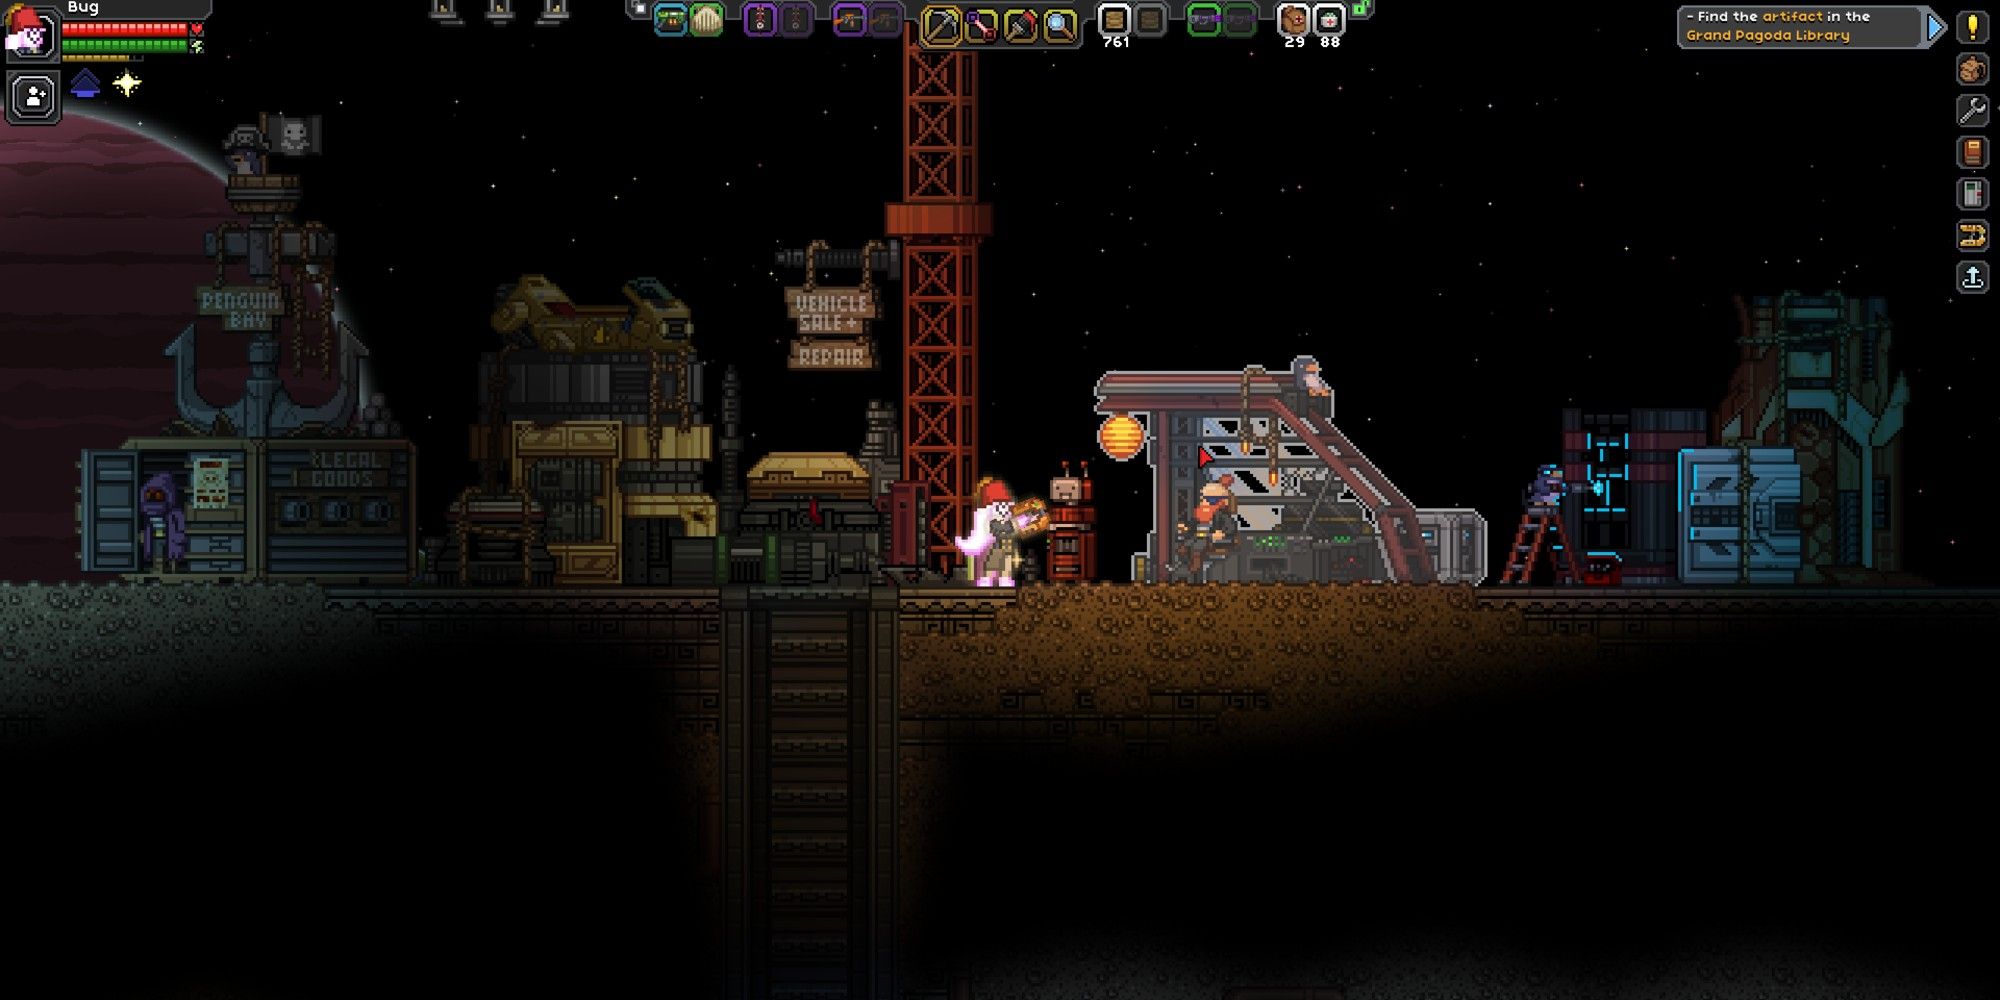
Prior to upgrading your ship for the first time, you will need to complete the Erchius Mining Facility mission. This is the first mission that you will encounter in the game. This quest will be given by Penguin Pete, who you will also visit later to upgrade your ship. You can find Penguin Pete in the shipyard to the right of the Outpost.
This quest will repair the FTL drive for your ship, allowing you to travel between different solar systems.
Ship Types For Different Races
Each race has a different ship. These ships are all upgraded the same, however, their overall appearance and size vary. Below, let’s take a look at each ship and its characteristics. This list is in order from biggest to smallest ship.
|
Race |
Ship Appearance |
Unique Pet |
|---|---|---|
|
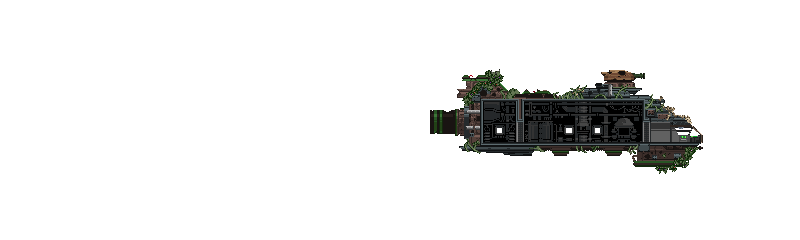
Floran |
Overgrown appearance with skeleton mounted to the front |
Snake |
|
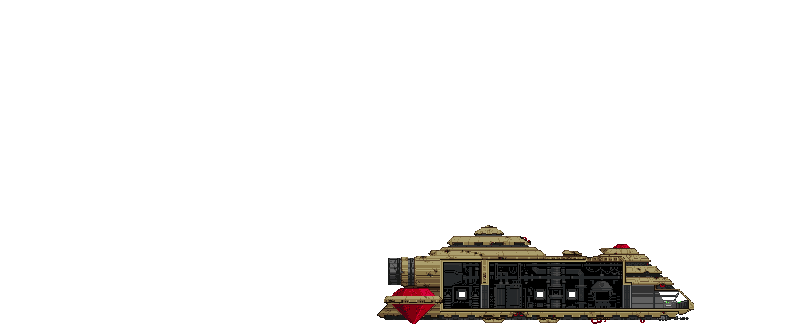
Avian |
Ancient Pyramid appearance, powered by a red crystal |
Bunny |
|
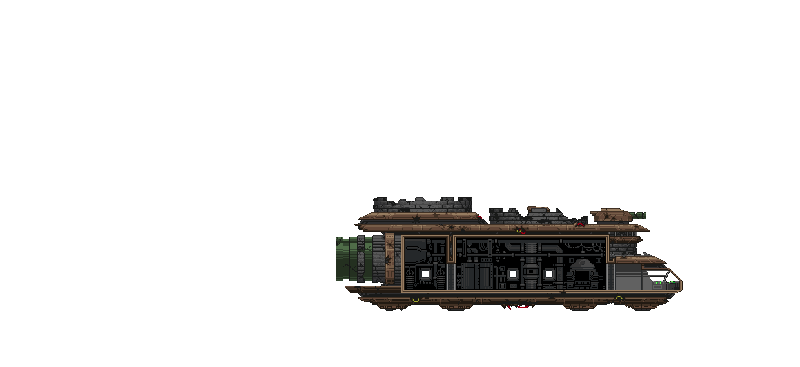
Novakid |
Old fashioned steam train appearance |
Snugget (a glowing blob, seemingly made from the material as a Novakid) |
|
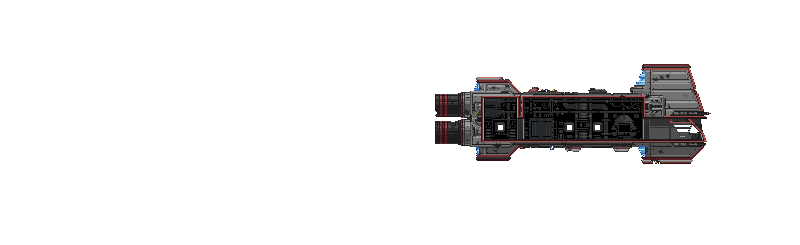
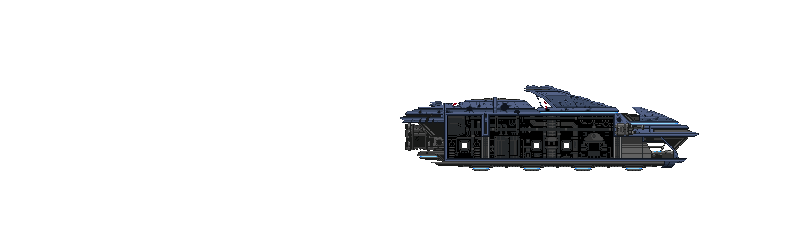
Human |
Simple and practical ship with a hammerhead appearance |
Cat |
|
Glitch |
Medieval Castle appearance with turrets and a canon |
Piglett |
|
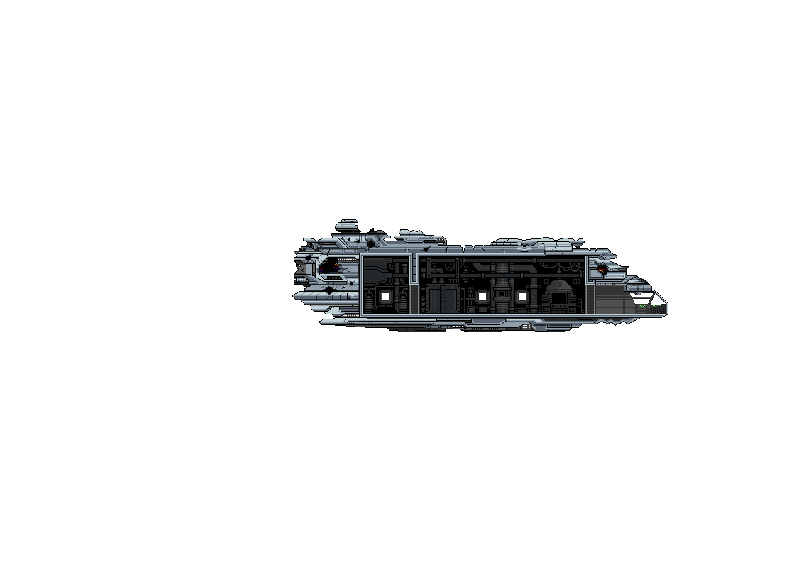
Apex |
Modern and streamlined appearance with light metals |
Weasel |
|
Hylotl |
Shaped like a large fish including a fin and tail when fully upgraded |
Crab |
These ships are unique to each race and vary in layout as well as appearance. Although the Floran ship is the largest, they all offer plenty of space. Try to pick your character’s race based on which one you want, rather than which one has the biggest (or coolest) ship. You can fully customize your ship any way you want.
Recruiting A Crew
To upgrade your ship, you will need to recruit a crew. For every two crew members you recruit, you will get this opportunity to upgrade. Your un-upgraded ship will hold two crew members to help you get started. In total, you can have 12 crew members.
There are a few different ways to recruit crew members, so let’s take a quick look at each method.
Villages
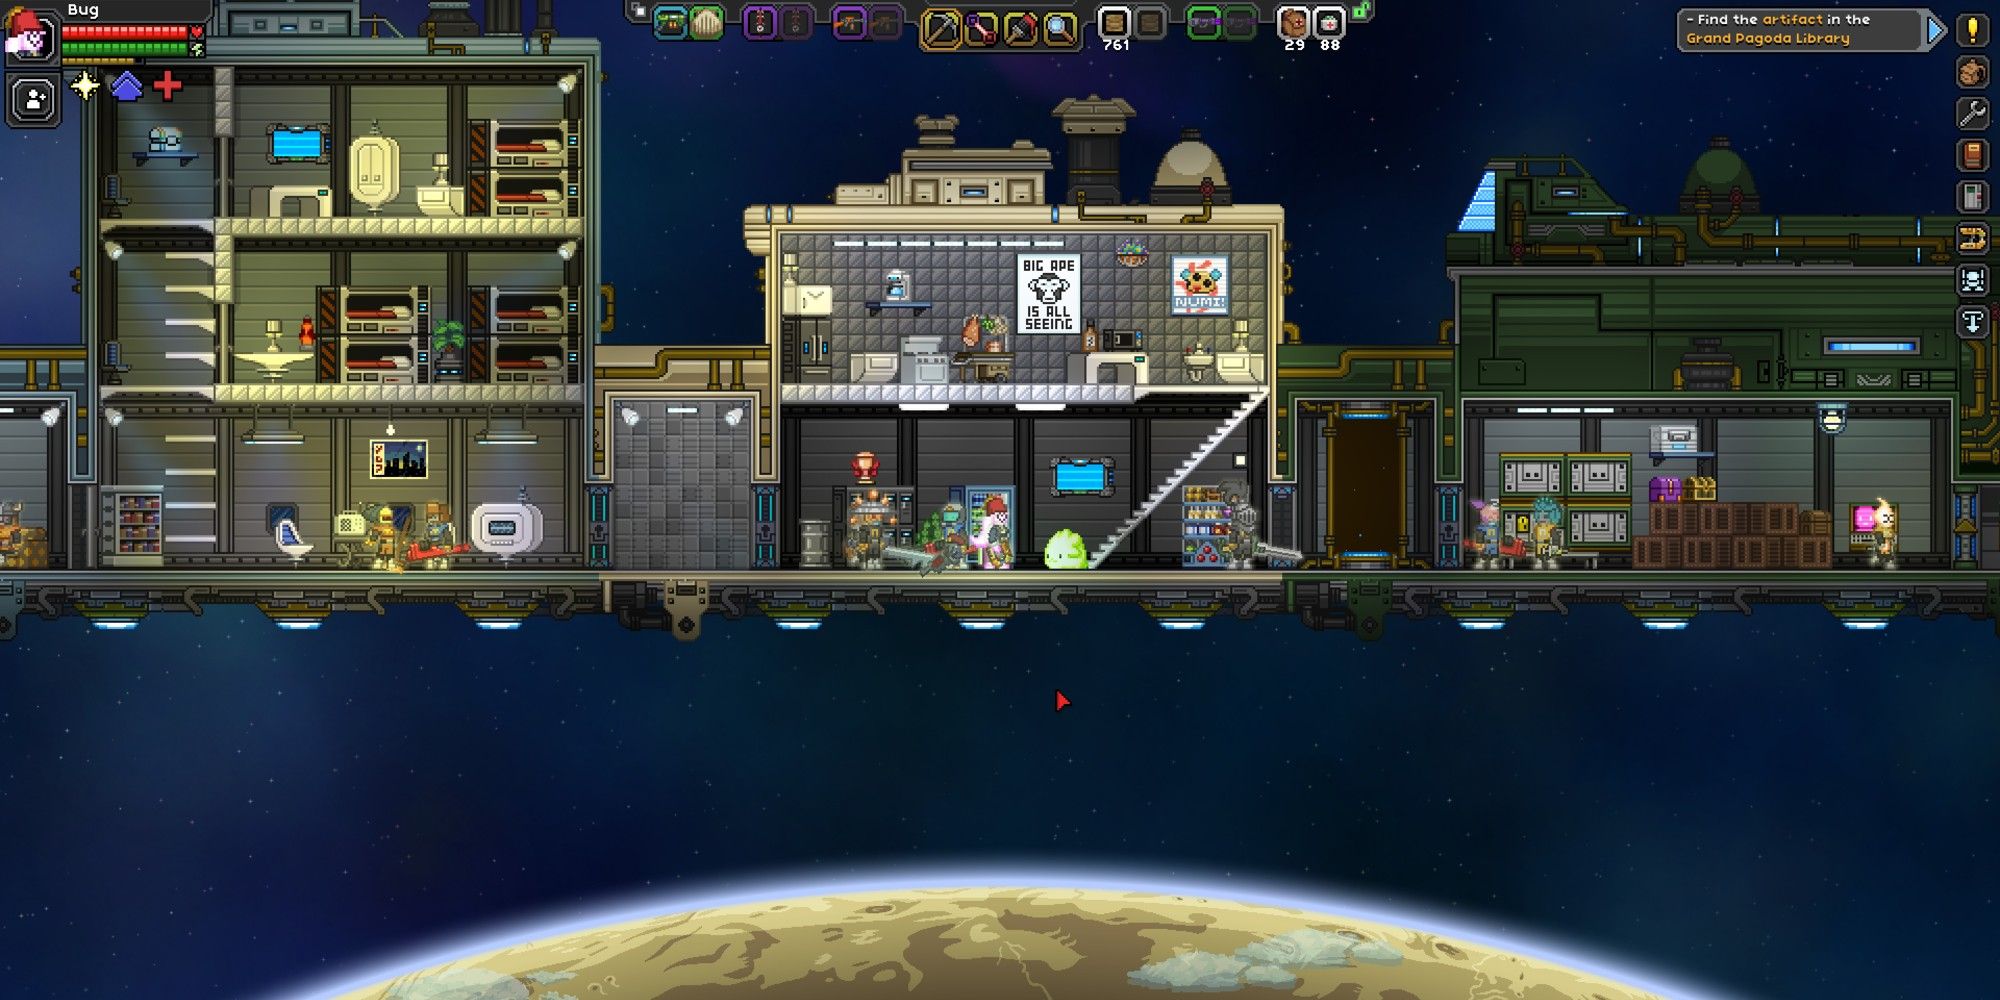
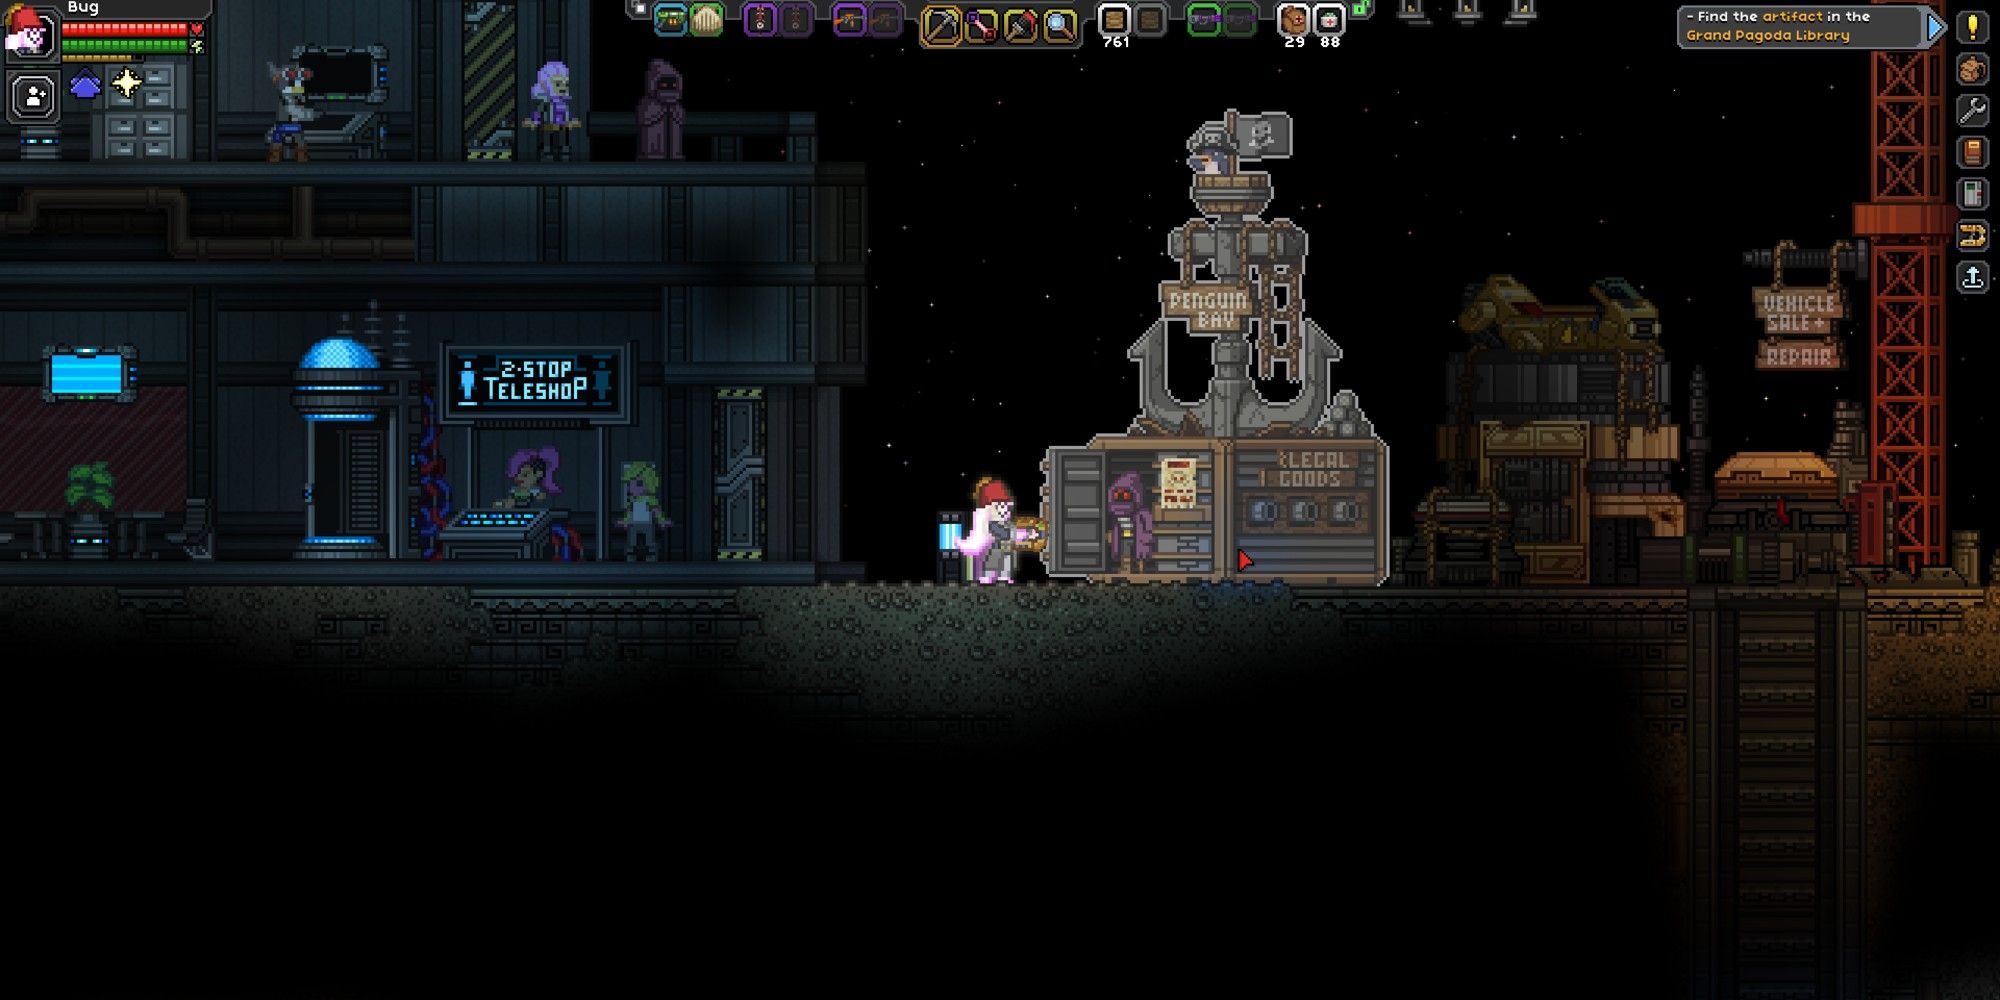
The easiest way to recruit a crew is by doing quests for NPCs in villages. Villages can be found on every planet, and are populated by every race. Above, you can see the marketplace area of an Avian village. These villages can range in size from small to massive. Over time, the NPCs within these villages will ask you to complete different quests.
When a yellow exclamation point appears above their heads, then they have a quest for you. Not all quest lines will result in the NPC wanting to join your crew, but if you do several quests, you will eventually come across someone who wants to join you. If there are no available quests, walk around and talk to NPCs. It takes some time for people to notice you and have quests. Set up a little area with a teleporter flag, allowing you to revisit the village and check for available quests.
Colony
In addition to recruiting a crew from a village, you can also find potential crew members from a colony.
Colonies take a while to set up, but they will provide a steady flow of NPC quests that lead to recruitment. To make a colony, head to Frogg Furnishing on the upper lefthand side of the Outpost. Here, you will be able to purchase a Colony Deed for 750 pixels.
Once you have a Colony Deed, find an area to start your new colony. For a colonist to spawn, you will need a room that has a wall, light source, and door. Build this area and then add the Colony Deed. If the room is acceptable, the colonist will spawn in. The decorations that you add to the room will determine the colonist type.
For example, if you have a room with an oven, then you will spawn in a chef colonist that will sell you different foods. You can also spawn in different races. If you have a room decorated with saloon furniture, you will spawn a Novakid colonist.
You will need one Colony Deed in each room that you want a colonist to occupy. There is no limit to the number of colonists you can have. With more colonists, you will have a higher chance to find people who want to join your crew.
Similar to NPCs in villages, a quest line may end in the colonist asking to join your crew.
Beak Easy
Lastly, you can recruit a crew from the Beak Easy. This underground area is beneath the Outpost. The first time you visit this area, you will come across the quest Dreadwing The Penguin. You will need to complete this quest before you can hire crew members from the Beak Easy.
Dreadwing is a tough enemy, so be sure to bring plenty of healing items, as well as good equipment and weapons.
Once you finish this quest, you will be able to purchase Dubloons for three diamonds each. These Dubloons can be given to penguins around the Outpost that you want to join your crew. All the penguin crew members will be soldiers, and you will get an achievement for getting your first penguin crew member.
Ship License
Once you have enough crew members, you will receive a ship license. There are 5 different ship licenses that you must obtain in order to fully upgrade your ship. You can find the upgrades listed below, as well as the requirements and licenses for each.
|
Upgrade Name |
Crew Members Required |
Materials Needed |
|---|---|---|
|
Sparrow Ship Upgrade |
2 Crew Members |
|
|
Kestrel Ship Upgrade |
4 Crew Members |
|
|
Falcon Ship Upgrade |
6 Crew Members |
|
|
Eagle Ship Upgrade |
8 Crew Members |
|
|
Condor Ship Upgrade |
10 Crew Members |
|
Licenses will automatically be obtained when you visit your ship after gathering the necessary amount of crew members.
You will be able to bypass the crew requirement by purchasing fake versions of each license, but these cost a lot of money. These fake licenses can be purchased from the Vendor on the left side of the shipyard at the Outpost. The licenses sell for the following prices.
- Fake Sparrow License: 10,000 pixels
- Fake Kestrel License: 20,000 pixels
- Fake Falcon License: 40,000 pixels
- Fake Eagle License: 80,000 pixels
- Fake Condor License: 150,000 pixels
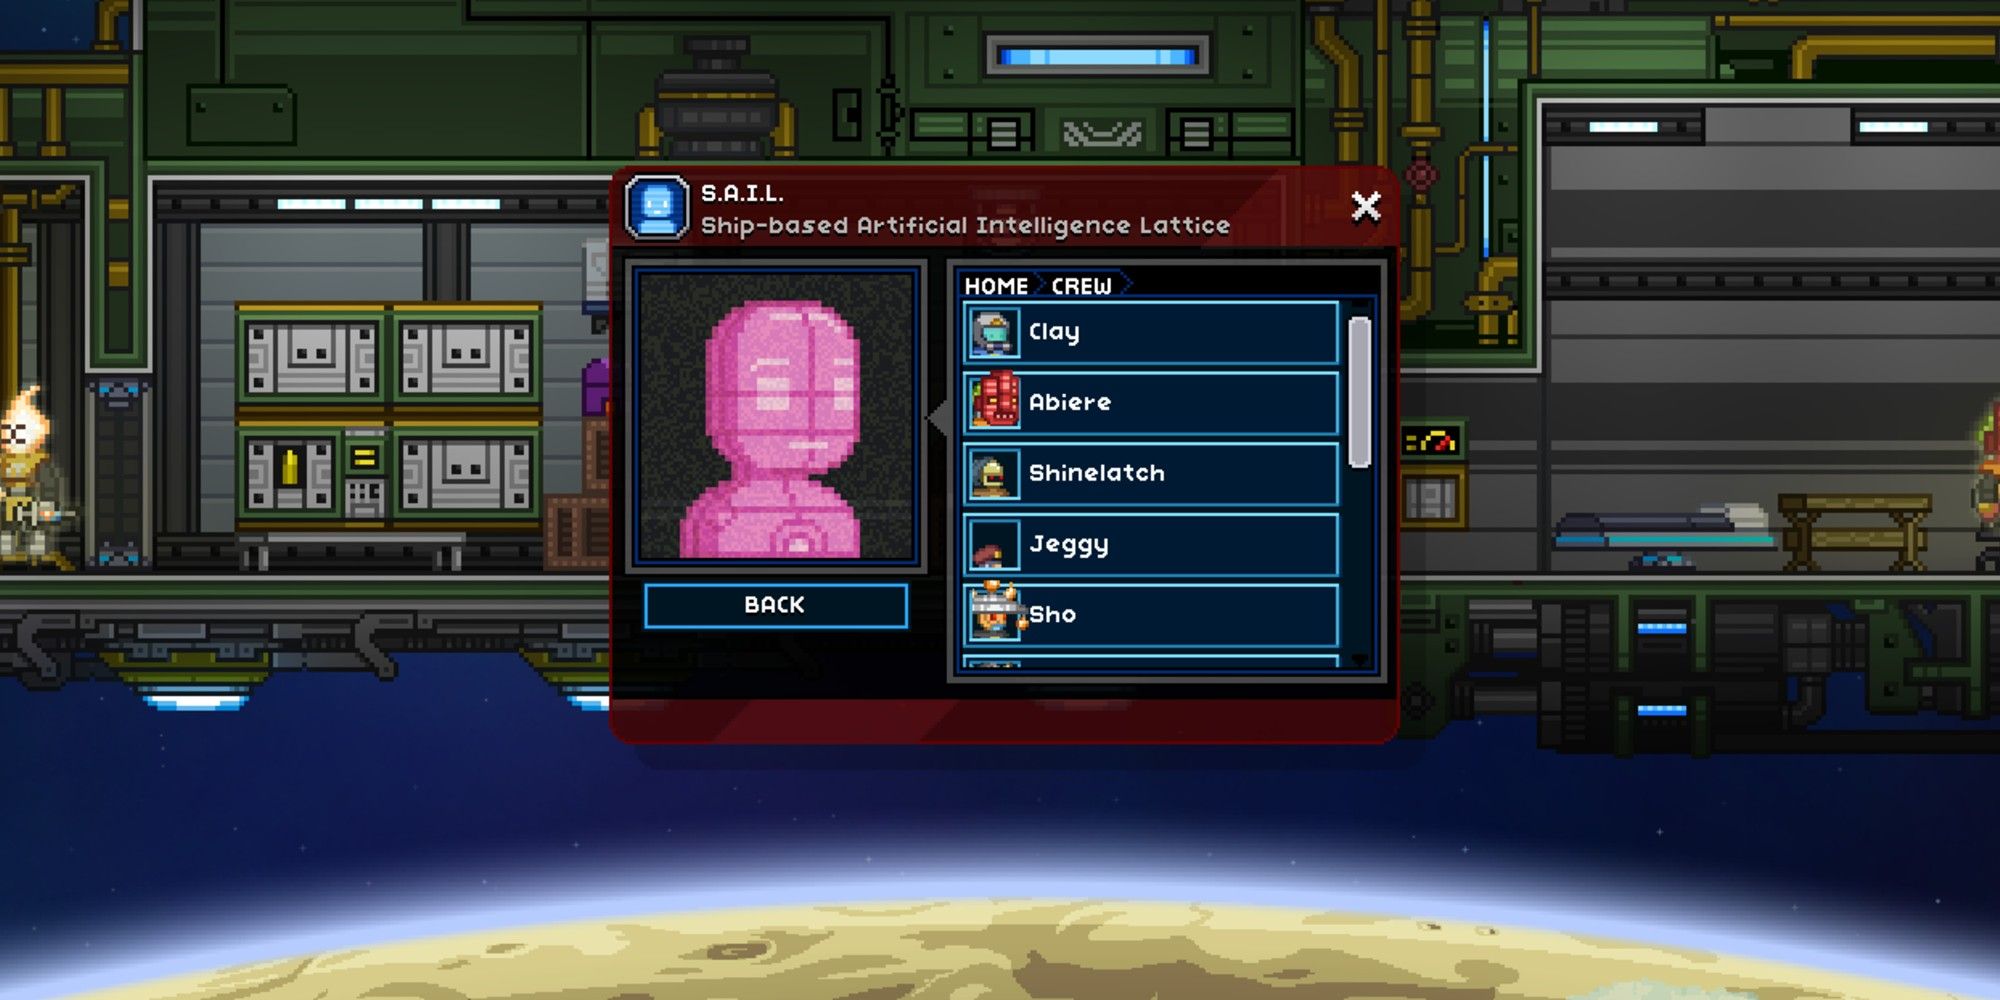
As you can see, this is a lot of money. Recruiting crew members is a cheaper option. If you are unhappy with your crew, you will be able to dismiss them from the S.A.I.L. panel.
Overall, each time you upgrade your ship, you will need enough crew members, a license, and Upgrade Modules.
Upgrade Modules

Each time you upgrade your ship, you will need a set amount of Upgrade Modules. This item cannot be purchased; you can only find them while exploring the universe. Upgrade Modules can be found in chests underground caves, as well as villages, and inside reward bags. Reward bags are given by NPCs after finishing a quest. Additionally, you can find Upgrade Modules in Challenge Rooms.
Challenge Rooms are located within Challenge Doors that can be found anywhere underground. Going through a door will teleport you to the Challenge Room. There are 27 different challenges that you may encounter. You may receive an Upgrade Module as a reward for completing a challenge, or from a chest hidden in the area. There is a small chance that one may drop from a slain enemy, but this isn’t too common.
Once you have enough Upgrade Modules, head back to Penguin Pete at the Outpost. After speaking with him, your ship will be upgraded immediately. Teleport back to your ship to see the newly upgraded area. The area will be closed off, but just use your Matter Manipulator to remove the blocks. Repeat this process until you have 10 crew members and the biggest ship upgrade. After your ship is fully upgraded, you can recruit two additional members. From the S.A.I.L. panel, you can dismiss crew members.
This will not affect any existing upgrades to your ship. With a fully upgraded ship, you can now decorate to your heart’s content!
Next: The Biggest Open-Worlds In Video Games Ever From Smallest To Largest
Quick Links
- Prerequisite For Ship Upgrades
- Ship Types For Different Races
- Recruiting A Crew
- Ship License
- Upgrade Modules
Starbound gives you an infinite amount of space to build amazing creations from massive colonies to personal bases. In addition to building on different planets throughout the universe, you will also get to decorate your ship and manage a crew. But ship maintenance goes beyond staff and aesthetics in Starbound.
There are 5 different ship upgrades in the game; each one will make your ship larger. This guide reviews everything you need to know about upgrading your ship in Starbound. But let’s start with the basics first.
Prerequisite For Ship Upgrades
Prior to upgrading your ship for the first time, you will need to complete the Erchius Mining Facility mission. This is the first mission that you will encounter in the game. This quest will be given by Penguin Pete, who you will also visit later to upgrade your ship. You can find Penguin Pete in the shipyard to the right of the Outpost.
This quest will repair the FTL drive for your ship, allowing you to travel between different solar systems.
Ship Types For Different Races
Each race has a different ship. These ships are all upgraded the same, however, their overall appearance and size vary. Below, let’s take a look at each ship and its characteristics. This list is in order from biggest to smallest ship.
|
Race |
Ship Appearance |
Unique Pet |
|---|---|---|
|
Floran |
Overgrown appearance with skeleton mounted to the front |
Snake |
|
Avian |
Ancient Pyramid appearance, powered by a red crystal |
Bunny |
|
Novakid |
Old fashioned steam train appearance |
Snugget (a glowing blob, seemingly made from the material as a Novakid) |
|
Human |
Simple and practical ship with a hammerhead appearance |
Cat |
|
Glitch |
Medieval Castle appearance with turrets and a canon |
Piglett |
|
Apex |
Modern and streamlined appearance with light metals |
Weasel |
|
Hylotl |
Shaped like a large fish including a fin and tail when fully upgraded |
Crab |
These ships are unique to each race and vary in layout as well as appearance. Although the Floran ship is the largest, they all offer plenty of space. Try to pick your character’s race based on which one you want, rather than which one has the biggest (or coolest) ship. You can fully customize your ship any way you want.
Recruiting A Crew
To upgrade your ship, you will need to recruit a crew. For every two crew members you recruit, you will get this opportunity to upgrade. Your un-upgraded ship will hold two crew members to help you get started. In total, you can have 12 crew members.
There are a few different ways to recruit crew members, so let’s take a quick look at each method.
Villages
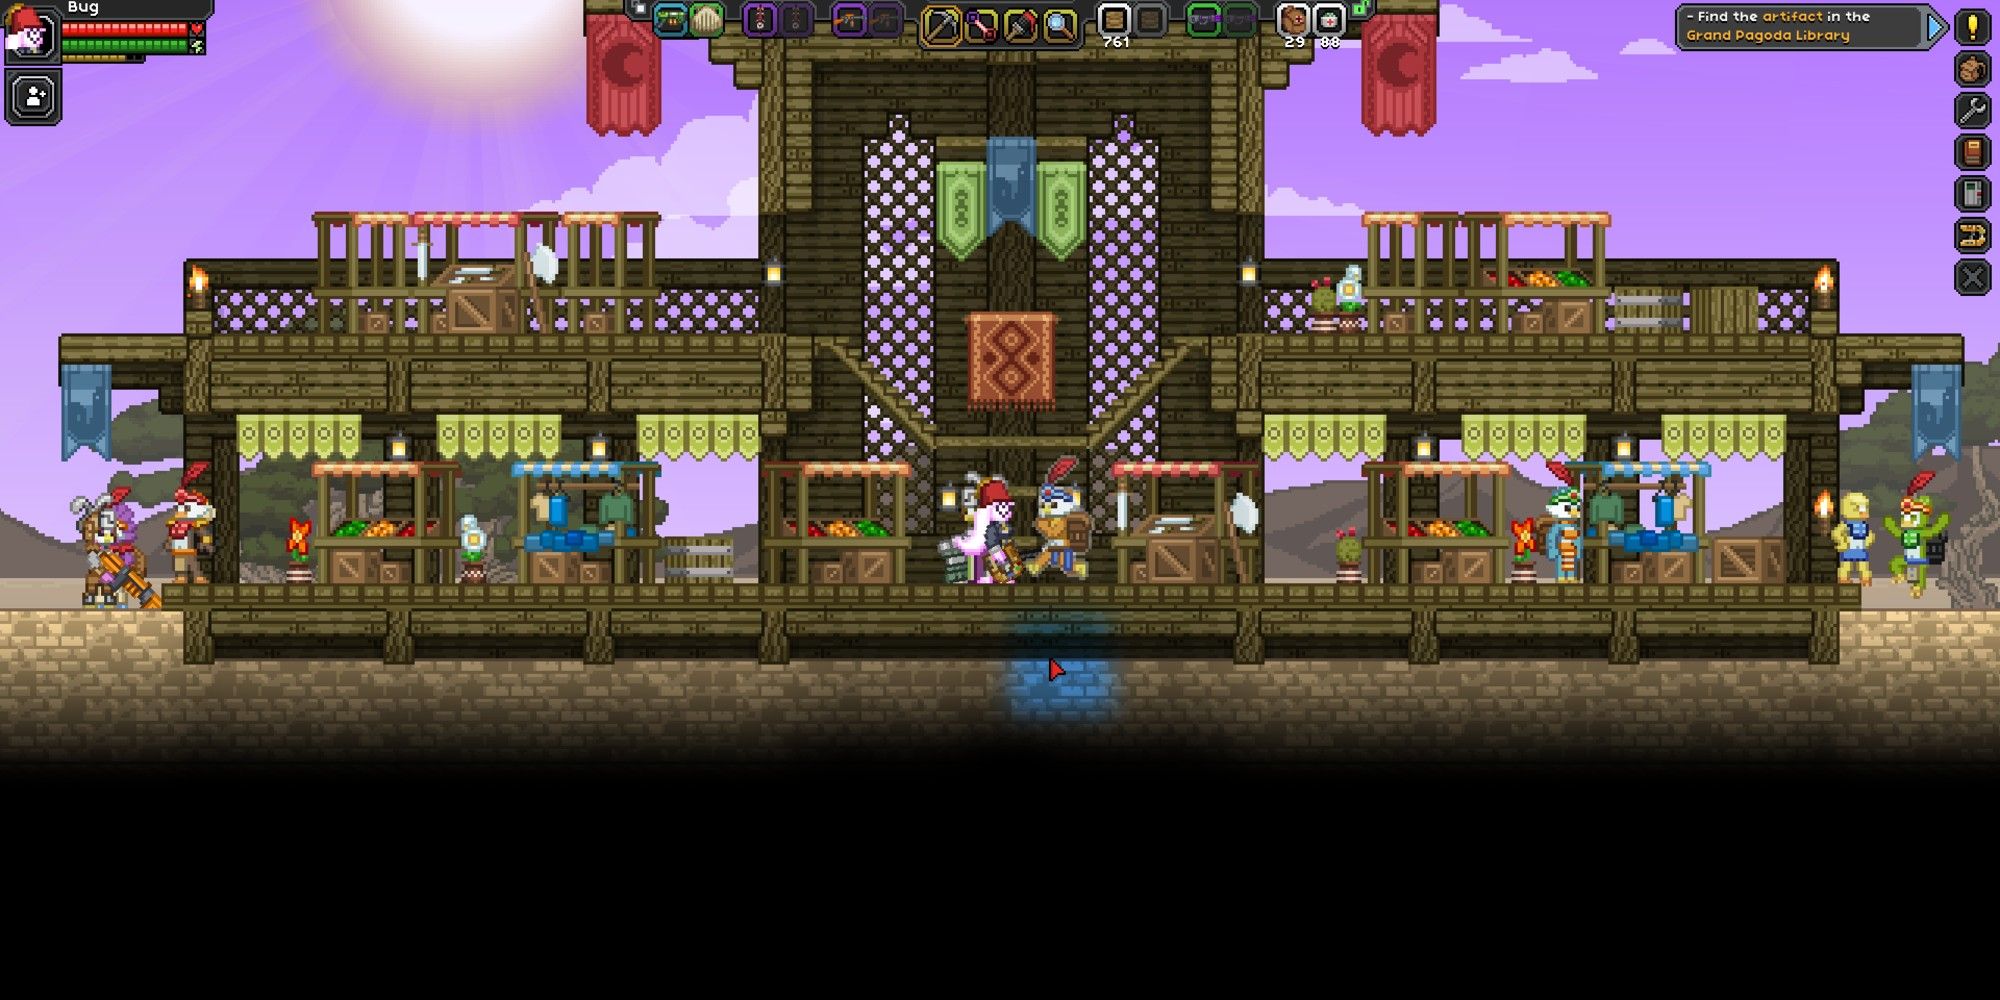
The easiest way to recruit a crew is by doing quests for NPCs in villages. Villages can be found on every planet, and are populated by every race. Above, you can see the marketplace area of an Avian village. These villages can range in size from small to massive. Over time, the NPCs within these villages will ask you to complete different quests.
When a yellow exclamation point appears above their heads, then they have a quest for you. Not all quest lines will result in the NPC wanting to join your crew, but if you do several quests, you will eventually come across someone who wants to join you. If there are no available quests, walk around and talk to NPCs. It takes some time for people to notice you and have quests. Set up a little area with a teleporter flag, allowing you to revisit the village and check for available quests.
Colony
In addition to recruiting a crew from a village, you can also find potential crew members from a colony.
Colonies take a while to set up, but they will provide a steady flow of NPC quests that lead to recruitment. To make a colony, head to Frogg Furnishing on the upper lefthand side of the Outpost. Here, you will be able to purchase a Colony Deed for 750 pixels.
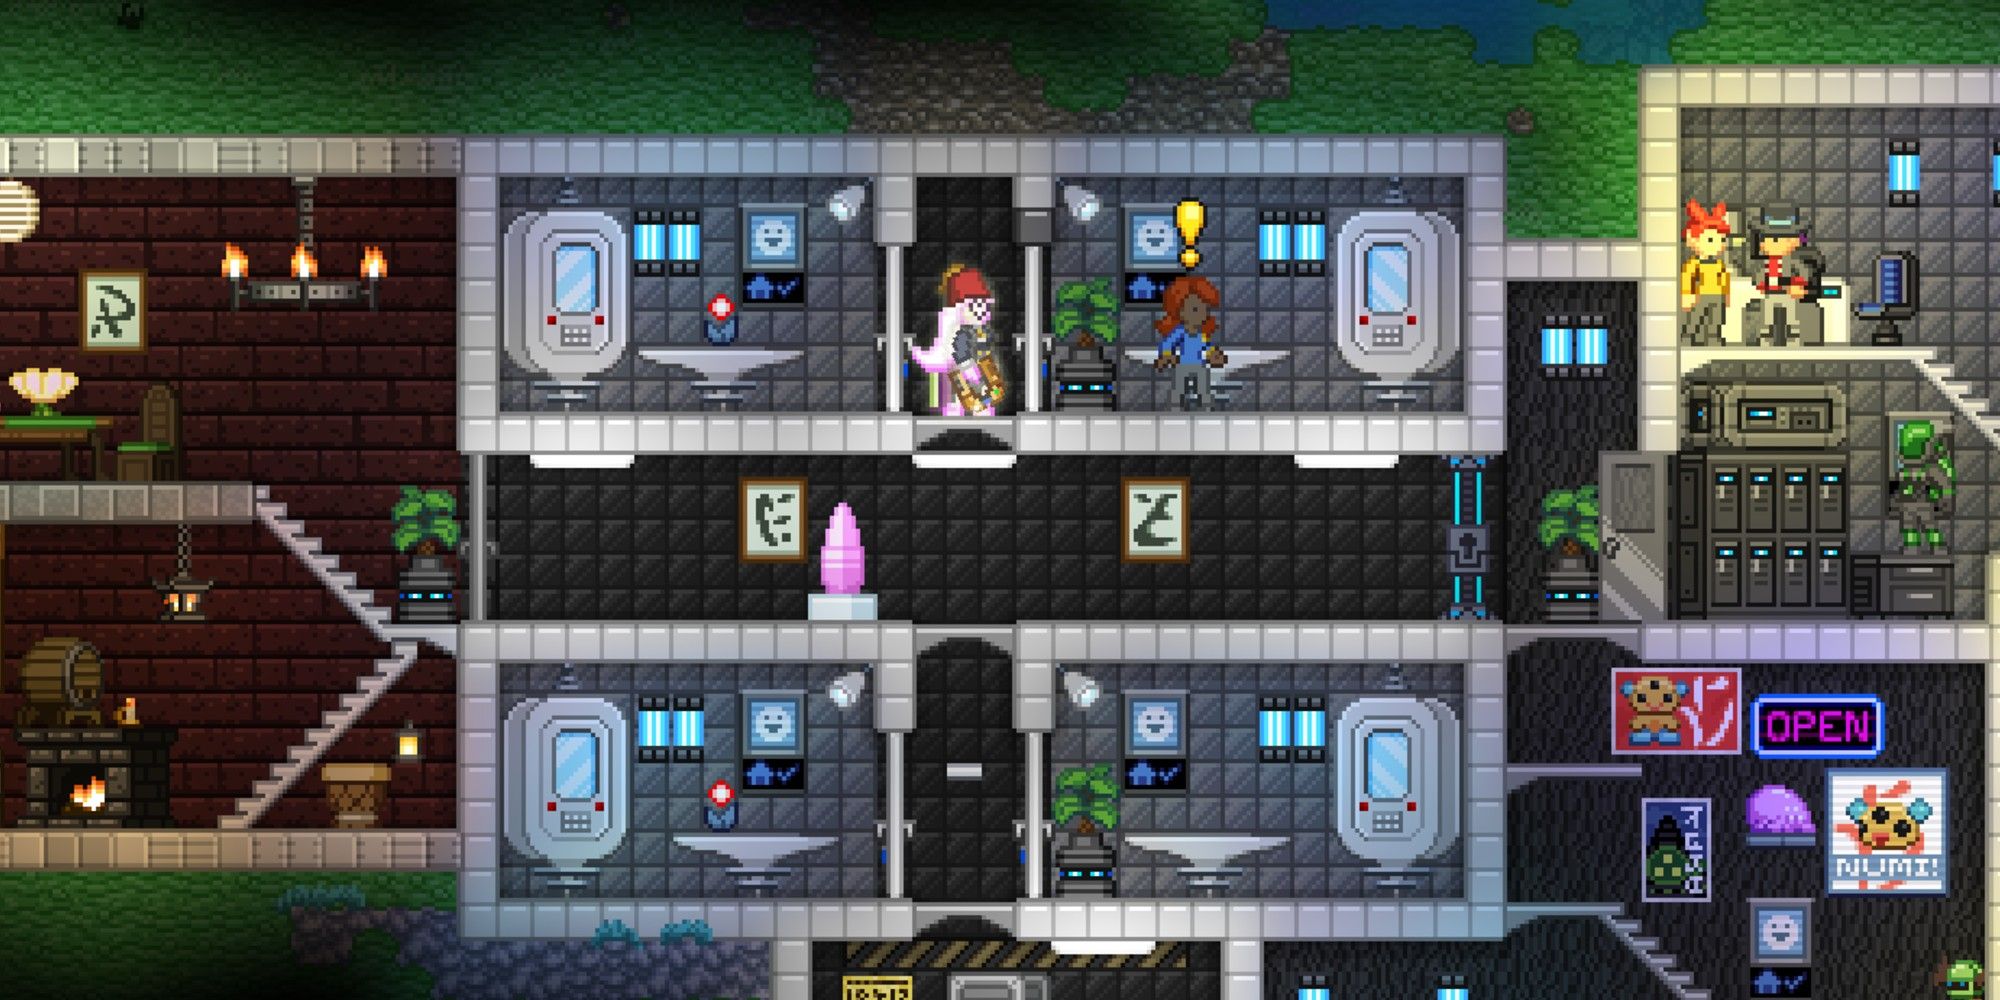
Once you have a Colony Deed, find an area to start your new colony. For a colonist to spawn, you will need a room that has a wall, light source, and door. Build this area and then add the Colony Deed. If the room is acceptable, the colonist will spawn in. The decorations that you add to the room will determine the colonist type.
For example, if you have a room with an oven, then you will spawn in a chef colonist that will sell you different foods. You can also spawn in different races. If you have a room decorated with saloon furniture, you will spawn a Novakid colonist.
You will need one Colony Deed in each room that you want a colonist to occupy. There is no limit to the number of colonists you can have. With more colonists, you will have a higher chance to find people who want to join your crew.
Similar to NPCs in villages, a quest line may end in the colonist asking to join your crew.
Beak Easy
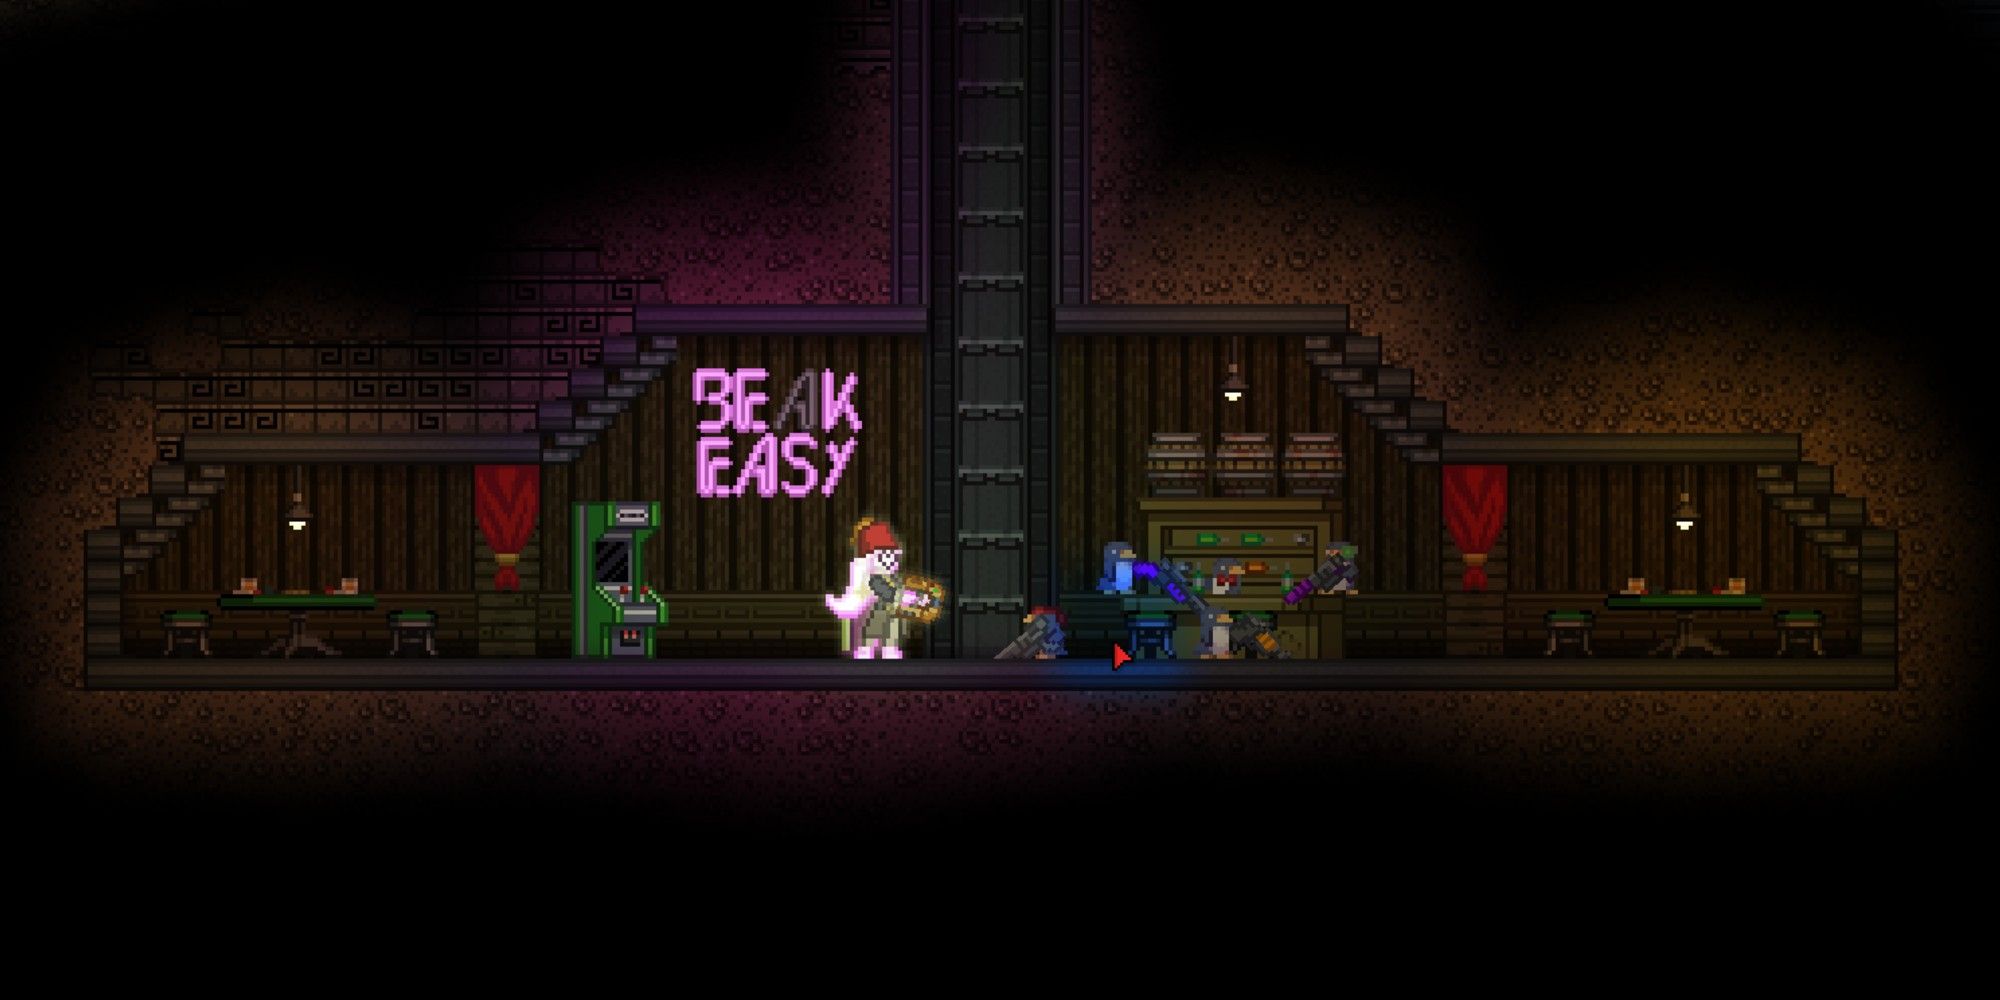
Lastly, you can recruit a crew from the Beak Easy. This underground area is beneath the Outpost. The first time you visit this area, you will come across the quest Dreadwing The Penguin. You will need to complete this quest before you can hire crew members from the Beak Easy.
Dreadwing is a tough enemy, so be sure to bring plenty of healing items, as well as good equipment and weapons.
Once you finish this quest, you will be able to purchase Dubloons for three diamonds each. These Dubloons can be given to penguins around the Outpost that you want to join your crew. All the penguin crew members will be soldiers, and you will get an achievement for getting your first penguin crew member.
Ship License
Once you have enough crew members, you will receive a ship license. There are 5 different ship licenses that you must obtain in order to fully upgrade your ship. You can find the upgrades listed below, as well as the requirements and licenses for each.
|
Upgrade Name |
Crew Members Required |
Materials Needed |
|---|---|---|
|
Sparrow Ship Upgrade |
2 Crew Members |
|
|
Kestrel Ship Upgrade |
4 Crew Members |
|
|
Falcon Ship Upgrade |
6 Crew Members |
|
|
Eagle Ship Upgrade |
8 Crew Members |
|
|
Condor Ship Upgrade |
10 Crew Members |
|
Licenses will automatically be obtained when you visit your ship after gathering the necessary amount of crew members.
You will be able to bypass the crew requirement by purchasing fake versions of each license, but these cost a lot of money. These fake licenses can be purchased from the Vendor on the left side of the shipyard at the Outpost. The licenses sell for the following prices.
- Fake Sparrow License: 10,000 pixels
- Fake Kestrel License: 20,000 pixels
- Fake Falcon License: 40,000 pixels
- Fake Eagle License: 80,000 pixels
- Fake Condor License: 150,000 pixels
As you can see, this is a lot of money. Recruiting crew members is a cheaper option. If you are unhappy with your crew, you will be able to dismiss them from the S.A.I.L. panel.
Overall, each time you upgrade your ship, you will need enough crew members, a license, and Upgrade Modules.
Upgrade Modules
Each time you upgrade your ship, you will need a set amount of Upgrade Modules. This item cannot be purchased; you can only find them while exploring the universe. Upgrade Modules can be found in chests underground caves, as well as villages, and inside reward bags. Reward bags are given by NPCs after finishing a quest. Additionally, you can find Upgrade Modules in Challenge Rooms.
Challenge Rooms are located within Challenge Doors that can be found anywhere underground. Going through a door will teleport you to the Challenge Room. There are 27 different challenges that you may encounter. You may receive an Upgrade Module as a reward for completing a challenge, or from a chest hidden in the area. There is a small chance that one may drop from a slain enemy, but this isn’t too common.
Once you have enough Upgrade Modules, head back to Penguin Pete at the Outpost. After speaking with him, your ship will be upgraded immediately. Teleport back to your ship to see the newly upgraded area. The area will be closed off, but just use your Matter Manipulator to remove the blocks. Repeat this process until you have 10 crew members and the biggest ship upgrade. After your ship is fully upgraded, you can recruit two additional members. From the S.A.I.L. panel, you can dismiss crew members.
This will not affect any existing upgrades to your ship. With a fully upgraded ship, you can now decorate to your heart’s content!
Next: The Biggest Open-Worlds In Video Games Ever From Smallest To Largest
Следование этим шагам позволит вам поменять ник, внешность, пол и расу персонажа Starbound(Или корабль).
ВНИМАНИЕ!
Следует ВНИМАТЕЛЬНО следовать этим шагам, иначе ничё не получится.
Вступление
Для того чтобы осуществить собсна изменение внешних параметров вашего персонажа необходимо скачать текстовый едитор Notepad++.
Ссылка: https://notepad-plus-plus.org/repository/7.x/7.4.2/npp.7.4.2.Installer.exe
Рекомендуется скопировать папку storage Starbound’a куда-нибудь чтобы восстановить её, если вы сделали что-нибудь неправильно и запороли своё сохранение.
Шаг I
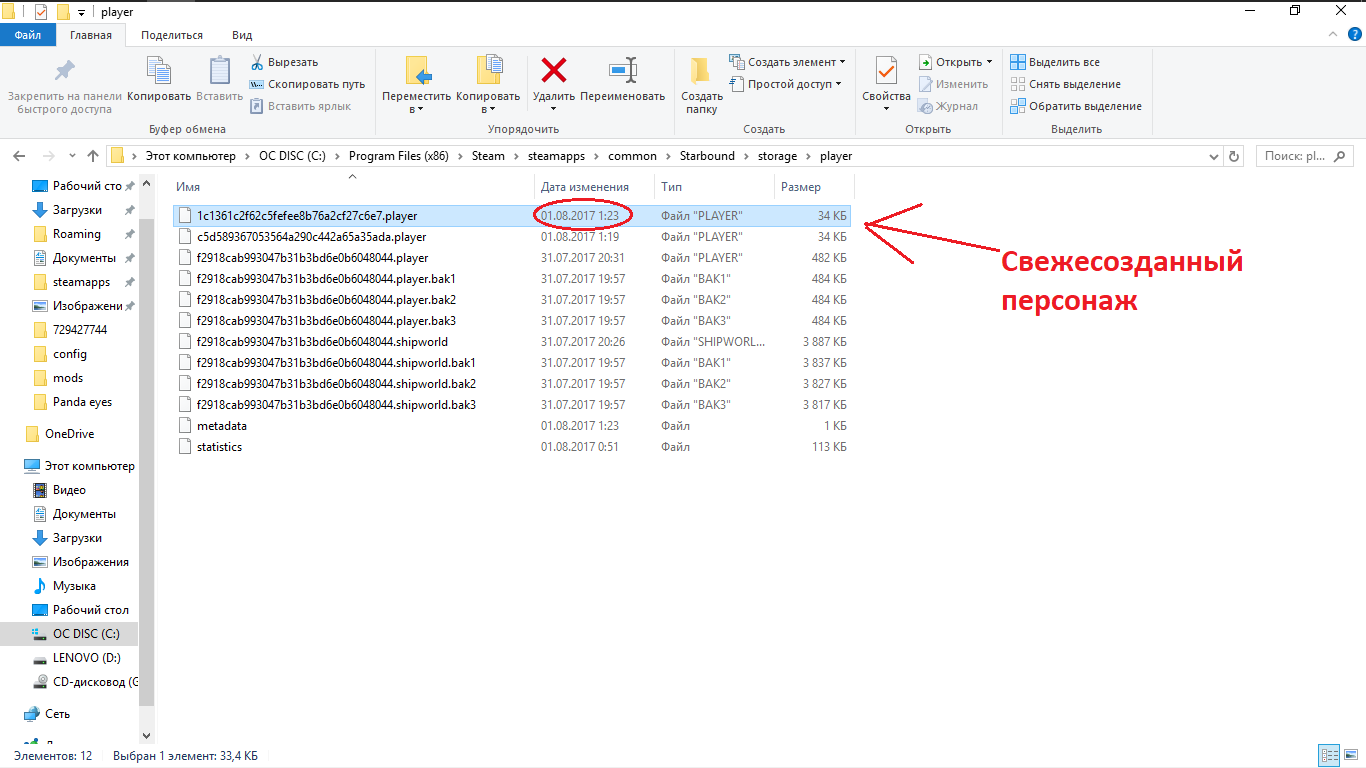
Заходим в папку контента старбаунда, дальше в папку player.
Нам нужен файл с расширением .player
Если у вас только один персонаж, то проблем не будет. Если это не так, а лишние персонажи вам не нужны, то следует их удалить для простоты следующих шагов. Если вам нужны оба, то следует несколько дополнить следующий шаг.
Так вот, нашли мы этот файл, теперь нажимаем на него правой кнопкой мыши и выбираем «Edit with Notepad++»
На этом этапе стоит запомнить содержимое папки, или даже сделать скриншот, будет проще позже.

После открытия в Notepad++ вылазиет окно с примерно вот таким, пугающим содержимым:

Шаг II
В программе зажимаем сочетание клавиш «Ctrl+F». Появляется окно поиска, вводим туда слово «identity», нажимаем «Искать далее». Подсвеивается это слово, примерно в конце файла, отлично, мы его нашли. Переходим к следующему шагу.

ВНИМАНИЕ. Если у вас несколько персонажей, то стоит следовать вышоупомянутому тексту. И после этого проследить на этой строке имя персонажа, и найти в одном из файлов нужного вам.

Шаг III
Заходим в Starbound и создаём такого персонажа, каким мы хотим видеть того, которого нужно поменять. UPD: Расу менять можно тоже

Сохраняем его и выходим из игры.
Шаг IV
Возвращаемся обратно в папку «player», ищем новый файл с расширением «.player» — тот самый персонаж, которого мы создали в предыдущем шаге.
Также открываем этот файл с помощью Notepad++, и также ищим строку со словом «identity»

Шаг V
Теперь аккуратно!
Выделяем строку со словом «identity» из файла нового персонажа.
Выделяем её от слова «identity» до первого слова «team»
Для этого кликаем в начало слова «identity» и проверяем что каретка находится точно перед первой буквой.

Перемещаемся в конец строки и с зажатой кнопкой «Shift» кликаем в конец первого слова «team», опять же проверяем что выделение заканчивается ДО первой буквы слова «team»

Шаг VI
Сейчас ещё аккуратнее!
Сверху в меню нажимаем Правка->Специальная вставка->Копировать как двоичный код

Шаг VII
Всё ещё аккуратно!
Переходим во вкладку с данными персонажа, которого мы хотим изменить. Также выделяем Строчку со словом «identity», также от слова «identity», до первого слова «team», ещё раз повторяю, аккуратно.
Опять же заходим в «Правка», «Специальная вставка», но нажимаем уже «Вставить как двоичный код».

Если всё получилось хорошо, и вообще получилось, и строка не слишком короткая, то вы по идеи всё сделали правильно.
На огромное кол-во «NUL»‘ов подряд внимания не обращаем, так должно быть.
Шаг VIII
Сохраняем файл комбинацией клавиш «Ctrl+S». Закрываем Notepad++, открываем старбик.
Заходим на персонажа, которого хотели поменять и ПО ИДЕИ, если вы всё СДЕЛАЛИ ПРАВИЛЬНО, делали всё АККУРАТНО и С ДУШОЙ, то он будет точь-в-точь как тот созданый недавно персонаж, помимо одежды.
Завершение
После завершения всех шагов и получения положительного результата стоит выдохнуть, покреститься и гордиться собой. Также можно удалить того персонажа, которого мы создали для того чтобы так сказать «снять с него слепок».
Поздравляю вас, господа. Спасибо за чтение этого руководства.
P.s. Автора стоит простить за ошибки и поощерить лайком, ибо время создания этого руководства видно на скриншотах с проводником.
ВАРНИНГ!!!11!
Автор не несёт ответственности за испорченные сейвы. Просил же вас сделать резервную копию в начале, если сделали, то восстановите и начните сначала, но внимательнее следуя шагам. С какого-то раза то у вас точно получится!
Смена корабля
Перед сменой корабля вынесите со своего старого все вещи например… на планету.
Менять корабль намного проще. Для этого нужно также сделать персонажа для снятия слепка или использовать любого другого с кораблём, который вы желаете у себя видеть.
Попрошу обратить внимание на то, что для генерации файла с расширением «.shipworld» нужно пройти обучение(можно пропустить), телепортироваться на корабль сохраниться и ВЫЙТИ ИЗ ИГРЫ(.UPD). Предварительно улучшаем корабль на «одноразовом» персонаже с помощью команды » /upgradeship ‘{«shipLevel» : УРОВЕНЬ}’ «(Внимательнее с кавычками)
Команде нужны права администратора, получаем их с помощью /admin, после улучшения забираем ею же.
1. Для того чтобы поменять корабль нужно удалить .shipworld старого корабля(Т.Е. файл — «ID вашего персонажа»+.shipworld).
2. Переименовать файл с расширением «.shipworld(.bak не трогаем из принципа)» и названием представляющим из себя ID персонажа с нужным нам кораблём, в файл с ID персонажа, которому корабль мы хотим вставить(+.shipworld).
3. Войти в игру обратно
Если вам нужен тот персонаж у которого мы «крадём» корабль, то предварительно скопируйте нужный нам .shipworld куда-нибудь и после переименования вставьте обратно.
НАГЛЯДНЕЕ(Все ID — произвольные, находите свои сами):
f2918cab993047b31b3bd6e0b6048044 — ID персонажа которому нужно поменять корабль.
89ae5f8e726d2814de5fa6c8b88473bc — ID донорского персонажа
1. Удалить(Или переместить, если не уверены в себе) файл f2918cab993047b31b3bd6e0b6048044.shipworld
2. Переименовать(Если донорский персонаж ещё нужен, то предварительно куда-нибудь копировать его) файл «89ae5f8e726d2814de5fa6c8b88473bc.shipworld» в «f2918cab993047b31b3bd6e0b6048044.shipworld»
3. Если копировали донорский корабль — вставить его обратно.
4. PROFIT!
Также попрошу обратить внимание на то, что вы получаете полную копию донорского корабля(Включая ИИ, он тоже меняется. Но миссии остаются, а про экипаж ничего не знаю. Скорее всего с нового корабля).
Конец, удачи в игре!