
The self-diagnosis system of dishwashers generates different codes to warn about interruptions in the operation of sensors and subunits. For example, in Frigidaire dishwasher, error code i30 means excessive water consumption. When it appears, the unit starts draining. In this case, the pump operates continuously, without reacting to opening the door and cancellation of the program.
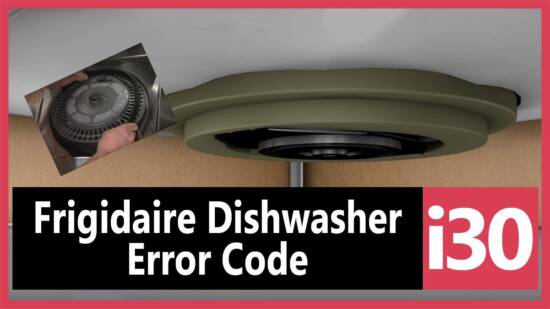
Error i30: description
When the tank is full, fluid drains into the bottom of the pan. Then the float switch actuates, the dishwasher interrupts the cycle and displays error code i30. Try rebooting it by unplugging it for 30 minutes. If after restarting, nothing has changed, carry out the following actions:
- slide the device out from under the tabletop;
- tilt the housing forward by 45 degrees to drain the water from the pan;
- put the appliance upright and emplace it;
- wait for two days so the pan can dry completely;
- do a test run and see if the i30 error has disappeared.
Usually, this solution helps, but not for long – after a while, the problem repeats.
On dishwashers without a display, the “END” LED flashes (2 Hz / 5-sec pause) – 3 blinks
There may be several reasons for concern. You will have to examine the entire dishwasher to find the source of the malfunction and understand why error code i30 appears.
Leak
The first thing to do is to check the pan. If it is empty, skip this step and come over to the next one. If it is wet, locate a leak:
- unscrew the top cover;
- remove the side walls;
- start any program;
- see where the water is dripping from.
The place through which fluid sinks can be covered with airtight, but such repair is short-life. It is desirable to replace the faulty element, and then error i30 will stop appearing.
Dirty leak sensor
At the bottom of the housing, there is a plastic foam float. It activates the switch when the pan is full. Sometimes a moving part sticks to the wall, so the device “thinks” that an overflow has occurred. In this case, it is very easy to eliminate error code i30: just clean the leak sensor.
Blockage of the drain system
If in Frigidaire dishwasher error code, i30 is combined with iF0, i40, or i20, this indicates a drain problem. First, check the sewage system and the place under the sink where the dishwasher connects to the piping. Then remove and clean the dirty filters. At the same time, examine the hose for blockage and folding.
Problems with the drain pump
Overfilling may occur due to a malfunctioning pump. Typically, error i30 appears when the impeller is damaged or blocked. Disconnect the pump and remove things stuck between the blades. If the impeller is broken, replace it. If there is no visible damage, check the subunit with a multimeter. If the indications do not match, buy a new drain pump for $ 40 – 50.
Faulty inlet valve
In a normal state, this element opens and closes, regulating the flow of water. But it also can fail, instigating error code i30. Common causes:
- wiring failure;
- breakdown of the mechanical part;
- blockage
Remove and disassemble the electromagnetic part. Look if there is no garbage in it. Then measure the contact resistance with a multimeter and check how the mechanism works. If a malfunction is detected, install a new valve. It costs about $ 10.
Problems with the pressure switch
The pressure switch may become clogged with food or fat. As a result, the dishwasher receives the wrong signals from it and “thinks” that the tank is empty. The system does not generate a command for the intake valve, so the membrane does not close. Water continues to flow in, spills, and enters the pan. The leakage sensor responds to flooding, wherefore error i30 is displayed.
To clean the pressure switch, follow the instructions:
- switch off the power and turn off the water supply;
- pull out the machine and find a pressure switch in the sediment pan;
- disconnect it and rinse with boiling water.
This must eliminate the problem. But if the sensor is defective, only its replacement will help. The price of a new spare part is $ 68.
Damaged electronic board
In Frigidaire dishwasher error code, i30 sometimes appears after voltage drops when moisture enters the main module or as a result of a short circuit. Most likely, the reason is the burnt-out triac, which controls the discharge and filling. In this case, you need to install a new element and, if necessary, solder the molten tracks. But note: if the processor burned out, this would not help. You will have to buy a new board for $115.
Discussions about HPLC, CE, TLC, SFC, and other «liquid phase» separation techniques.
-

- Jru

-
- Posts: 3
- Joined: Sat Sep 07, 2013 3:04 am
Hi!
First time poster, and quite the LCMS noob over here.
I’m currently working on an LCMS system with a CTO-20AC column oven that is giving me issues.
Recently every time I try to start a run, or turn the column oven on, it will stop and tell me there is a leak sensor problem (ERR LEAK DETECTED). Since there is no liquid leak from the column, I did some internet looking up and I’m guessing it’s the vapor sensor that is having the problem, but I’m not sure how to fix this problem. I’ve also noticed tha if I disconnect my guard column, the leak error stops.
Any helpful suggestions out there I can try before I am forced into calling technical support and have them laugh in my face when it turns out the fix is quite easy?  Any tips would be appreciated. Thanks!
-
- tom jupille
- Site Admin
-
- Posts: 4964
- Joined: Wed Aug 11, 2004 4:55 pm
- Location: Alamo, CA / USA
the fix is quite easy
Replace the guard column (if it’s a cartridge type, perhaps replace the holder as well).
-
- Jru
-
- Posts: 3
- Joined: Sat Sep 07, 2013 3:04 am
by Jru » Sat Sep 07, 2013 4:04 pm
Thanks for the tip Tom! 
I’ve replaced the column, and since the issue is still there I’ll replace the holder (as soon as I get another one sent in…)
Why does the holder need replacement as well? Is it caused by blockage or something that I might be able to clean out while I wait for my replacement holder to arrive? If not, I’ll just have to hope that my next samples won’t be too bad or try to wait to run those…
-
- tom jupille
- Site Admin
-
- Posts: 4964
- Joined: Wed Aug 11, 2004 4:55 pm
- Location: Alamo, CA / USA
You stated that the error did not occur when the guard was removed, so the leak has to come from either the cartridge or the holder. If swapping out the cartridge doesn’t fix the problem, then it’s the holder. You didn’t say whose system you’re using, but on many of them, the cartridge seal is actually incorporated into the holder not the cartridge (much like the seals on the pump are part of the head, not the piston).
Who is online
In total there is 1 user online :: 0 registered, 0 hidden and 1 guest (based on users active over the past 5 minutes)
Most users ever online was 1117 on Mon Jan 31, 2022 2:50 pm
Users browsing this forum: No registered users and 1 guest
Latest Blog Posts from Separation Science
Separation Science offers free learning from the experts covering methods, applications, webinars, eSeminars, videos, tutorials for users of liquid chromatography, gas chromatography, mass spectrometry, sample preparation and related analytical techniques.
Subscribe to our eNewsletter with daily, weekly or monthly updates: Food, Environmental, (Bio)Pharmaceutical, Bioclinical, Liquid Chromatography, Gas Chromatography and Mass Spectrometry.

If you own a Rinnai tankless water heater, sooner or later, you may stumble upon one of many different error codes. An audible “beeping” alarm generally accompanies tankless water heater error codes. If you have no hot water, you may have exceeded your tankless water heater capacity or likely have at least one error code.
To find your Rinnai error code, you need to check the unit’s digital display where the error code will flash. On some Rinnai models, by pressing and holding the ON/OFF button for 2 seconds and then pressing UP, you will be able to find your last nine Rinnai error codes.
However, finding out your error code is not enough. It would help if you also had a good idea of what said error codes mean. And this is what we will explore in this article.
Do You Need a Licensed Plumber?
Get FREE quotes from licensed Plumbers in your area today. Whether you need a new water heater, a sink repair, or a toilet fixed We Can Help! All Plumbers are screened, licensed, and insured.
Get a FREE Quote Today
We earn a commission if you purchase at no additional cost to you.
Error Code 00 (or LC0 through LC9): Scale Build-up in Heat Exchanger
Rinnai error code 00 (or LC0, LC1, LC2, LC3, LC4, LC5, LC6, LC7, LC8, and LC9) indicates there has been scale build-up in the heat exchanger. To fix this error code, you need to flush the heat exchanger. If this does not work, you may need to replace the heat exchanger.
Rinnai error code 00 will usually be replaced by LC code, followed by a number between 0 to 9 in the maintenance code history. It can be observed alternating between the current temperature setting and the LC error code, accompanied by a beeping sound.
You can find detailed information on cleaning and flushing the heat exchanger in your owner’s manual. Make sure to treat hard water to prevent scale build-ups in the future.
Pushing the temperature controller’s ON/OFF button five times will allow you to run the water heater even if you haven’t cleaned the heat exchanger. However, eventually, the water heater will stop working to prevent damage.
Error Code 02: No burner operation during freeze protection mode
Rinnai error code 02 indicates that the burner will not operate while the freeze protection mode is active. The Rinnai error code 02 cannot be fixed by the user, and the only solution is to make a service call and have a certified technician inspect your Rinnai.
If you live in an area with routine freezing winter temperatures, we’ve put together the article Maintaining Tankless Water Heaters in Freezing Temperatures.
Error Code 03: Power interruption during Bath fill
Rinnai error code 03 indicates that there has been a power interruption or outage while the Rinnai water heater happens when in use. This commonly occurs when filling a bathtub, causing the water heater to stop producing hot water. Rinnai error code 03 can be fixed by turning off all hot water taps and the ON/OFF button twice.
By restarting the unit, it should start working correctly.
If you live in an area that experiences routine blackouts or power failures, you may need to look into a battery backup power supply for your tankless water heater.
Error Code 05: Bypass Servo
Rinnai error code 05 can be seen on Rinnai water heaters with installed bypass valves when there is an issue with the bypass servo. If your Rinnai displays an error code 05, you need to restart the water heater and open the hot water faucet.
This code is not observed on all Rinnai water heaters. Measuring the resistance of the bypass flow control can help in determining the problem. If the error code persists, you may need to replace the bypass servo.
Error Code 07: Circulation flow rate has dropped below 2.1 GPM
Rinnai error code 07 indicates that the flow rate has fallen below 2.1 GPM. You need to confirm that the water supply is on, the water filter is not blocked or clogged, and it maintains a constant pressure of 30 psi. Lack of water pressure or a leak such as a broken or cracked water pipe connections can cause an error code 07.
Error Code 10: Air Supply or Exhaust Blockage
Rinnai error code 10 means that the air supply or the exhaust has been blocked. To fix the Rinnai error code 10, you need to ensure that the exhaust, vent pipes, condensation collar, and fans are installed and connected correctly and not blocked in some way.
They should also be of correct length and diameter. Do not forget to check the dip switches and ensure they have been set correctly.
Always use Rinnai approved venting materials as some materials can cause error code 10 due to incompatibility.
Error Code 11: No Ignition
Rinnai error code 11 is indicative of a problem with the ignition of the unit. Problems with the gas and electrical system can cause a Rinnai error code 11, so they should be inspected for problems. The Rinnai error code 11 may need to be assessed and fixed by a trained technician.
Ensure you are using the right type of gas (propane or natural gas), nothing is preventing the gas supply, the gas system is not bleeding, and the pressure is correct.
Confirming all the wiring is done correctly, the igniter creates sparks, and nothing blocks the burners. Check the gas solenoid valves are installed correctly.
Error Code 12: Flame Failure
Rinnai error code 12 signifies a failure in lighting up the flame. To fix the Rinnai error code 12, the electrical and gas systems need to be thoroughly inspected for the cause of the problem. In some instances, it may be necessary for a trained professional to do the inspection.
Check the pressure of the gas supply and that there is no air in the gas pipes. Look for any blockages and debris that may prevent a steady gas supply. Remove any obstructions in the venting system too.
Ensure the burners and the flame rod are clean and in good working condition and that the PCB connections, gas solenoid, flame rod, power supply are tightly fitted, and there are no loose connections or short circuits.
Error Code 13: Combustion abnormality
Rinnai error code 13 is indicative of problems in the combustion. If there is an error code 13, you need to ensure that the gas supply and pressure are within rangers and that the venting system and the dip switches are all correctly set up.
Also, check the high/low fire manifold pressure.
Error Code 14: Thermal Fuse
Rinnai error code 14 indicates a problem with either the thermal fuse, the thermal switch, or the PCB wiring. The Rinnai error code 14 doesn’t guarantee that your Rinnai is overheating. You may need to clean the filter, replace the thermal fuse, parts of the PCB wiring, or the PCB itself.
Check the heat exchanger, combustion chamber, and exhaust pipe and remove any blockage or build-ups. Check for build-ups or restrictions in the airflow near or around the vent terminal and the water heater.
Ensure the unit is being fed the right type of gas and that the water flow is in the correct ranges. Improper conversions can also cause problems. In addition to that, check the high and low fire manifold pressure and that the dip switches are set up correctly.
Error Code 15: Venturi Control
Rinnai error code 15 is found on units with venturi switches. If there is an error code 15 on your Rinnai, inspect the venturi motor’s condition, and replace the gas valve assembly. Reset the unit by completely turning it off from the power supply.
Error Code 16: Over Temperature Warning
Rinnai error code 16 represents an overheating warning. If there is an error code, 16 displayed on the controller, inspect your Rinnai for low water flow or any foreign objects, debris, restrictions, or blockage in the airflow, vent, combustion chamber, heat exchanger, and exhaust system.
This error code can also happen if the room temperature is too high (over 104°F), in which case you need to lower the room temperature.
Error Code 17: Venturi Blockage
Rinnai error code 17 is found on Rinnai models that have venturi control and switch. To fix the Rinnai error code 17, clean and remove any build-ups and restrictions blocking the venturi. If the error doesn’t go away, have a certified technician look into it or call customer support.
Error Code 19: Electrical Grounding
Rinnai error code 19 signifies that there is a problem with the electrical grounding. To fix the Rinnai error code 19, inspect all electrical components of the unit for electrical shorts. In some instances, this may need to be carried out by a trained technician.
Error Code 21: Data Transfer Error
Rinnai error code 21 means there is a problem with the data transfer. Rinnai error code 21 can be observed on some Rinnai models that have had their PCB replaced, and the data transfer has not been completed. The error code will go away when the data transfer is completed.
Error Code 25: Condensate Trap Error
Rinnai error code 25 means the condensate trap is full. To fix the Rinnai error code 25, ensure the condensate trap and drainpipe are clean from any blockage or debris. In certain cases, replacing the condensate trap may be needed.
Error Code 30: Flammable vapors detected
Rinnai error code 30 indicates the presence of flammable vapors. After ensuring there are no flammable vapors in the area, the flammable vapor sensor should be inspected for damage and loose wiring. In some cases, the flammable vapor sensor or the PC board may have to be replaced.
Error code 30 is a potential fire hazard and should not be taken lightly. A qualified technician should inspect the area for flammable gasses or vapors before doing any maintenance or repairs.
On some units, this error code could be displayed as error code FE instead of 30.
Error Code 31: Burner Sensor Error
Rinnai error code 31 is indicative of a problem with the burner sensor. If your Rinnai displays an error code 31 on the controller, you should inspect and measure the burner sensor’s condition and resistance and replace it with a new one if not working as intended.
Error Code 32: Outgoing Water Temperature Sensor Fault
Rinnai error code 32 indicates a problem with the outgoing water temperature sensor. To fix the Rinnai error code 32, you need to ensure the sensor is clean and in good working condition. Check the sensor’s resistance and its wiring for damage. If the problem remains, replace the sensor.
Error Code 33: Heat Exchanger Outgoing Temperature Sensor Fault
Rinnai error code 33 means there is a problem with the heat exchanger outgoing temperature sensor. To fix the error code 33 on your Rinnai, you need to check the sensor’s condition and wiring. Clean up any build-up and check the sensor’s resistance. If nothing helps, replace the sensor.
Error Code 34: Combustion Air Temperature Sensor Fault
Rinnai error code 34 is indicative of a problem with the combustion air temperature sensor. Inspect the sensor’s condition and resistance. Ensure there are no scale build-ups and there are no loose connections. Remove any objects that may be restricting airflow near the vent terminal and the unit.
Ensure that the fan blade is not loose and works properly. Replace the sensor if the error code persists.
Error Code 35: Tank Temperature Sensor
Rinnai error code 35 is associated with a problem with the tank’s temperature sensor. If your Rinnai is showing an error code 35, look for any damaged or loose sensor connections. Clean any build-ups and dirt on the sensor, and check its resistance readings. If the error persists, replace the sensor.
Error Code 38: Exhaust or CO sensor Problem
Rinnai error code 38 can be observed on some models and is indicative of a problem with the exhaust thermistor or the CO sensor. Check the condition of the sensor, check for loose wiring, or any build-ups. Clean the sensor if necessary. If needed, replace the sensor or the PC board.
In addition to that, check the gas inlet supply is according to specifications and check the high and low fire pressure. Ensure that the dip switch is also correctly set up. Check the condition of the venting materials and ensure that the venting system has been properly installed.
Error Code 41: Outside Temperature Sensor
Rinnai error code 41 means there is a problem with the outside temperature sensor, and it is usually observed only on outdoor units. Ensure the sensor is in good working condition, properly plugged in, or covered by something that can block it from measuring the ambient temperatures outside.
See our article Can Water Heaters Be Installed Outside: What You Should Know for more information on outdoor tankless water heater models.
Error Code 49: Sensor breakdown
Rinnai error code 49 can be found on some Rinnai tankless water heater models like the RHFE 1004. The error code 49 means there is a problem with the pressure sensor. Check for loose connections and damaged or broken parts. Clean and remove any build-ups or obstructions.
Also, check the blower and the corresponding wiring. The sensor may need to be replaced, or the unit to be inspected by a trained professional.
Error Code 51: Inlet Water Temperature Sensor
Rinnai error code 51 indicates a problem with the inlet water temperature sensor. Check the sensor’s wiring condition, its resistance and clean it if it has a scale build-up. If the error doesn’t go away, replace the sensor.
Error Code 52: Modulating Solenoid Valve Signal Abnormal
Rinnai error code 52 indicates a problem with the modulating gas solenoid valve and its readings. To fix Rinnai error code 52, ensure the terminals on the wiring harness are not damaged or loose. In addition to that, you may need to measure the resistance and voltage of the valve.
If all readings are good, but the error code continues to show up, you may need to replace the PCB board.
Error Code 53: Sparker Failure
Rinnai error code 53 can be observed on some Rinnai water heater models; it indicates a problem with the sparker. If your Rinnai is displaying an error code 53, you may need to replace the sparker or have a certified technician look into the problem.
This error code was observed on some older Rinnai RHFE models, some of which were recalled due to CO hazard.
Error Code 57: Overheat Bi-Metal Switch
Rinnai error code 57 indicates a problem with the bi-metal overheat switches or the burner. Usually, Rinnai error code 57 can occur if the unit is connected to the wrong type of gas or the gas pressure is not within the suggested ranges, or a wiring issue.
In the case of a wiring issue (Often found on the Rinnai KB series), ensure the unit receives enough power and water. It may be necessary to replace the thermal fuse or the sensor wiring harness, or even the PCB.
In the case of a gas issue, ensure the gas supply works correctly and there is enough gas pressure. This can be checked by turning on a gas appliance in your home and checking if the flame drops. If the gas pressure is low, the flame will drop.
In most cases, due to the nature of the issues associated with this error code, your Rinnai should be inspected by a qualified technician.
Error Code 58: Secondary Heat Exchanger Sensor
Rinnai error code 58 is an indication that one of the two bi-metal plates may be open. A Rinnai error 58 can be caused by scale build-up, in which case the heat exchanger should be flushed and cleaned. A wiring problem can also cause this error, in which case a certified technician should be contacted.
Check for damage or loose connections.
In the case of an error code 58, your Rinnai may or may not continue working depending on the problem’s source.
We have a how to guide for tankless water heater maintenance. In Easy Maintenance Tips for Tankless Water Heaters w/Photos will outline how to perform tankless water heater flushing and other maintenance.
Error Code 61: Combustion Fan Failure
Rinnai error code 61 is indicative of a problem with the combustion fan. If your Rinnai displays an error code 61, you need to ensure the fan moves freely, and nothing prevents its turning. Measure the motor winding resistance and check for any damage or loose connections in the motor’s wiring harness.
Error Code 63: Circulation Pump
Rinnai error code 63 means there is a problem with the water flow and that it may have dropped below 1.3 GPM. Check if the water is running as normal, check all the filters, ensure there is no air bleeding and no air in the system, check the thermal bypass valve if installed.
The water heater’s water pressure should be between 30 to 50 psi, and the water flow at least 3 GPM. This error appears only on some Rinnai models like the RUR98, for example.
Replace the pump if necessary.
Error Code 65: Water Flow Servo Fault
Rinnai error code 65 means there has been a failure to close the water control valve during the bath’s filling. If your Rinnai displays an error code 65, turn off the water ASAP to stop the bath’s filling. A licensed technician should fix this error code.
Error Code 70: Sensor Harness Connection
Rinnai error code 70 means there is an issue with the sensor harness connections. In the case of a Rinnai error code 70, you need to inspect the condition of the PC board switches and connection harnesses. In certain cases, replacing the PC board may be required.
On some of the older Rinnai units, error code 70 indicates a faulty ON/OFF switch.
Error Code 71: SV0, SV1, SV2, and SV3 Solenoid Valve Circuit Fault
Rinnai error code 71 means there has been a problem with the SV0, SV1, SV2, SV3, or SV4 solenoid valve circuits. Unfortunately, often fixing the Rinnai error code 71 means replacing the faulty PC board. But sometimes, this error can be caused by moisture build-up inside the gas valve, which may need to be replaced.
Inspect the voltage reading and the resistance of the SV0 through SV4 and confirm they are within specs. Check the gas valve for any moisture, too.
Error Code 72: Flame Sensing Device Fault
Rinnai error code 72 means there is a problem with the flame sensing rod. To fix the Rinnai error code 72, you need to ensure that nothing blocks the flame from touching the flame rod and there are no build-ups on the flame rod. The wiring of the rod and its microamp output should also be measured.
Sometimes build-up inside the burner can create a short circuit, resulting in this error code.
You may need to replace the flame rod, flame rod gasket, or the PC board.
Error Code 73: Burner thermocouple fault
Rinnai error code 73 indicates a problem with the burner thermocouple. If your Rinnai displays an error code 73, inspect the thermocouple’s condition, make sure it hasn’t been damaged or loose. Check if the dip switch has been set up correctly. Replace the thermocouple or the PC board if needed.
Error code 73, on Rinnai RHFE models, can signify a connection problem, in which case the unit should be restarted.
Error Code 79: Water leakage detected
Rinnai error code 79 means the sensor detected a water leak. To fix the Rinnai error code 79, ensure the leak sensor and piping are in good condition and there are no damaged or loose connections. Dry off any water inside the unit and restart it.
If there are no signs of water leakage but the code displays again, try disconnecting the leak sensors and see if the water heater will work. Closely monitor it for any sign of leakage. If the unit works as intended while the sensor is disconnected and no signs of leakage are visible, replace the sensor.
Error Code 99: Flue block
Rinnai error code 99 may be observed on some Rinnai models. It indicates that the fuel has been blocked by something or there is no fuel. Low gas pressure or obstructions found around or near the exhaust and air intake could also cause an error code 99.
Code FF: Maintenance Performed
If your Rinnai is displaying a code FF, it indicates that maintenance or a repair has been performed. That way, it is easy to determine if an error happened after the service. This code is entered by pressing the up, down, on, and off buttons simultaneously.
Code SS: Service Soon
A code SS on your Rinnai indicates that it is time to service the unit to prevent any damage. Ensure that there are also no build-ups on it. To reset the Rinnai code SS, press the temperature controller’s On and Off button 5 times quickly.
No code: Nothing happens when water flow is activated.
If, after activating your Rinnai water heater, nothing happens. There is no error code. This can indicate faulty wiring, DC shorts, poor water flow, blocked water filter, water turbine, reversed hot and cold water lines, or bleed over in the plumbing.
Sometimes there may not be any information about your error code. Although unlikely, check the digital display condition as sometimes it may not show the correct number. In any case, talking to Rinnai customer support or having a certified technician check your Rinnai is highly recommended.
A tankless water heater will last about 20 years and during that time you’re sure to experience at least one of these Rinnai error codes. Whether you’ve just brought a tankless water heater or looking to buy a tankless water heater, we hope this guide has helped you and that you’ll bookmark it for further reference.
Do You Need a Licensed Plumber?
Get FREE quotes from licensed Plumbers in your area today. Whether you need a new water heater, a sink repair, or a toilet fixed We Can Help! All Plumbers are screened, licensed, and insured.
Get a FREE Quote Today
We earn a commission if you purchase at no additional cost to you.
Other Troubleshooting Tankless Water Heater Error Code Guides
- Troubleshooting Tankless Water Heater Error Codes: Rinnai
- Troubleshooting Tankless Water Heater Error Codes: Rheem
- Troubleshooting Tankless Water Heater Error Codes: Navien
- Troubleshooting Tankless Water Heater Error Codes: Noritz
- Troubleshooting Titan Tankless Water Heater Problems
- Troubleshooting EcoSmart Tankless Water Heater Error Codes
- Troubleshooting Tankless Water Heater Error Codes: Bosch