- Manuals
- Brands
- PAX Manuals
- Payment Terminal
- S920
- User manual
-
Contents
-
Table of Contents
-
Bookmarks
Quick Links
USER MANUAL V1.0
S920 Retail User Manual
Date: 2018-09-17
Version: 1.00
PAXSTORE Customer Support
PAXSTORE-support@pax.us
(877) 859-0099
www.pax.us
navi
20180917 v1.00
Related Manuals for PAX S920
Summary of Contents for PAX S920
-
Page 1
USER MANUAL V1.0 S920 Retail User Manual Date: 2018-09-17 Version: 1.00 navi 20180917 v1.00 PAXSTORE Customer Support PAXSTORE-support@pax.us (877) 859-0099 www.pax.us… -
Page 2
USER MANUAL V1.0 THIS PAGE INTENTIONALLY LEFT BLANK 20180917 v1.00 PAXSTORE Customer Support PAXSTORE-support@pax.us (877) 859-0099 www.pax.us… -
Page 3
If you cannot resolve the Issue, please contact us. PAX support operates 24 hours a day, 7 days a week. Your level of access to this Service is governed by the support plan arrangements made between PAX and your Organization. Please consult this support plan for further information about your entitlements, including the hours when telephone support is available to you. -
Page 4
USER MANUAL V1.0 Revision History Date Version Description 20180917 V1.00.00 Shoap Technical Original Release Services 20180917 v1.00 PAXSTORE Customer Support PAXSTORE-support@pax.us (877) 859-0099 www.pax.us… -
Page 5: Table Of Contents
URPOSE ……………………….1 UPPORTED EVICES ……………………….1 NTENDED UDIENCE …………………………1 BBREVIATIONS PAX S920 TERMINAL OVERVIEW……………………2 …………………………. 2 EFINITIONS Screen and Keypad Layout ……………………2 …………………………3 CREEN ……………………….3 TATUS NDICATORS LOADING AN APPLICATION AND ACCESSING MANUAL SETTINGS …………..5 ……………………..
-
Page 6
Gift Cashout ……………………….. 148 APPENDIX A. TROUBLESHOOTING……………………151 …………………….. 151 ENERAL ROUBLESHOOTING A.1.1 Serial Number Location ……………………151 A.1.2 User Password Forgotten or Lost ………………….151 A.1.3 Terminal Appears Locked ……………………151 20180917 v1.00 PAXSTORE Customer Support PAXSTORE-support@pax.us (877) 859-0099 www.pax.us… -
Page 7
USER MANUAL V1.0 APPENDIX B. ERROR CODES ……………………… 152 PAXSTORE Customer Support 20180917 v1.00 PAXSTORE-support@pax.us (877) 859-0099 www.pax.us… -
Page 9: Introduction
USER MANUAL V1.0 1 Introduction This user manual provides a description of the S920 mobile point of sale terminal and its transaction functions. 1.1 Purpose This user manual describes transaction functions for the retail market. If you have a custom application, perform any modifications to your application in BroadPOS, or manually modify terminal settings, some of the options and screens as described in the manual may be different.
-
Page 10: Pax S920 Terminal Overview
USER MANUAL V1.0 2 PAX S920 Terminal Overview The S920 is a mobile point of sale terminal with wireless connectivity options including 4G LTE, 3g (WCDMA), WiFi and Bluetooth. The terminal accepts contactless, chip, and magstripe transactions. 2.1 Key Definitions The following table provides a brief description of the keys on the S920 keypad.
-
Page 11: Idle Screen
The status indicators located at the top of the terminal screen provide a visual indication of various terminal activities. The icons change color from gray to blue when that function is active. 20180917 v1.00 PAXSTORE Customer Support PAXSTORE-support@pax.us (877) 859-0099 www.pax.us…
-
Page 12
Displays the level remaining for the internal battery or indicates the battery is charging. Scroll up available Indicates additional content available above the screen currently viewed. Scroll down available Indicates additional content available below the screen currently viewed. 20180917 v1.00 PAXSTORE Customer Support PAXSTORE-support@pax.us (877) 859-0099 www.pax.us… -
Page 13: Loading An Application And Accessing Manual Settings
Quite often, the only steps you need to take to download an application are to ensure that the terminal is connected to the network and that power is supplied to the terminal. However, the S920 terminal should already be configured for the business upon arrival.
-
Page 14: Accessing Menu Options After Downloading An Application
2. At the Self-Test screen, press the number 2 key. 3. The Main Menu displays. Navigate through the options and make changes as needed. NOTE System Config requires that you input the Main Menu password before changing any parameters. 20180917 v1.00 PAXSTORE Customer Support PAXSTORE-support@pax.us (877) 859-0099 www.pax.us…
-
Page 15: Retail Environment Manual Settings
This section describes terminal options that you can set manually in the retail environment. However, PAX recommends that changes to terminal options be made by your administrator in BroadPOS and downloaded in the application. Any changes made manually are overwritten by a BroadPOS update or download.
-
Page 16: System Configuration
Use the Power Saving option to set the screen saver, sleep time, and sleep delay. AutoUDiskLoad Use the AutoUDiskLoad option to enable or disable auto-loading from an inserted USB flash drive. 20180917 v1.00 PAXSTORE Customer Support PAXSTORE-support@pax.us (877) 859-0099 www.pax.us…
-
Page 17: System Setting
USER MANUAL V1.0 System Setting Select the System Setting option to view the following options: • Date&Time • Language • UI Layout • Password Date&Time Set the date and time for the terminal. 20180917 v1.00 PAXSTORE Customer Support PAXSTORE-support@pax.us (877) 859-0099 www.pax.us…
-
Page 18
USER MANUAL V1.0 4.2.1.1.1 Date Set the terminal date. 4.2.1.1.2 Time Set the terminal time. 20180917 v1.00 PAXSTORE Customer Support PAXSTORE-support@pax.us (877) 859-0099 www.pax.us… -
Page 19
System Language Set the language for the terminal. The asterisk (*) indicates the current setting. UI Layout Set the color scheme for the terminal. The asterisk (*) indicates the current setting. 20180917 v1.00 PAXSTORE Customer Support PAXSTORE-support@pax.us (877) 859-0099 www.pax.us… -
Page 20
USER MANUAL V1.0 Password Set the Main Menu password. Enter the current case sensitive password, then a new case sensitive password. Re-enter the new password. If the passwords match, the password is changed. 20180917 v1.00 PAXSTORE Customer Support PAXSTORE-support@pax.us (877) 859-0099 www.pax.us… -
Page 21: Media
Media Select the Media option to view the following options: • Brightness • Keytone • Volume • Key Backlight Brightness Set the brightness of the terminal screen. Max value is 10. 20180917 v1.00 PAXSTORE Customer Support PAXSTORE-support@pax.us (877) 859-0099 www.pax.us…
-
Page 22
Enable or disable if the terminal beeps after a key is pressed. The asterisk (*) indicates the current setting. Volume Set the volume of the terminal keytone. Max value is 10. 20180917 v1.00 PAXSTORE Customer Support PAXSTORE-support@pax.us (877) 859-0099 www.pax.us… -
Page 23
USER MANUAL V1.0 Key Backlight Enable or disable if the terminal keys light up after pressed. The asterisk (*) indicates the current setting. 20180917 v1.00 PAXSTORE Customer Support PAXSTORE-support@pax.us (877) 859-0099 www.pax.us… -
Page 24: Wireless
Select the Wireless option to view the following options: • Switch • • SIM Card Pwd Switch Enable or disable the GPRS module. After enabling it, the mobile wireless signal strength shows. 20180917 v1.00 PAXSTORE Customer Support PAXSTORE-support@pax.us (877) 859-0099 www.pax.us…
-
Page 25
USER MANUAL V1.0 Enter the APN, APN username, and APN password. This setting takes effect after rebooting the terminal. 20180917 v1.00 PAXSTORE Customer Support PAXSTORE-support@pax.us (877) 859-0099 www.pax.us… -
Page 26: Wifi
USER MANUAL V1.0 SIM Card Password Set the password for the SIM card. WiFi Select the WiFi option to view the following options: • AutoSet • Manual Set • Auto Connect 20180917 v1.00 PAXSTORE Customer Support PAXSTORE-support@pax.us (877) 859-0099 www.pax.us…
-
Page 27
WiFi signals. After selecting the SSID, enter the network password. If the password is accepted, the terminal connects to the network and prompts for the IP type. Select if the IP changes (DCHP) or always remains the same (Static). 20180917 v1.00 PAXSTORE Customer Support PAXSTORE-support@pax.us (877) 859-0099 www.pax.us… -
Page 28
USER MANUAL V1.0 If DCHP is selected, the terminal acquires the IP address. The terminal displays the IP information. 20180917 v1.00 PAXSTORE Customer Support PAXSTORE-support@pax.us (877) 859-0099 www.pax.us… -
Page 29
If Static is selected, enter the IP address, netmask address, gateway address, and DNS server address. The input format is XXX.XXX.XXX.XXX. The terminal displays the IP information. Press the red CANCEL key to start exiting the menus. 20180917 v1.00 PAXSTORE Customer Support PAXSTORE-support@pax.us (877) 859-0099 www.pax.us… -
Page 30
USER MANUAL V1.0 20180917 v1.00 PAXSTORE Customer Support PAXSTORE-support@pax.us (877) 859-0099 www.pax.us… -
Page 31
Selecting the Manual Set option requires all network information to be entered manually. The format is alphanumeric. Enter the ESSID. If needed, enter the specific BSSID. Select the encryption type for the network and then the encryption protocol. 20180917 v1.00 PAXSTORE Customer Support PAXSTORE-support@pax.us (877) 859-0099 www.pax.us… -
Page 32
Enter the network password. If the password is accepted, the terminal connects to the network. Select if the IP changes (DCHP) or always remains the same (Static). If DCHP is selected, the terminal acquires the IP address. The terminal displays the IP information. 20180917 v1.00 PAXSTORE Customer Support PAXSTORE-support@pax.us (877) 859-0099 www.pax.us… -
Page 33
If Static is selected, enter the IP address, netmask address, gateway address, and DNS server address. The input format is XXX.XXX.XXX.XXX. The terminal displays the IP information. Press the red CANCEL key to start exiting the menus. 20180917 v1.00 PAXSTORE Customer Support PAXSTORE-support@pax.us (877) 859-0099 www.pax.us… -
Page 34
USER MANUAL V1.0 20180917 v1.00 PAXSTORE Customer Support PAXSTORE-support@pax.us (877) 859-0099 www.pax.us… -
Page 35
USER MANUAL V1.0 Auto Connect Enable or disable having the terminal automatically connecting to the WiFi network when in range. 20180917 v1.00 PAXSTORE Customer Support PAXSTORE-support@pax.us (877) 859-0099 www.pax.us… -
Page 36: Xcb Service
Enable or disable the XCB client. To turn on, select to connect to the client using USB or Network. The asterisk (*) indicates the current setting. If the service is closed, no asterisk is displayed. Reset Configuration Select the Reset Config option to return the terminal to its default settings. 20180917 v1.00 PAXSTORE Customer Support PAXSTORE-support@pax.us (877) 859-0099 www.pax.us…
-
Page 37: Remote Load
Save Log Enable or disable having the terminal save logs from the LogCat tool. The asterisk (*) indicates the current setting. 20180917 v1.00 PAXSTORE Customer Support PAXSTORE-support@pax.us (877) 859-0099 www.pax.us…
-
Page 38: Power Saving
Select the Power Saving option to view the following options: • Screen Saver • Sleep Time • Sleep Delay Screen Saver Set the period of inactivity to wait before the terminal screen dims. 20180917 v1.00 PAXSTORE Customer Support PAXSTORE-support@pax.us (877) 859-0099 www.pax.us…
-
Page 39
Sleep Time Set the period of inactivity to wait before the terminal screen goes directly to sleep. Sleep Delay Set the period of inactivity to wait before entering the sleep state. 20180917 v1.00 PAXSTORE Customer Support PAXSTORE-support@pax.us (877) 859-0099 www.pax.us… -
Page 40: Auto U-Disk Load
USER MANUAL V1.0 Auto U-Disk Load Enable or disable having the terminal automatically download files from an inserted USB flash drive. The asterisk (*) indicates the current setting. 20180917 v1.00 PAXSTORE Customer Support PAXSTORE-support@pax.us (877) 859-0099 www.pax.us…
-
Page 41: Module Test
USER MANUAL V1.0 4.3 Module Test Select the Module Test option to view the following options: • Card Readers • Communication • User Interface • Battery • App List 20180917 v1.00 PAXSTORE Customer Support PAXSTORE-support@pax.us (877) 859-0099 www.pax.us…
-
Page 42: Card Readers
Insert the user card or SAM card, also referred to as a SIM card, to test the chip card reader. If the card is already inserted, the terminal detects the card automatically. 20180917 v1.00 PAXSTORE Customer Support PAXSTORE-support@pax.us (877) 859-0099 www.pax.us…
-
Page 43: Communication
Tap the card to test the contactless card reader for the specified type of card. Communication Test the wireless network detection. Enter a wireless access point, its username, its password, the destination IP, and the amount of time to attempt connecting before timing out. 20180917 v1.00 PAXSTORE Customer Support PAXSTORE-support@pax.us (877) 859-0099 www.pax.us…
-
Page 44: User Interface
Press a key to test the keyboard. The pressed key displays onscreen. Press the number 1 key to exit the test. Speaker Plays a tone to test the speaker. Battery Displays the current battery life. 20180917 v1.00 PAXSTORE Customer Support PAXSTORE-support@pax.us (877) 859-0099 www.pax.us…
-
Page 45: App List
App List Displays the BIN and version for the current app. 4.4 U-Disk Load Select the U-Disk Load option to install application parameters, OS firmware, and upgrades from a USB flash drive. 20180917 v1.00 PAXSTORE Customer Support PAXSTORE-support@pax.us (877) 859-0099 www.pax.us…
-
Page 46: Terminal Information
Select the Terminal Info option to display the software and hardware information for the terminal. A QR code displays that contains all the terminal information. Press the green ENTER key to view the terminal information across ten screens. 20180917 v1.00 PAXSTORE Customer Support PAXSTORE-support@pax.us (877) 859-0099 www.pax.us…
-
Page 47
USER MANUAL V1.0 20180917 v1.00 PAXSTORE Customer Support PAXSTORE-support@pax.us (877) 859-0099 www.pax.us… -
Page 48: System Report
USER MANUAL V1.0 4.6 System Report Select the System Report option and the three options display. Selecting one of the options exports the related information for the application to the USB flash drive. 20180917 v1.00 PAXSTORE Customer Support PAXSTORE-support@pax.us (877) 859-0099 www.pax.us…
-
Page 49: Ped
Before performing a remote key injection, the terminal must contain the necessary developer authentication and encryption certificates and the terminal serial number must be registered in the RKI server. Contact PAX customer support if the certificates are not present on the terminal or to register the serial number.
-
Page 50: Security Information
USER MANUAL V1.0 4.8 Security Information View the security information for the terminal across two screens. 20180917 v1.00 PAXSTORE Customer Support PAXSTORE-support@pax.us (877) 859-0099 www.pax.us…
-
Page 51: Retail Environment Manual Options
Use to print the Tip Report or set a specific Tip Report as the new default report. NOTE Numerous options require that you input the terminal password before changing any parameters. 20180917 v1.00 PAXSTORE Customer Support PAXSTORE-support@pax.us (877) 859-0099 www.pax.us…
-
Page 52: Report
5.3 Batch Select the Batch option, input the password, and the following screen displays with the Batch Close option. Batch Close closes the open batch at the host and triggers merchant funding. 20180917 v1.00 PAXSTORE Customer Support PAXSTORE-support@pax.us (877) 859-0099 www.pax.us…
-
Page 53: Review
Select the Review option, input the password, and the following screen displays with a total of five options. These options display the total dollar amount for each transaction type. Selecting an option, excluding TOTAL, provides a transaction list for that option. 20180917 v1.00 PAXSTORE Customer Support PAXSTORE-support@pax.us (877) 859-0099 www.pax.us…
-
Page 54: Find
The terminal prints a dummy receipt for the customer to write the tip and total amounts. A separate SALE transaction must be completed with the total sale amount (base amount and tip amount). 20180917 v1.00 PAXSTORE Customer Support PAXSTORE-support@pax.us (877) 859-0099 www.pax.us…
-
Page 55: Reprint
Any Receipt Use to print the merchant or customer copy of a specific transaction. Last Customer Receipt Select the Last Cust. Receipt option to automatically print the most recent customer receipt copy. 20180917 v1.00 PAXSTORE Customer Support PAXSTORE-support@pax.us (877) 859-0099 www.pax.us…
-
Page 56: Any Receipt
Selecting an option prompts for the transaction number. After locating the transaction, select to print the customer copy or the merchant copy. 20180917 v1.00 PAXSTORE Customer Support PAXSTORE-support@pax.us (877) 859-0099 www.pax.us…
-
Page 57: Void
After locating the transaction, press the green ENTER key to void it. Confirm the void by pressing the green ENTER key or press the red CANCEL key to cancel the void. 20180917 v1.00 PAXSTORE Customer Support PAXSTORE-support@pax.us (877) 859-0099 www.pax.us…
-
Page 58: Return
See Section 6.7.2 on page 129 for Gift Return. 5.10 Tip Report Select the Tip Report option and the following screen displays with a total of four options. These options allow the merchant to select the payment type. 20180917 v1.00 PAXSTORE Customer Support PAXSTORE-support@pax.us (877) 859-0099 www.pax.us…
-
Page 59
Press the green ENTER key to override the current default report option or the red CANCEL key to keep the current default report the same. The Tip Report prints automatically after pressing either key. 20180917 v1.00 PAXSTORE Customer Support PAXSTORE-support@pax.us (877) 859-0099 www.pax.us… -
Page 60: Retail Environment Transactions
6 Retail Environment Transactions This section describes the tasks required for processing transactions in the retail environment with the S920 terminal. As already stated, the screens and options described in this manual may be different than your application. The S920 terminal automatically performs a Health Report (Activate, Update, Download, etc.) when it first boots up (powered on) and at 24 hours intervals while running.
-
Page 61: Manually Inputting Card Number
Over the Phone Transaction 1. The merchant initiates the transaction using the S920 terminal and requests the credit card information from the cardholder. When you manually input the card number and expiration date, the terminal may prompt for Address Verification System (AVS) settings.
-
Page 62
3. The merchant enters the card verification, such as CVV2 or CVC2, and presses the green ENTER key. This is commonly a 3-digit code located on the back of the card; however, for American Express, this is a 4-digit code on the front of the card. 20180917 v1.00 PAXSTORE Customer Support PAXSTORE-support@pax.us (877) 859-0099 www.pax.us… -
Page 63
USER MANUAL V1.0 4. The merchant enters the address verification information and presses the green ENTER key. 5. The terminal proceeds through the rest of the prompts for the specific transaction. 20180917 v1.00 PAXSTORE Customer Support PAXSTORE-support@pax.us (877) 859-0099 www.pax.us… -
Page 64: Retail Credit Card Transactions
This section details retail credit card transaction types. Credit Sale Credit card sales allow the cardholder to charge an amount indicated by the merchant on credit. 1. The merchant initiates a credit SALE transaction using the S920 terminal. 2. The merchant enters the transaction amount. 20180917 v1.00 PAXSTORE Customer Support PAXSTORE-support@pax.us…
-
Page 65
3. The cardholder inserts, taps, or swipes the card. If necessary, the merchant may manually enter the card number. a. Tapping the card processes the transaction and proceeds to printing the receipt. 20180917 v1.00 PAXSTORE Customer Support PAXSTORE-support@pax.us (877) 859-0099 www.pax.us… -
Page 66
Swiping the card prompts the cardholder to provide a signature before printing the receipt. The merchant may press the Cancel button to require a physical signature on the receipt instead. d. See Manually Inputting Card Number on page 53 for the manual entry prompts. 20180917 v1.00 PAXSTORE Customer Support PAXSTORE-support@pax.us (877) 859-0099 www.pax.us… -
Page 67
Then the terminal prompts the merchant to tear the receipt before printing the customer copy. 5. If the cardholder inserted their card, the terminal prompts the cardholder to remove the card. 20180917 v1.00 PAXSTORE Customer Support PAXSTORE-support@pax.us (877) 859-0099 www.pax.us… -
Page 68: Credit Forced
FORCED sale must be performed to complete the transaction and receive payment. A FORCED sale overrides any denial and allows the sale to go through. 1. The merchant initiates a credit FORCED transaction using the S920 terminal. 20180917 v1.00 PAXSTORE Customer Support PAXSTORE-support@pax.us…
-
Page 69
USER MANUAL V1.0 2. The merchant enters the transaction amount. 3. The cardholder taps or swipes the card. If necessary, the merchant may manually enter the card number. 20180917 v1.00 PAXSTORE Customer Support PAXSTORE-support@pax.us (877) 859-0099 www.pax.us… -
Page 70
The merchant may press the Cancel button to require a physical signature on the receipt instead. c. See Manually Inputting Card Number on page 53 for the manual entry prompts. 20180917 v1.00 PAXSTORE Customer Support PAXSTORE-support@pax.us (877) 859-0099 www.pax.us… -
Page 71
5. The terminal contacts the Host Processor for an approval and if it is approved, prints the merchant copy of the receipt. Then the terminal prompts the merchant to tear the receipt before printing the customer copy. 20180917 v1.00 PAXSTORE Customer Support PAXSTORE-support@pax.us (877) 859-0099 www.pax.us… -
Page 72: Credit Return
A credit RETURN is the reversal of an approved and settled transaction. A RETURN issues credit to the customer’s credit card. If the transaction has not already been settled, a VOID should be processed. 1. The merchant initiates a credit RETURN transaction using the S920 terminal. 20180917 v1.00 PAXSTORE Customer Support PAXSTORE-support@pax.us…
-
Page 73
USER MANUAL V1.0 2. The merchant enters the transaction amount. 3. The cardholder inserts, taps, or swipes the card. If necessary, the merchant may manually enter the card number. 20180917 v1.00 PAXSTORE Customer Support PAXSTORE-support@pax.us (877) 859-0099 www.pax.us… -
Page 74
Then the terminal requests the cardholder to provide a signature before printing the receipt. The merchant may press the Cancel button to require a physical signature on the receipt instead. 20180917 v1.00 PAXSTORE Customer Support PAXSTORE-support@pax.us (877) 859-0099 www.pax.us… -
Page 75
4. The terminal contacts the Host Processor for an approval and if it is approved, prints the merchant copy of the receipt. Then the terminal prompts the merchant to tear the receipt before printing the customer copy. 20180917 v1.00 PAXSTORE Customer Support PAXSTORE-support@pax.us (877) 859-0099 www.pax.us… -
Page 76: Credit Auth
(settlement) or the transaction hold expires. The AUTH transaction does NOT charge the credit card but reserves the requested amount and places a hold on the cardholder’s option-to-buy. 20180917 v1.00 PAXSTORE Customer Support PAXSTORE-support@pax.us (877) 859-0099 www.pax.us…
-
Page 77
The cardholder provides their credit card information to the hotel and the hotel performs a credit pre auth using the S920 terminal. 1. The merchant initiates a credit AUTH transaction using the S920 terminal. -
Page 78
3. The cardholder inserts, taps, or swipes the card. If necessary, the merchant may manually enter the card number. a. Tapping the card processes the transaction and proceeds to printing the receipt. 20180917 v1.00 PAXSTORE Customer Support PAXSTORE-support@pax.us (877) 859-0099 www.pax.us… -
Page 79
Swiping the card prompts the cardholder to provide a signature before printing the receipt. The merchant may press the Cancel button to require a physical signature on the receipt instead. d. See Manually Inputting Card Number on page 53 for the manual entry prompts. 20180917 v1.00 PAXSTORE Customer Support PAXSTORE-support@pax.us (877) 859-0099 www.pax.us… -
Page 80
Then the terminal prompts the merchant to tear the receipt before printing the customer copy. 5. If the cardholder inserted their card, the terminal prompts the cardholder to remove the card. 20180917 v1.00 PAXSTORE Customer Support PAXSTORE-support@pax.us (877) 859-0099 www.pax.us… -
Page 81: Credit Postauth
Credit PostAuth When authorization has previously been obtained via an AUTH transaction, a POSTAUTH can be performed to complete the transaction and receive payment. 1. The merchant initiates a credit POSTAUTH transaction using the S920 terminal. 20180917 v1.00 PAXSTORE Customer Support PAXSTORE-support@pax.us…
-
Page 82
3. The merchant presses the green ENTER key to confirm the transaction is correct. Or the merchant may use the left and right arrow buttons to scroll through the available AUTH transactions. Pressing the X button or red CANCEL key exits the POSTAUTH transaction. 20180917 v1.00 PAXSTORE Customer Support PAXSTORE-support@pax.us (877) 859-0099 www.pax.us… -
Page 83
5. The cardholder taps or swipes the card. If necessary, the merchant may manually enter the card number. If the merchant attempts to use a different card from the original AUTH transaction, an ACCOUNT MISMATCH error may occur. 20180917 v1.00 PAXSTORE Customer Support PAXSTORE-support@pax.us (877) 859-0099 www.pax.us… -
Page 84
Swiping the card prompts the cardholder to provide a signature before printing the receipt. The merchant may press the Cancel button to require a physical signature on the receipt instead. c. See Manually Inputting Card Number on page 53 for the manual entry prompts. 20180917 v1.00 PAXSTORE Customer Support PAXSTORE-support@pax.us (877) 859-0099 www.pax.us… -
Page 85
Then the terminal prompts the merchant to tear the receipt before printing the customer copy. After the transaction completes, the terminal may display the approval code on screen or return directly to the Idle Screen. 20180917 v1.00 PAXSTORE Customer Support PAXSTORE-support@pax.us (877) 859-0099 www.pax.us… -
Page 86: Credit Void
The merchant may void a SALE, RETURN, AUTH, or FORCED transaction. A VOID does not remove the hold on the customer’s open-to-buy. The terminal uses the same VOID prompts, except when performing a V/AUTH. 1. The merchant initiates a credit VOID transaction, indicated by V/ in the menu, using the S920 terminal. 20180917 v1.00 PAXSTORE Customer Support PAXSTORE-support@pax.us…
-
Page 87
Pressing the X button or red CANCEL key exits the VOID transaction. 20180917 v1.00 PAXSTORE Customer Support PAXSTORE-support@pax.us (877) 859-0099 www.pax.us… -
Page 88
5. The terminal nullifies the transaction in the batch and prints the merchant copy of the receipt. Then the terminal prompts the merchant to tear the receipt before printing the customer copy. 20180917 v1.00 PAXSTORE Customer Support PAXSTORE-support@pax.us (877) 859-0099 www.pax.us… -
Page 89
An AUTH sale can be VOIDED if the transaction is in the current open batch. A VOID/AUTH does remove any hold on the customer’s open-to-buy. A POSTAUTH transaction cannot be voided. 1. The merchant initiates a credit VOID/AUTH transaction using the S920 terminal. 20180917 v1.00 PAXSTORE Customer Support PAXSTORE-support@pax.us… -
Page 90
3. The merchant presses the green ENTER key to confirm the transaction is correct. Or the merchant may use the left and right arrow buttons to scroll through the available AUTH transactions. Pressing the X button or red CANCEL key exits the VOID transaction. 20180917 v1.00 PAXSTORE Customer Support PAXSTORE-support@pax.us (877) 859-0099 www.pax.us… -
Page 91
Tapping the card processes the transaction and requests the cardholder to provide a signature before printing the receipt. The merchant may press the Cancel button to require a physical signature on the receipt instead. 20180917 v1.00 PAXSTORE Customer Support PAXSTORE-support@pax.us (877) 859-0099 www.pax.us… -
Page 92
5. The terminal nullifies the transaction in the batch and prints the merchant copy of the receipt. Then the terminal prompts the merchant to tear the receipt before printing the customer copy. 20180917 v1.00 PAXSTORE Customer Support PAXSTORE-support@pax.us (877) 859-0099 www.pax.us… -
Page 93: Credit Balance Inquiry
After the transaction completes, the terminal returns to the Idle Screen. Credit Balance Inquiry A balance inquiry checks if the customer’s card has enough funds to cover the purchase. 1. The merchant initiates a credit BALANCE transaction using the S920 terminal. 20180917 v1.00 PAXSTORE Customer Support PAXSTORE-support@pax.us…
-
Page 94
2. The cardholder taps or swipes the card. If necessary, the merchant may manually enter the card number. a. See Manually Inputting Card Number on page 53 for the manual entry prompts. 3. The terminal prints the customer copy. 20180917 v1.00 PAXSTORE Customer Support PAXSTORE-support@pax.us (877) 859-0099 www.pax.us… -
Page 95: Credit Tokenize
Tokenization substitutes the sensitive card data with a generated number called a token. The token helps secure the cardholder data from potential hackers. 1. The merchant initiates a credit BALANCE transaction using the S920 terminal. 20180917 v1.00 PAXSTORE Customer Support PAXSTORE-support@pax.us…
-
Page 96
2. The cardholder taps or swipes the card. If necessary, the merchant may manually enter the card number. b. See Manually Inputting Card Number on page 53 for the manual entry prompts. 3. The terminal prints the customer copy. 20180917 v1.00 PAXSTORE Customer Support PAXSTORE-support@pax.us (877) 859-0099 www.pax.us… -
Page 97
USER MANUAL V1.0 After the transaction completes, the terminal returns to the Idle Screen. 20180917 v1.00 PAXSTORE Customer Support PAXSTORE-support@pax.us (877) 859-0099 www.pax.us… -
Page 98: Debit Transactions
Debit card sales immediately withdraw funds from the cardholder’s bank account. A debit card sale must be completed by the customer in person. Manually entered debit transactions are not allowed. 1. The merchant initiates a debit SALE transaction using the S920 terminal. 20180917 v1.00 PAXSTORE Customer Support PAXSTORE-support@pax.us…
-
Page 99
USER MANUAL V1.0 2. The merchant enters the transaction amount. 3. The cardholder inserts, taps, or swipes the card. 20180917 v1.00 PAXSTORE Customer Support PAXSTORE-support@pax.us (877) 859-0099 www.pax.us… -
Page 100
Then the terminal requests the cardholder to enter their PIN number, up to 12 digits, or provide a signature before printing the receipt. The merchant may press the Cancel button to require a physical signature on the receipt instead. 20180917 v1.00 PAXSTORE Customer Support PAXSTORE-support@pax.us (877) 859-0099 www.pax.us… -
Page 101
Swiping the card prompts the cardholder to enter their PIN number, up to 12 digits, or provide a signature before printing the receipt. The merchant may press the Cancel button to require a physical signature on the receipt instead. 20180917 v1.00 PAXSTORE Customer Support PAXSTORE-support@pax.us (877) 859-0099 www.pax.us… -
Page 102
Then the terminal prompts the merchant to tear the receipt before printing the customer copy. 5. If the cardholder inserted their card, the terminal prompts the cardholder to remove the card. 20180917 v1.00 PAXSTORE Customer Support PAXSTORE-support@pax.us (877) 859-0099 www.pax.us… -
Page 103: Debit Return
If the transaction has not already been settled, a VOID should be processed. Just like a debit SALE, the card must be physically present to perform a Debit RETURN. 1. The merchant initiates a debit RETURN transaction using the S920 terminal. 20180917 v1.00 PAXSTORE Customer Support PAXSTORE-support@pax.us…
-
Page 104
USER MANUAL V1.0 2. The merchant enters the transaction amount. 3. The cardholder inserts, taps, or swipes the card. 20180917 v1.00 PAXSTORE Customer Support PAXSTORE-support@pax.us (877) 859-0099 www.pax.us… -
Page 105
Then the terminal requests the cardholder to enter their PIN number, up to 12 digits, or provide a signature before printing the receipt. The merchant may press the Cancel button to require a physical signature on the receipt instead. 20180917 v1.00 PAXSTORE Customer Support PAXSTORE-support@pax.us (877) 859-0099 www.pax.us… -
Page 106
Swiping the card prompts the cardholder to enter their PIN number, up to 12 digits, or provide a signature before printing the receipt. The merchant may press the Cancel button to require a physical signature on the receipt instead. 20180917 v1.00 PAXSTORE Customer Support PAXSTORE-support@pax.us (877) 859-0099 www.pax.us… -
Page 107
Then the terminal prompts the merchant to tear the receipt before printing the customer copy. 5. If the cardholder inserted their card, the terminal prompts the cardholder to remove the card. 20180917 v1.00 PAXSTORE Customer Support PAXSTORE-support@pax.us (877) 859-0099 www.pax.us… -
Page 108: Debit Balance Inquiry
After the transaction completes, the terminal returns to the Idle Screen. Debit Balance Inquiry A balance inquiry checks if the customer’s card has enough funds to cover the purchase. 1. The merchant initiates a debit BALANCE transaction using the S920 terminal. 20180917 v1.00 PAXSTORE Customer Support PAXSTORE-support@pax.us…
-
Page 109
2. The cardholder taps or swipes the card. If necessary, the merchant may manually enter the card number. a. Tapping or swiping the card processes the transaction and requests the cardholder to enter their PIN number, up to 12 digits, before printing the receipt. 20180917 v1.00 PAXSTORE Customer Support PAXSTORE-support@pax.us (877) 859-0099 www.pax.us… -
Page 110
USER MANUAL V1.0 3. The terminal prints the customer copy. After the transaction completes, the terminal returns to the Idle Screen. 20180917 v1.00 PAXSTORE Customer Support PAXSTORE-support@pax.us (877) 859-0099 www.pax.us… -
Page 111: Debit Void
The merchant may void a SALE or RETURN transaction in the current open batch. The VOID prompts are the same. 1. The merchant initiates a debit VOID transaction, indicated by V/ in the menu, using the S920 terminal.
-
Page 112
4. The terminal nullifies the transaction in the batch and prints the merchant copy of the receipt. Then the terminal prompts the merchant to tear the receipt before printing the customer copy. 20180917 v1.00 PAXSTORE Customer Support PAXSTORE-support@pax.us (877) 859-0099 www.pax.us… -
Page 113
USER MANUAL V1.0 After the transaction completes, the terminal returns to the Idle Screen. 20180917 v1.00 PAXSTORE Customer Support PAXSTORE-support@pax.us (877) 859-0099 www.pax.us… -
Page 114: Electronic Benefits Transfer (Ebt) Transactions
EBT Food Stamp or Cash Benefit SALE transactions can only be swiped or manually entered. An EBT Voucher SALE transaction can only be manually entered. 1. The merchant initiates an EBT SALE transaction using the S920 terminal. 20180917 v1.00 PAXSTORE Customer Support PAXSTORE-support@pax.us…
-
Page 115
USER MANUAL V1.0 2. The merchant enters the transaction amount. 3. The merchant selects the type of EBT payment. 20180917 v1.00 PAXSTORE Customer Support PAXSTORE-support@pax.us (877) 859-0099 www.pax.us… -
Page 116
Benefit transaction. For a Voucher transaction, the cardholder inputs the card number. a. Swiping the card prompts the cardholder to enter their PIN number, up to 12 digits, before the terminal prints the receipt. 20180917 v1.00 PAXSTORE Customer Support PAXSTORE-support@pax.us (877) 859-0099 www.pax.us… -
Page 117
ENTER key. Then the merchant enters the authorization number obtained from the voice approval and presses the green ENTER key to complete the transaction before the terminal prints the receipt. 20180917 v1.00 PAXSTORE Customer Support PAXSTORE-support@pax.us (877) 859-0099 www.pax.us… -
Page 118
Then the terminal prompts the merchant to tear the receipt before printing the customer copy. After the transaction completes, the terminal returns to the Idle Screen. 20180917 v1.00 PAXSTORE Customer Support PAXSTORE-support@pax.us (877) 859-0099 www.pax.us… -
Page 119: Ebt Return
EBT card. If the transaction has not already been settled, a VOID should be processed. EBT return is not available for Cash Benefit. 1. The merchant initiates an EBT RETURN transaction using the S920 terminal. 2. The merchant enters the transaction amount.
-
Page 120
3. The merchant selects the type of EBT payment. 4. The cardholder swipes the card or manually enters the card number for a Food Stamp transaction. For a Voucher transaction, the cardholder inputs the card number. 20180917 v1.00 PAXSTORE Customer Support PAXSTORE-support@pax.us (877) 859-0099 www.pax.us… -
Page 121
For Voucher SALE transactions, the merchant manually enters the EBT card number, up to 19 digits, from the voucher and press the green ENTER key. Then the merchant enters the card’s expiration date and presses the green ENTER key. 20180917 v1.00 PAXSTORE Customer Support PAXSTORE-support@pax.us (877) 859-0099 www.pax.us… -
Page 122
5. The terminal contacts the Host Processor for an approval and if it is approved, prints the merchant copy of the receipt. Then the terminal prompts the merchant to tear the receipt before printing the customer copy. 20180917 v1.00 PAXSTORE Customer Support PAXSTORE-support@pax.us (877) 859-0099 www.pax.us… -
Page 123: Ebt Withdrawal
EBT Withdrawal An EBT WITHDRAWAL transaction allows the EBT cardholder to withdraw cash from their account. EBT withdrawal is only available for Cash Benefit. 1. The merchant initiates an EBT WITHDRAWAL transaction using the S920 terminal. 20180917 v1.00 PAXSTORE Customer Support PAXSTORE-support@pax.us…
-
Page 124
USER MANUAL V1.0 2. The merchant enters the amount of cash the cardholder wants to withdraw. 3. The cardholder swipes the card or manually enters the card number for a Cash Benefit transaction. 20180917 v1.00 PAXSTORE Customer Support PAXSTORE-support@pax.us (877) 859-0099 www.pax.us… -
Page 125
Manually entering the EBT card number requires the merchant to enter the card number, up to 19 digits, and press the green ENTER key. Then the merchant enters the card’s expiration date and presses the green ENTER key. 20180917 v1.00 PAXSTORE Customer Support PAXSTORE-support@pax.us (877) 859-0099 www.pax.us… -
Page 126
4. The terminal contacts the Host Processor for an approval and if it is approved, prints the merchant copy of the receipt. Then the terminal prompts the merchant to tear the receipt before printing the customer copy. 20180917 v1.00 PAXSTORE Customer Support PAXSTORE-support@pax.us (877) 859-0099 www.pax.us… -
Page 127: Ebt Balance Inquiry
After the transaction completes, the terminal returns to the Idle Screen. EBT Balance Inquiry A balance inquiry checks if the customer’s card has enough funds to cover the purchase. 1. The merchant initiates an EBT BALANCE transaction using the S920 terminal. 20180917 v1.00 PAXSTORE Customer Support PAXSTORE-support@pax.us…
-
Page 128
2. The cardholder taps or swipes the card. If necessary, the merchant may manually enter the card number. a. Swiping the card processes the transaction and requests the cardholder to enter their PIN number, up to 12 digits, before printing the receipt. 20180917 v1.00 PAXSTORE Customer Support PAXSTORE-support@pax.us (877) 859-0099 www.pax.us… -
Page 129
19 digits, and press the green ENTER key. Then the merchant enters the card’s expiration date and presses the green ENTER key. c. After entering the card’s expiration date, the cardholder enters their PIN number, up to 12 digits, before the terminal prints the receipt. 20180917 v1.00 PAXSTORE Customer Support PAXSTORE-support@pax.us (877) 859-0099 www.pax.us… -
Page 130
USER MANUAL V1.0 3. The terminal prints the customer copy. After the transaction completes, the terminal returns to the Idle Screen. 20180917 v1.00 PAXSTORE Customer Support PAXSTORE-support@pax.us (877) 859-0099 www.pax.us… -
Page 131: Ebt Void
The merchant may void a SALE or RETURN transaction in the current open batch. The VOID prompts are the same. 1. The merchant initiates an EBT VOID transaction, indicated by V/ in the menu, using the S920 terminal.
-
Page 132
4. The terminal nullifies the transaction in the batch and prints the merchant copy of the receipt. Then the terminal prompts the merchant to tear the receipt before printing the customer copy. 20180917 v1.00 PAXSTORE Customer Support PAXSTORE-support@pax.us (877) 859-0099 www.pax.us… -
Page 133
USER MANUAL V1.0 After the transaction completes, the terminal returns to the Idle Screen. 20180917 v1.00 PAXSTORE Customer Support PAXSTORE-support@pax.us (877) 859-0099 www.pax.us… -
Page 134: Gift Transaction
They allow the customer to purchase items or services using the card as payment. Gift Sale Gift SALE transactions can only be swiped or manually entered. 1. The merchant initiates a gift SALE transaction using the S920 terminal. 20180917 v1.00 PAXSTORE Customer Support PAXSTORE-support@pax.us (877) 859-0099 www.pax.us…
-
Page 135
3. The cardholder swipes the card. If necessary, the merchant may manually enter the card number. a. Swiping the card prompts the terminal to print the receipt. b. See Manually Inputting Card Number on page 53 for the manual entry prompts. 20180917 v1.00 PAXSTORE Customer Support PAXSTORE-support@pax.us (877) 859-0099 www.pax.us… -
Page 136
Then the terminal prompts the merchant to tear the receipt before printing the customer copy. After the transaction completes, the terminal returns to the Idle Screen. 20180917 v1.00 PAXSTORE Customer Support PAXSTORE-support@pax.us (877) 859-0099 www.pax.us… -
Page 137: Gift Return
If the transaction has not already been settled, a VOID should be processed. 1. The merchant initiates a gift RETURN transaction using the S920 terminal. 2. The merchant enters the transaction amount. 20180917 v1.00 PAXSTORE Customer Support PAXSTORE-support@pax.us…
-
Page 138
4. The terminal contacts the Host Processor for an approval and if it is approved, prints the merchant copy of the receipt. Then the terminal prompts the merchant to tear the receipt before printing the customer copy. 20180917 v1.00 PAXSTORE Customer Support PAXSTORE-support@pax.us (877) 859-0099 www.pax.us… -
Page 139: Gift Add Value
After the transaction completes, the terminal returns to the Idle Screen. Gift Add Value The ADD transaction adds additional credit to the available balance of an active gift card. 1. The merchant initiates a gift ADD transaction using the S920 terminal. 20180917 v1.00 PAXSTORE Customer Support PAXSTORE-support@pax.us…
-
Page 140
3. The cardholder swipes the card. If necessary, the merchant may manually enter the card number. a. Swiping the card prompts the terminal to print the receipt. b. See Manually Inputting Card Number on page 53 for the manual entry prompts. 20180917 v1.00 PAXSTORE Customer Support PAXSTORE-support@pax.us (877) 859-0099 www.pax.us… -
Page 141
Then the terminal prompts the merchant to tear the receipt before printing the customer copy. After the transaction completes, the terminal returns to the Idle Screen. 20180917 v1.00 PAXSTORE Customer Support PAXSTORE-support@pax.us (877) 859-0099 www.pax.us… -
Page 142: Gift Activate
Gift Activate The ACTIVATE transaction adds value to a gift card for the first time. 1. The merchant initiates a gift ACTIVATE transaction using the S920 terminal. 2. The merchant enters the amount to load on the card. 20180917 v1.00 PAXSTORE Customer Support PAXSTORE-support@pax.us…
-
Page 143
4. The terminal contacts the Host Processor for an approval and if it is approved, prints the merchant copy of the receipt. Then the terminal prompts the merchant to tear the receipt before printing the customer copy. 20180917 v1.00 PAXSTORE Customer Support PAXSTORE-support@pax.us (877) 859-0099 www.pax.us… -
Page 144: Gift Unload
After the transaction completes, the terminal returns to the Idle Screen. Gift Unload A gift UNLOAD transaction allows the cardholder to remove the amount on the gift card to receive cash. 1. The merchant initiates a gift UNLOAD transaction using the S920 terminal. 20180917 v1.00 PAXSTORE Customer Support PAXSTORE-support@pax.us…
-
Page 145
3. The cardholder swipes the card. If necessary, the merchant may manually enter the card number. a. Swiping the card prompts the terminal to print the receipt. b. See Manually Inputting Card Number on page 53 for the manual entry prompts. 20180917 v1.00 PAXSTORE Customer Support PAXSTORE-support@pax.us (877) 859-0099 www.pax.us… -
Page 146
Then the terminal prompts the merchant to tear the receipt before printing the customer copy. After the transaction completes, the terminal returns to the Idle Screen. 20180917 v1.00 PAXSTORE Customer Support PAXSTORE-support@pax.us (877) 859-0099 www.pax.us… -
Page 147: Gift Balance Inquiry
A balance inquiry checks if the customer’s card has enough funds to cover the purchase. 1. The merchant initiates a gift BALANCE transaction using the S920 terminal. 2. The cardholder swipes the card. If necessary, the merchant may manually enter the card number.
-
Page 148
USER MANUAL V1.0 3. The terminal prints the customer copy. After the transaction completes, the terminal returns to the Idle Screen. 20180917 v1.00 PAXSTORE Customer Support PAXSTORE-support@pax.us (877) 859-0099 www.pax.us… -
Page 149: Gift Void
However, if the transaction has already been settled, a RETURN must be processed. The merchant may void a gift transaction in the current open batch. 1. The merchant initiates a gift VOID transaction using the S920 terminal. 2. The merchant enters the transaction number to void.
-
Page 150
4. The terminal nullifies the transaction in the batch and prints the merchant copy of the receipt. Then the terminal prompts the merchant to tear the receipt before printing the customer copy. 20180917 v1.00 PAXSTORE Customer Support PAXSTORE-support@pax.us (877) 859-0099 www.pax.us… -
Page 151: Gift Deactivate
A gift DEACTIVATE transaction renders the gift card unusable. This is commonly done to prevent unauthorized use, such as the card being lost or stolen. 1. The merchant initiates a gift DEACTIVATE transaction using the S920 terminal. 20180917 v1.00 PAXSTORE Customer Support PAXSTORE-support@pax.us…
-
Page 152
USER MANUAL V1.0 2. The terminal confirms the card deactivation. 3. The cardholder swipes the card. If necessary, the merchant may manually enter the card number. 20180917 v1.00 PAXSTORE Customer Support PAXSTORE-support@pax.us (877) 859-0099 www.pax.us… -
Page 153
Then the terminal prompts the merchant to tear the receipt before printing the customer copy. After the transaction completes, the terminal returns to the Idle Screen. 20180917 v1.00 PAXSTORE Customer Support PAXSTORE-support@pax.us (877) 859-0099 www.pax.us… -
Page 154: Gift Issue
USER MANUAL V1.0 Gift Issue The gift ISSUE transaction activates the card with the desired amount. 1. The merchant initiates a gift ISSUE transaction using the S920 terminal. 2. The merchant enters the amount to place on the new card. 20180917 v1.00 PAXSTORE Customer Support PAXSTORE-support@pax.us…
-
Page 155
4. The terminal contacts the Host Processor for an approval and if it is approved, prints the merchant copy of the receipt. Then the terminal prompts the merchant to tear the receipt before printing the customer copy. 20180917 v1.00 PAXSTORE Customer Support PAXSTORE-support@pax.us (877) 859-0099 www.pax.us… -
Page 156: Gift Cashout
A gift CASHOUT transaction allows the cardholder to obtain cash. This is commonly used to obtain all the stored value of a gift card. 1. The merchant initiates a gift CASHOUT transaction using the S920 terminal. 20180917 v1.00 PAXSTORE Customer Support PAXSTORE-support@pax.us…
-
Page 157
3. The cardholder swipes the card. If necessary, the merchant may manually enter the card number. a. Swiping the card prompts the terminal to print the receipt. b. See Manually Inputting Card Number on page 53 for the manual entry prompts. 20180917 v1.00 PAXSTORE Customer Support PAXSTORE-support@pax.us (877) 859-0099 www.pax.us… -
Page 158
Then the terminal prompts the merchant to tear the receipt before printing the customer copy. After the transaction completes, the terminal returns to the Idle Screen. 20180917 v1.00 PAXSTORE Customer Support PAXSTORE-support@pax.us (877) 859-0099 www.pax.us… -
Page 159: Appendix A. Troubleshooting
USER MANUAL V1.0 Appendix A. Troubleshooting This section briefly describes how to trouble shoot issues that may arise during normal operation of the S920 Terminal. General Troubleshooting Review the following sections for possible issues and causes before requesting service for the terminal.
-
Page 160
USER MANUAL V1.0 Appendix B. Error Codes This section briefly describes the error codes that may arise during normal operation of the S920 Terminal. Message Comment Code Timeout No activity with the transaction. If Idle too long the transaction times out. -
Page 161
Secure Card Error The secure card input times have been exceeded. Invoice Can Not Be Do not enter 0 for invoice number. Zero NONE Deprecated Split Tender Not Not Used Supported 20180917 v1.00 PAXSTORE Customer Support PAXSTORE-support@pax.us (877) 859-0099 www.pax.us… -
Page 162
Current time is not in the allowed time for Offline Mode Store & Forward. Out of SAF count Store & Forward transaction count exceeded limit maximum limit. Please close store & forward mode or upload all SAF transactions. 20180917 v1.00 PAXSTORE Customer Support PAXSTORE-support@pax.us (877) 859-0099 www.pax.us… -
Page 163
USER MANUAL V1.0 This page intentionally left blank 20180917 v1.00 PAXSTORE Customer Support PAXSTORE-support@pax.us (877) 859-0099 www.pax.us…
S920
Мобильный платежный терминал
ПАКС ТЕХНОЛОДЖИ ЛИМИТЕД

Внешний вид Описание


установка
Сэм/SIM/SD-карта:
а) С помощью монеты или отвертки снимите крышку батарейного отсека (в нижней части терминала).
б) Вставьте карту SAM/SIM/SD в соответствующий слот для карты.
Замена батареи:
а) С помощью монеты или отвертки снимите крышку батарейного отсека (в нижней части терминала).
б) Извлеките старую батарею: удерживайте батарею и вытащите ее.
c) Замените батарею новой: возьмитесь за разъем батареи и вставьте его в розетку, затем совместите батарею в батарейных отсеках.
инструкции
- Включение / выключение питания
Включение питания: нажмите кнопку ВКЛ/ВЫКЛ в течение двух секунд, пока не загорится подсветка ЖК-дисплея и терминал не включится.
Выключение питания: нажмите кнопку ВКЛ/ВЫКЛ в течение двух секунд, пока ЖК-дисплей не перестанет отображаться, и терминал успешно выключится.
 - Карта с магнитной полосой
Поднесите магнитную карту стороной с магнитной полосой к внутренней части устройства, проведите картой с постоянной скоростью через слот магнитного считывателя.
(Поддержка двунаправленного пролистывания) - IC Card
Поместите чип карты IC стороной вверх, вставьте слот для карты IC и опустите его вниз. - Бесконтактные карты
Поместите бесконтактную карту в сенсорную зону над ЖК-дисплеем. - Инструкции по эксплуатации измельчения бумаги
Сделайте бумагу под углом 45 градусов прямо к ножу для бумаги и измельчите бумагу.
Характеристики
По умолчанию
ЦП: 32-разрядный, ARM11
Память: 128 МБ оперативной памяти DDR, 256 МБ флэш-памяти NAND
Дисплей: 3.5-дюймовый цветной TFT LCD с разрешением 240×320 пикселей, светодиодная подсветка, сенсорный экран
Клавиатура: 10 буквенно-цифровых клавиш, 5 функциональных клавиш
Считыватель магнитных карт: дорожка 1/2/3, двунаправленное движение
Считыватель карт IC: 1 пользовательская карта (EMV2000)
Слоты SAM: 2 слота SAM (ISO7816)
Связь: LTE GSM
Периферийные порты: 1 MicroUSB
Принтер: термопринтер; Скорость: 20 линий/сек; Ширина бумаги: 58 мм
Внешний диаметр рулона бумаги: 25 мм
Источник питания: Вход: 100 ~ 240 В переменного тока, 50 Гц / 60 Гц, 0.2 А макс.
Выход: 5.0 В постоянного тока, 1 А
Аккумулятор: литий-ионный аккумулятор, 3350 мАч, 3.6 В
Рабочая среда: Температура: 0 ℃~50 ℃ (32 ℉~120 ℉)
Относительная влажность: 10%~93% (без конденсации)
Условия хранения: Температура: -20℃ ~ 70℃ (-4℉~150℉)
Относительная влажность: 5% ~ 95% (без конденсации)
Размеры: 165 мм 78 мм 61 мм (ДШВ)
Вес: 330g
Дополнительно: WiFi, BT, слоты для одной SIM-карты
Встроенный модуль бесконтактного считывателя карт.(ISO/IEC 14443, тип A/B, Mifare ![]() /Felica, область распознавания карты: ЖК-экран)
/Felica, область распознавания карты: ЖК-экран)
Советы по установке и использованию
- Избегайте попадания терминала на прямой солнечный свет, высокую температуру, влажную или пыльную среду.
- Запретить непрофессионалу ремонтировать терминал.
- Перед тем, как вставить карту, проверьте внутреннюю часть и вокруг гнезда для карты IC. при обнаружении подозрительных объектов необходимо сообщить о них соответствующему администратору.
Советы по использованию литий-ионных аккумуляторов
- Заряжайте зарядным устройством PAX в помещении, в прохладном и хорошо вентилируемом месте;
- Не отделяйте батарею;
- Не замыкайте батарею накоротко;
- Держите батарею вдали от солнечных лучей, смога и пыли;
- Не сжимайте, не пробивайте аккумулятор, не помещайте его в жидкость или рядом с огнем;
- Держите подальше от окружающей среды, которая слишком горячая, слишком холодная, damp, и взрывоопасные;
- Однажды произошел сбой, такой как нагрев или искажение, или он был сломан. Пожалуйста, замените новую батарею;
- Замените новую батарею, если она не может удовлетворить ваши требования;
- Замените новую батарею, если она используется более двух лет. Опасность взрыва при замене батареи неправильным типом» или эквивалентным текстом.
Правила FCC:
Данное устройство соответствует части 15 Правил. Эксплуатация осуществляется при соблюдении следующих двух условий: (1) это устройство не должно создавать вредных помех, и (2) это устройство должно принимать любые получаемые помехи, включая помехи, которые могут вызвать нежелательную работу.
Это устройство было протестировано и признано соответствующим ограничениям для цифровых устройств класса B в соответствии с частью 15 правил FCC. Эти ограничения предназначены для обеспечения разумной защиты от вредных помех при установке в жилых помещениях. Это оборудование генерирует, использует и может излучать радиочастотную энергию и, если оно не установлено и не используется в соответствии с инструкциями, может создавать вредные помехи для радиосвязи. Тем не менее, нет гарантии, что помехи не возникнут в конкретной установке. Если это оборудование создает вредные помехи для радио- или телевизионного приема, что можно определить, выключив и включив оборудование, пользователю рекомендуется попытаться устранить помехи. одной или несколькими из следующих мер:
-Переориентировать или переместить приемную антенну.
-Увеличьте расстояние между оборудованием и приемником.
-Подключите оборудование к розетке в цепи, отличной от той, к которой подключен приемник.
-Советуйтесь с продавцом или опытным радио / телевизионным техником.
Предупреждение: Изменения или модификации, не одобренные явным образом стороной, ответственной за соответствие требованиям, могут привести к аннулированию права пользователя на эксплуатацию оборудования.
Информация FCC о радиочастотном воздействии (SAR)
Это устройство разработано и изготовлено так, чтобы не превышать пределы излучения для воздействия радиочастотной (РЧ) энергии, установленные Федеральной комиссией по связи США.
Во время тестирования SAR это устройство настраивается на передачу на максимальном сертифицированном уровне мощности во всех протестированных диапазонах частот и размещается в положениях, которые имитируют радиочастотное воздействие при использовании рядом с телом. Хотя SAR определяется при самом высоком сертифицированном уровне мощности, фактический уровень SAR во время работы может быть значительно ниже максимального значения. Это связано с тем, что устройство предназначено для работы с несколькими уровнями мощности, чтобы использовать только ту мощность, которая необходима для подключения к сети. Как правило, чем ближе вы находитесь к антенне беспроводной базовой станции, тем ниже выходная мощность.
Стандарт воздействия для беспроводной связи использует единицу измерения, известную как удельный коэффициент поглощения или SAR. Предел SAR, установленный FCC, составляет 1.6 Вт/кг.
FCC предоставила разрешение на оборудование для этой модели устройства, при этом все зарегистрированные уровни SAR оцениваются как соответствующие рекомендациям FCC по радиочастотному излучению. ЮАР
информация об этой модели устройства находится на file с FCC и его можно найти в разделе Display Grant www.fcc.gov/oet/ea/fccid после поиска по идентификатору FCC: V5PS9204GBW
Для этого устройства максимальное заявленное значение SAR вблизи тела составляет 2.98 Вт/кг для FCC/IC.
Устройство было проверено на соответствие общим требованиям к воздействию радиочастотного излучения. Устройство можно использовать в условиях переносного воздействия без ограничений.
Несмотря на то, что между уровнями SAR для различных устройств и в разных положениях могут быть различия, все они соответствуют требованиям правительства.
Заявление Министерства промышленности Канады
- Это устройство соответствует стандартам RSS Министерства промышленности Канады, не требующим лицензирования. Эксплуатация возможна при соблюдении следующих двух условий:
1) это устройство не должно вызывать помех, и
2) это устройство должно принимать любые помехи, включая помехи, которые могут вызвать нежелательную работу устройства. - Это устройство и его антенна (антенны) не должны находиться рядом или работать вместе с какой-либо другой антенной или передатчиком, за исключением проверенных встроенных радиоприемников.
- Функция выбора кода округа отключена для продуктов, продаваемых в США / Канаде.
Заявление о радиационном воздействии:
Это оборудование соответствует ограничениям на радиационное воздействие IC, установленным для неконтролируемой среды. Это оборудование следует устанавливать и эксплуатировать на расстоянии не менее 0 см между радиатором и вашим телом.
Документы / Ресурсы
Рекомендации

Поиск по идентификатору FCC | Федеральная комиссия связи
- Manuals
- Brands
- PAX Manuals
- Payment Terminal
- S920
- User manual
Hide thumbs
Also See for S920:
- Reference manual (35 pages)
- Quick setup manual (17 pages)
- User manual (6 pages)
,
,
1
2
3
4
Table Of Contents
5
6
7
8
9
10
11
12
13
14
15
16
17
18
19
20
21
22
23
24
25
26
27
28
29
30
31
32
33
34
35
36
37
38
39
40
41
42
43
44
45
46
47
48
49
50
51
52
53
54
55
56
57
58
59
60
61
62
63
64
65
66
67
68
69
70
71
72
73
74
75
76
77
78
79
80
81
82
83
84
85
86
87
88
89
90
91
92
93
94
95
96
97
98
99
100
101
102
103
104
105
106
107
108
109
110
111
112
113
114
115
116
117
118
119
120
121
122
123
124
125
126
127
128
129
130
131
132
133
134
135
136
137
138
139
140
141
142
143
144
145
146
147
148
149
150
151
152
153
154
155
156
157
158
159
160
161
162
163
-
page
of
163/
163 -
Contents
-
Table of Contents
-
Bookmarks
Advertisement
Table of Contents
USER MANUAL V1.0
System Setting
Select the System Setting option to view the following options:
•
Date&Time
•
Language
•
UI Layout
•
Password
Date&Time
Set the date and time for the terminal.
PAXSTORE Customer Support
PAXSTORE-support@pax.us
(877) 859-0099
www.pax.us
9
20180917 v1.00
Table of Contents
Previous Page
Next Page
- 1
- …
- 14
- 15
- 16
- 17
- 18
- 19
- 20
- 21
Show quick links
- Quick Links:
-
Main Menu Options
-
System Setting
-
Wifi
Hide quick links:
Advertisement
Table of Contents
Related Manuals for PAX S920
-
Payment Terminal PAX S920 Reference Manual
(35 pages)
-

Payment Terminal PAX S920 Quick Setup Manual
Mobile terminal (17 pages)
-
Payment Terminal PAX S920 User Manual
Mobile payment terminal (6 pages)
-
Payment Terminal PAX S920 Quick Reference Manual
(2 pages)
-
Payment Terminal PAX S90 User Manual
(250 pages)
-
Payment Terminal PAX S90 Setup Manual
(4 pages)
-
Payment Terminal PAX S90 User Manual
(7 pages)
-
Payment Terminal PAX S90 Quick Reference Manual
(2 pages)


-
Payment Terminal PAX S900 User Manual
(82 pages)
-
Payment Terminal PAX S80 Setup Manual
(6 pages)
-
Payment Terminal PAX S80 Quick Reference Manual
Restaurant/retail (9 pages)
-
Payment Terminal PAX S80 Quick Reference Manual
(9 pages)
-
Payment Terminal PAX S300 Manual
(9 pages)
-
Payment Terminal PAX S300 Manual
(19 pages)
-
Payment Terminal PAX S300 User Manual
(82 pages)
-
Payment Terminal PAX S300 Manual
Emv certified pinpad with heartland payment processing by pcamerica (78 pages)

Related Content for PAX S920
-
S300 System Setting
PAX S300
-
S300 Setting Up Your Eftpos Equiment
PAX S300
-
A920 Setting Up Communications
PAX A920
-
Pax S300 Combo Setting Up Your Eftpos Equiment
Pax Pax S300 Combo


-
S80 System Setup
PAX S80
-
S300 System Settings
PAX S300
-
S90 File System Report
PAX S90
-
S300 Setting The Debit Prompt To Off (Required)
PAX S300

Содержание
- Инструкция по установке терминала на точке
- Pax s920 как настроить wi fi
- Банковский POS терминал PAX S920
- Pax S920 c доставкой в Москве
- POS-терминал Pax S920
- Внешний вид и комплектация Pax S920
- Функционал Pax S920
- Технические характеристики
- Преимущества
- POS-терминал PAX S920. Обзор и прошивка для эквайринга
- PAX S920 3G CTLS (подключение через SIM-карту)
- Каталог
- Онлайн-кассы
- Эквайринг
- Pax S920 c доставкой в Нижнем Новгороде
- POS-терминал Pax S920
- Внешний вид и комплектация Pax S920
- Функционал Pax S920
- Технические характеристики
- Преимущества
- POS-терминал PAX S920. Обзор и прошивка для эквайринга
- Pax S920 c доставкой в Рязани
- POS-терминал Pax S920
- Внешний вид и комплектация Pax S920
- Функционал Pax S920
- Технические характеристики
- Преимущества
- POS-терминал PAX S920. Обзор и прошивка для эквайринга
- Драйвер INPAS для банковских терминалов PAX
Инструкция по установке терминала на точке

Инструкция по установке терминала на точке.
1. Перед выездом на ТСП необходимо проверить комплектность оборудования. В комплект входит:
1.5 Инструкция кассира ТСП.
1.6 Инструкция по работе с картами.
1.7 Акты обучения кассиров и передачи оборудования.
1.8 Материалы информирующие клиентов о том, что ТСП принимает к оплате пластиковые карты.
2. По приезду на точку, необходимо произвести подключение терминала.
2.1.1 Установить sim карту(если необходима по комплектности).
Модели в которых может использоваться SIM – карта:
· VeriFone Vx 510 GPRS.
· VeriFone Vx 675.
· VeriFone Vx 670.
· VeriFone Vx 520.
2.1.2 Подключить Ethernet кабель.
Модели в которых может использоваться Ethernet кабель:
· VeriFone Vx 510
· VeriFone Vx 520
Модели в которых может использоваться Dial-up кабель:
· VeriFone Vx 510.
· VeriFone Vx 520.
· VeriFone Vx 510 GPRS.
2.2 Подключить питание терминала.
2.2.1 Для переносных терминалов Подключить аккумуляторную батарею.
2.2.2 Подключить питание к терминалу.
3. Включение терминала.
3.1 Включить терминал
3.1.1 Включение терминала производится автоматически при подключении питания.
3.1.2 Для переносных терминалов если включение не произошло автоматически, необходимо зажать зеленую кнопку и удерживать до включения.
4. Настройка терминала.
4.1 После включения терминала на экране должна появиться надпись «Введите карту».
4.2 При необходимости надо настроить подключение (WI—FI, Статическая адресация в локальной сети).
4.2.1 WI-FI Настройка подключения.
4.2.1.1 нажимаем зеленую кнопку, на экране появляется меню.
4.2.1.2 нажатием на экран выбираем пункт меню «ПАРАМЕТРЫ».
4.2.1.3 Выбираем пункт «РЕДАКТИРОВАНИЕ».
4.2.1.4 Выбираем пункт «КОММУНИКАЦИИ».
4.2.1.5 Выбираем пункт «WIFI».
4.2.1.6 Выбираем пункт «НАСТРОЙКА WIFI».
4.2.1.7 Выбираем пункт «SSID» В появившемся поле вбиваем имя точки Wi-FI с учетом реестра(должна предоставить организация). И нажать Зеленую кнопку.
4.2.1.8 Выбираем пункт «СХЕМА ШИФРАЦИИ» выбираем тип шифрации для данной точки Wi-FI(должна предоставить организация). И нажать Зеленую кнопку.
4.2.1.9 Выбираем пункт в зависимости типа шифрации «КЛЮЧ WPA» либо «КЛЮЧ WEP» (должна предоставить организация). Вводим пароль от точки WI-FI и нажимаем зеленую кнопку.
4.2.1.10 Нажимаем красную кнопку три раза и попадаем в пункт меню «РЕДАКТИРОВАНИЕ».
4.2.1.11 Выбираем пункт «НАСТРОЙКА АГЕНТА».
4.2.1.12 Выбираем пункт «ПАРАМЕТРЫ СОЕДИНЕНИЯ».
4.2.1.13 Выбираем пункт «ИЗМЕНИТЬ СОЕДИНЕНИЕ».
4.2.1.14 Выбираем пункт «CONNECTION 1».
4.2.1.15 Выбираем пункт «SA».
4.2.1.16 Выбираем пункт «WIFI».
4.2.1.17 В пункте меню «МАКС. ДЛИНА ПАКЕТА» выставляем параметр «1000». Нажимаем зеленую кнопку.
4.2.1.18 В пункте меню «ИМЯ СЕТИ» вбиваем имя точки Wi-FI с учетом реестра(должна предоставить организация). И нажать Зеленую кнопку.
4.2.1.19 В пункте меню «НОМЕР КАНАЛА СВЯЗИ» вбиваем предпочитаемый канал(должна предоставить организация), если такого нет, оставляем без изменений. И нажать Зеленую кнопку.
4.2.1.20 В пункте меню «ШИФРОВАНИЕ WI-FI» выбираем тип шифрации для данной точки Wi-FI(должна предоставить организация). И нажать Зеленую кнопку.
4.2.1.21 В пункте меню «TCP» «адрес шлюза» вбиваем адрес шлюза (если на роутере не включена Динамическая раздача адресов (должна предоставить организация)) Нажимаем зеленую кнопку.
4.2.1.22 В пункте меню «TCP» «МАСКА СЕТИ» вбиваем маску сети (если на роутере не включена Динамическая раздача адресов (должна предоставить организация)) Нажимаем зеленую кнопку.
4.2.1.23 В пункте меню «TCP» «АДРЕС ТЕРМИНАЛА» вбиваем Статический адрес терминала (если на роутере не включена Динамическая раздача адресов (должна предоставить организация)) Нажимаем зеленую кнопку.
4.2.1.24 В пункте меню «TCP» «АДРЕС СЕРВЕРА» вбиваем Адрес сервера 193.219.127.76 (если он уже указан то оставляем без изменений) Нажимаем зеленую кнопку.
4.2.1.25 В пункте меню «TCP» «ПОРТ СЕРВЕРА» вбиваем Порт сервера 30303 (если он уже указан то оставляем без изменений) Нажимаем зеленую кнопку.
4.2.1.26 В пункте меню «СТАТУС ИСПОЛЬЗ. SSL» выбираем пункт «ПРИНИМАТЬ ВСЕ СЕРТИ». Нажимаем зеленую кнопку.
4.2.1.27 В пункте меню «SSL» «ФАЙЛ ДОВЕРЕННЫХ СЕРТЕФИКАТОВ» пишем «S» (если он уже указан то оставляем без изменений). Нажимаем зеленую кнопку.
4.2.1.28 В пункте меню «SSL» «ФАЙЛ ДОВЕРЕННЫХ СЕРТЕФИКАТОВ» Должно быть пустым (если он уже указан то оставляем без изменений). Нажимаем зеленую кнопку.
4.2.1.29 В пункте меню «SSL» «ФАЙЛ КЛИЕНТСКОГО СЕРТИФИКАТА» пишем «S» (если он уже указан то оставляем без изменений). Нажимаем зеленую кнопку.
4.2.1.30 В пункте меню «SSL» «ФАЙЛ КЛИЕНТСКОГО ПРИВАТНОГО КЛЮЧА» пишем «K» (если он уже указан то оставляем без изменений). Нажимаем зеленую кнопку.
4.2.1.31 В пункте меню «ТАЙМАУТ» «ТАЙМАУТ УСТАНОВКИ СОЕДИНЕНИЯ» пишем «30» (если он уже указан то оставляем без изменений). Нажимаем зеленую кнопку.
4.2.1.32 Выключаем терминал: зажимаем красную кнопку(при отключенном зарядном устройстве) до его выключения.
4.2.1.33 Включаем терминал: зажимаем зеленую кнопку до включения терминала.
4.2.1.34 настройка WI-FI соединения закончена.
4.2.2 Настройка подключения со статической раздачей адресов.
4.2.2.1 Нажимаем зеленую кнопку, на экране появляется меню.
4.2.2.2 Выбираем пункт меню «ПАРАМЕТРЫ».
4.2.2.3 Выбираем пункт «РЕДАКТИРОВАНИЕ».
4.2.2.4 Выбираем пункт «КОММУНИКАЦИИ».
4.2.2.5 Выбираем пункт «ETHERNET».
4.2.2.6 Выбираем пункт «ОБЩИЕ НАСТРОЙКИ».
4.2.2.7 Выбираем пункт «СТАТИЧ. АДРЕС» Вводим статический адрес терминала(должна предоставить организация).Нажимаем зеленую кнопку.
4.2.2.8 Нажимаем красную кнопку попадаем в меню «ETHERNET».
4.2.2.9 Выбираем пункт «ШЛЮЗЫ».
4.2.2.10 Выбираем пункт «Ethernet Clear». Нажимаем зеленую кнопку.
4.2.2.11 В пункте меню «ШЛЮЗ» «ВВЕДИТЕ АДРЕС ШЛЮЗА» вбиваем адрес шлюза (должна предоставить организация) Нажимаем зеленую кнопку.
4.2.2.12 В пункте меню «МАСКА СЕТИ» «ВВЕДИТЕ МАСКУ СЕТИ» вбиваем маску сети (должна предоставить организация) Нажимаем зеленую кнопку.
4.2.2.13 Три раза нажимаем красную кнопку и попадаем в пункт меню «РЕДАКТИРОВАНИЕ».
4.2.2.14 Выбираем пункт «НАСТРОЙКА АГЕНТА».
4.2.2.15 Выбираем пункт «ПАРАМЕТРЫ СОЕДИНЕНИЯ».
4.2.2.16 Выбираем пункт «ИЗМЕНИТЬ».
4.2.2.17 Выбираем пункт «CONNECTION 1».
4.2.2.18 Выбираем пункт «SA».
4.2.2.19 Выбираем пункт «ETHERNET».
4.2.2.20 В пункте меню «МАКС. ДЛИНА ПАКЕТА» выставляем параметр «1000» (если он уже указан то оставляем без изменений). Нажимаем зеленую кнопку.
4.2.2.21 В пункте меню «TCP» «адрес шлюза» вбиваем адрес шлюза (должна предоставить организация). Нажимаем зеленую кнопку.
4.2.2.22 В пункте меню «TCP» «МАСКА СЕТИ» вбиваем маску сети (должна предоставить организация). Нажимаем зеленую кнопку.
4.2.2.23 В пункте меню «TCP» «АДРЕС ТЕРМИНАЛА» вбиваем Статический адрес терминала (должна предоставить организация). Нажимаем зеленую кнопку.
4.2.2.24 В пункте меню «TCP» «АДРЕС СЕРВЕРА» вбиваем Адрес сервера 193.219.127.76 (если он уже указан то оставляем без изменений) Нажимаем зеленую кнопку.
4.2.2.25 В пункте меню «TCP» «ПОРТ СЕРВЕРА» вбиваем Порт сервера 30303 (если он уже указан то оставляем без изменений) Нажимаем зеленую кнопку.
4.2.2.26 В пункте меню «СТАТУС ИСПОЛЬЗ. SSL» выбираем пункт «ПРИНИМАТЬ ВСЕ СЕРТИ». Нажимаем зеленую кнопку.
4.2.2.27 В пункте меню «SSL» «ФАЙЛ ДОВЕРЕННЫХ СЕРТЕФИКАТОВ» пишем «S» (если он уже указан то оставляем без изменений). Нажимаем зеленую кнопку.
4.2.2.28 В пункте меню «SSL» «ФАЙЛ ДОВЕРЕННЫХ СЕРТЕФИКАТОВ» Должно быть пустым (если он уже указан то оставляем без изменений). Нажимаем зеленую кнопку.
4.2.2.29 В пункте меню «SSL» «ФАЙЛ КЛИЕНТСКОГО СЕРТИФИКАТА» пишем «S» (если он уже указан то оставляем без изменений). Нажимаем зеленую кнопку.
4.2.2.30 В пункте меню «SSL» «ФАЙЛ КЛИЕНТСКОГО ПРИВАТНОГО КЛЮЧА» пишем «K» (если он уже указан то оставляем без изменений). Нажимаем зеленую кнопку.
4.2.2.31 В пункте меню «ТАЙМАУТ» «ТАЙМАУТ УСТАНОВКИ СОЕДИНЕНИЯ» пишем «30» (если он уже указан то оставляем без изменений). Нажимаем зеленую кнопку.
4.2.2.32 Выключаем терминал: Отключаем питание.
4.2.2.33 Включаем терминал: Подключаем питание.
4.2.2.34 Настройка Ethernet соединения закончена.
5. Проверка терминала
5.1 Необходимо провести тестовую транзакцию с карты на любую сумму.
5.1.1 Вставить карту.
5.1.2 Выбрать операцию «Оплата товара». Нажать зеленую кнопку.
5.1.3 Ввести сумму. Нажать зеленую кнопку.
5.1.4 Ввести pin-код. Нажать зеленую кнопку.
5.2 Результатом успешной транзакции будет чек:
5.2.1 Удостовериться, что информация на чеке соответствует информации в заявке (название ЮЛ, адрес).
5.2.2 Удостовериться что транзакция завершилась успешно(в низу чека надпись ОДОБРЕНО)
5.3 После этого необходимо отменить данную операцию (чтобы не было проблем с бухгалтерией у клиента).
5.3.1 Вставляем ту же самую карту.
5.3.2 Выбираем операцию «отмена». Нажать зеленую кнопку.
5.3.3 Вводим номер чека (с чека), Нажать зеленую кнопку.
5.3.4 Удостовериться что транзакция завершилась успешно(в низу чека надпись ОДОБРЕНО).
5.4 Делаем сверку итогов.
5.4.1 Нажимаем зеленую кнопку.
5.4.2 Выбираем пункт меню «СЛУЖЕБ. ОПЕРАЦИИ» Нажать зеленую кнопку.
5.4.3 Выбираем пункт меню «СВЕРКА ИТОГОВ» Нажать зеленую кнопку.
6. Оформление документов.
6.1 Подписать акт «Приема передачи оборудования» в двух экземплярах.
6.1.1 Один акт отдается клиенту.
6.1.2 Один акт забирается с собой (в банк предоставляется скан этого акта (уже подписанный)).
6.2 Чек сверки итогов с тестовой транзакцией забирается с собой (в банк предоставляется скан этого чека).
6.3 Заполняется «Акт выполненных работ» (в банк предоставляется скан этого акта).
Источник
Pax s920 как настроить wi fi
Банковский POS терминал PAX S920
Банковский POS терминал PAX S920
Переносной терминал с подключением по WI-Fi или GPRS (SIM-карта).
POS терминал PAX S920 специально разработан для бизнеса, который все время в движении: мобильная торговля, рестораны, небольшие выездные точки продаж.
Самые современные типы беспроводной связи, яркий контрастный экран и поддержка всех типов платежных карт делают POS терминал PAX S920 надежным бизнес-инструментом, которым легко пользоваться и удобно взять с собой.
- Цветной сенсорный экран
- Ввод электронной подписи
- Мощный встроенный аккумулятор
- Регулируемые стереодинамики
- Процессор 32-разрядный ARM11
- Память 192 Мб (128 Мб flash, 64 Мб DDR), Микро-SD до 32 Гб
- Дисплей 3,5 дюйма, разрешение 240×320 пикселей, емкостный сенсорный дисплей с функцией ввода подписи
- Связь WiFi + GPRS
- Аккумулятор Литий-ионный 3.7В/ 4000мАч
- Безопасность PCI PTS 4.x, SRED, EMV L1&L2, EMV less L1, Visa payWave, MasterCard less, AMEX Expresspay, Discover D-PAS, JCB J/Speedy, Interac Flash, MasterCard TQM
- Размеры терминала
- Высота, ширина, длина 44 мм, 78 мм, 150 мм
- Вес 330 г
Pax S920 c доставкой в Москве
POS-терминал Pax S920
Компактный платежный терминал с цветным мультимедийным сенсорным экраном. Мобильное устройство Pax S920 позволяет с комфортом обслуживать гостей ресторанов, кафе и постояльцев гостиниц.
Внешний вид и комплектация Pax S920
Обтекаемый элегантный корпус в черном пластике с задней подсветкой. Большую часть верхней панели занимает сенсорный экран, под ним расположена рельефная клавиатура. Справа и снизу расположены слоты для считывания банковских карт с чипом и магнитной полосой. В задней части устройства встроен принтер чеков.
Купить Pax S920 можно в различных комплектациях, которые отличаются набором интерфейсов подключения:
- Wi-Fi, Bluetooth, 3G;
- Wi-Fi, Bluetooth, 4G;
- Wi-Fi, Bluetooth, GPRS.
Устройство оснащено периферийным портом microUSB.
Функционал Pax S920
- Прием платежей с банковских карт.
- Поддержка технологии NFC.
- Ввод электронной подписи.
- Передача изображений и видео с высоким разрешением.
Благодаря технологичному процессору память устройства увеличена по сравнению с аналогами, а проведение транзакций ускорено.
Технические характеристики
- Объем памяти: 192 Мб + microSD до 32 Гб.
- Экран: 3,5 дюйма, цветной TFT, 240×320.
- Скорость принтера: от 18 строк/сек.
- Ширина термоленты: 58 мм, 40 мм — опционально.
- Разброс рабочих температур: 0-+50°.
- Температуры хранения: -20-70°.
- Допустимый уровень влажности: 10-93%.
- Габариты: 150х78х46 мм.
- Масса: 0,33 кг.
Преимущества
Цена Pax S920 соответствует практическим достоинствам устройства:
- значительный объем памяти;
- возможность ввода электронной подписи;
- увеличенный ресурс аккумулятора;
- качественная передача картинок и видео;
- вариативность модификаций и интерфейсов.
Терминал применяется и в стационарной, и в выездной торговле.
POS-терминал PAX S920. Обзор и прошивка для эквайринга
Если не знаете, что пригодится для вашего предприятия, можете связаться с нашими менеджерами. Это квалифицированные специалисты, которые знают своё дело и смогут быстро подобрать оборудование, необходимое для комфортного ведения торговли в соответствии с 54-ФЗ.
Вы можете быстро приобрести оборудование, нажав кнопку «Купить в 1 клик» и оставив номер для связи с менеджером. Наши сотрудники помогут с формированием заказа.
Если нужен целый перечень товаров, можно использовать кнопку «В корзину». После того, как добавите в неё всё, что нужно, нажмите на иконку с тележкой в правом верхнем углу. Далее вы можете пойти двумя путями:
- «Быстрый заказ». Нажмите эту кнопку, если не уверены в выборе товара. Б-Касса предложит оставить номер телефона для связи с менеджером, который уточнит детали. Наши сотрудники перезванивают в течение 15 минут и могут подобрать оборудование, идеально подходящее для Вашего бизнеса.
- «Оформить заказ». Эта кнопка подходит вам, если в корзине есть всё, что нужно, и сомнений в выборе нет. После нажатия на неё можно будет оставить всю информацию, необходимую для оплаты и получения: расчётный счёт, контактные данные и промокод.
Мы работаем по полной безналичной предоплате. Счёт будет выставлен после оформления заказа и уточнения менеджером деталей покупки.
Доставка осуществляется либо в пункт выдачи транспортной службы, либо до двери курьером. Мы работаем со следующими компаниями:
- DHL. К преимуществам можно отнести экспресс-доставку, благодаря которой вы сможете уже на следующий день после оплаты получить оборудование и начать им пользоваться.
- СДЭК. Российская компания, пользующаяся популярностью у интернет-магазинов из-за относительно низкой стоимости доставки и развитой сети пунктов выдачи.
- DPD. Доставляет посылки в любое время. Если нужно получить оборудование в выходной или вечером, стоит выбрать именно эту курьерскую службу.
Чтобы уточнить стоимость доставки, обратитесь к нашим менеджерам: они могут не только посоветовать оборудование, но и помочь выбрать оптимальный способ получения заказа.
PAX S920 3G CTLS (подключение через SIM-карту)
Каталог
Онлайн-кассы
Эквайринг
Терминал Pax S920 — мобильный терминал, который представляет собой полностью независимое, мощное, современное, защищенное платежное устройство, достаточно компактное по размерам,
Pax S920 в комплектации 3G работает как мобильный автономный терминал.
Наши клиенты выбирают его когда нужен современный терминал с большим цветным дисплеем и ярким современным дисплеем. Обычно данную модель выбирают, когда требуется сочитать мобильное платежное решение с элегантным и современным дизайном, чтобы показать своб статусность и технолгичность перед клиентами.
Отличительным плюсом данной модели, как и всех терминалов PAX, является продолжительный срок гарантии — 3 года.
Pax S920 c доставкой в Нижнем Новгороде
POS-терминал Pax S920
Компактный платежный терминал с цветным мультимедийным сенсорным экраном. Мобильное устройство Pax S920 позволяет с комфортом обслуживать гостей ресторанов, кафе и постояльцев гостиниц.
Внешний вид и комплектация Pax S920
Обтекаемый элегантный корпус в черном пластике с задней подсветкой. Большую часть верхней панели занимает сенсорный экран, под ним расположена рельефная клавиатура. Справа и снизу расположены слоты для считывания банковских карт с чипом и магнитной полосой. В задней части устройства встроен принтер чеков.
Купить Pax S920 можно в различных комплектациях, которые отличаются набором интерфейсов подключения:
- Wi-Fi, Bluetooth, 3G;
- Wi-Fi, Bluetooth, 4G;
- Wi-Fi, Bluetooth, GPRS.
Устройство оснащено периферийным портом microUSB.
Функционал Pax S920
- Прием платежей с банковских карт.
- Поддержка технологии NFC.
- Ввод электронной подписи.
- Передача изображений и видео с высоким разрешением.
Благодаря технологичному процессору память устройства увеличена по сравнению с аналогами, а проведение транзакций ускорено.
Технические характеристики
- Объем памяти: 192 Мб + microSD до 32 Гб.
- Экран: 3,5 дюйма, цветной TFT, 240×320.
- Скорость принтера: от 18 строк/сек.
- Ширина термоленты: 58 мм, 40 мм — опционально.
- Разброс рабочих температур: 0-+50°.
- Температуры хранения: -20-70°.
- Допустимый уровень влажности: 10-93%.
- Габариты: 150х78х46 мм.
- Масса: 0,33 кг.
Преимущества
Цена Pax S920 соответствует практическим достоинствам устройства:
- значительный объем памяти;
- возможность ввода электронной подписи;
- увеличенный ресурс аккумулятора;
- качественная передача картинок и видео;
- вариативность модификаций и интерфейсов.
Терминал применяется и в стационарной, и в выездной торговле.
POS-терминал PAX S920. Обзор и прошивка для эквайринга
Если не знаете, что пригодится для вашего предприятия, можете связаться с нашими менеджерами. Это квалифицированные специалисты, которые знают своё дело и смогут быстро подобрать оборудование, необходимое для комфортного ведения торговли в соответствии с 54-ФЗ.
Вы можете быстро приобрести оборудование, нажав кнопку «Купить в 1 клик» и оставив номер для связи с менеджером. Наши сотрудники помогут с формированием заказа.
Если нужен целый перечень товаров, можно использовать кнопку «В корзину». После того, как добавите в неё всё, что нужно, нажмите на иконку с тележкой в правом верхнем углу. Далее вы можете пойти двумя путями:
- «Быстрый заказ». Нажмите эту кнопку, если не уверены в выборе товара. Б-Касса предложит оставить номер телефона для связи с менеджером, который уточнит детали. Наши сотрудники перезванивают в течение 15 минут и могут подобрать оборудование, идеально подходящее для Вашего бизнеса.
- «Оформить заказ». Эта кнопка подходит вам, если в корзине есть всё, что нужно, и сомнений в выборе нет. После нажатия на неё можно будет оставить всю информацию, необходимую для оплаты и получения: расчётный счёт, контактные данные и промокод.
Мы работаем по полной безналичной предоплате. Счёт будет выставлен после оформления заказа и уточнения менеджером деталей покупки.
Доставка осуществляется либо в пункт выдачи транспортной службы, либо до двери курьером. Мы работаем со следующими компаниями:
- DHL. К преимуществам можно отнести экспресс-доставку, благодаря которой вы сможете уже на следующий день после оплаты получить оборудование и начать им пользоваться.
- СДЭК. Российская компания, пользующаяся популярностью у интернет-магазинов из-за относительно низкой стоимости доставки и развитой сети пунктов выдачи.
- DPD. Доставляет посылки в любое время. Если нужно получить оборудование в выходной или вечером, стоит выбрать именно эту курьерскую службу.
Чтобы уточнить стоимость доставки, обратитесь к нашим менеджерам: они могут не только посоветовать оборудование, но и помочь выбрать оптимальный способ получения заказа.
Pax S920 c доставкой в Рязани
POS-терминал Pax S920
Компактный платежный терминал с цветным мультимедийным сенсорным экраном. Мобильное устройство Pax S920 позволяет с комфортом обслуживать гостей ресторанов, кафе и постояльцев гостиниц.
Внешний вид и комплектация Pax S920
Обтекаемый элегантный корпус в черном пластике с задней подсветкой. Большую часть верхней панели занимает сенсорный экран, под ним расположена рельефная клавиатура. Справа и снизу расположены слоты для считывания банковских карт с чипом и магнитной полосой. В задней части устройства встроен принтер чеков.
Купить Pax S920 можно в различных комплектациях, которые отличаются набором интерфейсов подключения:
- Wi-Fi, Bluetooth, 3G;
- Wi-Fi, Bluetooth, 4G;
- Wi-Fi, Bluetooth, GPRS.
Устройство оснащено периферийным портом microUSB.
Функционал Pax S920
- Прием платежей с банковских карт.
- Поддержка технологии NFC.
- Ввод электронной подписи.
- Передача изображений и видео с высоким разрешением.
Благодаря технологичному процессору память устройства увеличена по сравнению с аналогами, а проведение транзакций ускорено.
Технические характеристики
- Объем памяти: 192 Мб + microSD до 32 Гб.
- Экран: 3,5 дюйма, цветной TFT, 240×320.
- Скорость принтера: от 18 строк/сек.
- Ширина термоленты: 58 мм, 40 мм — опционально.
- Разброс рабочих температур: 0-+50°.
- Температуры хранения: -20-70°.
- Допустимый уровень влажности: 10-93%.
- Габариты: 150х78х46 мм.
- Масса: 0,33 кг.
Преимущества
Цена Pax S920 соответствует практическим достоинствам устройства:
- значительный объем памяти;
- возможность ввода электронной подписи;
- увеличенный ресурс аккумулятора;
- качественная передача картинок и видео;
- вариативность модификаций и интерфейсов.
Терминал применяется и в стационарной, и в выездной торговле.
POS-терминал PAX S920. Обзор и прошивка для эквайринга
Если не знаете, что пригодится для вашего предприятия, можете связаться с нашими менеджерами. Это квалифицированные специалисты, которые знают своё дело и смогут быстро подобрать оборудование, необходимое для комфортного ведения торговли в соответствии с 54-ФЗ.
Вы можете быстро приобрести оборудование, нажав кнопку «Купить в 1 клик» и оставив номер для связи с менеджером. Наши сотрудники помогут с формированием заказа.
Если нужен целый перечень товаров, можно использовать кнопку «В корзину». После того, как добавите в неё всё, что нужно, нажмите на иконку с тележкой в правом верхнем углу. Далее вы можете пойти двумя путями:
- «Быстрый заказ». Нажмите эту кнопку, если не уверены в выборе товара. Б-Касса предложит оставить номер телефона для связи с менеджером, который уточнит детали. Наши сотрудники перезванивают в течение 15 минут и могут подобрать оборудование, идеально подходящее для Вашего бизнеса.
- «Оформить заказ». Эта кнопка подходит вам, если в корзине есть всё, что нужно, и сомнений в выборе нет. После нажатия на неё можно будет оставить всю информацию, необходимую для оплаты и получения: расчётный счёт, контактные данные и промокод.
Мы работаем по полной безналичной предоплате. Счёт будет выставлен после оформления заказа и уточнения менеджером деталей покупки.
Доставка осуществляется либо в пункт выдачи транспортной службы, либо до двери курьером. Мы работаем со следующими компаниями:
- DHL. К преимуществам можно отнести экспресс-доставку, благодаря которой вы сможете уже на следующий день после оплаты получить оборудование и начать им пользоваться.
- СДЭК. Российская компания, пользующаяся популярностью у интернет-магазинов из-за относительно низкой стоимости доставки и развитой сети пунктов выдачи.
- DPD. Доставляет посылки в любое время. Если нужно получить оборудование в выходной или вечером, стоит выбрать именно эту курьерскую службу.
Чтобы уточнить стоимость доставки, обратитесь к нашим менеджерам: они могут не только посоветовать оборудование, но и помочь выбрать оптимальный способ получения заказа.
Драйвер INPAS для банковских терминалов PAX
Поддерживаемое банковское оборудование: PAX SP30, S300, D200, D210, S80, S920.
Поддерживаемые банки: ВТБ24, Банк Русский Стандарт, БИНБАНК, Открытие, Банк Санкт-Петербург, ВТБ, Газпромбанк, Связь-Банк, Тинькофф Банк.
Для правильной работы интегрированного решения с использованием Драйвера ИНПАС необходимо выполнить:
1. Настройку банковского POS-терминала (пинпада).
2. Настройку Драйвера ИНПАС.
Примечание. При обращении в службу поддержки, в теме письма необходимо добавлять префикс evotor.psp.
1. Настройка банковского POS-терминала (пинпада).
a) Для работы с кассой Эвотор в интегрированном режиме в POS-терминале (пинпаде) должны быть: открыта лицензия SmartSale; включен режим «Работа с кассой» (на экране POS-терминала (пинпада) отображается сообщение «Ожидание команды от ККМ»); настроена печать чеков и отчетов «Только на кассе»; включен функционал «Подтверждения завершения операции на кассе» (опционально для предотвращения Автоотмен).
b) Инструкции по ручной настройке POS-терминала (пинпада) различных банков для работы с кассой приведены на сайте компании ИНПАС (ftp://freesoft:freesoft@ftp.in-line.ru/ — Эвотор/). Необходимо учитывать, что при автоматическом обновлении параметров со стороны банка, ручные настройки могут сбрасываться.
c) В случае возникновения проблем при работе POS-терминала (пинпада), необходимо обратиться к банку-поставщику оборудования для изменения настроек.
2.1 Настройка Драйвера ИНПАС при работе с POS-терминалом (пинпадом) по USB.
a) Установите драйвер на смарт-терминал Эвотор.
b) Подключите пинпад (POS-терминал) к USB-порту смарт-терминала.
c) На экране планшета появится окно для ввода номера TerminalID пинпада. Номер TerminalID должен сообщить поставщик пинпада.
d) Введите TerminalID и подтвердите ввод данных кнопками «ОК» и «Закрыть». (Ввод полей ip-адрес и ip-порт не требуется).
e) Убедитесь, что банковский пинпад выбран «По умолчанию».
f) Пинпад готов к работе — можете принимать платежи по банковским картам.
Примечание. При работе с POS-терминалами (пинпадами), имеющими питание от сети (Pax D210, Verifone VX 520 и т.д.), рекомендуется использовать USB-хаб ревизии 3.0(ALM020.47.000 USBG rev. 3.0) и операционной системой (ОС) кассы версии 3.8.1 и выше. Для проверки версии установленной платы USB-хаба требуется вскрытие устройство. Для данной процедуры советуем обратиться в авторизованный сервисный центр.
2.2 Настройка Драйвера ИНПАС при работе с POS-терминалом (пинпадом) по Ethernet или WiFi.
Организация соединения POS-терминала (пинпада) с кассой возможна 2 способами:
- подключение пинпада (POS-терминала) по Ethernet к сети, в которой работает касса.
- подключение пинпада (POS-терминала) с собственными WiFi коммуникациями к сети, в которой работает касса.
a) Установите драйвер на смарт-терминал Эвотор.
b) Перейдите в пункт Настройки — Оборудование — Добавить банковский терминал.
c) Выберите необходимый драйвер для пинпада.
d) В выпадающем меню выберите тип подключения «BLUETOOTH, СЕТЕВОЕ И ДР. УСТРОЙСТВО».
e) На экране планшета появится окно для ввода номера TerminalID. Номер TerminalID должен сообщить поставщик пинпада.
f) Введите TerminalID.
g) Выберите тип подключения «WiFi, Ethernet». Ниже появится окно для ввода ip-адреса и ip-порта пинпада.Ip-адрес и ip-порт должен сообщить поставщик пинпада.
h) Введите ip-адрес и ip-порт подтвердите ввод данных кнопками «ОК» и «Закрыть».
i) Убедитесь, что банковский терминал выбран «По умолчанию».
j) Пинпад готов к работе — можете принимать платежи по банковским картам.
2.3 Настройка Драйвера ИНПАС при работе с POS-терминалом (пинпадом) по Bluetooth.
a) Установите драйвер на смарт-терминал Эвотор.
b) Перейдите в пункт Настройки — Оборудование — Добавить банковский терминал.
c) Выберите необходимый драйвер для пинпада.
d) В выпадающем меню выберите тип подключения «BLUETOOTH, СЕТЕВОЕ И ДР. УСТРОЙСТВО».
e) На экране планшета появится окно для ввода номера TerminalID. Номер TerminalID должен сообщить поставщик пинпада.
f) Введите TerminalID.
g) Выберите тип подключения «Bluetooth». Ниже появится окно для ввода имени Bluetooth устройства. Имя Bluetooth устройства должен сообщить поставщик пинпада.
h) Введите имя Bluetooth устройства, подтвердите ввод данных кнопками «ОК» и «Закрыть».
i) Убедитесь, что банковский терминал выбран «По умолчанию».
j) Пинпад готов к работе — можете принимать платежи по банковским картам.
2.4 Изменение в Драйвере ИНПАС параметров TerminalID, ip-адреса и ip-порта.
Если требуется изменить TerminalID, ip-адрес или ip-порт пинпада, то перейдите в пункт меню смарт-терминала Эвотор «Настройки > Оборудование > Банковские терминалы», выберите драйвер подключенного пинпада. В появившемся окне введите TerminalID, ip-адрес и ip-порт подтвердите ввод данных кнопками «ОК» и «Закрыть».
2.5 Настройка логирования работы Драйвера ИНПАС.
Логирование включается только в случае возникновения проблем по согласованию со службой поддержки
Источник
Содержание
- Инструкция для терминала pax s920
- S920 PAX
- PAX S920 3G CTLS (подключение через SIM-карту)
- Каталог
- Онлайн-кассы
- Эквайринг
- Подключение терминала эквайринга с интеграцией (напрямую к смарт-терминалу АТОЛ SIGMA)
- Инструкции к POS-терминалам
- POS-терминалы и выносные клавиатуры (пин-пады) Ingenico
- POS-терминалы и выносные клавиатуры (пин-пады) Verifone
- POS-терминалы PAX
- Настройка яркости экрана на PAX S80
- Шаг 1.
- Шаг 2.
- Шаг 3.
- Шаг 4.
- Инструкция для терминала pax s920
- S920 PAX
- PAX S920 3G CTLS (подключение через SIM-карту)
- Каталог
- Онлайн-кассы
- Эквайринг
- Подключение терминала эквайринга с интеграцией (напрямую к смарт-терминалу АТОЛ SIGMA)
- Инструкции к POS-терминалам
- POS-терминалы и выносные клавиатуры (пин-пады) Ingenico
- POS-терминалы и выносные клавиатуры (пин-пады) Verifone
- POS-терминалы PAX
Инструкция для терминала pax s920
S920 PAX
Терминал S920 представляет собой самый элегантный компактный мобильный платежный терминал в мире, оснащенный самым полным ассортиментом сертификатов в платежной индустрии и произведен в соответствии с высочайшими мировыми стандартами с использованием новейшей технологии и высококачественных материалов.
Отличаясь большим сверхчистым мультимедийным цветным сенсорным экраном с высокой четкостью и клавиатурой с превосходной задней подсветкой, миниатюрный терминал S920 является предпочтительным выбором для гостиниц и ресторанов, где портативность, удобство в использовании и безупречная работа с клиентами являются ключевыми требованиями. Торговые компании восхищаются элегантным обтекаемым корпусом, большим сроком службы аккумулятора и ускоренным временем проведения трансакции терминала S920, работающего на базе высокотехнологичного процессора, увеличенного объема памяти и встроенного считывателя с поддержкой NFC технологии.
Невероятно большой выбор возможностей беспроводного подключения, включая 3G (WCDMA), 4G, GPRS, WiFi и Bluetooth дополняется высокозащищенной открытой платформой, способствующей специальной разработке различных банковских и ценных программных приложений.
Исключительная стабильность и надежность:
- Сверхскоростной процессор ARM11, 400МГц
- Множественные параметры подключений:
- 3G, 4G, GPRS, WiFi, Bluetooth
- Считыватель бесконтактных карт с поддержкой NFC
- Большой объем памяти с разъемом для карт микро-SD
- Передовая технология DDR
- Обтекаемый корпус и облегченный дизайн
- Повышенный ресурс аккумулятора
- Сверхчистый цветной сенсорный экран
- Ввод электронной подписи
- Сверхчистый цветной сенсорный экран
- Изображения и видео с высоким разрешением
- Регулируемые стереодинамики
- Реклама, передача сообщений, сигнал тревоги
PAX S920 3G CTLS (подключение через SIM-карту)
Каталог
Онлайн-кассы
- Смарт-терминал Эвотор
- Смарт-терминал LiteBox
- Онлайн-кассы с эквайрингом
- Фискальный регистратор
- Автономная онлайн-касса
- Мобильная онлайн-касса
Эквайринг
- Все модели POS-терминалов
- Стационарные POS-терминалы
- Мобильные POS-терминалы
- ПИН-пады для онлайн-касс
- ПИН-пады для вендинга
- Аксессуары для терминалов
Терминал Pax S920 — мобильный терминал, который представляет собой полностью независимое, мощное, современное, защищенное платежное устройство, достаточно компактное по размерам,
Pax S920 в комплектации 3G работает как мобильный автономный терминал.
Наши клиенты выбирают его когда нужен современный терминал с большим цветным дисплеем и ярким современным дисплеем. Обычно данную модель выбирают, когда требуется сочитать мобильное платежное решение с элегантным и современным дизайном, чтобы показать своб статусность и технолгичность перед клиентами.
Отличительным плюсом данной модели, как и всех терминалов PAX, является продолжительный срок гарантии — 3 года.
Подключение терминала эквайринга с интеграцией (напрямую к смарт-терминалу АТОЛ SIGMA)
Подключение терминала эквайринга с интеграцией (то есть прямое подключение к кассовому смарт-терминалу АТОЛ SIGMA) удобно для работы кассира — при оплате картой сумма платежа вводится один раз (в отличие от работы с отдельно стоящим терминалом, там сумму надо вводить два раза — и на терминале и на кассе).
На данный момент поддерживаются следующие терминалы:
- Verifone vx520
- Verifone vx805
- Verifone vx820
- Ingenico IPP320
- Ingenico IPP350
- Ingenico Lane/3000 (Skytech)
- Castles v3 (Vega 3000)
- PAX SP30
Мы поддерживаем интеграцию с ПАО Сбербанк. Подробная инструкция.
Интеграция с другими банками:
Терминалы Ingenico: на терминале должно быть установлено банковское программное обеспечение, поддерживающее протокол общения Arcus 2.
Терминалы Verifon и Pax: банковское программное обеспечение должно поддерживать протокол общения Inpas smartsale.
Ingenico Lane 3000 работает с библиотекой Skytech.
Информацию о том, какой протокол поддерживается, уточняйте у банка-поставщика терминала.
Далее в инструкции описан процесс подключения терминала. Настройкой терминала и его подключением к банку занимаются представители банка!
Подключите терминал к кассе , через USB .
При подключении терминалов «Отличный безналичный» , обратите внимание на версию (видно на стартовом окне терминала внизу надпись под вставьте карту) она должна быть выше 497 версии.
Запустите приложение SIGMA и нажмите
в левом верхнем углу экрана.
Перейдите в раздел «Настройки» — «Банковские терминалы».
Далее выберите терминал из списка.
Готово, терминал подключен.
Количество печатаемых слипов, можно указать в настройках банковского терминала.
Оплата проводится как оплата картой, подробнее : Оплата заказа
Инструкции к POS-терминалам
В этой небольшой статье мы собрали для вас инструкции по эксплуатации для самых популярных POS-терминалов на российском рынке.
Все эти инструкции и руководства вы могли бы и сами найти в интернете, но гораздо удобнее, когда уже все найдено и собрано в одном месте, не так ли? Тем более, что русский человек вспоминает об инструкции только тогда, когда что-то пошло не так и времени на долгие поиски не осталось .
Даже если вы не увидели здесь инструкцию от вашего банка все равно посмотрите те, что есть. Вполне вероятно, что вы найдете ответы на ваши вопросы, т.к. инструкции не сильно отличаются между собой.
POS-терминалы и выносные клавиатуры (пин-пады) Ingenico
Инструкция по работе с терминалами Ingenico iCT220/iCT250 от компании АТОЛ — Скачать
Инструкция по установке терминалов Ingenico — Скачать
Инструкция по эксплуатации Ingenico iCT220 от Россельхозбанка — Скачать
Инструкция по эксплуатации Ingenico iCT220 от Стройлесбанка — Скачать
Руководство пользователя Ingenico iCT220/iCT250 — Скачать
Руководство пользователя Ingenico iPP2xx — Скачать
Руководство пользователя Ingenico iPP3xx — Скачать
Руководство пользователя Ingenico iWL2xx — Скачать
Инструкция по эксплуатации от Россельхозбанка Ingenico iWL220 — Скачать
Инструкция по использованию Ingenico iWL220 от Стройлесбанка — Скачать
POS-терминалы и выносные клавиатуры (пин-пады) Verifone
Инструкция по работе с платежными терминалами Verifone — Скачать
Руководство по установке Verifone 5xxx/Vx5xx/Vx6xx — Скачать
Руководство по установке Verifone Vx680 — Скачать
POS-терминалы PAX
Руководство пользователя PAX S90 (EN) — Скачать
Статья будет пополняться новыми инструкциями. Следите за обновлениями.
Спасибо за внимание. Надеюсь, вы нашли то, что искали. Успехов в вашем бизнесе!
Источник
Настройка яркости экрана на PAX S80
Бывает так, что яркости подсветки экрана недостаточно, чтобы увидеть информацию на экране терминала, например, при ярком освещении.
Сейчас, мы рассмотрим, как же можно увеличить яркость экрана. Сделать это совсем не сложно. Для начала включаем терминал с помощью кнопки питания (верхняя левая круглая кнопка).
Шаг 1.
В момент загрузки терминала нажимаем кнопку MENU. Появится системное меню терминала.

Шаг 2.
Далее кнопками вверх-вниз находим пункт меню 2-LCD ADJUST. Выбираем его с помощью кнопки 2.
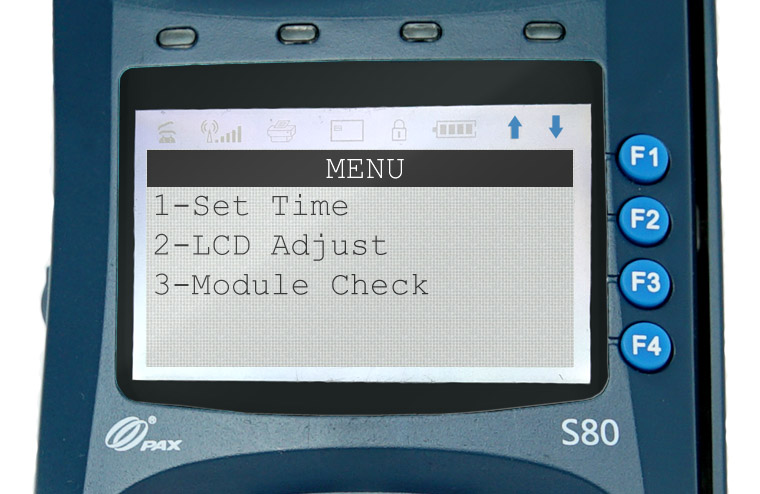
Шаг 3.
Попадаем в меню настройки яркости дисплея, где видим надпись Brightness: XX%. Это и есть параметр яркости, где ХХ% — значение яркости, которое сейчас установлено.
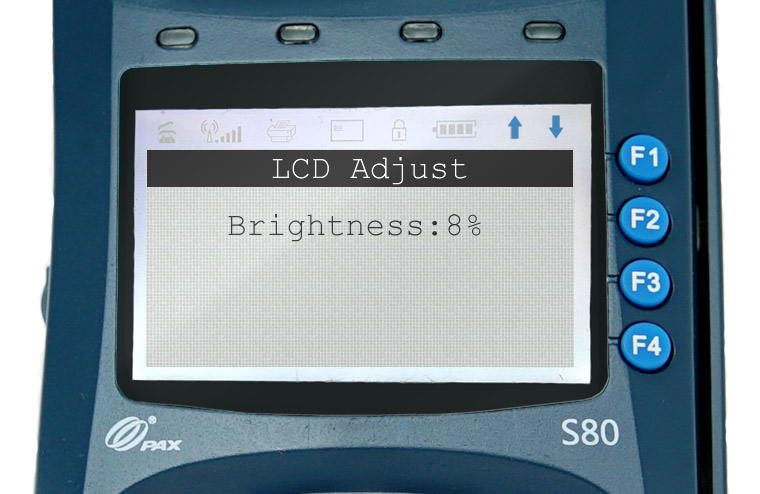
Шаг 4.
Минимальное значение 8% максимальное 100%. Клавишами вверх-вниз на клавиатуре терминала мы можем установить яркость дисплея которая нам необходима.
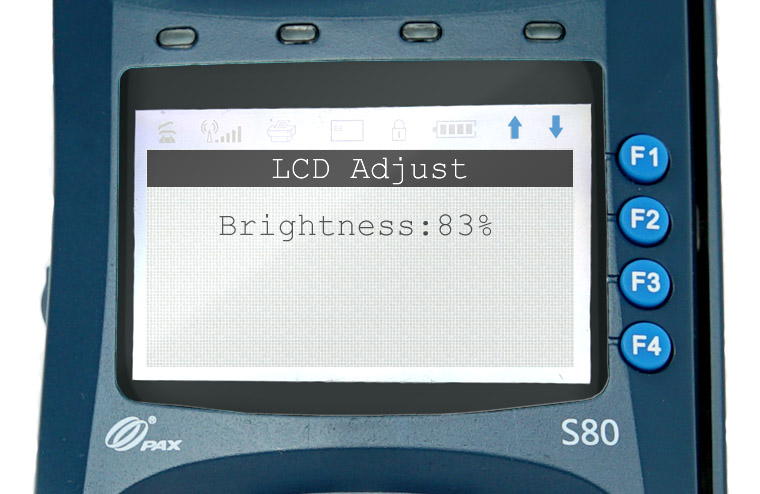
Таким образом мы установили нужную нам яркость дисплея терминала.
Источник
Инструкция для терминала pax s920
S920 PAX
Терминал S920 представляет собой самый элегантный компактный мобильный платежный терминал в мире, оснащенный самым полным ассортиментом сертификатов в платежной индустрии и произведен в соответствии с высочайшими мировыми стандартами с использованием новейшей технологии и высококачественных материалов.
Отличаясь большим сверхчистым мультимедийным цветным сенсорным экраном с высокой четкостью и клавиатурой с превосходной задней подсветкой, миниатюрный терминал S920 является предпочтительным выбором для гостиниц и ресторанов, где портативность, удобство в использовании и безупречная работа с клиентами являются ключевыми требованиями. Торговые компании восхищаются элегантным обтекаемым корпусом, большим сроком службы аккумулятора и ускоренным временем проведения трансакции терминала S920, работающего на базе высокотехнологичного процессора, увеличенного объема памяти и встроенного считывателя с поддержкой NFC технологии.
Невероятно большой выбор возможностей беспроводного подключения, включая 3G (WCDMA), 4G, GPRS, WiFi и Bluetooth дополняется высокозащищенной открытой платформой, способствующей специальной разработке различных банковских и ценных программных приложений.
Исключительная стабильность и надежность:
- Сверхскоростной процессор ARM11, 400МГц
- Множественные параметры подключений:
- 3G, 4G, GPRS, WiFi, Bluetooth
- Считыватель бесконтактных карт с поддержкой NFC
- Большой объем памяти с разъемом для карт микро-SD
- Передовая технология DDR
- Обтекаемый корпус и облегченный дизайн
- Повышенный ресурс аккумулятора
- Сверхчистый цветной сенсорный экран
- Ввод электронной подписи
- Сверхчистый цветной сенсорный экран
- Изображения и видео с высоким разрешением
- Регулируемые стереодинамики
- Реклама, передача сообщений, сигнал тревоги
PAX S920 3G CTLS (подключение через SIM-карту)
Каталог
Онлайн-кассы
- Смарт-терминал Эвотор
- Смарт-терминал LiteBox
- Онлайн-кассы с эквайрингом
- Фискальный регистратор
- Автономная онлайн-касса
- Мобильная онлайн-касса
Эквайринг
- Все модели POS-терминалов
- Стационарные POS-терминалы
- Мобильные POS-терминалы
- ПИН-пады для онлайн-касс
- ПИН-пады для вендинга
- Аксессуары для терминалов
Терминал Pax S920 — мобильный терминал, который представляет собой полностью независимое, мощное, современное, защищенное платежное устройство, достаточно компактное по размерам,
Pax S920 в комплектации 3G работает как мобильный автономный терминал.
Наши клиенты выбирают его когда нужен современный терминал с большим цветным дисплеем и ярким современным дисплеем. Обычно данную модель выбирают, когда требуется сочитать мобильное платежное решение с элегантным и современным дизайном, чтобы показать своб статусность и технолгичность перед клиентами.
Отличительным плюсом данной модели, как и всех терминалов PAX, является продолжительный срок гарантии — 3 года.
Подключение терминала эквайринга с интеграцией (напрямую к смарт-терминалу АТОЛ SIGMA)
Подключение терминала эквайринга с интеграцией (то есть прямое подключение к кассовому смарт-терминалу АТОЛ SIGMA) удобно для работы кассира — при оплате картой сумма платежа вводится один раз (в отличие от работы с отдельно стоящим терминалом, там сумму надо вводить два раза — и на терминале и на кассе).
На данный момент поддерживаются следующие терминалы:
- Verifone vx520
- Verifone vx805
- Verifone vx820
- Ingenico IPP320
- Ingenico IPP350
- Ingenico Lane/3000 (Skytech)
- Castles v3 (Vega 3000)
- PAX SP30
Мы поддерживаем интеграцию с ПАО Сбербанк. Подробная инструкция.
Интеграция с другими банками:
Терминалы Ingenico: на терминале должно быть установлено банковское программное обеспечение, поддерживающее протокол общения Arcus 2.
Терминалы Verifon и Pax: банковское программное обеспечение должно поддерживать протокол общения Inpas smartsale.
Ingenico Lane 3000 работает с библиотекой Skytech.
Информацию о том, какой протокол поддерживается, уточняйте у банка-поставщика терминала.
Далее в инструкции описан процесс подключения терминала. Настройкой терминала и его подключением к банку занимаются представители банка!
Подключите терминал к кассе , через USB .
При подключении терминалов «Отличный безналичный» , обратите внимание на версию (видно на стартовом окне терминала внизу надпись под вставьте карту) она должна быть выше 497 версии.
Запустите приложение SIGMA и нажмите
в левом верхнем углу экрана.
Перейдите в раздел «Настройки» — «Банковские терминалы».
Далее выберите терминал из списка.
Готово, терминал подключен.
Количество печатаемых слипов, можно указать в настройках банковского терминала.
Оплата проводится как оплата картой, подробнее : Оплата заказа
Инструкции к POS-терминалам
В этой небольшой статье мы собрали для вас инструкции по эксплуатации для самых популярных POS-терминалов на российском рынке.
Все эти инструкции и руководства вы могли бы и сами найти в интернете, но гораздо удобнее, когда уже все найдено и собрано в одном месте, не так ли? Тем более, что русский человек вспоминает об инструкции только тогда, когда что-то пошло не так и времени на долгие поиски не осталось .
Даже если вы не увидели здесь инструкцию от вашего банка все равно посмотрите те, что есть. Вполне вероятно, что вы найдете ответы на ваши вопросы, т.к. инструкции не сильно отличаются между собой.
POS-терминалы и выносные клавиатуры (пин-пады) Ingenico
Инструкция по работе с терминалами Ingenico iCT220/iCT250 от компании АТОЛ — Скачать
Инструкция по установке терминалов Ingenico — Скачать
Инструкция по эксплуатации Ingenico iCT220 от Россельхозбанка — Скачать
Инструкция по эксплуатации Ingenico iCT220 от Стройлесбанка — Скачать
Руководство пользователя Ingenico iCT220/iCT250 — Скачать
Руководство пользователя Ingenico iPP2xx — Скачать
Руководство пользователя Ingenico iPP3xx — Скачать
Руководство пользователя Ingenico iWL2xx — Скачать
Инструкция по эксплуатации от Россельхозбанка Ingenico iWL220 — Скачать
Инструкция по использованию Ingenico iWL220 от Стройлесбанка — Скачать
POS-терминалы и выносные клавиатуры (пин-пады) Verifone
Инструкция по работе с платежными терминалами Verifone — Скачать
Руководство по установке Verifone 5xxx/Vx5xx/Vx6xx — Скачать
Руководство по установке Verifone Vx680 — Скачать
POS-терминалы PAX
Руководство пользователя PAX S90 (EN) — Скачать
Статья будет пополняться новыми инструкциями. Следите за обновлениями.
Спасибо за внимание. Надеюсь, вы нашли то, что искали. Успехов в вашем бизнесе!
Источник