Содержание
- Unrecognised Disk Label When Creating Partition
- Разделение и форматирование дисков в Linux
- Установка инструментов
- Определение нового диска в системе
- Разделение нового диска
- Выбор стандарта дискового разделения
- Создание нового раздела
- Создание файловой системы на новом разделе
- Монтирование новой файловой системы
- Временное монтирование файловой системы
- Автоматическое монтирование файловой системы
- Проверка монтирования
- Заключение
- How to Create Partition on Linux for >2TB Size using Parted GPT
- Creating 2TB partition using Fdisk
- Set Partition Table to GPT using Parted mklabel
- Create >2TB Partition using Parted mkpart
- Format and Mount the Partition
- If you enjoyed this article, you might also like..
Unrecognised Disk Label When Creating Partition
Failed to save partition : parted -s /dev/sdb unit cyl mkpart primary 0 30394 failed : Error: /dev/sdb: unrecognised disk label
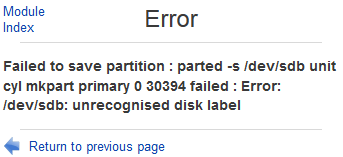
If you list the partition layout and all block devices information using “parted -l” command, it will give you similar error too:
Error: /dev/sdb: unrecognised disk label
Apparently Webmin cannot manage a new drive without any existing partition table. The resolution is to make a label on the disk first, with “parted” command.
Login to the server’s terminal which you want to install the new disk via console or SSH if remotely, and run the following command (replace the name of the disk with actual one assigned by Linux to the new disk):
Steps above create a blank table on the hard disk. Then, you can continue to add new partition using Webmin’s “Partitions on Local Disks” module.
Alternatively, you can continue to manually create the filesystem on the new partition created with parted, mkfs, and other commands. For example:
Then, create a mount point for the new filesystem and mount the new file system:
Ensure that the entry for the new filesystem and hard disk is recorded inside /etc/fstab so that it will mount automatically on system startup.
Where you can modify the parameters according to your need, with explanation below:
/dev/sdb1: Name for the partition
/newdisk: Mount point
ext4: Filesystem (fs) type
defaults : Mount options
0: Zero indicates to exclude this filesystem from dump command backup.
2: Second indicates the order which fsck filesystem check at boot. Only the root (/) filesystem should be specified with 1, all others should be 2.
Источник
Разделение и форматирование дисков в Linux
В Linux можно очень быстро подготовить новый диск к работе. Для этого система поддерживает много различных инструментов, форматов файловых систем и схем разделения дискового пространства.
Данное руководство научит вас:
- Определять новый диск в системе.
- Создавать единый раздел, который охватывает весь диск (большинству операционных систем необходима структура разделов даже при использовании одной файловой системы).
- Форматировать разделы с помощью файловой системы Ext4 (она используется по умолчанию в большинстве современных дистрибутивов Linux).
- Монтировать файловую систему и настраивать автоматическое монтирование при запуске.
Установка инструментов
Для разделения диска используется утилита parted. В большинстве случаев она установлена на сервере по умолчанию.
Если эта утилита не установлена, используйте следующие команды, чтобы установить её:
Ubuntu или Debian

sudo apt-get update

sudo apt-get install parted
CentOS или Fedora

sudo yum install parted
Определение нового диска в системе
Прежде чем установить диск, нужно научиться правильно определять его на сервере.
Чтобы определить на сервере совершенно новый диск, проще всего узнать, где в системе отсутствует схема разбиения. Запросите у parted структуру разделов дисков. Эта команда вернёт сообщение об ошибке для всех дисков, которые не имеют схемы разбиения диска. Это поможет определить новый диск:
sudo parted -l | grep Error
Неразделённый новый диск вернёт ошибку:
Error: /dev/sda : unrecognised disk label
Также можно использовать команду lsblk, чтобы найти диск определённого размера, с которым не связаны разделы:
lsblk

NAME   MAJ:MIN RM   SIZE RO TYPE MOUNTPOINT

sda      8:0    0   100G  0 disk

vda    253:0    0    20G  0 disk

└─vda1 253:1    0    20G  0 part /
Предупреждение: Команду lsblk нужно использовать в сессии до внесения каких-либо изменений. Дисковые идентификаторы /dev/sd* и /dev/hd* не всегда обеспечивают согласованность имён между загрузками системы. Это значит, что вы можете случайно создать раздел и отформатировать неправильный диск без предварительной проверки идентификатора диска. Рекомендуется использовать более постоянные идентификаторы (например /dev/disk/by-uuid, /dev/disk/by-label ил и/dev/disk/by-id). Больше информации по этому вопросу можно получить здесь.
Узнав имя, которое ядро системы присвоило новому диску, можно приступать к разделению.
Разделение нового диска
Данный раздел поможет создать единый раздел, охватывающий весь диск.
Выбор стандарта дискового разделения
Для начала нужно выбрать стандарт разделения диска. Стандарт GPT предлагает более современное решение, а MBR – широкую поддержку. Если у вас нет каких-либо особых требований, рекомендуется использовать GPT.
Чтобы выбрать стандарт GPT, используйте:
sudo parted /dev/sda mklabel gpt
Чтобы выбрать MBR, введите:
sudo parted /dev/sda mklabel msdos
Создание нового раздела
Выбрав формат разделения, создайте раздел диска, охватывающий весь диск:
sudo parted -a opt /dev/sda mkpart primary ext4 0% 100%
С помощью команды lsblk можно узнать, появился ли новый раздел:
lsblk

NAME   MAJ:MIN RM   SIZE RO TYPE MOUNTPOINT

sda      8:0    0   100G  0 disk

└─sda1   8:1    0   100G  0 part

vda    253:0    0    20G  0 disk

└─vda1 253:1    0    20G  0 part /
Создание файловой системы на новом разделе
Итак, теперь у вас есть новый диск и раздел на нём. Отформатируйте его как файловую систему Ext4. Для этого используется утилита mkfs.ext4.
Чтобы добавить метку раздела, используйте флаг –L. Выберите имя, которое поможет в дальнейшем узнать этот диск.
Примечание: Убедитесь, что вы переходите в раздел, а не на сам диск. В Linux диски называются sda, sdb, hda и т.п. Идентификаторы дисковых разделов заканчиваются порядковым номером раздела (например, первый раздел диска sda будет называться sda1).
sudo mkfs.ext4 -L datapartition /dev/sda1
Чтобы изменить метку раздела, используйте команду e2label:
sudo e2label /dev/sda1 newlabel
Чтобы узнать о других способах идентификации разделов, используйте lsblk. Нужно найти имя, метку и UUID раздела. Некоторые версии lsblk выводят все эти данные с помощью:
Если ваша версия не поддерживает этой команды, запросите эти данные вручную:
sudo lsblk -o NAME,FSTYPE,LABEL,UUID,MOUNTPOINT
Команда должна вернуть такой результат.
NAME FSTYPE LABEL UUID MOUNTPOINT
sda
└─ sda1 ext4 datapartition 4b313333-a7b5-48c1-a957-d77d637e4fda
vda
└─vda1 ext4 DOROOT 050e1e34-39e6-4072-a03e-ae0bf90ba13a /
Примечание: Выделенная красным строка указывает различные методы, которые можно использовать для обозначения новой файловой системы.
Монтирование новой файловой системы
Стандарт иерархии файловой системы рекомендует использовать каталог /mnt или его подкаталоги для временно смонтированных файловых систем.
Он не дает никаких рекомендаций относительно более постоянных файловых систем, потому вы можете выбрать для них любое место в системе. В этом руководстве для этого используется /mnt/data.
Создайте такой каталог:
sudo mkdir -p /mnt/data
Временное монтирование файловой системы
Чтобы временно смонтировать файловую систему, введите:
sudo mount -o defaults /dev/sda1 /mnt/data
Автоматическое монтирование файловой системы
Чтобы файловая система автоматически монтировалась во время загрузки сервера, отредактируйте файл /etc/fstab:
sudo nano /etc/fstab
Ранее с помощью команды:
вы получили три идентификатора файловой системы. Добавьте любой из них в файл.
## Use one of the identifiers you found to reference the correct partition
# /dev/sda1 /mnt/data ext4 defaults 0 2
# UUID=4b313333-a7b5-48c1-a957-d77d637e4fda /mnt/data ext4 defaults 0 2
LABEL=datapartition /mnt/data ext4 defaults 0 2
Примечание: Чтобы узнать больше о полях файла /etc/fstab, откройте мануал с помощью man fstab. Больше опций монтирования можно найти при помощи команды man [filesystem] (например man ext4).
Для SSD-накопителей иногда добавляется опция discard, которая включает поддержку continuous TRIM. Воздействие TRIM на производительность и целостность данных до сих пор остаётся предметом обсуждения, потому большинство дистрибутивов включают periodic TRIM в качестве альтернативы.
Сохраните и закройте файл.
Если вы ранее не смонтировали систему, сделайте это сейчас:
Проверка монтирования
Смонтировав том, нужно убедиться, что система имеет доступ к новой файловой системе.
Чтобы убедиться, что диск доступен, используйте df:
df -h -x tmpfs -x devtmpfs
Filesystem Size Used Avail Use% Mounted on
/dev/vda1 20G 1.3G 18G 7% /
/dev/sda1 99G 60M 94G 1% /mnt/data
Также вы должны найти каталог lost+found в каталоге /mnt/data, который обычно указывает на root файловой системы Ext *.
ls -l /mnt/data
total 16
drwx—— 2 root root 16384 Jun 6 11:10 lost+found
Также можно проверить права на чтение и изменение файла, попробовав записать в тестовый файл:
echo «success» | sudo tee /mnt/data/test_file
Теперь прочтите только что изменённый файл:
cat /mnt/data/test_file
success
После тестирования можно просто удалить этот файл.
sudo rm /mnt/data/test_file
Заключение
Данное руководство описало полный процесс подготовки неформатированного диска к использованию. Теперь у вас есть новый разделённый диск, отформатированный, смонтированный и полностью готовый к работе. Конечно, существуют и более сложные методы и подходы, которые позволяют создать более сложный диск.
Источник
How to Create Partition on Linux for >2TB Size using Parted GPT
Question: I have a disk that is greater than 2TB size. I cannot create a partition on this >2TB disk using fdisk. Can you explain me with an example on how to create a partition on a disk that is larger than 2TB using parted and GPT format?
Answer: If you are using fdisk to create partition on a >2TB disk, you’ll get the following warning message.
Creating 2TB partition using Fdisk
The size of the disk in this example is roughly 6 TB. You can still create a partition in this disk for 2TB using fdisk as shown below.
As you see above, even though there are 718357 cylinders available on this disk (this is for total of roughly 6TB), the last cylinder value it shows is only 267349 (which is roughly close to 2TB in this example).
So, fdisk has created a partition of 2 TB as shown below (even though the disk size is around 6 TB).
Set Partition Table to GPT using Parted mklabel
In our case, we need to create a partition >2TB. So, we should use parted command.
Before creating the partition command, we should set the disk label to GPT.
GPT stands for GUID partition table format (GPT).
Use parted’s mklabel command to set disk label to GPT as shown below.
Create >2TB Partition using Parted mkpart
Use parted’s mkpart command as shown below to create partition that is greater than 2TB. In this example, we are creating a partition that is roughly of 6TB in size.
To understand how to use parted command effectively, refer to: 9 Linux Parted Command Examples.
Just for curiosity, let us see how this >2TB partition is displayed in fdisk. As you see below, it still shows the size as roughly 2TB (under the Blocks columns). However there is a + at the end indicating that this is greater than 2TB. The System column displays “GPT”.
Format and Mount the Partition
Use mkfs to format the partition. This will take some time depending the size of the partition. You’ll see that it is “Writing inode tables” and the counter will keep increasing. In this example, it roughly took around 15 minutes to complete the mkfs.
Finally, mount this >2TB partition.
If you enjoyed this article, you might also like..
|
|

Comments on this entry are closed.
I want to install Lamp on my computer. Intel i7 running on MINT 12.04 (Ubuntu 12.04).
Something is going wrong with the elements compability. Maybe I did installed and uninstalled those elements to many times. Do I have to reformat my disk? And start everything from scatch?
It is usefull a reminder. clearly expressed.
I think it should be GPT instead of GTP.
Thanks a lot, very useful article..
thanks again
Hi, remember to align partitions according to the block-sizes of the underlaying (or should I say, the upper level) blocksystem’s: ie. common filesystem block-size (512 bytes), HW RAID vdisk block-size (ie. 64kb) and possibly the popular optimal blocksizes of SSDs (4kb). If partitions are misaligned to the hardware/other blocksystems, there will be unnessessary IO operations as the requested block may span over to the neighbouring block, needing to read the adjacent block too.
To use the sectors as units instead of blocks:
fdisk -u s /dev/sda
then start the first partition from sector 1024, 2048 (1 MB with 512 bytes / sec ) or 4096 etc.
parted has an align-check command :
(parted) align-check minimal 1
1 aligned
and with EXT4 check the man-page for stripe-width parameter.
When you draw a picture or visualize the blocksystem’s on top of each other, the picture says more than thousand words.
Can you write an article about partition alignment too, thanks!
Thanks for pointing out the typo. It is fixed now.
Very nice article..
Another way to accomplish the same ultimate effect is to use LVM. To do this, go ahead and make three 2TB partitions with fdisk, and set their types to physical volume. Then, do your pvcreate on all three partitions, stick all of them in a volume group with vgcreate, and then make your logical volume with lvcreate.
Finally, mkfs on this logical volume, and have fun. 🙂
Or you can just add the whole disk as a physical volume to an LVM volume group. And then just create logical volumes. These are very easy to resize (even while the file system is mounted).
Hi Ramesh Natarajan,
I Have external hard disk 4 tb with full with some data, i want to mount that hard disk in linux system i run this command ‘parted /dev/sdc print ‘ it doesn’t show any thing .please give some advice how to mount that disk
# fdisk -l
Disk /dev/sdc: 4000.7 GB, 4000786149376 bytes
256 heads, 63 sectors/track, 60562 cylinders
Units = cylinders of 16128 * 4096 = 66060288 bytes
Device Boot Start End Blocks Id System
/dev/sdc1 1 266306 4294967292 ee EFI GPT
# parted /dev/sdc print
Warning: Device /dev/sdc has a logical sector size of 4096. Not all parts of
GNU Parted support this at the moment, and the working code is HIGHLY
EXPERIMENTAL.
Error: Unable to open /dev/sdc – unrecognised disk label.
Information: Don’t forget to update /etc/fstab, if necessary.
Thanks … very useful info
what you refer to as “format” is filesystem creation. formatting is something else, but often confused with filesystem creation.
Thanks !
This was really helpful and clearly explaned.
I love you linux guys (I really do), it is wonderful to see everybody helping each others. That does not happen in windoze world.
Good Stuff.. Useful article
Thanks a bunch for this! Great site.
Thanks for the info in a concise, clear and logical presentation.
Thanks for posting this article. It helped me a lot!!
A minor correction. As I understand it, GPT disks don’t have partition types anymore, they are all “primary”. Command ‘mkpart primary’ doesn’t create a primary partition like it does on msdos disks, it just creates a partition called primary. You can just as well use command
(parted) mkpart Parted-FUN! 21476MB 4000787MB
(parted) print
Model: ATA ST4000DM000-1F21 (scsi)
Disk /dev/sdf: 4000787MB
Sector size (logical/physical): 512B/4096B
Partition Table: gpt
Number Start End Size File system Name Flags
1 1.05MB 17181MB 17180MB ext4 raid-var
2 17181MB 21476MB 4295MB raid-swap
3 21476MB 4000786MB 3979310MB Parted-FUN!
This may cause confusion if you try creating logical partitions, I know it did for me.
(parted) mkpart extended 21476MB 4000787MB
(parted) mkpart logical 21476MB 1000787MB
Warning: You requested a partition from 21476MB to 1000787MB.
The closest location we can manage is 4000786MB to 4000786MB.
Is this still acceptable to you?
Yes/No? Yes
(parted) print
Model: ATA ST4000DM000-1F21 (scsi)
Disk /dev/sdf: 4000787MB
Sector size (logical/physical): 512B/4096B
Partition Table: gpt
Number Start End Size File system Name Flags
1 1.05MB 17181MB 17180MB ext4 raid-var
2 17181MB 21476MB 4295MB raid-swap
3 21476MB 4000786MB 3979310MB extended
4 4000786MB 4000786MB 0.00MB logical
You can’t create a partition called “logical” inside a partition called “extended”.
I want to format a disk using parted and make the LVM can you please help
I’ve successfully mkpart, but why when mkfs got this error ?
# mkfs /dev/sdb1
mke2fs 1.39 (29-May-2006)
/dev/sdb1 is apparently in use by the system; will not make a filesystem here!
What is the pre-requisite before using parted / GPT command ?
Источник
12 августа, 2016 12:35 пп
12 458 views
| 1 комментарий
Centos, Debian, Linux, Ubuntu
В Linux можно очень быстро подготовить новый диск к работе. Для этого система поддерживает много различных инструментов, форматов файловых систем и схем разделения дискового пространства.
Данное руководство научит вас:
- Определять новый диск в системе.
- Создавать единый раздел, который охватывает весь диск (большинству операционных систем необходима структура разделов даже при использовании одной файловой системы).
- Форматировать разделы с помощью файловой системы Ext4 (она используется по умолчанию в большинстве современных дистрибутивов Linux).
- Монтировать файловую систему и настраивать автоматическое монтирование при запуске.
Установка инструментов
Для разделения диска используется утилита parted. В большинстве случаев она установлена на сервере по умолчанию.
Если эта утилита не установлена, используйте следующие команды, чтобы установить её:
Ubuntu или Debian
sudo apt-get update
sudo apt-get install parted
CentOS или Fedora
sudo yum install parted
Определение нового диска в системе
Прежде чем установить диск, нужно научиться правильно определять его на сервере.
Чтобы определить на сервере совершенно новый диск, проще всего узнать, где в системе отсутствует схема разбиения. Запросите у parted структуру разделов дисков. Эта команда вернёт сообщение об ошибке для всех дисков, которые не имеют схемы разбиения диска. Это поможет определить новый диск:
sudo parted -l | grep Error
Неразделённый новый диск вернёт ошибку:
Error: /dev/sda: unrecognised disk label
Также можно использовать команду lsblk, чтобы найти диск определённого размера, с которым не связаны разделы:
lsblk
NAME MAJ:MIN RM SIZE RO TYPE MOUNTPOINT
sda 8:0 0 100G 0 disk
vda 253:0 0 20G 0 disk
└─vda1 253:1 0 20G 0 part /
Предупреждение: Команду lsblk нужно использовать в сессии до внесения каких-либо изменений. Дисковые идентификаторы /dev/sd* и /dev/hd* не всегда обеспечивают согласованность имён между загрузками системы. Это значит, что вы можете случайно создать раздел и отформатировать неправильный диск без предварительной проверки идентификатора диска. Рекомендуется использовать более постоянные идентификаторы (например /dev/disk/by-uuid, /dev/disk/by-label ил и/dev/disk/by-id). Больше информации по этому вопросу можно получить здесь.
Узнав имя, которое ядро системы присвоило новому диску, можно приступать к разделению.
Разделение нового диска
Данный раздел поможет создать единый раздел, охватывающий весь диск.
Выбор стандарта дискового разделения
Для начала нужно выбрать стандарт разделения диска. Стандарт GPT предлагает более современное решение, а MBR – широкую поддержку. Если у вас нет каких-либо особых требований, рекомендуется использовать GPT.
Чтобы выбрать стандарт GPT, используйте:
sudo parted /dev/sda mklabel gpt
Чтобы выбрать MBR, введите:
sudo parted /dev/sda mklabel msdos
Создание нового раздела
Выбрав формат разделения, создайте раздел диска, охватывающий весь диск:
sudo parted -a opt /dev/sda mkpart primary ext4 0% 100%
С помощью команды lsblk можно узнать, появился ли новый раздел:
lsblk
NAME MAJ:MIN RM SIZE RO TYPE MOUNTPOINT
sda 8:0 0 100G 0 disk
└─sda1 8:1 0 100G 0 part
vda 253:0 0 20G 0 disk
└─vda1 253:1 0 20G 0 part /
Создание файловой системы на новом разделе
Итак, теперь у вас есть новый диск и раздел на нём. Отформатируйте его как файловую систему Ext4. Для этого используется утилита mkfs.ext4.
Чтобы добавить метку раздела, используйте флаг –L. Выберите имя, которое поможет в дальнейшем узнать этот диск.
Примечание: Убедитесь, что вы переходите в раздел, а не на сам диск. В Linux диски называются sda, sdb, hda и т.п. Идентификаторы дисковых разделов заканчиваются порядковым номером раздела (например, первый раздел диска sda будет называться sda1).
sudo mkfs.ext4 -L datapartition /dev/sda1
Чтобы изменить метку раздела, используйте команду e2label:
sudo e2label /dev/sda1 newlabel
Чтобы узнать о других способах идентификации разделов, используйте lsblk. Нужно найти имя, метку и UUID раздела. Некоторые версии lsblk выводят все эти данные с помощью:
sudo lsblk --fs
Если ваша версия не поддерживает этой команды, запросите эти данные вручную:
sudo lsblk -o NAME,FSTYPE,LABEL,UUID,MOUNTPOINT
Команда должна вернуть такой результат.
NAME   FSTYPE LABEL         UUID                                 MOUNTPOINT

sda

└─sda1 ext4   datapartition 4b313333-a7b5-48c1-a957-d77d637e4fda

vda

└─vda1 ext4   DOROOT        050e1e34-39e6-4072-a03e-ae0bf90ba13a /
Примечание: Выделенная красным строка указывает различные методы, которые можно использовать для обозначения новой файловой системы.
Монтирование новой файловой системы
Стандарт иерархии файловой системы рекомендует использовать каталог /mnt или его подкаталоги для временно смонтированных файловых систем.
Он не дает никаких рекомендаций относительно более постоянных файловых систем, потому вы можете выбрать для них любое место в системе. В этом руководстве для этого используется /mnt/data.
Создайте такой каталог:
sudo mkdir -p /mnt/data
Временное монтирование файловой системы
Чтобы временно смонтировать файловую систему, введите:
sudo mount -o defaults /dev/sda1 /mnt/data
Автоматическое монтирование файловой системы
Чтобы файловая система автоматически монтировалась во время загрузки сервера, отредактируйте файл /etc/fstab:
sudo nano /etc/fstab
Ранее с помощью команды:
sudo lsblk --fs
вы получили три идентификатора файловой системы. Добавьте любой из них в файл.
## Use one of the identifiers you found to reference the correct partition

# /dev/sda1 /mnt/data ext4 defaults 0 2

# UUID=4b313333-a7b5-48c1-a957-d77d637e4fda /mnt/data ext4 defaults 0 2

LABEL=datapartition /mnt/data ext4 defaults 0 2
Примечание: Чтобы узнать больше о полях файла /etc/fstab, откройте мануал с помощью man fstab. Больше опций монтирования можно найти при помощи команды man [filesystem] (например man ext4).
Для SSD-накопителей иногда добавляется опция discard, которая включает поддержку continuous TRIM. Воздействие TRIM на производительность и целостность данных до сих пор остаётся предметом обсуждения, потому большинство дистрибутивов включают periodic TRIM в качестве альтернативы.
Сохраните и закройте файл.
Если вы ранее не смонтировали систему, сделайте это сейчас:
sudo mount -a
Проверка монтирования
Смонтировав том, нужно убедиться, что система имеет доступ к новой файловой системе.
Чтобы убедиться, что диск доступен, используйте df:
df -h -x tmpfs -x devtmpfs

Filesystem      Size  Used Avail Use% Mounted on

/dev/vda1        20G  1.3G   18G   7% /

/dev/sda1        99G   60M   94G   1% /mnt/data
Также вы должны найти каталог lost+found в каталоге /mnt/data, который обычно указывает на root файловой системы Ext *.
ls -l /mnt/data

total 16

drwx------ 2 root root 16384 Jun  6 11:10 lost+found
Также можно проверить права на чтение и изменение файла, попробовав записать в тестовый файл:
echo "success" | sudo tee /mnt/data/test_file
Теперь прочтите только что изменённый файл:
cat /mnt/data/test_file

success
После тестирования можно просто удалить этот файл.
sudo rm /mnt/data/test_file
Заключение
Данное руководство описало полный процесс подготовки неформатированного диска к использованию. Теперь у вас есть новый разделённый диск, отформатированный, смонтированный и полностью готовый к работе. Конечно, существуют и более сложные методы и подходы, которые позволяют создать более сложный диск.
Tags: Ext4, Linux
Issue
-
Why does ‘parted’ print that the disk has an unrecognised disk label?
-
From the output of ‘parted’:
Error: Unable to open /dev/sdb - unrecognised disk label. Disk /dev/sdb doesn't contain a valid partition table -
From the output of ‘fdisk’:
Disk /dev/sdb: 32.2 GB, 32212254720 bytes
255 heads, 63 sectors/track, 3916 cylinders
Units = cylinders of 16065 * 512 = 8225280 bytes

Disk /dev/sdb doesn't contain a valid partition table
Environment
- Red Hat Enterprise Linux 7
- Red Hat Enterprise Linux 6
- Red Hat Enterprise Linux 5
Subscriber exclusive content
A Red Hat subscription provides unlimited access to our knowledgebase, tools, and much more.
Current Customers and Partners
Log in for full access
Log In
GParted forum → GParted → [solved]»unrecognized disk label» — typical resolutions not successful
Pages 1
You must login or register to post a reply
1 2014-09-20 23:44:39 (edited by notorious.dds 2014-09-23 11:29:49)
- notorious.dds
- New member
- Offline
- Registered: 2014-09-20
- Posts: 3
Topic: [solved]»unrecognized disk label» — typical resolutions not successful
I have a 320 GB HD that was originally formatted using a Windows Vista x64 installation disk utilizing an MSDOS partition table. It was formatted into 2 partitions per the default Vista installation. Following the installation of Vista, the disk appeared normally when viewed with Gparted (Live CD or via Parted Magic).
All was normal until I decided to clone the Windows 8.1 partition (/dev/sda5) from my Microsoft surface over the Vista parition (/dev/sda2) on the HD mentioned above. The /dev/sda5 partition was roughly 100 GB and came from a disk that had a GPT partition table. It was cloned to a 300 GB partition (/dev/sda2) on the 320 GB drive mentioned above with the MSDOS partition table. This HD only has 2 partitions.
After cloning, I boot the windows 8.1 install disk and ran the following commands on the 320GB drive:
bootrec /fixmbr
bootrec /fixboot
bootrec /scanos
bootrec /rebuildbcd
At this point, the computer will boot the OS without issue and all seems well and good. That is, until I try to access either partition from linux OS. I can’t mount either parition in linux and when I view the drive in Gparted, I get the «unrecognized disk label» error. The drive essentially appears as though it has no partition table within Gparted.
Following
sudo fdisk -l -u /dev/sdaIt does not appear that there is any overlap of the two partitions.
Following
sudo parted /dev/sdb unit s printThere is no error about a partition being outside of the disk.
Following
There’s nothing about lingering GPT data
At any rate, I’m not sure where to go from here. I’ve tried Gparted 0.19.1 Live as well as earlier versions with no success.
Any ideas are appreciated. Thanks!
2 Reply by mfleetwo 2014-09-21 12:51:19
- mfleetwo
- Developer
- Offline
- Registered: 2012-05-18
- Posts: 441
Re: [solved]»unrecognized disk label» — typical resolutions not successful
Hi,
GParted uses libparted to query the hard drive and show the partitions, so what «parted /dev/MYDISK unit s print» shows is what GParted should show.
Please show the output of the fdisk and parted commands. (Was that a typo saying «parted /dev/sdb» instead of sda?) Also the output from «blkid» and if available «lsblk».
How did you clone Windows 8.1 partition to the 320 GB HD?
Thanks,
Mike
3 Reply by notorious.dds 2014-09-21 15:00:59 (edited by notorious.dds 2014-09-21 15:45:28)
- notorious.dds
- New member
- Offline
- Registered: 2014-09-20
- Posts: 3
Re: [solved]»unrecognized disk label» — typical resolutions not successful
Thanks Mike,
Here’s the output:
Welcome - Parted Magic (Linux 3.5.6-pmagic)

root@PartedMagic:~# fdisk -l -u /dev/sda

Disk /dev/sda: 320.1 GB, 320072933376 bytes
255 heads, 63 sectors/track, 38913 cylinders, total 625142448 sectors
Units = sectors of 1 * 512 = 512 bytes
Sector size (logical/physical): 512 bytes / 512 bytes
I/O size (minimum/optimal): 512 bytes / 512 bytes
Disk identifier: 0x0b8fdec7

This doesn't look like a partition table
Probably you selected the wrong device.

   Device Boot      Start         End      Blocks   Id  System
/dev/sda1   ?        2048      718847      358400    7  HPFS/NTFS/exFAT
/dev/sda2          718848   625139711   312210432    7  HPFS/NTFS/exFAT


root@PartedMagic:~# parted /dev/sda unit s print
Error: /dev/sda: unrecognised disk label
Model: ATA Hitachi HTS54323 (scsi)
Disk /dev/sda: 625142448s
Sector size (logical/physical): 512B/512B
Partition Table: unknown
Disk Flags:


root@PartedMagic:~# fixparts /dev/sda
FixParts 0.8.5

Loading MBR data from /dev/sda

MBR command (? for help): p

** NOTE: Partition numbers do NOT indicate final primary/logical status,
** unlike in most MBR partitioning tools!

** Extended partitions are not displayed, but will be generated as required.

Disk size is 625142448 sectors (298.1 GiB)
MBR disk identifier: 0x0B8FDEC7
MBR partitions:

                                                   Can Be   Can Be
Number  Boot  Start Sector   End Sector   Status   Logical  Primary   Code
   1      *           2048       718847   primary     Y        Y      0x07
   2                718848    625139711   primary              Y      0x07


root@PartedMagic:~# blkid
/dev/sdb1: LABEL="Parted Magic" UUID="2671-BF4E" TYPE="vfat"
/dev/sdb2: LABEL="Data" UUID="d9ab5edb-07ab-4418-bb25-8b1df42b6efc" TYPE="ext2"
/dev/loop0: TYPE="squashfs"
/dev/loop1: TYPE="squashfs"


root@PartedMagic:~# lsblk
NAME   MAJ:MIN RM   SIZE RO TYPE MOUNTPOINT
sda      8:0    0 298.1G  0 disk
└─sda2   8:2    0   7.3G  0 part
sdb      8:16   1   3.8G  0 disk
├─sdb1   8:17   1   656M  0 part
└─sdb2   8:18   1   3.1G  0 part
sr0     11:0    1  1024M  0 rom
loop0    7:0    0  39.3M  1 loop
loop1    7:1    0 184.1M  1 loop
Yes, the sdb was a typo. And, I think I used that typo when originally running my parted command. It’s corrected in the commands above.
I cloned the windows partition using clonezilla. I used sda5 as the source and cloned it to an image. I then changed all of the sda5’s to sda2’s in the image and cloned the image to sda2 on the 320GB disk.
4 Reply by mfleetwo 2014-09-21 19:35:53
- mfleetwo
- Developer
- Offline
- Registered: 2012-05-18
- Posts: 441
Re: [solved]»unrecognized disk label» — typical resolutions not successful
Hi,
The partition table on your 320 GB HD appears to have been partitially corrupted.
Assuming the partition table printed by fdisk is correct …
Re-write the partition table using fdisk:
1) Write down the details of the 2 partitions: start, end sectors and partition type and boot flag.
2) Run «fdisk /dev/sda».
2a) Delete both partitions.
2b) Recreate two new partitions with the exact same start and end sectors, restore partition type, boot flag and write the partition table back to the disk.
It is a possiblilty that the MBR boot code is corrupted too. You may need to follow this FAQ: 15: What are the commands for repairing Windows Vista or Windows 7 boot problems?
Thanks,
Mike
5 Reply by notorious.dds 2014-09-23 11:29:16 (edited by notorious.dds 2014-09-23 15:43:22)
- notorious.dds
- New member
- Offline
- Registered: 2014-09-20
- Posts: 3
Re: [solved]»unrecognized disk label» — typical resolutions not successful
Thanks again Mike!
Deleting and recreating the partitions with fdisk did it. However, upon booting into Windows, I noticed that the disk usage was constantly hovering around 100% and some programs were not opening properly even with a reboot. I decided to run chkdsk (with the /f /r options).
For whatever reason, the chkdsk stopped at 12% complete and stayed there for hours. I decided to let it go and went to bed. When I woke up, I was pleasantly surprised to find that all was well. ![]()
Thanks.
As a side note to anyone reading this in the same situation, I would normally use Clonezilla to back up a drive before playing with the partition table in this way. However, given it’s issue as described above, Clonezilla was a no go as well. In lieu of using Clonezilla, I was able to successfully create a disk image using Macrium Reflect.
Pages 1
You must login or register to post a reply
GParted forum → GParted → [solved]»unrecognized disk label» — typical resolutions not successful