Ошибка DirectX device creation error появляется, как правило, при открытии современных игр или программ. А говорит она о неполадках в системе или самой библиотеке. Многие пользователи жалуются на такую проблему, поэтому и нужно знать о том, как с ней разобраться. Именно об этом и пойдет речь в данной статье.
Содержание
- Подробности
- Случай №1: Обновление Директа
- Случай №2: Обязательное обновление драйвера
- Случай №3: Принудительный откат драйвера
- Случай №4: Отключение защиты ОС
- Случай №5: Очистка ПК от вирусов
- Случай №6: Восстанавливаем файлы ОС
- Заключение
Подробности
Как правило, такая ошибка указывает на проблемы в драйвере, настройках операционной системы или неправильную работу отдельных программ для защиты ОС. И в этом случае мы можем сделать многое.
В данном материале мы рассмотрим основные варианты решения проблемы. С самого начала речь пойдет о самых простых и доступных из них. Однако потом пойдут довольно сложные решения. Впрочем, если все делать в соответствии с инструкцией, то ничего страшного не случится.
Хотелось бы заметить, что в некоторых случаях сбой указывает на то, что ваша видеокарта не поддерживает нужную версию DirectX. И в этом случае что-то сделать программно невозможно. Придется приобретать новый графический адаптер.
Случай №1: Обновление Директа
Самый очевидный в данной ситуации шаг – обновление Директа до самой актуальной версии. Специально для этих целей разработчики библиотеки предусмотрели специальный инструмент – онлайн-установщик. Он загружает на компьютер недостающие компоненты с серверов Microsoft, а затем располагает их по нужным каталогам. Причем вся процедура происходит в автоматическом режиме, от пользователя требуется минимальное количество действий.
Обратитесь к нашей статье «Онлайн-установщик DirectX», чтобы загрузить последнюю версию библиотеки
Случай №2: Обязательное обновление драйвера
Это еще одно действие, которое стоит попробовать в том случае, если при запуске игры появляется вышеозначенная ошибка и ваша видеокарта точно поддерживает нужный DirectX. Вероятнее всего, вы используете старые драйверы для своего графического адаптера, которые не умеют работать с данной версией библиотек.
Поэтому нужно заняться обновлением программного обеспечения. Можно, конечно, посетить сайт производителя оборудования, скачать там нужную версию ПО и установить ее вручную. Но это несколько затруднительно. Гораздо проще использовать для обновления инструменты самой операционной системы. Вот как это можно сделать:
- Нажимаем комбинацию клавиш Win + R.
- Выполняем команду devmgmt.msc.
 В результате откроется «Диспетчер устройств».
 - Теперь раскрываем раздел «Видеоадаптеры».
- Находим имя своей графической карты, а затем кликаем на эту графу правой кнопкой мыши.
- В отобразившемся списке вызываем функцию «Обновить драйвер».

- Ждем запуска соответствующего инструмента. В нем выбираем опцию «Автоматический поиск…».
 В результате откроется «Диспетчер устройств».
Не забудьте, что после обновления драйверов обязательно нужно перезагрузить компьютер. Иначе новая версия ПО просто не будет учтена системой. А уже затем стоит проверять работоспособность игры. Вдруг вам повезет и первый же вариант поможет? А если нет, то стоит перейти к следующему пункту нашего материала.
Случай №3: Принудительный откат драйвера
А еще может быть и совсем по-другому. К примеру, если эта ошибка начала появляться у вас после установки свежей версии драйвера с сайта производителя, то виновата именно она. Вероятно, в ней содержится какой-то баг, мешающий нормальной работе графического адаптера и вызывающий проблемы такого типа.
Поэтому самым правильным решением будет возврат прежней версии. Для этого не нужно искать ее на соответствующих ресурсах. Достаточно воспользоваться возможностями операционной системы Windows и ее инструментами. В этом случае нам опять поможет диспетчер устройств. Вот инструкция, рассказывающая о том, как и что делать:
- По аналогии с предыдущей инструкцией вызываем инструмент «Диспетчер устройств».
- Вновь находим графу с названием видеокарты. Но на этот раз дважды щелкаем по ней ЛКМ.
- Перемещаемся на вкладку «Драйвер».
- Нажимаем на кнопку «Откатить».

- Подтверждаем выполнение действия.

Теперь у вас установлена именно та версия ПО, которая использовалась до обновления. Однако учтите, что изменения вступят в силу только после перезагрузки компьютера. Рестарт необходим для учета всех изменений. А потом уже можно тестировать любимую игру на наличие ошибок. Если и это не помогло, то у нас есть еще несколько вариантов.
Случай №4: Отключение защиты ОС
Иногда различные антивирусные продукты находят в некоторых играх то, что им не нравится и всеми силами пытаются это заблокировать. Отсюда различные ошибки, нестабильная работа с библиотеками и прочие прелести. Конечно, приятного в этом мало. Особенно, если вы точно знаете, что с файлами игры все в полном порядке.
Такой паранойей обычно страдают брандмауэр Windows и разного рода антивирусы. Но если последняя еще умудряется как-то находить потенциальные угрозы, то брандмауэр во многих случаях оказывается совсем неэффективен. В любом случае, на время защиту нужно отключить для проверки нашей теории. Вот что нужно сделать для этого:
- Опять нажимаем Win + R.
- Вводим services.msc и кликаем по кнопке «ОК».
- В отобразившемся перечне служб находим пункт «Брандмауэр…» и кликаем по нему дважды ЛКМ.

- Откроется окошко с параметрами. Нажимаем на кнопку «Остановить».
- А теперь кликаем «Применить».

- Закрываем все окна.


Вот так отключается брандмауэр. Как вы могли заметить, мы не стали копаться в его настройках (все равно бесполезно), а поступили гораздо проще – отключили всю службу, хоть ее работа и будет восстановлена после перезагрузки ПК. Так проще и намного быстрее. Теперь же пришло время заняться вторым возможным источником проблем – антивирусом.
Деактивировать его можно следующим образом:
- Находим значок антивируса в трее Windows.
- Кликаем по нему ПКМ.
- Выбираем опцию временного отключения.

- Указываем временной промежуток (хватит нескольких минут).
- Подтверждаем выполнение действия.
Теперь, когда защита ОС полностью отключена, можно пробовать запускать игру. Если ошибка более не появляется, то это значит, что нужно править правила антивируса и файервола. Но если все осталось точно так же, как и было, то проблема в другом. А вот защиту в любом случае придется возвращать на место.
Случай №5: Очистка ПК от вирусов
Это закономерно. Если ничего из вышеперечисленного не помогает, то 99 шансов из 100 за то, что на компьютере пользователя поселились вирусы. Эти вредные объекты способны блокировать работу самых разных файлов. В том числе и Директа. Отсюда и различные ошибки. Более того, последствия могут быть еще печальнее (потеря важных данных, поломка ОС и т.д.), если ничего не предпринимать. Поэтому с вредоносными объектами следует бороться. Просканировать компьютер можно несколькими антивирусами. Используйте тот, который вам больше нравится.
А мы же остановимся на ESET Internet Security – это мощный продукт для борьбы с вирусами, который распространяется на платной основе, но также имеет бесплатную версию, доступную на протяжении месяца.
Инструкция по использованию программы:
- Перейдите к главному окошку Internet Security.
- Откройте раздел «Сканирование компьютера», расположенный в меню слева.
- Теперь активируйте пункт «Выборочное сканирование», предварительно нажав на «Расширенное…».

- Задайте все доступные местоположения для проверки.
- Кликните ЛКМ на кнопку «Сканировать как…».


Остальная часть процедуры полностью автоматическая, так что от пользователя ничего не требуется. Не забудьте только перезагрузить компьютер, как только она будет окончена. А уже потом следует запустить проблемную игрушку и проверить ее работоспособность. Если это не помогло, то двигаемся дальше.
Случай №6: Восстанавливаем файлы ОС
Почему мы включили в инструкцию данный способ? Простая логика. Если на компьютере были вирусы, то резонно предположить, что они могли существенно повредить важные файлы операционной системы, которые требуются для нормальной работы библиотек DirectX. Отсюда и та ошибка, которая мешает нам запустить игру или программу.
К счастью, разработчики Windows предусмотрели такую ситуацию и встроили в ОС инструмент для ее исправления. Для восстановления файлов нам будет достаточно простой командной строки. Если делать все в строгом соответствии с инструкцией, то никаких неприятных казусов не будет. Итак, начнем:
- Открываем меню «Пуск.
- Затем ищем каталог «Служебные…» и кликаем по нему.
- Здесь нам нужен инструмент «Командная строка». Откройте ее с правами администратора, кликнув по соответствующей строке ПКМ и выбрав нужную опцию.

- В самой консоли введите sfc /scannow.

После нажатия на Enter начнется проверка целостности файлов и их восстановление в случае необходимости. Процесс займет от 5 до 15 минут. После того, как процедура будет завершена, обязательно перезагрузите компьютер. Иначе от этого восстановления не будет никакого толку. Проверять работоспособность игры нужно после рестарта.
Заключение
В рамках данного материала мы попытались ответить на вопрос о том, что делать если вдруг возникает ошибка «DirectX device creation error» при запуске какой-нибудь игры. Как правило, эта ошибка связана с какой-нибудь программной неполадкой в самих библиотеках, в драйвере графического адаптера или же в операционной системе.
Однако эта же ошибка может говорить и о том, что вам пора менять видеокарту, так как она уже не поддерживает данную версию DirectX. Именно поэтому пользователям приходится перебирать все способы устранения данной ошибки. Некоторые из них весьма сложны. Но если делать все в строгом соответствии с инструкцией, то ничего страшного не случится.
Содержание
- Устранение ошибки DirectX device creation error
- Решение проблемы
- Завершение
- Различные ошибки DirectX
- Устранение неполадок
- DirectX function device CreateTexture2D
- Unable to create DirectX 11 device
- The Launcher cannot query DirectX
- DirectX function device createbuffer
- Не удается создать устройство DirectX
- DirectX encountered an unrecoverable error
- Your graphics card does not support DirectX 11 features
- Заключение
- Ошибка DirectX device creation error
- Подробности
- Случай №1: Обновление Директа
- Случай №2: Обязательное обновление драйвера
- Случай №3: Принудительный откат драйвера
- Случай №4: Отключение защиты ОС
- Случай №5: Очистка ПК от вирусов
- Случай №6: Восстанавливаем файлы ОС
- Заключение
Устранение ошибки DirectX device creation error
Без актуальной версии ДиректХ не будут работать современные игры и некоторые другие программы. Если соответствующего компонента нет в системе, то будут возникать разного рода ошибки. Нередко пользователи задаются вопросом: «Когда появляется сообщение “DirectX device creation error” — что делать?». Мы дадим на него развернутый и проверенный ответ.
Рекомендуем! MultiSetup
| Официальный дистрибутив Telegram |
| Тихая установка без диалоговых окон |
| Рекомендации по установке необходимых программ |
| Пакетная установка нескольких программ |
Решение проблемы
Подобный сбой, увы, не является редким. В тексте ошибки, как правило, упоминается, что текущая конфигурация компьютера не поддерживается. Там же пишется нужная для корректной работы приложения версия DirectX. Но это далеко не всегда значит, что «железо» ПК придется обновлять. Есть несколько важных нюансов:
- Если необходим ДиректХ 12, а у вас не Windows 10, то нужно установить именно эту версию ОС, поскольку только в ней поддерживается соответствующая библиотека.
- Иногда компоненты просто отсутствуют в системе, хоть и поддерживается текущей конфигурацией.
Именно второй случай заслуживает дальнейшего рассмотрения. Вам нужно выяснить модель видеокарты и версию Виндовс, чтобы узнать информацию о совместимости. Узнать ОС можно, открыв «Мой компьютер», кликнув ПКМ на свободную область и выбрав «Свойства». Здесь и отобразятся нужные сведения.
Чтобы определить модель графического устройства, из открытого окна перейдите в «Диспетчер устройств» и раскройте вкладку «Видеоадаптеры». Далее, перейдите на сайт производителя и узнайте подробности о ней.
Про ОС стоит учитывать следующие факторы:
- DirectX 12 доступно только для «десятки».
- Одиннадцатая версия библиотеки совместима с Вистой и более поздними ОС от Microsoft.
- Десятая и младшие — на всех Windows.
Завершение
Если вы удостоверились, что ошибка DirectX device creation error, некорректна, то остается только загрузить нужную версию библиотеки с нашего сайта:
Источник
Различные ошибки DirectX
Ошибка DirectX – далеко не редкое явление. Эти библиотеки весьма чувствительны к драйверам, настройкам операционной системы и прочим штукам. Поэтому сбои случаются довольно часто. И нужно знать все о том, как им противостоять. Рассмотрим самые популярные ситуации.
Устранение неполадок
В данном материале мы рассмотрим те сбои ДиректХ, которые встречаются чаще всего в повседневной жизни. Естественно, мы расскажем и о том, как их исправить. Но в тексте будет много сложного. Так что внимательно читайте инструкции.
DirectX function device CreateTexture2D
Если появляется ошибка «DirectX function device CreateTexture2D», то, вероятнее всего, виноваты драйвера видеокарты. Бывает так, что в старых драйверах не хватает куска кода, который требуется для нормальной работы видеокарты с той или иной версией библиотеки. Это случается из-за недосмотра разработчиков. Однако в новых версиях ПО ошибка может быть устранена.
Для обновления драйвера вовсе не обязательно посещать официальный сайт разработчика, скачивать нужную версию драйвера и устанавливать ее вручную. Гораздо проще и безопаснее использовать для обновления инструменты Windows.
Сейчас мы рассмотрим вариант обновления с помощью «Диспетчера устройств» Windows:
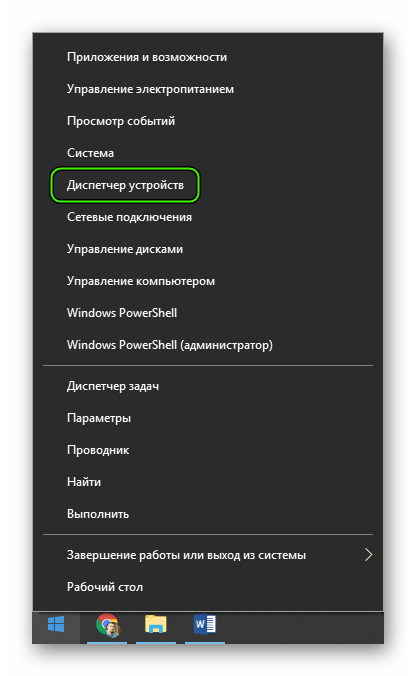
- Щелкаем по кнопке «Пуск» правой кнопкой мыши и дожидаемся появления контекстного меню.
- В меню ищем «Диспетчер устройств» и нажимаем на этот пункт.

- Появится окно со списком установленного оборудования. Ищем «Видеоадаптеры» и щелкаем по данной записи.
- Находим имя своей видеокарты и щелкаем по нему правой кнопкой мыши.
- В контекстном меню выбираем «Обновить драйвер».
- Запустится мастер обновления. Необходимо щелкнуть по кнопке «Автоматический поиск драйверов в сети».
По завершении обновления необходимо перезагрузить компьютер. Только после рестарта система сможет инициализировать новый драйвер и начать его использовать. После рестарта можно пробовать запускать проблемную игру. Если ошибка все еще остается, то стоит попробовать еще один вариант.
Unable to create DirectX 11 device
А вот ошибка «Unable to create DirectX 11 device», наоборот, может появиться после обновления драйвера, если в его коде есть какой-то баг. Если это сбой обнаружился только после обновления, то это значит, что в новой версии ПО присутствует какой-то баг, мешающий нормальной работе графического адаптера и системных библиотек.
Откат также осуществляется при помощи встроенных инструментов операционной системы Windows. Но для его осуществления требуются немного другие шаги, чем для обновления драйвера. Впрочем, мы в любом случае предоставим подробную инструкцию, рассказывающую о данном процессе. Вот она:
- Опять переходим раздел «Видеоадаптеры» в «Диспетчере задач».
- Теперь необходимо найти имя нашей графической карты и кликнуть по ней правой кнопкой мыши.
- В появившемся меню просто выбираем «Свойства».
- Перемещаемся на вкладку «Драйвер».
- Нажимаем на кнопку «Откатить».
- Подтверждаем действие путем нажатия на кнопку «ОК».
Как водится, после работы с драйверами обязательно нужно перезагрузить компьютер. Иначе система просто не увидит другой драйвер и попытается работать со старым, что приведет к падению ОС. После рестарта можно проверять игру на наличие ошибок. Если и этот вариант не помог, то у нас в запасе есть еще несколько.
The Launcher cannot query DirectX
Весьма часто в окошке с ошибкой появляется текст The Launcher cannot query DirectX в L.A Noire. Что делать в этом случае? Вероятнее всего, на компьютере хозяйничают вирусы. Именно из-за них может получиться такой казус. И это еще не предел. Огромное количество вирусов на компьютере вполне может повесить всю ОС. Так что стоит воспользоваться каким-либо антивирусом, чтобы проверить компьютер
Еще одно решение – обновление компонента Microsoft .NET Framework до версии 4.7.1:
- Откройте эту ссылку.
- Кликните по кнопке «Скачать».
- Дождитесь завершения загрузки.
- Теперь запустите полученный файл.
- Выполните инсталляцию компонента.

DirectX function device createbuffer
Для появления ошибки «DirectX function device createbuffer» тоже имеется свое объяснение. Если на вашем компьютере находились полчища вирусов, то вполне вероятно, что они могли повредить некоторые системные файлы, ответственные за работу библиотек DirectX. Отсюда и постоянные ошибки при запуске той или иной игрушки. Также могут возникнуть конфликты в работе драйверов и компонентов библиотек.
Однако даже если файлы сильно повреждены, есть возможность вернуть все на круги своя. Для восстановления элементов даже не нужно никаких дополнительных программ. Достаточно командной строки. Бояться ее не стоит. Если все выполнять в строгом соответствии с инструкцией, то ничего страшного не случится. А вот и она:
- Открываем меню «Пуск» при помощи соответствующей кнопки в панели задач.
- Далее щелкаем по папке «Служебные».
- Находим пункт «Командная строка» и кликаем по нему правой кнопкой мыши.
- Появится меню, в котором нужно выбрать опцию «Запуск от имени администратора».
- В главном окне консоли вводим sfc /scannow и жмем на кнопку Enter.
Проверка файлов и их восстановление займет около 10-15 минут. Не забудьте, что после окончания проверки обязательно нужно будет перезагрузить компьютер. Иначе в восстановлении не будет никакого толку. После рестарта можно проверять работоспособность библиотек DirectX и любимой игрушки. Если это не помогло, то остается всего один вариант.
Не удается создать устройство DirectX
Если «Не удается создать устройство DirectX», то такое поведение может быть также связано с работой антивируса или системного брандмауэра. Эти программы любят блокировать все подряд. Даже несмотря на то, что перед ними вовсе не вредоносный объект. Вероятно, они блокируют и некоторые компоненты библиотек Директ Икс.
Самым правильным шагом будет временное отключение защиты. Достаточно это сделать для антивируса. Просто найдите его иконку в трее Windows, кликните по ней ПКМ и выберите соответствующую опцию.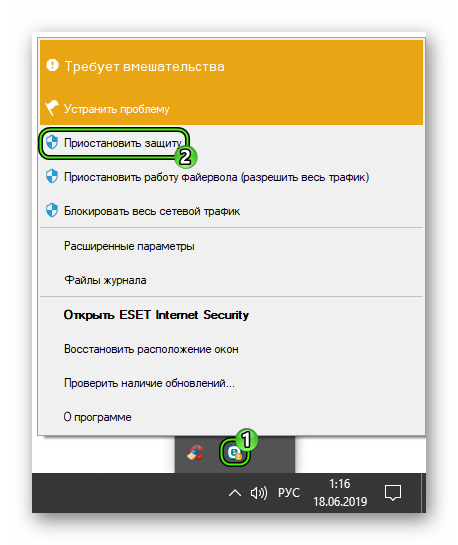
DirectX encountered an unrecoverable error
При появлении ошибки с текстом «DirectX encountered an unrecoverable error» остается только одно – переустановка. Ведь, вероятнее всего, вирусы повредили какие-то файлы самих библиотек. Поэтому и появляются ошибки такого типа. И именно поэтому видеокарта не может нормально работать с DirectX. Если это действительно так, то приятного в этом мало.
Здесь поможет только полная переустановка компонента. Данная процедура очень простая в исполнении, ведь от пользователя требуется просто скачать и запустить специальную утилиту. Подробности о ней изложены в отдельной статье, с которой мы и предлагаем вам ознакомиться. Это же действие нередко спасает и при сбое DirectX error 0x887a0004.
Your graphics card does not support DirectX 11 features
Некоторые ошибки указывают на аппаратную проблему. Да, именно на ту, которая связана с железом компьютера. И здесь мы вряд ли что-нибудь сможем сделать.
Ошибка с текстом Your graphics card does not support DirectX 11 features недвусмысленно говорит о том, что у вас слишком древний графический адаптер, который не поддерживает DirectX 11. И такое действительно случается. Под раздачу даже попадают видеокарты 2011 года выпуска. И неудивительно. Ведь они поддерживают только версию 10.1.
Решение проблемы простое. Нужно пойти в магазин и купить новую видеокарту. Есть еще один вариант: отказаться от идеи запуска той игры, которая выдала такую ошибку. Все равно ничего не получится до тех пор, пока вы не обновите свое оборудование. Эту ошибку исправить невозможно другими способами.
Заключение
В рамках данного материала мы поговорили о том, что делать, если вдруг возникла неустранимая ошибка DirectX. Если именно так написано в окне с ошибкой, то это еще ничего не значит. В большинстве случаев ее можно устранить. Если, конечно, она имеет программный характер, а не связана с аппаратными частями компьютера.
Для решения программных проблем существует много способов. Все они перечислены чуть выше. Некоторые из них могут показаться вам довольно сложными. Но не стоит паниковать. Нужно выполнять все в строгом соответствии с инструкцией. Только в этом случае можно надеяться, что проблема будет решена и библиотеки заработают так, как им положено. Кстати, если вы поняли, что проблема имеет аппаратный характер, то не пытайтесь ремонтировать видеокарту сами. Вы ее только убьете.
Источник
Ошибка DirectX device creation error
Ошибка DirectX device creation error появляется, как правило, при открытии современных игр или программ. А говорит она о неполадках в системе или самой библиотеке. Многие пользователи жалуются на такую проблему, поэтому и нужно знать о том, как с ней разобраться. Именно об этом и пойдет речь в данной статье.
Подробности
Как правило, такая ошибка указывает на проблемы в драйвере, настройках операционной системы или неправильную работу отдельных программ для защиты ОС. И в этом случае мы можем сделать многое.
В данном материале мы рассмотрим основные варианты решения проблемы. С самого начала речь пойдет о самых простых и доступных из них. Однако потом пойдут довольно сложные решения. Впрочем, если все делать в соответствии с инструкцией, то ничего страшного не случится.
Случай №1: Обновление Директа
Самый очевидный в данной ситуации шаг – обновление Директа до самой актуальной версии. Специально для этих целей разработчики библиотеки предусмотрели специальный инструмент – онлайн-установщик. Он загружает на компьютер недостающие компоненты с серверов Microsoft, а затем располагает их по нужным каталогам. Причем вся процедура происходит в автоматическом режиме, от пользователя требуется минимальное количество действий.
Обратитесь к нашей статье «Онлайн-установщик DirectX», чтобы загрузить последнюю версию библиотеки
Случай №2: Обязательное обновление драйвера
Это еще одно действие, которое стоит попробовать в том случае, если при запуске игры появляется вышеозначенная ошибка и ваша видеокарта точно поддерживает нужный DirectX. Вероятнее всего, вы используете старые драйверы для своего графического адаптера, которые не умеют работать с данной версией библиотек.
Поэтому нужно заняться обновлением программного обеспечения. Можно, конечно, посетить сайт производителя оборудования, скачать там нужную версию ПО и установить ее вручную. Но это несколько затруднительно. Гораздо проще использовать для обновления инструменты самой операционной системы. Вот как это можно сделать:
- Нажимаем комбинацию клавиш Win + R.
- Выполняем команду devmgmt.msc. В результате откроется «Диспетчер устройств».
- Теперь раскрываем раздел «Видеоадаптеры».
- Находим имя своей графической карты, а затем кликаем на эту графу правой кнопкой мыши.
- В отобразившемся списке вызываем функцию «Обновить драйвер».
- Ждем запуска соответствующего инструмента. В нем выбираем опцию «Автоматический поиск…».
Не забудьте, что после обновления драйверов обязательно нужно перезагрузить компьютер. Иначе новая версия ПО просто не будет учтена системой. А уже затем стоит проверять работоспособность игры. Вдруг вам повезет и первый же вариант поможет? А если нет, то стоит перейти к следующему пункту нашего материала.
Случай №3: Принудительный откат драйвера
А еще может быть и совсем по-другому. К примеру, если эта ошибка начала появляться у вас после установки свежей версии драйвера с сайта производителя, то виновата именно она. Вероятно, в ней содержится какой-то баг, мешающий нормальной работе графического адаптера и вызывающий проблемы такого типа.
Поэтому самым правильным решением будет возврат прежней версии. Для этого не нужно искать ее на соответствующих ресурсах. Достаточно воспользоваться возможностями операционной системы Windows и ее инструментами. В этом случае нам опять поможет диспетчер устройств. Вот инструкция, рассказывающая о том, как и что делать:
- По аналогии с предыдущей инструкцией вызываем инструмент «Диспетчер устройств».
- Вновь находим графу с названием видеокарты. Но на этот раз дважды щелкаем по ней ЛКМ.
- Перемещаемся на вкладку «Драйвер».
- Нажимаем на кнопку «Откатить».
- Подтверждаем выполнение действия.
Теперь у вас установлена именно та версия ПО, которая использовалась до обновления. Однако учтите, что изменения вступят в силу только после перезагрузки компьютера. Рестарт необходим для учета всех изменений. А потом уже можно тестировать любимую игру на наличие ошибок. Если и это не помогло, то у нас есть еще несколько вариантов.
Случай №4: Отключение защиты ОС
Иногда различные антивирусные продукты находят в некоторых играх то, что им не нравится и всеми силами пытаются это заблокировать. Отсюда различные ошибки, нестабильная работа с библиотеками и прочие прелести. Конечно, приятного в этом мало. Особенно, если вы точно знаете, что с файлами игры все в полном порядке.
Такой паранойей обычно страдают брандмауэр Windows и разного рода антивирусы. Но если последняя еще умудряется как-то находить потенциальные угрозы, то брандмауэр во многих случаях оказывается совсем неэффективен. В любом случае, на время защиту нужно отключить для проверки нашей теории. Вот что нужно сделать для этого:
- Опять нажимаем Win + R.
- Вводим services.msc и кликаем по кнопке «ОК».
- В отобразившемся перечне служб находим пункт «Брандмауэр…» и кликаем по нему дважды ЛКМ.
- Откроется окошко с параметрами. Нажимаем на кнопку «Остановить».
- А теперь кликаем «Применить».
- Закрываем все окна.
Вот так отключается брандмауэр. Как вы могли заметить, мы не стали копаться в его настройках (все равно бесполезно), а поступили гораздо проще – отключили всю службу, хоть ее работа и будет восстановлена после перезагрузки ПК. Так проще и намного быстрее. Теперь же пришло время заняться вторым возможным источником проблем – антивирусом.
Деактивировать его можно следующим образом:
- Находим значок антивируса в трее Windows.
- Кликаем по нему ПКМ.
- Выбираем опцию временного отключения.
- Указываем временной промежуток (хватит нескольких минут).
- Подтверждаем выполнение действия.
Теперь, когда защита ОС полностью отключена, можно пробовать запускать игру. Если ошибка более не появляется, то это значит, что нужно править правила антивируса и файервола. Но если все осталось точно так же, как и было, то проблема в другом. А вот защиту в любом случае придется возвращать на место.
Случай №5: Очистка ПК от вирусов
Это закономерно. Если ничего из вышеперечисленного не помогает, то 99 шансов из 100 за то, что на компьютере пользователя поселились вирусы. Эти вредные объекты способны блокировать работу самых разных файлов. В том числе и Директа. Отсюда и различные ошибки. Более того, последствия могут быть еще печальнее (потеря важных данных, поломка ОС и т.д.), если ничего не предпринимать. Поэтому с вредоносными объектами следует бороться. Просканировать компьютер можно несколькими антивирусами. Используйте тот, который вам больше нравится.
А мы же остановимся на ESET Internet Security – это мощный продукт для борьбы с вирусами, который распространяется на платной основе, но также имеет бесплатную версию, доступную на протяжении месяца.
Инструкция по использованию программы:
- Перейдите к главному окошку Internet Security.
- Откройте раздел «Сканирование компьютера», расположенный в меню слева.
- Теперь активируйте пункт «Выборочное сканирование», предварительно нажав на «Расширенное…».
- Задайте все доступные местоположения для проверки.
- Кликните ЛКМ на кнопку «Сканировать как…».
Остальная часть процедуры полностью автоматическая, так что от пользователя ничего не требуется. Не забудьте только перезагрузить компьютер, как только она будет окончена. А уже потом следует запустить проблемную игрушку и проверить ее работоспособность. Если это не помогло, то двигаемся дальше.
Случай №6: Восстанавливаем файлы ОС
Почему мы включили в инструкцию данный способ? Простая логика. Если на компьютере были вирусы, то резонно предположить, что они могли существенно повредить важные файлы операционной системы, которые требуются для нормальной работы библиотек DirectX. Отсюда и та ошибка, которая мешает нам запустить игру или программу.
К счастью, разработчики Windows предусмотрели такую ситуацию и встроили в ОС инструмент для ее исправления. Для восстановления файлов нам будет достаточно простой командной строки. Если делать все в строгом соответствии с инструкцией, то никаких неприятных казусов не будет. Итак, начнем:
- Открываем меню «Пуск.
- Затем ищем каталог «Служебные…» и кликаем по нему.
- Здесь нам нужен инструмент «Командная строка». Откройте ее с правами администратора, кликнув по соответствующей строке ПКМ и выбрав нужную опцию.
- В самой консоли введите sfc /scannow.
После нажатия на Enter начнется проверка целостности файлов и их восстановление в случае необходимости.Процесс займет от 5 до 15 минут. После того, как процедура будет завершена, обязательно перезагрузите компьютер. Иначе от этого восстановления не будет никакого толку. Проверять работоспособность игры нужно после рестарта.
Заключение
В рамках данного материала мы попытались ответить на вопрос о том, что делать если вдруг возникает ошибка «DirectX device creation error» при запуске какой-нибудь игры. Как правило, эта ошибка связана с какой-нибудь программной неполадкой в самих библиотеках, в драйвере графического адаптера или же в операционной системе.
Однако эта же ошибка может говорить и о том, что вам пора менять видеокарту, так как она уже не поддерживает данную версию DirectX. Именно поэтому пользователям приходится перебирать все способы устранения данной ошибки. Некоторые из них весьма сложны. Но если делать все в строгом соответствии с инструкцией, то ничего страшного не случится.
Источник
Без актуальной версии ДиректХ не будут работать современные игры и некоторые другие программы. Если соответствующего компонента нет в системе, то будут возникать разного рода ошибки. Нередко пользователи задаются вопросом: «Когда появляется сообщение “DirectX device creation error” — что делать?». Мы дадим на него развернутый и проверенный ответ.
Рекомендуем! MultiSetup
| Официальный дистрибутив DirectX | |
| Тихая установка без диалоговых окон | |
| Рекомендации по установке необходимых программ | |
| Пакетная установка нескольких программ |
Решение проблемы
Подобный сбой, увы, не является редким. В тексте ошибки, как правило, упоминается, что текущая конфигурация компьютера не поддерживается.Там же пишется нужная для корректной работы приложения версия DirectX. Но это далеко не всегда значит, что «железо» ПК придется обновлять. Есть несколько важных нюансов:
- Если необходим ДиректХ 12, а у вас не Windows 10, то нужно установить именно эту версию ОС, поскольку только в ней поддерживается соответствующая библиотека.
- Иногда компоненты просто отсутствуют в системе, хоть и поддерживается текущей конфигурацией.
Именно второй случай заслуживает дальнейшего рассмотрения. Вам нужно выяснить модель видеокарты и версию Виндовс, чтобы узнать информацию о совместимости. Узнать ОС можно, открыв «Мой компьютер», кликнув ПКМ на свободную область и выбрав «Свойства». Здесь и отобразятся нужные сведения.
Чтобы определить модель графического устройства, из открытого окна перейдите в «Диспетчер устройств» и раскройте вкладку «Видеоадаптеры».Далее, перейдите на сайт производителя и узнайте подробности о ней.
- Страница Nvidia — http://www.nvidia.ru/.
- Страница AMD — https://www.amd.com/ru/.
Про ОС стоит учитывать следующие факторы:
- DirectX 12 доступно только для «десятки».
- Одиннадцатая версия библиотеки совместима с Вистой и более поздними ОС от Microsoft.
- Десятая и младшие — на всех Windows.
Завершение
Если вы удостоверились, что ошибка DirectX device creation error, некорректна, то остается только загрузить нужную версию библиотеки с нашего сайта:
- DirectX 9
- DirectX 10
- DirectX 11
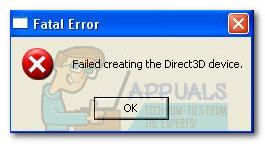
The error message in view indicates that DirectX failed to make or render an object. DirectX device creation failed or Failed to create DirectX device are similar messages describing the same error or problem in slightly different ways. The notification can come up in any of the following scenarios:
- After users install a 3rd party game or when they try to run it. Here are some examples of the games involved: Warframe, Battlefield 4, Trials Fusion, Fortnite, and so on.
- During gameplay or after the successful launch of a game. We have even seen reports that confirm that the error comes up when users click on the Play button in a game or when they reach specific locations or milestones
- When users try to open built-in Windows applications like the Windows Media Center utility or Microsoft games like Minesweeper, Solitaire, and so on. We tend to see the error in this particular form on versions of Windows older than Windows 8 (Windows 7, for example).
Causes of the DirectX device creation error
We have seen enough reports about the error, the forms of its manifestation and other details that helped us in our investigation of its behavior. We finally got hold of the culprits responsible, or we found some events to blame. Here are some of them:
- Corrupted or missing DirectX files. Users sometimes unintentionally delete the wrong stuff on their PC. A rogue app could also be involved. Malware activity too cannot be ruled out
- The conflicts between applications (usually 2 programs or more) may be to blame. For example, the Windows Media Center and a built-in app might attempt to use a specific DLL file around the same time, and the Failed to create DirectX device error message is the result of such software altercation
- Incompatibilities involving the operations of newer driver software on the Windows running on a PC. Graphics card makers (AMD and NVIDIA being the major ones) tend to release beta versions of drivers that are ridden with inconsistencies and bugs that cause a lot of problems, and these things cause the disturbing error to occur
- Software glitches within Windows that occurred independently of the system user. From the list of events or causes on this list, this one is the least likely to occur
- In a situation where your GPU card is struggling to meet the requirements of the game. In this scenario, after the “Failed to create Direct X device” part of the error description, you will see a message stating that the application requires at least DirectX AA compatible GPU (note that AA represents the specific Direct X number or version).
Of course, we would love to tell you to get better graphics cards to stop seeing the error, but we understand that things are not always the way they seem. Some users might see the error even when they have the best GPU on the market or the newest cards.
We know of a good number of error messages that have something to do with a specific DirectX version running on a system, and to be fair, the DirectX device creation failed error occurs frequently. Therefore, we can quickly proffer enough effective solutions that will help you to get rid of the problem in any of the scenarios we talked about earlier.
How to remove the Directx device creation failed error?
As usual, we recommend that you start with the first fix on the list and work your way down to the bottom until you find what works for you. However, we would like you to note some important things.
- The first, second and third fixes on the list are geared toward users who experienced the error in the first and second scenarios (or in situations very similar to the description we gave).
- We provided the remaining solutions for users who encountered the problem in its required form for the last two scenarios on the list above. Nevertheless, individuals with problem descriptions that best fit the first and second scenarios are welcome to try them if they have used up the main fixes we outlined for them but are still struggling with the error.
-
Download and open DirectX End-User Runtime Web Installer:
From the description of the problem, we can conclude that Windows struggled to execute a specific DirectX function or procedure. Therefore, our first attempt to solve the issue involves the use of a program that Microsoft has designed to help users address challenges associated with DirectX.
The DirectX End-User Runtime Web Installer will help you install missing files or rectify damaged components. Follow these instructions to run the required tool:
- Open your web browser and search for “DirectX End-User Runtime Web Installer” without the quotes in the text box present on Google. From the result page, you should see a link to a download page on Microsoft’s website. Click on it
- After your browser loads up the page entirely, choose your preferred language from the list available and click on the Download button to get the file. Follow the instructions on the screen that come up to complete the procedure. Your download should start soon enough
- Once your browser notifies you that it has completed the download, click or double-click on the saved item to open and run it. Follow the displayed instructions to ensure a successful installation of downloaded files
Ø After all the operations end, you must restart your PC to see if anything has changed. Open the game or program with which you experienced the problem earlier. Check if the error occurs at launch or during gameplay. If nothing came up, then you know that you have successfully resolved the issue associated with the DirectX device creation failed error on your PC.
-
Roll back your GPU driver:
The operation you are going to execute here restores your driver software to an older version. Sometimes the Failed to create DirectX device error message comes up because the new device driver has unresolved bugs or it is just incompatible with your system. The Rollback feature in Windows becomes very handy here.
Is your computer running slow or suffering system glitches? If so, it may need maintenance. Try running a dedicated PC optimization tool to check the health of your PC and apply the necessary fixes.
Follow these instructions:
- Launch the Run app. Press (and hold) the Windows button on your keyboard, then tap the letter R key to open the program. Input devmgmt.msc into the text box present and hit the Enter key or click on the OK button to run this code. A Device Manager window should come up now to prove that your action was successful.
If for some strange reason the above method failed to work for you, you can open the required app with a more direct approach. Press (and hold) the Windows button on your keyboard and tap the letter X to see a list of programs, which include Device Manager. Right-clicking on the Windows Start icon always present on your desktop screen does the trick too
- After the program window opens, you should see the full list of device drivers available on your PC. Look for Display Adapters. Once you have found it, you must double-click on it to expand its menu. Now you should see your Graphics card drivers.
If you have a dedicated GPU, then you should see more than one item on that list. Otherwise, only the Intel graphics card driver will be present
- Double-click on the driver. The Properties window for the item should come up now. Navigate to the Driver tab and click on the Roll back driver button to restore the old driver

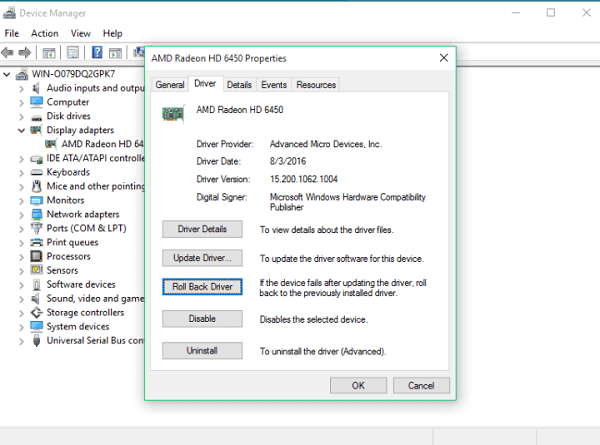
If you noticed that the Roll back driver button is greyed out (or you are unable to click on it with the effect you are used to), then either you are still using the old version of the driver or Windows cannot find the required software. You should move to the next fix (it involves the updating of drivers).
- A small dialog box requesting confirmation for your action should come up. Click on Yes (or OK) to continue. Follow the displayed instructions (if any) to finish the operation
- Now it is time you restarted your computer to let the new changes take effect. After the reboot, once your system comes on and settles down, open the game or program you struggled with due to the error and see how things go this time
-
Upgrade your graphics card drivers:
We earlier established that missing, corrupted or outdated graphics drivers can cause the DirectX device creation failed (or Failed to create DirectX device) error message to show up. An upgrade of the drivers involved is enough to solve the problem in the vast majority of scenarios, and we will guide you through the process.
You should skip the manual method below of updating drivers since it is riskier than the automatic procedure and it demands more time and effort. After all, it consists of long and numerous operations that a user must carry out in contrast to the quicker method, which involves the use of a unique program.
Therefore, we advise that you download and run Auslogics Driver Updater at once. This excellent program will perform all the operations that you otherwise would have been required to complete on your own had you preferred to go with the manual way of updating device drivers.
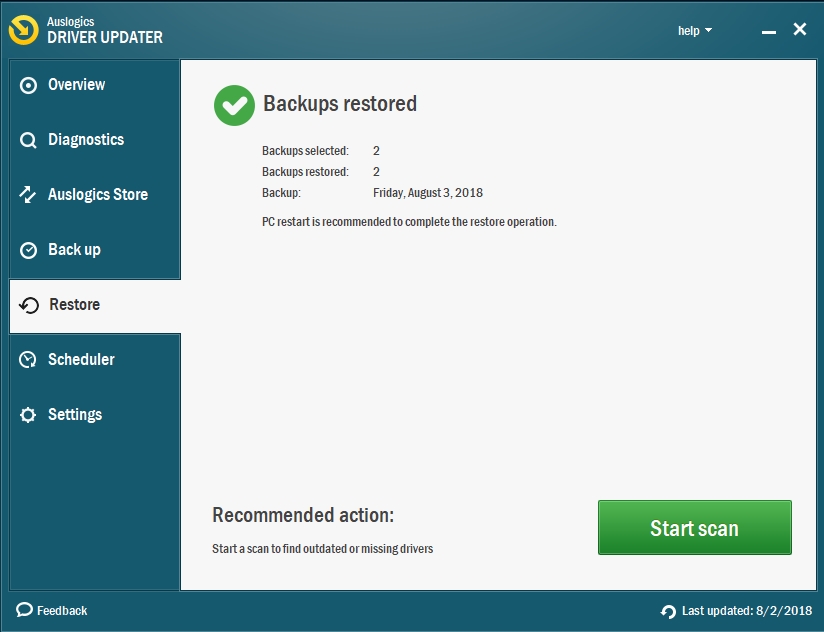
The recommended app will scan your PC to identify the driver problems, which range from missing to outdated drivers or even corrupted driver software. It will show you a report on the issues it found so that you can go through them.
There on, you can use the available option there (usually in the form of a button you can click) to update the drivers to their latest manufacturer-recommended versions or the iterations your system needs to function well. From the description of the process, the amount of time and effort you get to save becomes incredibly apparent.
After you finish downloading and installing the required software, you must restart your system for obvious reasons. Windows would probably prompt you to do so on its own. Now you must return to the activity you were involved with earlier before the error interrupted your work. See if anything changes.
Nevertheless, we have provided the instructions on using the more laborious method because it is inevitable that there will be users who end up choosing a different path:
- First, you must identify the affected drivers or the software that requires an upgrade. Open the Device Manager program. We provided instructions on doing this earlier. After the program window opens, go through the items you can see there. You should find Display Adapter on the list, expand its menu to make your drivers visible
- Expand the menu or window for each of the drivers there. Take note of the date or time Windows installed them on your PC. Check for any recorded issues or problems with them, and so on.
Some users might need to uninstall their drivers first in a different way before they can install the versions required. If you are not one of them, you can skip the short section below and move on the instructions for the search. Otherwise, you must go through these steps:
- Press (and hold) the Windows button on your keyboard, then hit the letter R to launch the Run app. After the small program window comes up, input the following code and press the Enter key to execute it: appwiz.cpl
- You should see the Add or Remove window in the Programs and Features app menu now. Locate your GPU drivers from the list of installed programs. Select it and click on the Uninstall button to get rid of it. Follow the instructions that come up to complete the process
- After the successful uninstallation of the driver, you are now free to move on the next operation
You must search for the updated versions of the drivers online. They could be anywhere.
- Your PC manufacturer webpage is an excellent place to start your search. Open your web browser and use the details about the drivers you obtained from the Device Manager program to narrow down your search operation. Whatever you do, ensure you download the correct drivers from reputable sources. Download the latest stable build of every driver.
- You surely would want to avoid installing the wrong software that can cause even worse problems. You would also hate to infect your system with viruses or malicious items. If you are unsure of the authenticity of anything or you do not trust its source, do not download it. It is not worth the risk
- If you see the WHQL (abbreviation for Windows Hardware Quality Labs testing) icon beside the driver’s name or in its description, then that driver is a durable build. Microsoft gives a program this standard detail after its engineers have extensively tested the software and certified it to be safe to use or stable in its operations.
- Beta drivers often promise performance improvements or optimizations but sometimes cause a lot of trouble because Microsoft has not certified them since the GPU maker has not done enough work on them. Download only WHQL certified drivers since you will not have any problem with them
- After you have finished downloading the required files, click or double-click on them (one at a time if they are numerous). Windows should run them and guide you through their installation. Follow any on-screen instruction that you see to ensure the success of this operation. Ensure that you install the latest version for every one of the outdated or missing drivers
- If you have completed the installation of all the needed software, then it is time you restarted your PC to let the new drivers start working so that the changes will take effect. After the reboot, your system should come on and settle down. Now you are free to run your game or program and see if your problem is no more.
-
Reboot your system and solve the issue with Windows updates:
In the vast majority of scenarios where the DirectX device creation failed error had something to do with Windows updates, we found out that that the problem came up after users attempted to download or install a specific update. Therefore, the first thing you must do is to check and ensure that you have no Windows updates that are pending currently.
Follow these instructions:
- Open the Windows update program menu and go through the information about its operations there. You can open the required app by pressing the Windows button on your keyboard or clicking on the Windows start icon, searching for update in the text box present, and finally clicking on the program in the list of results
- If you notice that you have a pending update, then a reboot of your PC might be all you need to fix the issue. Close all your open program windows and restart your computer. This procedure will also work for users who have not rebooted their systems in a long while.
We understand that some people prefer to use the Sleep or Hibernate option instead of the Shutdown procedure for reasons best understood by them. Those people must know that, in theory, the Windows operating system fails to refresh itself correctly due to their actions
- Your system should shut down as expected. Windows should start working on the updates. You might see messages indicating the progress of the operation and so on. Be patient.
- Whatever you did, after your system comes on, you must confirm that the problem has disappeared. Otherwise, you must open the Windows update program as you did earlier and check if there are still unresolved issues. To be fair, there is a good chance that you might not see an ongoing or pending update (even if there is supposed to be one) and you cannot do much about this.
However, what you can do is to ensure that your internet connection is up and working fine (Windows might still be downloading updates) and try to restart your PC numerous times until you get the breakthrough. If you feel you have executed enough reboots, but nothing has changed, then you must move on the next fix.
-
Try to resolve software conflicts:
Since we know nothing about the apps you have installed on your PC that might be causing the error, the descriptions we provide here might appear to be vague. To simplify things, we will use the conflicts that occur between the Windows Media Center and another app or game as our base case or reference point.
The Windows Media Center belongs to the exclusive class of startup program on a good number of Windows operating system versions. Its work is not supposed to inconvenience users, but sometimes we have observed that it causes problems with applications that use the same DLL files it employs.
For example, if a user tries to open a built-in game while the Windows Media Center program is running (or minimized), the Failed to create Directx device error message might pop up. To be honest, most experts still do not fully understand the intricacies of this issue, and there is a good chance that our description of the problem is poor in absolute terms.
However, the mysteries surrounding the problem are not enough to deter us from trying to troubleshoot it or proffering a solution. If you are getting the error whenever you try to open an app or while you are playing a game, check if the Windows Media Center app is running. Close it correctly. Avoid minimizing it. Now return to your program and see if the issue persists.
If the error fails to come up, then you know the reason it came up in the first place. Now you would have to remember to close the Windows Media Center program anytime you want to use the affected app or play the game.
Can you recall when we stated earlier that the Windows Media is not exactly at fault? Yes, we meant that this program might struggle to work well due to the operations of other apps. The solution to the software conflict in this scenario is based on the same principle we applied earlier, but this time the fix is in a reversed format.
That is, if you get the error while you are using the Windows Media Center app, then you must correctly terminate any built-in game or app that shares the same file if you want to resolve the conflict in this scenario.
Use the knowledge you have acquired here to resolve all software conflicts on your system wherever they might be. If you did everything required here, but nothing changed for you, then software conflicts are probably not to blame for your headache. Move on to other fixes.
-
Transfer specific files to another directory:
Some users reported that they had been able to solve the software conflict involving DLL files through this method. Here, you are going to move the data for the affected game to another location or a new place (usually a folder that is far away enough from the paths in view). After this operation, Windows will find it incredibly difficult to trigger the events that cause the DirectX device creation failed error.
Follow these instructions to move the files to another directory:
- Open the File Explorer program. Its icon is usually on the taskbar on your regular desktop screen. Click on it. After the program window opens, navigate to your default system drive or storage location (usually C)
- Now you must create a new folder that does not fall into the protected paths. You are free to give this fresh folder any name you want but ensure that its way (or the road involving the directories) is different from that of the protected games
- Navigate through the following folders: C: / Program Files / Microsoft Games
Remember that the Program Files location differs from Program Files (x86), so avoid going through the wrong path.
- Copy all the folders and files you see in your current destination by highlighting all of the items there, right-clicking on them and selecting Copy from the list of options that come up
- Navigate to the folder you created earlier, and there, you must paste the items that you copied recently. Take note of the apps or programs on the list you copied. You can get rid of any of them you hardly use.
- Now try to open your game by clicking or double-clicking on its executable file (the items in your newly created folder). The executable file usually ends with .exe.
You can even create a new shortcut of the game or program on your desktop screen if you find it inconvenient to go to the newly created file each time you want to run the program. Right-click on the app executable file and from the list of options that come up, select Send to, and you will see a short menu. Click on Desktop (create shortcut)
If the above fix failed to work for you, then there is only one procedure left for you to attempt.
-
Turn off the game features and re-enable them from the Windows features menu:
From the information we gathered through research on the internet, there is an effective way of resolving the software glitch that causes the problem. The operations here form the last fix on how to fix DirectX device creation failed in this guide.
If you are yet to figure out what you are going to do here from the fix description, then we will have to spell it out for you. Here, you are going to turn off game features, reboot your system, and turn back on the items you disabled earlier. This series of operations forces a new initialization of the components Windows need to run the game, and in the process, your problem disappears.
Follow these instructions:
- Press (and hold) the Windows button on your keyboard, then hit the letter R to launch the Run app. By now, you should be familiar with this procedure. After the small program window comes up, you should see a text box. There, you must type in the following code and run it by tapping the Enter key or clicking on the OK button: appwiz.cpl
- After the Program and Features window opens, click on the Turn Windows on or off link (on the right pane). You should see a list of items now
- Locate Games and untick the checkbox for it. This action will force Windows to disable all the built-in games on your PC. Click on the OK button to confirm and move on
- A small dialog box should come up to indicate that Windows is making the necessary changes. Be patient as this procedure can take a while. Once it ends, you must reboot your system
- After your computer comes on, you must reverse the operation that you executed not long ago. Perform steps number 1 and 2 again, but this time you must tick the checkbox for Games and click on OK to confirm as usual
- Windows will now carry the operation to re-enable the gaming components you got rid of earlier. This process too might use up considerable time. Windows should show you a message requesting that you restart your PC. Click on Yes (or OK). Otherwise, you must perform the reboot yourself.
- After your system comes on this time, we expect that the Failed to create DirectX device error is no more.
Содержание
- Ошибка «DirectX device creation error» в играх
- Поддержка DirectX
- Видеодрайвер
- Библиотеки DirectX
- Операционная система
- Заключение
- Вопросы и ответы
Ошибки при запуске игр в основном случаются из-за несовместимости различных версий компонентов или отсутствия поддержки необходимых редакций со стороны аппаратного обеспечения (видеокарты). Одна из них – «DirectX device creation error» и именно о ней пойдет речь в данной статье.
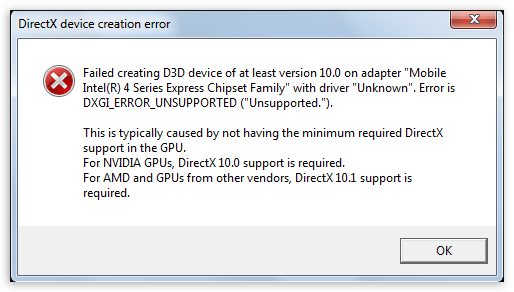
Эта неполадка чаще всего встречается в играх от Electronic Arts, таких, как Battlefield 3 и Need for Speed: The Run, в основном, во время загрузки игрового мира. При доскональном разборе сообщения в диалоговом окне выясняется, что игре требуется графический адаптер с поддержкой DirectX 10 версии для видеокарт NVIDIA и 10.1 для AMD.
Здесь скрыта и другая информация: устаревший видеодрайвер также может препятствовать нормальному взаимодействию игры и видеокарты. Кроме того, при официальных обновлениях игры, некоторые компоненты DX могут перестать полноценно функционировать.
Поддержка DirectX
С каждым новым поколением видеоадаптеров повышается и максимальная версия поддерживаемого API DirectX. В нашем случае требуется редакция не ниже 10. У видеокарт NVIDIA это серия 8, например 8800GTX, 8500GT и т.д.
Подробнее: Определяем серию продукта видеокарт Nvidia
У «красных» поддержка необходимой версии 10.1 началась с серии HD3000, а для интегрированных графических ядер – с HD4000. Встроенные видеокарты Intel начали снабжаться десятой редакцией DX, начиная с чипсетов серии G (G35, G41, GL40 и так далее). Проверить, какую версию поддерживает видеоадаптер, можно двумя способами: при помощи программного обеспечения или на сайтах AMD, NVIDIA и Intel.
Подробнее: Определяем, поддерживает ли видеокарта DirectX 11
В статье представлена универсальная информация, а не только об одиннадцатом DirectX.
Видеодрайвер
Устаревшие «дрова» для графического адаптера также могут вызвать эту ошибку. Если Вы убедились в том, что карта поддерживает необходимый DX, то стоит обновить драйвер видеокарты.
Подробнее:
Как переустановить драйвера видеокарты
Как обновить драйвер видеокарты NVIDIA
Библиотеки DirectX
Несмотря на то, что все необходимые компоненты входят в комплект ОС Windows, не лишним будет убедиться в том, что они самые свежие.
Подробнее: Обновить DirectX до последней версии
Если у Вас установлена операционная система Windows 7 или Vista, то можно воспользоваться универсальным веб-установщиком. Программа проверит имеющуюся редакцию DX, и, если требуется, установит обновление.
Страница загрузки программы на официальном сайте Microsoft

Операционная система
Официальная поддержка DirectX 10 началась с Windows Vista, поэтому, если Вы до сих пор пользуетесь XP, то никакие ухищрения не помогут запустить вышеуказанные игры.
Заключение
При выборе игр внимательнее читайте системные требования, это поможет на начальном этапе определить, будет ли работать игра. Это сэкономит Вам массу времени и нервов. Если планируется приобретение видеокарты, то стоит обратить пристальное внимание на поддерживаемую версию DX.
Пользователям XP: не пытайтесь устанавливать пакеты библиотек с сомнительных сайтов, это ни к чему хорошему не приведет. Если очень хочется поиграть в новые игрушки, то придется перейти на более молодую операционную систему.
Еще статьи по данной теме:
Помогла ли Вам статья?
When you are going to play games like Warframe, battlefield 4, trials fusion, Fortnite and so on, you will come up with error message DirectX device creation failed. It is also known as Warframe DirectX creation failed as the error causing with Warframe game. It would be so frustrating to face this Warframe update failed error and you will be in a dilemma what to do next to rectify it. Don’t worry this is one of the common Warframe DirectX creation failed error in Windows and you can resolve the issue with the solutions given in this article.
We will look into the causes of DirectX device creation failed for a better understanding of the error.

- The Warframe DirectX creation failed occurs due to your system GPU (Graphical Processing Unit) card. When your system GPU is struggling to meet the requirement of games like Warfare. In this case, after a pop–up an error message of DirectX device creation failed. You will also see the message stating that application requires at least DirectX AA compatible GPU (AA is nothing but the specific DirectX number of version)
- Some of the software glitches in your system Windows also cause DirectX device creation failed error. From the list of occurrence software glitches are the least likely to occur.
- Incompatibilities with the new driver software on the Windows also cause DirectX device creation failed error. Graphics card makers like AMD and NVIDIA tend to release beta versions of drivers that are ridden with inconsistencies and bugs. That will cause a lot of problems and this will cause the disturbing error Warframe DirectX creation failed to occur.
- The conflicts between applications are the cause of DirectX device creation failed error. For example, two applications attempt to use a specific DLL file around the same time and create the error.
- Corrupted or missing DirectX files is also causing for the error DirectX device creation failed. For the reason deleting that required files accidentally also causes the error. As downloading a rogue app that also causes the error to arise. Malware or virus attack on your system also causes the Warframe DirectX creation failed error.
While playing games on your computer you might have come across with some other errors also like Directdraw error. Here are the solutions to fix this type of errors. Keep reading to fix the Warframe Update error or DirectX Device Creation Failed error!
How to Fix DirectX Device Creation Failed Error?
As a consequence, we recommend you to start with the first fix on the list. And later continue with the other fixes until you find the best fix for the error DirectX device creation failed or Warframe Update failed error.
Download and Run DirectX End-User Runtime Web Installer
Our first step is to solve the issues related to missing of files with the help of Microsoft program. It is designed to help users fix challenges associated with DirectX. This will provide the updates for DirectX and will help to rectify the issues related to DirectX software.
The software DirectX end-user runtime web installer will help you to install missing files or to rectify damaged components.
- Open the web browser and search for DirectX End-User Runtime Web Installer. From the result page, click on the page of Microsoft’s website.

- After the browser loads up the page entirely, choose your preferred language from the available list. Finally, click on the download button to get the file.

- You will download the file dxwebsetup.exe, after completion of download double – click on the file to open and run it.
- Click on yes button to run the file. Next, you can see Microsoft DirectX window. Select I accept the agreement and click on next button.

- Follow the displayed instructions to successful install DirectX.
Note: Later on completion of the installation process, you must restart your PC to apply changes. Open the game or program with which you have experienced the issue Warframe Update failed or DirectX device creation failed. Check whether the error occurs at launch or during gameplay. If an error doesn’t occur that shows you have successfully resolved the issue DirectX device creation failed.
Roll Back Your GPU Driver
Rollback GPU driver will restore your driver software to an older version. In this case game, Warframe DirectX creation failed error message comes up. Because the new device driver has unresolved bugs or they are incompatible with your system. The rollback feature in Windows for drivers is very handy without completely uninstalling and reinstalling a driver. It saves your time and helps to fix the error simply.
- Click on the start button on the Windows screen and type devmgmt.msc and click Ok to apply.

- Device Manager window opens. Double click on display adapters to expand it.

- Select the graphics card in your system. Right-click on the graphics driver and select properties.

- Go to the driver tab from the menu. And select roll back driver option to take your graphics driver to the previous version. Finally, click on the OK button.

- A small dialog box opens requesting confirmation of your action. Click on YES (or OK) button to continue. Follow the displayed instructions to finish the operation.

- Restart your computer and open Warframe or other programs that causing an error to see whether an error is fixed.
NOTE: Rollback button is grey out and unavailable to click means that your Windows doesn’t have the previous driver to install. So, if you face the same situation skip to the next solution to fix the issue.
Update Graphics Card Driver
Missing or outdated graphics driver can cause DirectX device creation failed error. So, you have to make sure that your graphics card driver is up to date.
Manually update the driver: You can manually browse the latest version of your graphics card driver from the manufacturer. Download the driver and install it on your computer. This requires patience, time, and computer skills.
Manually follow below steps to update graphics driver easily
- Click on the Start button from the desktop screen, type device manager in the search box, and click on device manager to open it.

- On the open window, click the display adapters to expand it, and from the expanded list select graphics driver. And then right-click on the selected graphics driver and from the drop-down list select update driver.

- On the pop–up window select search automatically for updated driver software option for searching the driver online. Select browse my computer for driver software option to update the driver from the downloaded driver in your computer.

- Follow the on-screen instructions to successfully update the driver through either of the options.
- After completion of driver updating, restart your computer. And check whether the game Warframe DirectX creation failed or another programming issue is resolved.
Automatically Update the Driver
You can automatically download drivers using third-party software. It helps you to detect the drivers that are having updates and will update it using the internet. You no need to risk downloading and installing the wrong driver. There is n need of worrying about making a mistake while installing. Using any of the third-party software or driver update will help you to automatically do the work.
NOTE: The excellent strength of internet connection is needed to update the driver without any breaks.
System Restore to fix DirectX device creation failed error
System restore is also the best solution to fix game Warframe DirectX creation failed error. It will help to restore the system to a point where there is no problem of DirectX creation failed error.
- Go to start menu, search for the control panel, and select the control panel from the list.

- Select the System and Security option.

- The next window screen shows the list, select backup and restore option.

- On the bottom of the window, select Recover system settings or your computer.

- Next, on the screen, double-click on open system restore.

- Click on the next button to go to the system restore points.

- Uptick the show more restore points, select a restore point, and click on the Next button.

- Select the restart computer on the pop–up window. It will take some time to complete the restoration of your computer.
- After restarting your computer, launch the game that causing the error. And see either the problem is fixed or not.
- Hopefully, this solution will help to fix the issue.
Close Windows Media Center Program
The conflict between the software and Media Center Program led to Warframe Device creation failed error. So, to resolve the same, you must turn off Windows Media Center Program. Generally, Windows Media Center Program is an inbuilt application of Windows OS and it contains DLL files and whenever any software that comprises DLL files runs in the OS, then conflict arises between the two and results in an issue.
- Open Windows Media Center Program and then minimize the same.

- Now, launch the game and soon, you will get a pop-up on your screen displaying an error message ‘DirectX device creation failed’.

- After getting the message, close Window Media Center and then launch the game again. This time, you won’t get an error.
If your issue is resolved, then follow the steps provided below to disable Windows Media Center Program.
- Open Control Panel and for that press the Windows and R key together and then type ‘appwiz.cpl’ in the box without an inverted comma.

- Soon, you will get the list of applications to uninstall, given under ‘Program and Features’. At the sub-section of program and feature, you will get ‘Turn Windows Features on or off’, click on it.

- Thereafter, a pop-up window will open and here you need to select ‘Media Features’. Click on the plus symbol given beside the ‘Media Features’ to expand the options.

- Then uncheck the box stating ‘Windows Media Center’.

- A confirmation box will appear on the screen and you need to click on the ‘Yes’ button.

- Finally, click on the ‘OK’ button.

- Now, wait for a while and give some time to OS to disable this feature.
- After the completion of the process, restart your computer.
In this issue, Window Media Center is not a culprit; it is the DLL file that is conflicting with the other application.
Transfer the files to another folder
However, if the problem is with the software that is causing the conflict of the DLL files then you can transfer such files or folders in other locations of the drive. Due to this method, Window will fail to find the application that is causing the issue.
- Launch File Explorer.

- Go to the default drive, it is usually ‘C’ drive. Now, create a folder and name it as per your wish.

- After completing the above step, move to “C: Program FilesMicrosoft Games”or other location where you have installed the game. Then navigate to the game that is causing an issue and open the folder and then copy all the files.

- After copying the files, move to the folder that you created earlier and then paste all the files.

- That’s it; now you can launch the game by clicking on the executable file, it is denoted by ‘.exe’. However, you can create a shortcut for the game and for that right-click on the ‘.exe’ file, select ‘Send To’ and then choose ‘Desktop’.

Re-enable the game components
In this process, you are going to turn off the game feature and then turn it ON again. This will enable Windows to initialize the game components freshly. The procedure for the same is provided below.
- Click on the Start menu, type Control Panel in the search bar and then press the ‘Enter’ key.

- Soon, you will find the list of applications in the Control Panel, click on ‘Programs and Features’.

- In the Program and Features section, you will get ‘Turn Windows Features On or off’, click on it.

- Thereafter, a new pop-up window will open and now you need to find out the game and then uncheck the box.

- After completing the above step, close the Window and restart your computer.
- Now, again launch the Control Panel and move to the ‘Programs and Features’ section. And again select ‘Turn Windows features on or off’ and then select the game that you have unchecked earlier. This time, make sure the box is check marked.

- Now, close the window and restart your computer.

- This time, the issue DirectX device creation failed error will vanish.
Need Any Assistance
The above solutions help to fix the error DirectX creation failed or Warframe DirectX creation failed error. If you are stuck up at any step of the solution or need any assistance. Write to us with an issue you are facing and we will help you out with the best solution. Wanna some more DeviceTricks? Stay tuned to this space to get latest updates on errors related to Windows, Mac and Android.
If you feel this article helpful please like, share and follow our Facebook page.
Перейти к содержанию
На чтение 2 мин Просмотров 725 Опубликовано 2017-09-21
Директ используется для игр и обеспечения их нормальной работы. Данная утилита работает на благо пользователей уже десятки лет и помогает им. Программа делает это в невидимом режиме, не нужно прикладывать никаких усилий. Но иногда могут возникать определенные трудности и сбои в ее работе. Если вы устанавливаете игру с очень хорошей, современной графикой, Директ может создавать ошибки.

Что делать при ошибке directx device creation error? Распространенный вариант поиска в интернете. Многие игроки, которые пытаются поиграть в такие игры как Battlefield 3 и так далее, сталкиваются с ней. Все дело в том, что графические элементы и сама программа не могут работать нормально в некоторых случаях. Отсюда выходит, что утилита просто выбивает ошибки и не дает запустить игру.
Что же делать с ошибкой?
Для начала нужно просмотреть требования игры и мощность вашего компьютера. Если даже минимальный уровень выше, вашего ПК, то можете смело удалять ее с компьютера. Если же ситуация обратная, то есть несколько вариантов, которые помогут игрокам, насладиться любимой игрой и обойти надоедливую ошибку.

Этапы действий:
- Для начала нужно попробовать обновиться Директ. В этом поможет большое количество утилит, всего пара кликов и готово. В другом случае, удаляем программу с компьютера и устанавливаем заново. Третий вариант – нужно перейти в папку, где расположилась ваша игра, к примеру, F:Battlefield 3Battlefield 3__Installerdirectx
edist и найти там файл под названием DXSETUP, с помощью этой иконки можно легко обновить утилиту; - Теперь нужно попробовать запустить игру, предварительно перезагружаем вам компьютер. Если ничего не получилось и ошибка продолжает появляться, то действуем дальше по инструкции;
- Самые популярные видеокарты это GeForce и ATi Radeon. Нужно перейти на официальный сайт для того, чтобы обновить драйвера видеокарты. Выполняется это достаточно просто и быстро, всего за несколько кликов. Если вы не знаете английского, то можно перейти на русскоязычный сайт, но сейчас расплодилось большое количество мошенников, файлов с вирусами. Мы бы настоятельно советовали использовать именно официальный сайт.
- Теперь осталось скачать драйвера, обновить их и перезагрузить компьютер. После проведенных действий ошибка должна исчезнуть и вы сможете насладиться игровым процессом любимой игры.
@top-advice.ru
The error “Failed to create Directx device” is typically encountered by users when opening a built-in Windows game (Minesweeper, Solitaire, etc.) or when opening Windows Media center. This particular issue is only encountered on OS versions older than Windows 8.
After investigating the issue thoroughly, we came up with a shortlist of potential culprits that might be causing the issue:
- Windows updates were downloaded by WU and are pending to install – If this is the cause of the issue, rebooting your machine and allowing it to install the updates will automatically resolve the issue.
- A conflict between Windows Media Center and built-in OS game – As it turns out, the error might be displayed when two applications are actively using the same DLL file (Windows Media Center and one built-in Windows game).
- Beta graphics drivers are causing the issue – If this is the cause of the error, reverting to a stable driver will resolve the issue
- The issue is caused by Windows glitch – It can be resolved by reinitiated the built-in Windows games from Windows Features.
If you’re currently struggling with this particular issue, use the collection of methods below to troubleshoot the issue away. Please follow each method in order until you encounter a fix that manages to resolves the problem. Let’s begin.
Method 1: Reboot to install pending Windows updates
You should start your troubleshooting quest by making sure you have no pending Windows updates. As some users have pointed out, the issue can arise right after WU (Windows Update) finishes downloading an update. If that’s the case, a simple reboot will remove the error message indefinitely. If you have the habit of using the sleep function instead of shutting down your computer when you’re not using it, there’s a strong chance that you’ve just identified the culprit.
Depending on the pending update, it might only install partially after WU finishes downloading it – This can cause unexpected errors until the user reboots the system and allows it to install the update fully. Whether you think you have a pending update or not, reboot your system and see if the issue gets automatically resolved.
If a reboot hasn’t resolved your issue, continue with the method below.
Method 2: Resolving an application conflict
Depending on your OS version, you might find the Windows Media Center will automatically run at startup. While this is certainly not an inconvenience, it can cause problems with certain applications that are using the same DLL files.
As some users have reported, whenever Windows Media Center is opened or minimized, you might encounter the “Failed to create Directx device” error while trying to open a built-in game. Although the technical aspects of this issue are not clear, it seems like they are both configured to use some of the same DLL files.
If you get this error while opening a game, investigate if Windows Media Center is opened. In the event that it’s opened, close it properly (do not minimize it) and see whether it has resolved your issue. If it has, make sure you close Windows Media Center whenever you decide on playing a built-in game.
Note: Keep in mind that you can also apply this potential fix in reverse. E.g. you get the error while opening Windows Media Center, close any built-in game that might be currently running to resolve the application conflict.
If this method wasn’t effective, move down to Method 3. In the event that you want to use Windows Media Center while playing a built-in game, refer directly to Method 4.
Method 3: Install a stable graphics card driver (if applicable)
The “Failed to create Directx device” issue can also be caused by your graphics card drivers. If you own a newer GPU, you might be tempted to install the beta driver – as it usually promises performance optimizations for the latest games. However, this is not always beneficial, as beta drivers are often not WHQL (Windows Hardware Quality Labs) certified. Because of this, you might find that certain Windows functions (including built-in games) will not function properly and display the error as a result – while using beta drivers.
Note: You can skip this method if you’re certain that the graphics driver used by your system is WHQL certified.
If you’re currently using a beta graphics driver, follow the steps below to uninstall it and install a WHQL certified driver for your GPU:
- Press Windows key + R to open a Run window. Type “appwiz.cpl” and hit Enter to open Add or Remove Programs.

- In the Add or Remove Programs window, scroll down to your GPU drivers and Uninstall the graphics driver.

- Once the driver is removed, navigate to your GPU manufacturer’s website and download the latest stable build. Use this link (here) for Nvidia and this link (here) for ATI.
 Note: If you use the default downloading channels, you probably won’t end up with a beta driver. However, double-check that you install a stable build by looking for a WHQL icon near the driver’s name or in the description.
 - Install the graphics driver and reboot your system to finish the installation. Check if the issue is now resolved by opening one of the built-in games.
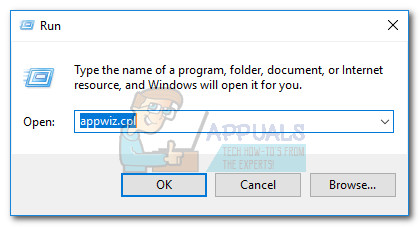
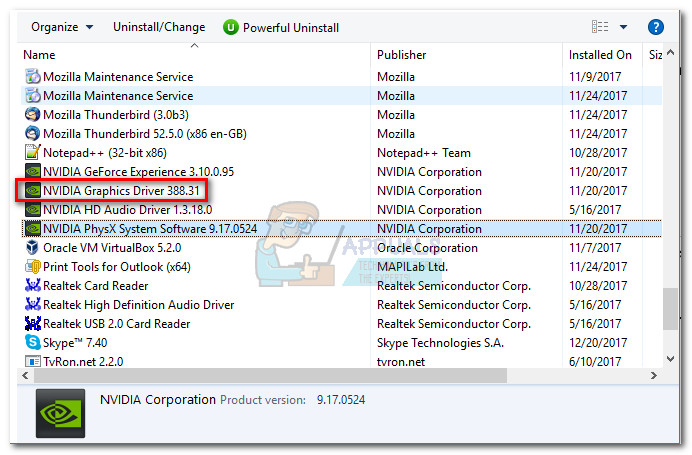
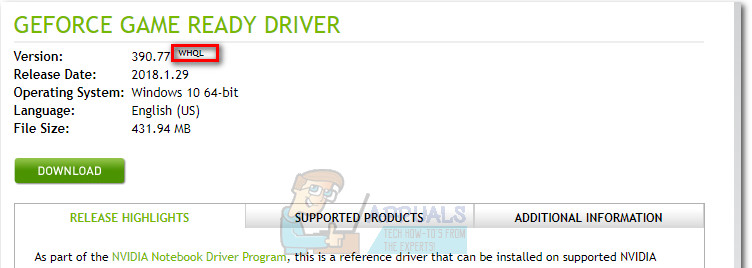 Note: If you use the default downloading channels, you probably won’t end up with a beta driver. However, double-check that you install a stable build by looking for a WHQL icon near the driver’s name or in the description.
If you’re still bothered by the same issue, move to the method below.
Method 4: Moving games files to a new directory
If you’ve followed all of the above methods without a result, there’s one user-created fix that might resolve your issue. It involves moving game files to a newly created folder outside the predetermined paths. This will eliminate any DLL conflicts that might trigger the “Failed to create Directx device” error.
Follow the steps below move the built-in games files to a separate directory:
- Create a new folder outside the protected paths and name it whatever you want (we named it Games). The folder’s location doesn’t matter, as long as it’s different from the default path of the built-in games.
- Navigate to C:/ Program Files / Microsoft Games, and copy all the game folders that are present there.
 Note: Be careful not to confuse the paths. The Microsoft Games folder is located in Program Files (not Program Files (x86)).
 - Paste the folders copied from the Microsoft Games folder into the newly created Games folder.
 Note: If you only play a few of the games listed here, you can only copy the folders of those games that you actually play.
 - Once the built-in game folders have been copied, you can open them without issues by double-clicking the executable.
Note: You can make things even easier for you by creating a desktop shortcut of the game executable. To do this, right-click on the game executable and select Send to > Desktop (create shortcut).
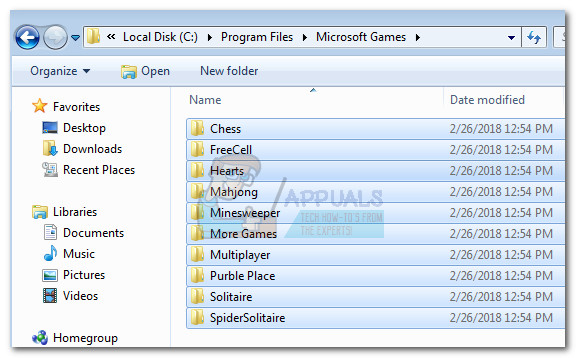 Note: Be careful not to confuse the paths. The Microsoft Games folder is located in Program Files (not Program Files (x86)).
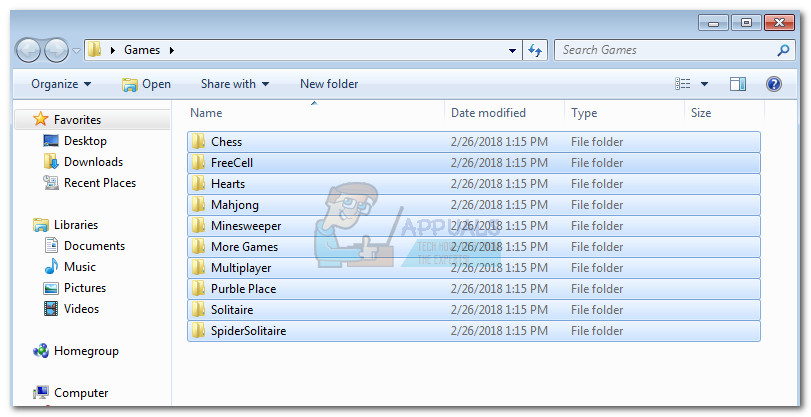 Note: If you only play a few of the games listed here, you can only copy the folders of those games that you actually play.
If you’re still presented with the same “Failed to create Directx device” error, move down to the final method.
Method 5: Re-enabling Games from Windows features
If all of the above methods have proved to be ineffective, let’s take the steps appropriate to resolve a known Windows glitch that can be causing the problem. Some users have pointed out that turning off game features, rebooting, then turning them back on has automatically resolved the issue. This will force Windows to reinitiate the components needed to run the game, thus solving the problem.
Follow the steps below to re-enable the built-in games from Windows Features:
- Press Windows key + R to open a Run window. Type “appwiz.cpl” and hit Enter to open Add or Remove Programs.
- In Programs and Features, click on Turn Windows features on or off.

- Now look for a folder named Games and deactivate the checkbox next to it. This should automatically disable all the built-in games. Hit Ok to confirm.

- Wait until Windows makes the necessary changes, then reboot your computer.

- Once your computer boots back up, use steps 1 and 2 again to return to Windows Features. Once there, re-enable the checkbox next to Games and hit Ok to confirm.

- Windows will take a while to re-enable the gaming components. If not prompted to restart, do so on your own and see if the issue has been resolved at the next startup.
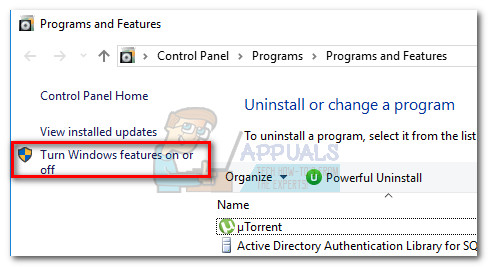
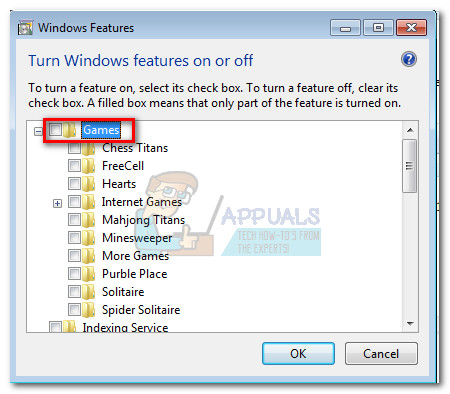
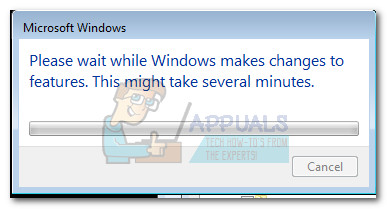
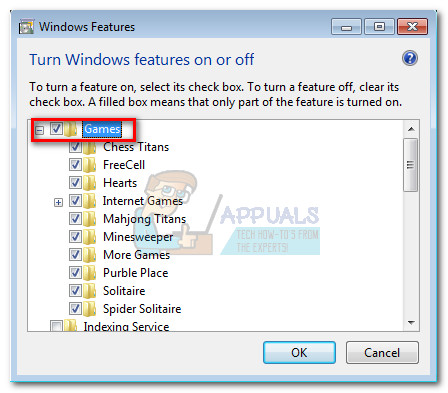

Kevin Arrows
Kevin is a dynamic and self-motivated information technology professional, with a Thorough knowledge of all facets pertaining to network infrastructure design, implementation and administration. Superior record of delivering simultaneous large-scale mission critical projects on time and under budget.