
| F0 | Ошибок нет. | Объяснение: Не зарегистрировано ни одной ошибки. |
Устранение: Не требуется. |
| F5 | Ошибка датчика Pt 1000. | Объяснение: Короткое замыкание датчика температуры духовки Pt 1000. |
Устранение: Обратитесь в сервисный центр Miele. |
| F6 | Ошибка датчика Pt 1000. | Объяснение: Разомкнутая цепь датчика температуры духовки Pt 1000. |
Устранение: Обратитесь в сервисный центр Miele. |
| F7 | Ошибка датчика Pt 1000. | Объяснение: Короткое замыкание датчика температуры катализатора Pt 1000. |
Устранение: Обратитесь в сервисный центр Miele. |
| F9 | Ошибка датчика Pt 1000. | Объяснение: Разомкнутая цепь датчика температуры катализатора Pt 1000. |
Устранение: Обратитесь в сервисный центр Miele. |
| F21 | Ошибка гриля. | Объяснение: Нагревательный элемент гриля не работает. |
Устранение: Обратитесь в сервисный центр Miele. |
| F22 | Ошибка нагревателя. | Объяснение: Нагревательный элемент вентилятора нагревателя не работает. |
Устранение: Обратитесь в сервисный центр Miele. |
| F23 | Ошибка пиролиза. | Объяснение: Самостоятельная очистка перед нагревом (пиролиз) — не было достигнуто 460 град. в отведенное время. |
Устранение: Обратитесь в сервисный центр Miele. |
| F30 | Ошибка двери. | Объяснение: Дверь и дверной контакт — разные сигналы. |
Устранение: Обратитесь в сервисный центр Miele. |
| F31 | Ошибка двери. | Объяснение: Дверь открыта с неисправным замком. |
Устранение: Обратитесь в сервисный центр Miele. |
| F32 | Ошибка двери. | Объяснение: Дверной замок не закрывается. Дверной замок не блокируется в режиме самоочистки. (Ошибка сохраняется через 20 секунд, если положение переключателя дверного замка не изменилось.) |
Устранение: Обратитесь в сервисный центр Miele. |
| F33 | Ошибка двери. | Объяснение: Дверной замок не открывается. Дверной замок не разблокируется после режима самоочистки. (Ошибка сохраняется через 20 секунд, если положение переключателя дверного замка не изменилось.) |
Устранение: Обратитесь в сервисный центр Miele. |
| F43 | Ошибка программирования. | Объяснение: Тип модели не запрограммирован правильно. |
Устранение: Обратитесь в сервисный центр Miele. |
| F44 | Ошибка программирования. | Объяснение: Тип модели не запрограммирован правильно. |
Устранение: Обратитесь в сервисный центр Miele. |
| F47 | Ошибка связи. | Объяснение: Неисправный интерфейс BAE / SLT. |
Устранение: Обратитесь в сервисный центр Miele. |
| F48 | Ошибка связи. | Объяснение: Неисправный датчик интерфейса BAE / 02. |
Устранение: Обратитесь в сервисный центр Miele. |
| F54 | Ошибка вертела. | Объяснение: Короткое замыкание вертела. |
Устранение: Обратитесь в сервисный центр Miele. |
| F55 | Ошибка контроля времени. | Объяснение: Превышен контроль времени. Духовка не выключалась автоматически после определенного времени работы (в зависимости от используемой функции печи). Проверьте защитные выключатели. |
Устранение: Обратитесь в сервисный центр Miele. |
| F57 | Ошибка вентилятора. | Объяснение: Неисправность охлаждающего вентилятора. |
Устранение: Обратитесь в сервисный центр Miele. |
| F58 | Ошибка вентилятора. | Объяснение: Неисправность вентилятора горячего воздуха. |
Устранение: Обратитесь в сервисный центр Miele. |
| F60 | Ошибка температуры. | Объяснение: Чрезмерная температура. |
Устранение: Обратитесь в сервисный центр Miele. |
| F61 | Ошибка напряжения. | Объяснение: Нет 12 Вольт. |
Устранение: Обратитесь в сервисный центр Miele. |
| F89 | Ошибка электроники. | Объяснение: Датчик кислорода O2 — ошибка датчика. |
Устранение: Обратитесь в сервисный центр Miele. |
| F90 | Ошибка электроники. | Объяснение: Датчик кислорода O2 — ошибка системы. |
Устранение: Обратитесь в сервисный центр Miele. |
| F102 | Ошибка умного дома. | Объяснение: Отказ линии связи с умным домом (smart house). |
Устранение: Обратитесь в сервисный центр Miele. |
| F103 | Ошибка умного дома. | Объяснение: Несовместимость связи с умным домом (smart house). |
Устранение: Обратитесь в сервисный центр Miele. |
| F180 | Ошибка датчика Pt 1000. | Объяснение: Короткое замыкание датчика температуры Pt 1000 — вторая духовка (нижняя духовка). |
Устранение: Обратитесь в сервисный центр Miele. |
| F181 | Ошибка датчика Pt 1000. | Объяснение: Разомкнутая цепь датчика температуры Pt 1000 — вторая духовка (нижняя духовка). |
Устранение: Обратитесь в сервисный центр Miele. |
| F182 | Ошибка датчика Pt 1000. | Объяснение: Короткое замыкание датчика температуры катализатора Pt 1000 — вторая печь (нижняя печь). |
Устранение: Обратитесь в сервисный центр Miele. |
| F183 | Ошибка датчика Pt 1000. | Объяснение: Разомкнутая цепь датчика температуры катализатора Pt 1000 — вторая печь (нижняя печь) |
Устранение: Обратитесь в сервисный центр Miele. |
| F184 | Ошибка пиролиза. | Объяснение: Пиролизный нагрев второй печи (нижней печи) — не было достигнуто 460 град. в отведенное время. |
Устранение: Обратитесь в сервисный центр Miele. |
| F185 | Ошибка двери. | Объяснение: Дверь открыта с неисправным дверным замком — вторая духовка (нижняя духовка). |
Устранение: Обратитесь в сервисный центр Miele. |
| F186 | Ошибка двери. | Объяснение: Дверной замок не закрывается — вторая духовка (нижняя духовка). |
Устранение: Обратитесь в сервисный центр Miele. |
| F187 | Ошибка двери. | Объяснение: Дверной замок не открывается — вторая духовка (нижняя духовка). |
Устранение: Обратитесь в сервисный центр Miele. |
| F188 | Ошибка вертела. | Объяснение: Короткое замыкание вертела — вторая духовка (нижняя духовка). |
Устранение: Обратитесь в сервисный центр Miele. |
| F189 | Ошибка контроля времени. | Объяснение: Превышен контроль времени — вторая духовка (нижняя духовка). Духовка не выключалась автоматически после определенного времени работы (в зависимости от используемой функции печи). |
Устранение: Обратитесь в сервисный центр Miele. |
| F195 | Ошибка связи. | Объяснение: Ошибка связи с радио. (Communication fault with radio loud probe.) |
Устранение: Обратитесь в сервисный центр Miele. |
Ошибки духовых шкафов Miele – это сигналы, которые подает устройство в случае обнаружения неисправности или в результате наличия проблем, связанных с эксплуатацией. В обслуживании такой техники важно уметь правильно диагностировать причины сбоев, чтобы легко и быстро устранять их. Облегчить задачу диагностики может система сигнализирования об ошибках.
Ошибки духовых шкафов Miele – причины появления
Немецкая техника Miele достаточно качественная и надежная, но неисправности в духовых шкафах этого бренда всё же иногда случаются. Об этом могут сигнализировать коды ошибок, которые выводятся на дисплей. Чтобы вовремя определить сбой в работе оборудования, важно знать, почему появляются ошибки.
Производитель в инструкции к технике указывает, что может значить каждый код ошибки, поэтому причин их появления много. Ниже описаны самые распространенные.
- Проблемы разного характера, связанные с датчиком Pt. Обычно сбой такого типа приводит к выводу на экран сообщений об ошибке в диапазоне F5-F
- Проблемы с основным тэном или другими встроенными нагревательными элементами, а также с температурными датчиками, могут быть причиной сообщения об ошибках F21, F22, F
- Ошибки F30, F31, F32, F33 сигнализируют о том, что есть проблемы с дверцей. Возможно, неисправен механизм блокировки или же имеются другие неисправности.
Если на дисплее отображается F0, не стоит переживать – это сигнал, актуальный для всех моделей, он означает, что в процессе тестирования ошибки не были обнаружены. То есть прибор работает исправно, можно использовать все его функции.
Ошибки духовой шкаф Miele – как устранить?
Всё зависит от того, какая именно модель духового шкафа отображает ошибку на дисплее и какой именно код выводится. Коды ошибок в целом актуальны для всех моделей, просто у одних присутствует не полный набор. Важно изначально посмотреть в инструкции к прибору, о какой неисправности сигнализирует устройство.
Важно первым делом отключить устройство и проверить, всё ли сделано правильно, не нарушили ли вы инструкцию по эксплуатации. В отдельных случаях ошибки могут быть следствием неправильного использования. Также в крайне редких случаях они появляются в результате сбоя в работе модуля управления или программ. В таких ситуациях обычно помогает выключение с последующим включением, проще говоря – перезапуск. В том случае, если всё сделано правильно и никаких нарушений инструкции вы не допустили, а перезапуск не устранил проблему, вам стоит обратиться в сервисный центр Miele.
Сообщите специалисту о том, какой код ошибки был отображен на экране, расскажите, после чего произошел сбой в работе прибора, а также укажите на другие проблемы, связанные с функционированием устройства. После этого специалист проведет детальную диагностику, проверит всё, что может быть связано с ошибкой на экране и выявит неисправность. После этого обычно владельцу техники озвучивается полная стоимость ремонта и сроки его выполнения.
В отдельных случаях может помочь и самостоятельное устранение неполадок. Но для этого важно знать, как устроена техника, как правильно осуществлять диагностику. Если с этим опытный электронщик может справиться, то с поиском оригинальных комплектующих могут возникнуть проблемы. Именно поэтому лучше обращаться в специализированный сервисный центр, который сотрудничает с поставщиками деталей.
Чтобы реже сталкиваться с ошибками и сбоями духовых шкафов, стоит тщательно изучить инструкцию по эксплуатации и строго придерживаться правил, которые в ней прописаны.
|
|
|
|
|
|
|
|
|
|
|
|
Для устранения неисправности (ошибка 05, 06):
- Проверьте напряжение питающей сети.
- Проверьте датчик PT 1000.
- Проверьте разъемы и цепи подключения датчика.
- Если неисправность не исчезла, обратитесь в Сервисный Центр Miele. Требуется замена датчика температуры или ремонт цепей коммутации.
Для устранения неисправности (ошибка 07, 09):
- Проверьте датчик температуры катализатора PT 1000.
- Проверьте разъемы и цепи подключения указанного датчика.
- Если неисправность не исчезла, обратитесь в Сервисный Центр Miele. Требуется замена датчика температуры или ремонт цепей коммутации.
Ошибка чаще всего возникает из-за неправильной установки всасывающего шланга: шланг не закреплен или установлен не вертикально.
Для решения проблемы (ошибка 10):
- Выдвиньте резервуар для воды и убедитесь в том, что шланг подачи установлен корректно (см. инструкцию по эксплуатации).
- Если неисправность не исчезла, обратитесь в Сервисный Центр Miele.
Регистрируется проблема со сливом воды из пароварки.
Для решения проблемы (ошибка 11):
- Проведите процедуру удаления накипи из духового шкафа (см. раздел «Чистка и уход – удаления накипи»).
- Если неисправность не исчезла, обратитесь в Сервисный Центр Miele.
Для устранения неисправности (ошибка 21):
- Проверьте силовые цепи питания ТЭН’а гриля.
- Проверьте и при необходимости замените ТЭН гриля.
Регистрируется неисправность вентилятора нагревательного элемента.
Для устранения неисправности (ошибка 22):
- Проверьте возможность вращения крыльчатки вентилятора (возможна блокировка).
- Проверьте силовые цепи питания вентилятора нагревательного элемента.
- Проверьте и при необходимости замените сам вентилятор.
В отведенное время не была достигнута температура 460°C для самоочистки перед нагревом (пиролиз). Чаще всего данная ошибка возникает из-за неисправности датчика температуры или проблемы с выключателем блокировки дверцы.
Для решения проблемы (ошибка 23) обратитесь в Сервисный Центр Miele.
Неверный сигнал дверного контакта: несоответствие сигналов состояния двери и дверного контакта.
Для устранения неисправности (ошибка 40):
- Отключите духовой шкаф от электрической сети на несколько минут, затем снова включите.
- Если ошибка не исчезла, обратитесь в Сервисный Центр Miele: требуется диагностика и ремонт контроллера на компонентно уровне.
Имеет место ошибка в блоке управления на компонентном уровне.
Для решения проблемы (ошибка 43, 44) обратитесь в Сервисный Центр Miele.
Потеря связи между модулем индикации и платой управления.
Блок управления интерфейсом не получает сигнал с модуля индикации.
Наиболее вероятная причина проблемы: короткое замыкание (обмоток) или неисправность двигателя.
Регистрируется ошибка датчика кислорода, которая в большинстве случаев возникает из-за неисправности указанного датчика (засор датчика в результате пиролиза).
Это не критическая ошибка. Можно продолжать пользоваться духовым шкафом, за исключением автоматических программ.
Для устранения неисправности (ошибка 90):
- Выключите духовой шкаф на несколько минут, зачем снова включите его. После указанной операции ошибка обычно временно исчезает из-за перекалибровки датчика кислорода.
- Для устранения неисправности, обратитесь в Сервисный Центр Miele: требуется замена датчика, модуля его управления и силового блока.
Наша инженерная служба подготовила таблицу с кодами ошибок для духовых шкафов Миле. Эта информация будет одинаково полезна другим мастерам и особенно, самим владельца этой техники.
С помощью описанных кодов Вы узнаете:
- как устранить проблему своими руками;
- степень неисправности;
- как избежать подобных проблем в будущем.
Ошибки актуальны для всех моделей духовок Miele.
F0 – выполнена самодиагностика и неисправности не обнаружены.
F5 – произошло короткое замыкание датчика температуры Pt1000. Основная причина – нестабильное напряжение в электросети.
F6 – цепь питания датчика температуры разомкнулась. Необходимо восстановление цепи питания.
F7 – катализатор датчика температуры сгорел из-за короткого замыкания.
F9 – цепь питания катализатора датчика температуры Pt1000 разомкнулась.
F21 – попытка запустить ТЭН гриля не удалась. Причина – неисправен нагревательный элемент.
F22 – вентилятор на нагревательном элементе вышел из строя.
F23 – невозможно завершить работу функции пиролиза. Пиролиз – это органическое разложение углеводородного сырья. Перед каждым циклом приготовления пищи, духовой шкаф запускает функцию очистки.
Обратитесь в сервисный центр.
F30 – контакт блокировки дверцы не получает сигнал с модуля управления. Требуется ремонт механизма блокировки.
F31 – дверца не закрыта (чаще всего неисправен датчик фиксации закрытия дверцы).
F32 – ошибка срабатывания блокировки дверцы. Как правило, перед началом самоочистки система блокирует дверцу, если этого не произошло в течение 20 секунд – выдаётся предупреждение.
F33 – замок дверцы не открывается. Отключите духовку от сети на 30 минут, ошибка исчезнет.
F43 или F44 – ошибка, связанная с невозможностью системы прочитать программный код оболочки. Скорее всего был произведён некачественный ремонт.
F47 – отсутствует связь между блоком управления и микропроцессором.
F48 – датчик управления интерфейсом не получает сигнал с модуля индикации.
F54 – не работает вертел гриля. Скорее всего необходимо заменить двигатель.
F55 – ошибка автоматического отключения. В духовых шкафах Miele есть функция «Time Control», которая предотвращает длительную работу духовки (более 6 часов). Предположительно, защитный предохранитель перегорел.
F57 – вентилятор, используемый для охлаждения духовки вышел из строя.
F58 – вентилятор, используемый для нагнетания горячего воздуха вышел из строя.
F60 – превышение допустимой температуры. Скорее всего контроллер температуры вышел из строя.
F61 – напряжение в сети упало ниже 12 вольт. Требуется перезапуск системы или ремонт электросети.
F89 и F90 – неисправен датчик кислорода. Не критическая ошибка.
F102 или F103 – потеряна связь с системой умного дома. Проверьте подключение WiFi или Bluetooth.
F180 – датчик температуры нижней духовки вышел из строя.
F181 – цепь питания температурного датчика Pt1000 нижней духовки разомкнулась.
F182 – катализатор датчика Pt1000 нижней духовки (вторая печь) замкнуло.
F183 – разомкнутый катализатор термостата нижней печи.
F195 – потеряна связь радиоканала. Требуется перезапуск печи.
Если в данном списке отсутствует код ошибки, который Вы искали, мы готовы бесплатно проконсультировать Вас:
- единая служба сервиса Miele – 8 (495) 109-20-69;
- онлайн канал (перезвоним Вам в течение 10 минут).
-
Contents
-
Table of Contents
-
Bookmarks
Quick Links
Operating instructions
Ovens
H 334 B, H 334 B KAT
H 344-2 B
GZWO
To avoid the risk of accidents
or damage to the appliance it is
essential to read these operating
instructions before it is installed or
Used for the first time.
M.-Nr. 05 844 950
Related Manuals for Miele H 344-2 B
Summary of Contents for Miele H 344-2 B
-
Page 1: Operating Instructions
Operating instructions Ovens H 334 B, H 334 B KAT H 344-2 B GZWO To avoid the risk of accidents or damage to the appliance it is essential to read these operating instructions before it is installed or used for the first time.
-
Page 2: Table Of Contents
Selecting an oven setting ……..
-
Page 3
To dismantle the oven door…….. -
Page 4
Programme selector b Input dial for entering settings c Display d Function dial for selecting oven functions e Heating element for top heat and grilling with roof liner f Air inlet for fan g Runner heights 1, 2, 3, 4, 5… -
Page 5
Programme selector b Input dial for entering settings c Display d Function dial for selecting oven functions e Lever for switching the catalyser on f Heating element for top heat and grilling with roof liner g Air inlet for fan… -
Page 6: Features
– System lock, to prevent the appliance being used unintentionally – Safety cut-out As soon as the oven is switched on a cooling fan is automatically engaged. The cooling fan mixes hot air from the oven cavity with cool room air before…
-
Page 7: Accessories
The following accessories are supplied with this oven. These and other accessories are also available to order from the Miele Spare Parts Dept. or your Miele Dealer. See «Extra Accessories» further on in this booklet for more details.
-
Page 8: Roasting Filter
The droplets of fat caught up in the circulating air are deposited on the roasting filter. This helps to keep the oven and the area behind the interior back panel cleaner. Do not use the roasting filter when baking. This would increase the times needed for baking and give uneven browning results.
-
Page 9
The transport and protective packing has been selected from materials which are environmentally friendly for disposal and can normally be recycled. Ensure that any plastic wrappings, bags etc. are disposed safely and kept out of the reach of babies and young children. -
Page 10
If allowing older children to use the appliance without supervision please ensure that they are aware of how the oven works and understand the dangers of improper use. Before connecting the appliance to the mains supply make sure that… -
Page 11
When working with «Conventional» heating or when grilling, the element in the roof of the oven gets very hot, and there is a danger of being burnt. When cleaning the roof of the oven wait until the grill element has cooled down before lowering it. -
Page 12
Do not push pots and pans around on the oven floor as this could damage the surface. Do not lean or sit on an open oven door, or place heavy items on it. This could damage the appliance. The oven door can support a maximum load of 15 kg. -
Page 13
Never leave the appliance unattended when cooking with oil or fats as these are a fire hazard if overheated. Do not use the oven to heat up the room. Due to the high temperatures radiated, objects left near the oven could catch fire. -
Page 14
Alcohol should be burnt off before the dish is placed in the oven to avoid this danger. In countries where there are areas which may be subject to infestation… -
Page 15
– Set the clock. – Switch the catalyser on, if fitted. – Clean the appliance. – Heat the oven up with nothing in it. New appliances have a slight smell on first use and this procedure will dissipate the smells before you use the oven to cook any food. -
Page 16
In the following example the time of day is changed from 12:05 to 13:33. To do this: ^ Turn the programme selector to «0». ^ Turn the function selector (right hand dial) until triangle V is underneath the m symbol in the display. ^ Whilst triangle V is flashing, turn the (–/+) input dial clockwise until the required time shows in the display. -
Page 17
^ Turn the programme selector to the Light H position. The time of day will show in the display. ^ Turn the function selector (right hand dial) until triangle V is underneath the m symbol in the display. Four horizontal bars will then appear in the display. -
Page 18
Before using the appliance appliances have a slight smell on first use and this procedure will dissipate the smells before you use the oven to cook any food. Before use please remove – any stickers from the floor of the oven, baking trays, grill pan etc. -
Page 19
Then run the oven for at least 1 hour at a high temperature. To do this: ^ Turn the programme selector to the Fan D position. The suggested temperature of 160 °C appears in the display. ^ Whilst the triangle V is flashing underneath the U symbol, use the (–/+) input dial to set the temperature… -
Page 20
– the time (time of day or a programmed cooking time). – the oven temperature together with the p or U symbol. – the key symbol 0—§ will appear if e.g. the programme selector is… -
Page 21
Use the V oven functions which require input e.g. the time of day. The V can be turned clockwise or anti-clockwise. To select a function, turn the function dial until triangle V is underneath the symbol in the display of the function you wish to make changes to. -
Page 22
– – – – – Input minute minder time (egg timer) Lock a cooking programme Change the oven temperature Switch Rapid heat up off (only with Fan heat D, Automatic roasting E, Conventional heating Enter start time Enter duration Enter end time… -
Page 23: Changing The Time Of Day
– Input dial (–/+) – Function dial (V). The display will show what these dials are set to. To change a setting on the oven: ^ Turn the required position. ^ Turn the anti-clockwise until triangle V is underneath the the display.
-
Page 24
Pre-heat the grill for at least 5 minutes with the door shut before grilling. More practical advice about these cooking functions is given in the «Baking», «Roasting» and «Grilling» sections of this book and in the Miele cookbook supplied with this oven. -
Page 25
A programme must first be selected using the Programme selector and then, if necessry, the temperature changed. The programmes on this oven have pre-set recommended temperatures to simplify operation. ^ Turn the programme dial clockwise or anti-clockwise to the required programme position. -
Page 26
The oven starts to heat up. The display will then change to show and depending on which programme is being used the symbol p or U will also show. -
Page 27
– and the oven heating will switch on, – together with the cooling fan. Take the cake out of the oven when it is ready. ^ Turn the programme selector to «0». will continue to run for… -
Page 28
Food which browns quickly should not be placed at the top of the oven when rapid heat up is being used. U in the top line of the display indicates that… -
Page 29
Most dishes can be placed in a cold oven. They will then make use of the heat produced during the heating-up phase. It is only necessary to pre-heat the oven in certain instances. With for foods which cook in less than… -
Page 30
You can set the oven to switch itself off automatically or to switch itself on and off automatically when baking and roasting. First select the appropriate symbol: Select the g symbol to enter the duration of a cooking programme. Once the time set has elapsed, the oven will switch itself off automatically. -
Page 31
In addition to the m and p symbols the symbols representing the duration, start and finish time are also displayed constantly if times have been entered for a cooking programme. If you have only entered the (e. g. 1 h) , the display will show: –… -
Page 32
The Residual heat function then comes into action. «EC» now appears in the oven display instead of the actual oven temperature to show that the oven is in energy save mode. The oven heating will switch on again if: – The required temperature is altered. -
Page 33
The following example shows the programming for baking a cake using Fan Heat D/160 °C, 45 minutes. ^ Place the cake tin in the oven and close the door. ^ Select a function and temperature. ^ Call up the g symbol for duration by… -
Page 34
It is a good idea to set the oven to switch on and off automatically when roasting. When baking the oven should not be set to start a long time off. The batter or dough will dry out and the raising agents will lose their effectiveness. -
Page 35
(11:45) will show in the display, when you call up the f symbol. The oven will start heating up at this time and the duration will then be displayed. Once the time set has elapsed, the oven will switch itself off automatically. -
Page 36
The minute minder can be used to time any activity in the kitchen, e.g. boiling eggs. (It cannot be used to switch the oven off at the end of a set time). You can enter a time up to a maximum of 12 hours. -
Page 37
Please ensure that the function selector is at «0». If it is pointing to the oven interior lighting H position, the showroom demo mode will be activated instead of the system lock. The oven can be operated as normal, but it will not heat up. -
Page 38
A cooking programme can be «locked» to prevent anyone changing the settings. ^ Select the programme and set a temperature. If necessary set the cooking time. ^ Call up the a symbol. Four horizontal bars will appear in the display. ^ Turn the input dial in a clockwise direction until a key symbol 0—§… -
Page 39
Temperatures and times cannot be changed during a programme if the safety lock has been activated. To switch it off: ^ Call up the a symbol. ^ Turn the (–/+) input dial anti-clockwise until four horizontal bars appear in the display. The safety lock has now been de-activated and you can change settings. -
Page 40
Place the tin or dish on the baking tray in the oven, with the sloping edge of the tray towards the door. The following baking tins give an evenly browned result: Dark metal, aluminium or enamel tins with a matt finish are preferable. -
Page 41
The cooling fan will continue for a while after switching the oven off. Always remove all accessories, trays and racks which are not being used when using the oven to get the best results and to keep cleaning of the trays to a minimum. given in the… -
Page 42
1) 3) Eclairs Macaroons Meringues 1) Pre-heat the oven when using Conventional A heat. 2) Pre-heat the oven when using Fan Heat D and Conventional A heat. 3) Switch off «rapid heat-up». 150 – 170 – – 160 – 170 160 –… -
Page 43
160 – 180 130 – 150 – – – 180 – 200 180 – 200 190 – 210 180 – 200 200 – 210 170 – 180 160 – 180 – 180 – 200 230 – 250 200 – 220 200 –… -
Page 44: Auto Roast E
– Auto Roast E – Conventional A – This ensures that sufficient stock remains for making gravy. – The oven stays cleaner, too. Roasting pots with a lid made from earthenware, cast iron, ovenproof china or glass and roasting foil are all suitable.
-
Page 45
Do not roast deep frozen meat. Meat should be thoroughly defrosted before roasting. ^ Take the roast out of the oven, wrap in aluminium foil and leave to stand for about 10 minutes. This helps retain juices when the meat is carved. -
Page 46
Poultry, approx. 4 kg Whole fish, approx. 1.5 kg Unless otherwise stated, the times given are for an oven which has not been pre-heated. 1) Fit the roasting filter in place 2) If pot roasting, set the temperature 20 °C higher. -
Page 47
If you grill with the door open the hot air will escape from the oven and not get cooled by the cooling fan. Control elements on the oven could get hot. Danger of burning! -
Page 48
For thin cuts of meat (e. g. chops or steak) ..275 °C For grilling larger items, (e. g. rolled meat, poultry) ..240 °C See the grill chart for more information. To grill thicker pieces of food more gradually after an initial high temperature, continue grilling at a lower… -
Page 49
Pre-heat the grill for at least 5 minutes with the door closed. Steak Kebab / mixed grill Chicken kebabs Burgers Sausages Fish fillet Trout Toast Open toasted sandwich Tomatoes Chicken (approx. 1 kg) Rolled meat, Ø 7 cm (approx. 1 kg) Leg of pork (approx. -
Page 50
You can also use the oven for defrosting. To defrost select Fan heat D with a maximum temperature of 50 °C. For defrosting meat and delicate foods use the lowest possible temperature (30°C). Please note the following – Where possible remove the… -
Page 51
^ Wipe the surfaces dry using a soft cloth. A microfibre «E-Cloth» is available from the Miele UK Spare Parts Department, Part number 98013530, which is suitable for cleaning surfaces such as stainless steel, glass, plastic and chrome without the use of chemicals. -
Page 52
– oven sprays. If you are unsure about a particular product or need further advice please contact your nearest Miele Sales office. See back page for address. Do not leave accessories in the oven when they are not in use. -
Page 53
However if you still cannot get the surface clean, an oven cleaner can be used for a couple of minutes only. Do not attempt to use on a hot oven or accessories. Allow the PerfectClean surfaces to cool down to room temperature before applying… -
Page 54
– sponges and cloths which have previously been used with abrasive cleaning agents. – oven spray must not be used in a hot oven or left on for too long. – items coated with PerfectClean enamelling must not be cleaned in a dishwasher. -
Page 55
Catalytic enamel has very good self-cleaning properties. During fan operated cooking, circulating air in the oven deposits oil and fat splashes predominantly on the back panel of the oven. When this catalytic enamel is heated to temperatures above 200 °C, oil and grease deposits are removed automatically. -
Page 56
(see «Switching off automatically»). Should the catalytic coating on the back panel, side liners or the roof liner become ineffective through improper use or heavy soiling, a replacement can be obtained from your Miele dealer or the Miele Spare Parts dept. -
Page 57
– lower the top heating element, – and take out the back panel, side liners (if fitted) and roof liner. The oven door is connected to the oven by hinges. Before removing the door the locking clamps on both hinges have to be released. -
Page 58
The handle could break. Make sure that you lift the door off equally on both sides. The oven door has seals on all sides to protect it. In the rare event that condensate has worked its way in between the glass panes, the door can be dismantled in order to clean in between the panes. -
Page 59
The aluminium guides on the outer and inner glass panes are bonded to the glass and cannot be removed. Depending on model the oven door is fitted with two or three glass panes. middle pane can also be taken out. -
Page 60
^ When replacing the inner pane make sure that the aluminium guide and handle face upwards. The words «Miele CleanGlas» will then be legible. If the seals on the inner pane have loosened during cleaning you will have to push them back into the… -
Page 61
^ Hook the inner glass pane into the aluminium guides on the outer pane and lower it into position. Make sure when lowering the inner pane that it does not come out of its fixings. After lowering it into position the inner pane has to be pushed back into its retainers. -
Page 62
^ Hold the door securely at both sides and carefully fit it back onto the hinge guides. Make sure that the door goes back on straight. ^ Open the door fully. ^ Flip both locking clamps back up to lock them. Turn them as far as they will go into a horizontal position. -
Page 63
Make sure the oven heating elements are switched off and cool. Danger of burning. ^ Pull on the fixing knob to release it. ^ Remove the runners. in the reverse order, carefully ensuring all parts are correctly in place. Make sure the oven heating elements are switched off and cool. -
Page 64
^ Remove the runners. ^ Loosen the screws in the back panel and take it out. The oven must not be used without the back panel fitted. This could cause considerable injury. in the reverse order, carefully ensuring all parts are correctly in place. -
Page 65
the catalytic side liners, ensure they sit correctly. ^ Ease the back lug into the opening in the rear wall panel. ^ Lift the front locating hole on to the guide pin behind the collar. ^ Put the runners back into place. -
Page 66
Department: Check whether, ^ the system lock has been activated. ^ the mains fuse has blown. Contact a qualified electrician or the Miele Ser- vice Department. ^ MES_ appears briefly in the display when the programme selector is turned to the light H position. -
Page 67: Switching On The Catalyser
The cooling fan continues to run for a while after the oven has been switched off to prevent any humidity building up in the oven, on the control panel or in the oven housing unit. When the temperature has fallen sufficiently the fan switches off automatically.
-
Page 68
This combination indicates a fault. – switched itself off during use. This is a safety feature to protect the oven if it has been operating for an exceedingly long period. The length of time depends on the oven function selected. -
Page 69
In the event of any faults which you cannot remedy yourself, please contact – Your Miele Dealer – The nearest Miele Service Department (see back cover for address). When contacting the Service Department, please quote the model and serial number of your appliance. -
Page 70
The following accessories may come as standard with some models. They are also available at extra cost from your Dealer or the Miele Spare Parts Dept. The telescopic baking carriage with 5 levels of runners can be drawn right out of the oven. This gives a good overview of all the cooking in progress. -
Page 71: Liner
A lid is available separately. If you roast or grill frequently catalytic coated side liners can be fitted in the sides of the oven to help keep the oven clean. When ordering please state the model number of your oven and whether it is fitted with side runners or a telescopic baking carriage.
-
Page 72
Ensure that these match the household mains supply. Please quote these data, and the model and serial number when contacting the Miele Ser- vice dept. Connection of this appliance should be made either via a suitable isolator,… -
Page 73
Data relating to electrical connection will be found on the data plate, visible when the oven door is open. Make sure that these figures comply with the main voltage. Connection should be made via a suitable isolator which complies with national and local regulations. -
Page 74
The voltage and rated load are given on the data plate, visible when the oven door is open. Please ensure that these match the household mains supply. Please quote these data, and the model and serial number when contacting the Miele Service dept. -
Page 75
^ Connect the oven to the electricity supply by the isolator. ^ Place the oven into the oven housing unit as far as the oven trim and align. ^ Open the oven door and using two screws secure the oven to the side walls of the housing unit through the holes in the oven trim. -
Page 76
Alteration rights reserved / 22 / 3603 M.-Nr. 05 844 950 / 02 (H 334, H 344-2) This paper consists of cellulose which has been bleached without the use of chlorine.
-
Contents
-
Table of Contents
-
Bookmarks
Quick Links
Operating instructions
Ovens
H 334 B, H 334 B KAT
H 344-2 B
GZWO
To avoid the risk of accidents
or damage to the appliance it is
essential to read these operating
instructions before it is installed or
Used for the first time.
M.-Nr. 05 844 950
Related Manuals for Miele H 344-2 B
Summary of Contents for Miele H 344-2 B
-
Page 1: Operating Instructions
Operating instructions Ovens H 334 B, H 334 B KAT H 344-2 B GZWO To avoid the risk of accidents or damage to the appliance it is essential to read these operating instructions before it is installed or used for the first time.
-
Page 2: Table Of Contents
Selecting an oven setting ……..
-
Page 3
To dismantle the oven door…….. -
Page 4
Programme selector b Input dial for entering settings c Display d Function dial for selecting oven functions e Heating element for top heat and grilling with roof liner f Air inlet for fan g Runner heights 1, 2, 3, 4, 5… -
Page 5
Programme selector b Input dial for entering settings c Display d Function dial for selecting oven functions e Lever for switching the catalyser on f Heating element for top heat and grilling with roof liner g Air inlet for fan… -
Page 6: Features
– System lock, to prevent the appliance being used unintentionally – Safety cut-out As soon as the oven is switched on a cooling fan is automatically engaged. The cooling fan mixes hot air from the oven cavity with cool room air before…
-
Page 7: Accessories
The following accessories are supplied with this oven. These and other accessories are also available to order from the Miele Spare Parts Dept. or your Miele Dealer. See «Extra Accessories» further on in this booklet for more details.
-
Page 8: Roasting Filter
The droplets of fat caught up in the circulating air are deposited on the roasting filter. This helps to keep the oven and the area behind the interior back panel cleaner. Do not use the roasting filter when baking. This would increase the times needed for baking and give uneven browning results.
-
Page 9
The transport and protective packing has been selected from materials which are environmentally friendly for disposal and can normally be recycled. Ensure that any plastic wrappings, bags etc. are disposed safely and kept out of the reach of babies and young children. -
Page 10
If allowing older children to use the appliance without supervision please ensure that they are aware of how the oven works and understand the dangers of improper use. Before connecting the appliance to the mains supply make sure that… -
Page 11
When working with «Conventional» heating or when grilling, the element in the roof of the oven gets very hot, and there is a danger of being burnt. When cleaning the roof of the oven wait until the grill element has cooled down before lowering it. -
Page 12
Do not push pots and pans around on the oven floor as this could damage the surface. Do not lean or sit on an open oven door, or place heavy items on it. This could damage the appliance. The oven door can support a maximum load of 15 kg. -
Page 13
Never leave the appliance unattended when cooking with oil or fats as these are a fire hazard if overheated. Do not use the oven to heat up the room. Due to the high temperatures radiated, objects left near the oven could catch fire. -
Page 14
Alcohol should be burnt off before the dish is placed in the oven to avoid this danger. In countries where there are areas which may be subject to infestation… -
Page 15
– Set the clock. – Switch the catalyser on, if fitted. – Clean the appliance. – Heat the oven up with nothing in it. New appliances have a slight smell on first use and this procedure will dissipate the smells before you use the oven to cook any food. -
Page 16
In the following example the time of day is changed from 12:05 to 13:33. To do this: ^ Turn the programme selector to «0». ^ Turn the function selector (right hand dial) until triangle V is underneath the m symbol in the display. ^ Whilst triangle V is flashing, turn the (–/+) input dial clockwise until the required time shows in the display. -
Page 17
^ Turn the programme selector to the Light H position. The time of day will show in the display. ^ Turn the function selector (right hand dial) until triangle V is underneath the m symbol in the display. Four horizontal bars will then appear in the display. -
Page 18
Before using the appliance appliances have a slight smell on first use and this procedure will dissipate the smells before you use the oven to cook any food. Before use please remove – any stickers from the floor of the oven, baking trays, grill pan etc. -
Page 19
Then run the oven for at least 1 hour at a high temperature. To do this: ^ Turn the programme selector to the Fan D position. The suggested temperature of 160 °C appears in the display. ^ Whilst the triangle V is flashing underneath the U symbol, use the (–/+) input dial to set the temperature… -
Page 20
– the time (time of day or a programmed cooking time). – the oven temperature together with the p or U symbol. – the key symbol 0—§ will appear if e.g. the programme selector is… -
Page 21
Use the V oven functions which require input e.g. the time of day. The V can be turned clockwise or anti-clockwise. To select a function, turn the function dial until triangle V is underneath the symbol in the display of the function you wish to make changes to. -
Page 22
– – – – – Input minute minder time (egg timer) Lock a cooking programme Change the oven temperature Switch Rapid heat up off (only with Fan heat D, Automatic roasting E, Conventional heating Enter start time Enter duration Enter end time… -
Page 23: Changing The Time Of Day
– Input dial (–/+) – Function dial (V). The display will show what these dials are set to. To change a setting on the oven: ^ Turn the required position. ^ Turn the anti-clockwise until triangle V is underneath the the display.
-
Page 24
Pre-heat the grill for at least 5 minutes with the door shut before grilling. More practical advice about these cooking functions is given in the «Baking», «Roasting» and «Grilling» sections of this book and in the Miele cookbook supplied with this oven. -
Page 25
A programme must first be selected using the Programme selector and then, if necessry, the temperature changed. The programmes on this oven have pre-set recommended temperatures to simplify operation. ^ Turn the programme dial clockwise or anti-clockwise to the required programme position. -
Page 26
The oven starts to heat up. The display will then change to show and depending on which programme is being used the symbol p or U will also show. -
Page 27
– and the oven heating will switch on, – together with the cooling fan. Take the cake out of the oven when it is ready. ^ Turn the programme selector to «0». will continue to run for… -
Page 28
Food which browns quickly should not be placed at the top of the oven when rapid heat up is being used. U in the top line of the display indicates that… -
Page 29
Most dishes can be placed in a cold oven. They will then make use of the heat produced during the heating-up phase. It is only necessary to pre-heat the oven in certain instances. With for foods which cook in less than… -
Page 30
You can set the oven to switch itself off automatically or to switch itself on and off automatically when baking and roasting. First select the appropriate symbol: Select the g symbol to enter the duration of a cooking programme. Once the time set has elapsed, the oven will switch itself off automatically. -
Page 31
In addition to the m and p symbols the symbols representing the duration, start and finish time are also displayed constantly if times have been entered for a cooking programme. If you have only entered the (e. g. 1 h) , the display will show: –… -
Page 32
The Residual heat function then comes into action. «EC» now appears in the oven display instead of the actual oven temperature to show that the oven is in energy save mode. The oven heating will switch on again if: – The required temperature is altered. -
Page 33
The following example shows the programming for baking a cake using Fan Heat D/160 °C, 45 minutes. ^ Place the cake tin in the oven and close the door. ^ Select a function and temperature. ^ Call up the g symbol for duration by… -
Page 34
It is a good idea to set the oven to switch on and off automatically when roasting. When baking the oven should not be set to start a long time off. The batter or dough will dry out and the raising agents will lose their effectiveness. -
Page 35
(11:45) will show in the display, when you call up the f symbol. The oven will start heating up at this time and the duration will then be displayed. Once the time set has elapsed, the oven will switch itself off automatically. -
Page 36
The minute minder can be used to time any activity in the kitchen, e.g. boiling eggs. (It cannot be used to switch the oven off at the end of a set time). You can enter a time up to a maximum of 12 hours. -
Page 37
Please ensure that the function selector is at «0». If it is pointing to the oven interior lighting H position, the showroom demo mode will be activated instead of the system lock. The oven can be operated as normal, but it will not heat up. -
Page 38
A cooking programme can be «locked» to prevent anyone changing the settings. ^ Select the programme and set a temperature. If necessary set the cooking time. ^ Call up the a symbol. Four horizontal bars will appear in the display. ^ Turn the input dial in a clockwise direction until a key symbol 0—§… -
Page 39
Temperatures and times cannot be changed during a programme if the safety lock has been activated. To switch it off: ^ Call up the a symbol. ^ Turn the (–/+) input dial anti-clockwise until four horizontal bars appear in the display. The safety lock has now been de-activated and you can change settings. -
Page 40
Place the tin or dish on the baking tray in the oven, with the sloping edge of the tray towards the door. The following baking tins give an evenly browned result: Dark metal, aluminium or enamel tins with a matt finish are preferable. -
Page 41
The cooling fan will continue for a while after switching the oven off. Always remove all accessories, trays and racks which are not being used when using the oven to get the best results and to keep cleaning of the trays to a minimum. given in the… -
Page 42
1) 3) Eclairs Macaroons Meringues 1) Pre-heat the oven when using Conventional A heat. 2) Pre-heat the oven when using Fan Heat D and Conventional A heat. 3) Switch off «rapid heat-up». 150 – 170 – – 160 – 170 160 –… -
Page 43
160 – 180 130 – 150 – – – 180 – 200 180 – 200 190 – 210 180 – 200 200 – 210 170 – 180 160 – 180 – 180 – 200 230 – 250 200 – 220 200 –… -
Page 44: Auto Roast E
– Auto Roast E – Conventional A – This ensures that sufficient stock remains for making gravy. – The oven stays cleaner, too. Roasting pots with a lid made from earthenware, cast iron, ovenproof china or glass and roasting foil are all suitable.
-
Page 45
Do not roast deep frozen meat. Meat should be thoroughly defrosted before roasting. ^ Take the roast out of the oven, wrap in aluminium foil and leave to stand for about 10 minutes. This helps retain juices when the meat is carved. -
Page 46
Poultry, approx. 4 kg Whole fish, approx. 1.5 kg Unless otherwise stated, the times given are for an oven which has not been pre-heated. 1) Fit the roasting filter in place 2) If pot roasting, set the temperature 20 °C higher. -
Page 47
If you grill with the door open the hot air will escape from the oven and not get cooled by the cooling fan. Control elements on the oven could get hot. Danger of burning! -
Page 48
For thin cuts of meat (e. g. chops or steak) ..275 °C For grilling larger items, (e. g. rolled meat, poultry) ..240 °C See the grill chart for more information. To grill thicker pieces of food more gradually after an initial high temperature, continue grilling at a lower… -
Page 49
Pre-heat the grill for at least 5 minutes with the door closed. Steak Kebab / mixed grill Chicken kebabs Burgers Sausages Fish fillet Trout Toast Open toasted sandwich Tomatoes Chicken (approx. 1 kg) Rolled meat, Ø 7 cm (approx. 1 kg) Leg of pork (approx. -
Page 50
You can also use the oven for defrosting. To defrost select Fan heat D with a maximum temperature of 50 °C. For defrosting meat and delicate foods use the lowest possible temperature (30°C). Please note the following – Where possible remove the… -
Page 51
^ Wipe the surfaces dry using a soft cloth. A microfibre «E-Cloth» is available from the Miele UK Spare Parts Department, Part number 98013530, which is suitable for cleaning surfaces such as stainless steel, glass, plastic and chrome without the use of chemicals. -
Page 52
– oven sprays. If you are unsure about a particular product or need further advice please contact your nearest Miele Sales office. See back page for address. Do not leave accessories in the oven when they are not in use. -
Page 53
However if you still cannot get the surface clean, an oven cleaner can be used for a couple of minutes only. Do not attempt to use on a hot oven or accessories. Allow the PerfectClean surfaces to cool down to room temperature before applying… -
Page 54
– sponges and cloths which have previously been used with abrasive cleaning agents. – oven spray must not be used in a hot oven or left on for too long. – items coated with PerfectClean enamelling must not be cleaned in a dishwasher. -
Page 55
Catalytic enamel has very good self-cleaning properties. During fan operated cooking, circulating air in the oven deposits oil and fat splashes predominantly on the back panel of the oven. When this catalytic enamel is heated to temperatures above 200 °C, oil and grease deposits are removed automatically. -
Page 56
(see «Switching off automatically»). Should the catalytic coating on the back panel, side liners or the roof liner become ineffective through improper use or heavy soiling, a replacement can be obtained from your Miele dealer or the Miele Spare Parts dept. -
Page 57
– lower the top heating element, – and take out the back panel, side liners (if fitted) and roof liner. The oven door is connected to the oven by hinges. Before removing the door the locking clamps on both hinges have to be released. -
Page 58
The handle could break. Make sure that you lift the door off equally on both sides. The oven door has seals on all sides to protect it. In the rare event that condensate has worked its way in between the glass panes, the door can be dismantled in order to clean in between the panes. -
Page 59
The aluminium guides on the outer and inner glass panes are bonded to the glass and cannot be removed. Depending on model the oven door is fitted with two or three glass panes. middle pane can also be taken out. -
Page 60
^ When replacing the inner pane make sure that the aluminium guide and handle face upwards. The words «Miele CleanGlas» will then be legible. If the seals on the inner pane have loosened during cleaning you will have to push them back into the… -
Page 61
^ Hook the inner glass pane into the aluminium guides on the outer pane and lower it into position. Make sure when lowering the inner pane that it does not come out of its fixings. After lowering it into position the inner pane has to be pushed back into its retainers. -
Page 62
^ Hold the door securely at both sides and carefully fit it back onto the hinge guides. Make sure that the door goes back on straight. ^ Open the door fully. ^ Flip both locking clamps back up to lock them. Turn them as far as they will go into a horizontal position. -
Page 63
Make sure the oven heating elements are switched off and cool. Danger of burning. ^ Pull on the fixing knob to release it. ^ Remove the runners. in the reverse order, carefully ensuring all parts are correctly in place. Make sure the oven heating elements are switched off and cool. -
Page 64
^ Remove the runners. ^ Loosen the screws in the back panel and take it out. The oven must not be used without the back panel fitted. This could cause considerable injury. in the reverse order, carefully ensuring all parts are correctly in place. -
Page 65
the catalytic side liners, ensure they sit correctly. ^ Ease the back lug into the opening in the rear wall panel. ^ Lift the front locating hole on to the guide pin behind the collar. ^ Put the runners back into place. -
Page 66
Department: Check whether, ^ the system lock has been activated. ^ the mains fuse has blown. Contact a qualified electrician or the Miele Ser- vice Department. ^ MES_ appears briefly in the display when the programme selector is turned to the light H position. -
Page 67: Switching On The Catalyser
The cooling fan continues to run for a while after the oven has been switched off to prevent any humidity building up in the oven, on the control panel or in the oven housing unit. When the temperature has fallen sufficiently the fan switches off automatically.
-
Page 68
This combination indicates a fault. – switched itself off during use. This is a safety feature to protect the oven if it has been operating for an exceedingly long period. The length of time depends on the oven function selected. -
Page 69
In the event of any faults which you cannot remedy yourself, please contact – Your Miele Dealer – The nearest Miele Service Department (see back cover for address). When contacting the Service Department, please quote the model and serial number of your appliance. -
Page 70
The following accessories may come as standard with some models. They are also available at extra cost from your Dealer or the Miele Spare Parts Dept. The telescopic baking carriage with 5 levels of runners can be drawn right out of the oven. This gives a good overview of all the cooking in progress. -
Page 71: Liner
A lid is available separately. If you roast or grill frequently catalytic coated side liners can be fitted in the sides of the oven to help keep the oven clean. When ordering please state the model number of your oven and whether it is fitted with side runners or a telescopic baking carriage.
-
Page 72
Ensure that these match the household mains supply. Please quote these data, and the model and serial number when contacting the Miele Ser- vice dept. Connection of this appliance should be made either via a suitable isolator,… -
Page 73
Data relating to electrical connection will be found on the data plate, visible when the oven door is open. Make sure that these figures comply with the main voltage. Connection should be made via a suitable isolator which complies with national and local regulations. -
Page 74
The voltage and rated load are given on the data plate, visible when the oven door is open. Please ensure that these match the household mains supply. Please quote these data, and the model and serial number when contacting the Miele Service dept. -
Page 75
^ Connect the oven to the electricity supply by the isolator. ^ Place the oven into the oven housing unit as far as the oven trim and align. ^ Open the oven door and using two screws secure the oven to the side walls of the housing unit through the holes in the oven trim. -
Page 76
Alteration rights reserved / 22 / 3603 M.-Nr. 05 844 950 / 02 (H 334, H 344-2) This paper consists of cellulose which has been bleached without the use of chlorine.
Cтиральные машины
Коды ошибок
Световая индикация
| Проверить дозировку | Чрезмерное пенообразование. | Подробнее » |
| Замачивание / Предварительная стирка | Ошибка датчика давления. | Подробнее » |
| Старт | Включена защита от детей. | Подробнее » |
| Основная стирка | Ошибка датчика NTC. | Подробнее » |
| Насос / Окончательный отжим | Ошибка отжима. | Подробнее » |
| Полоскание 1-2 | Ошибка двигателя, тахогенератора или блока управления. | Подробнее » |
| Полоскание 3 | Ошибка блока управления. | Подробнее » |
| Полоскание | Ошибка двигателя, тахогенератора или блока управления. | Подробнее » |
| Остановка полоскания | Ошибка блока управления. | Подробнее » |
| Заблокировано | Активирован защитный замок для детей. | Подробнее » |
| Предварительная стирка | Ошибка датчика давления | Подробнее » |
| Стирка | Ошибка в системе нагрева воды. | Подробнее » |
| Проверка слива воды | Ошибка в системе слива воды. | Подробнее » |
| Проверка подачи воды | Ошибка подачи воды. | Подробнее » |
| Проверить подачу + Проверить процесс | Ошибка в системе водяного контроля. | Подробнее » |
| Проверить подачу | Ошибка в системе залива воды. | Подробнее » |
Посудомоечные машины
Коды ошибок
Сушильные машины
Коды ошибок
Кофемашины
Коды ошибок, кофемашины отдельно стоящие
Коды ошибок, кофемашины встраиваемые
Варочные панели
Коды ошибок, газовые варочные панели
Коды ошибок, индукционные варочные панели
Коды ошибок, инфракрасные варочные панели
Коды ошибок, Miele KM 5773 Induction
| FE00, FE04, FE08, FE12, FE16, FE76 | Ошибка программирования. | Подробнее » |
| FE01 | Ошибка сенсора. | Подробнее » |
| FE02 | Ошибка сенсора. | Подробнее » |
| FE03 | Ошибка сенсора. | Подробнее » |
| FE05 | Ошибка сенсора. | Подробнее » |
| FE06 | Ошибка сенсора. | Подробнее » |
| FE07 | Ошибка сенсора. | Подробнее » |
| FE09 | Ошибка сенсора. | Подробнее » |
| FE10 | Ошибка сенсора. | Подробнее » |
| FE11 | Ошибка сенсора. | Подробнее » |
| FE13 | Ошибка сенсора. | Подробнее » |
| FE14 | Ошибка сенсора. | Подробнее » |
| FE15 | Ошибка сенсора. | Подробнее » |
| FE17 | Ошибка сенсора. | Подробнее » |
| FE18 | Ошибка сенсора. | Подробнее » |
| FE19 | Ошибка сенсора. | Подробнее » |
| FE20 | Ошибка сенсора. | Подробнее » |
| FE21 | Ошибка сенсора. | Подробнее » |
| FE22 | Ошибка сенсора. | Подробнее » |
| FE23 | Ошибка сенсора. | Подробнее » |
| FE24 | Ошибка сенсора. | Подробнее » |
| FE25 | Ошибка сенсора. | Подробнее » |
| FE30 + непрерывный звуковой сигнал | Ошибка подключения. | Подробнее » |
| FE31, FE32, FE33, FE34, FE35 | Ошибка электроники. | Подробнее » |
| FE39 | Ошибка программирования. | Подробнее » |
| FE40 + мигает | Ошибка программирования. | Подробнее » |
| FE41, FE42 | Ошибка NTC. | Подробнее » |
| FE43, FE44 | Ошибка NTC. | Подробнее » |
| FE45 | Ошибка NTC. | Подробнее » |
| FE51 | Ошибка PTC. | Подробнее » |
| FE52 | Ошибка PTC. | Подробнее » |
| FE53 | Ошибка PTC. | Подробнее » |
| FE54 | Ошибка PTC. | Подробнее » |
| FE55 | Ошибка PTC. | Подробнее » |
| FE60 | Ошибка электроники. | Подробнее » |
| FE80 | Ошибка электроники. | Подробнее » |
| FE81 | Ошибка электроники. | Подробнее » |
| FE84, FE85, FE86 | Ошибка электроники. | Подробнее » |
| FE99 | Ошибка перегрева. | Подробнее » |
Духовые шкафы
Коды ошибок
Холодильники
Коды ошибок, морозильники
Коды ошибок, холодильники
Гладильные системы
Коды ошибок
Сообщения на дисплее
| Авт. закр. слив. кл. | Закрытие сливного клапана. | Подробнее » |
| Неполад. сл. клап. Включ./Выключ. | Неполадки сливного клапана. | Подробнее » |
| Ошибка памяти Включ./Выключ. | Ошибка памяти. | Подробнее » |
| Выключить из сети. | Ошибка электроники. | Подробнее » |
| Неполадка залива Включ./Выключ. | Неисправность в гладильной системе. | Подробнее » |
| Неиспр. пнев. выкл. Включ./Выключ. | Неисправность в гладильной системе. | Подробнее » |
| Пароген. перегрет Включ./Выключ. | Неисправность в гладильной системе. | Подробнее » |
| Пароген. не нагрет Включ./Выключ. | Неисправность в гладильной системе. | Подробнее » |
| Разбл. кнопку пара | Кнопка «Пар» заблокирована. | Подробнее » |
| Неполад. сл. клап. Включ./Выключ. | Неисправность в гладильной системе. | Подробнее » |
Профессиональная техника
Miele Professional

ПОСТГАРАНТИЙНЫЙ
СЕРВИСНЫЙ ЦЕНТР
ПРОДАЕМ ЗАПЧАСТИТОЛЬКО С УСТАНОВКОЙ
ПОСТГАРАНТИЙНЫЙ РЕМОНТ, ДАЕМ СВОЮ ГАРАНТИЮ ДО 24 МЕСЯЦЕВ
БОЛЕЕ 20 МАСТЕРОВ ГОТОВЫ ВАМ ПОМОЧЬ С РЕМОНТОМ ПРЯМО СЕЙЧАС
СКИДКИ 25%: МНОГОДЕТНЫМ, МАТЕРЯМ-ОДИНОЧКАМ, МАЛОИМУЩИМ
Заказать консультацию БЕСПЛАТНО
На дисплее код ошибки — духовой шкаф MIELE

духовой шкаф на дисплее код ошибки?
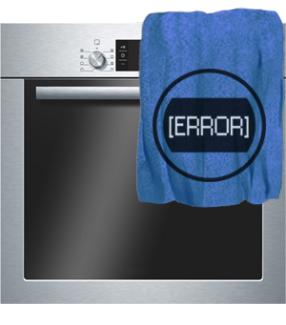
На дисплее духового шкафа производителя Милле загорелся код ошибки? Рассмотрим причины этой проблемы:
- Низкое напряжение в сети питания.
- Повреждена панель управления. Решение – замена комплектующей.
- На табло горит сообщение о включении режима демонстрации.
- На экране мигает значение времени по причине сбоя напряжения.
- Вышел из строя термодатчик или отсутствует сигнал между платой контроллера и термосенсором. Решение – ремонт либо смена поврежденной детали.
- Повреждена управляющая плата. Решение – замена управляющего модуля Miele.
Звоните в наш сервис, чтобы после ремонта духовки Миеле прибор еще годы радовал вас безупречной работой!
Какие поломки духовых шкафов мы ремонтируем

Все поломки

Схема обслуживания клиентов

Клиент звонит или отправляет форму заявки


Клиенту звонит диспетчер или мастер

Клиент сообщает адрес и пр. мастер говорит цену

Мастер делает диагностику

Cогласование цены ремонта

Мастер ремонтирует

Клиент оплачивает
Подробнее
1) Заказчик звонит диспетчеру или заполняет формуляр заявки-онлайн
2) В течение 15 минут клиенту позвонит:
- если заявка была сделана online, то менеджер — для уточнения иных обстоятельств заказа.
- если заявка была сделана по телефону — назначенный сервис-мастер Miele.
3) В течение разговора мастер, как правило, записывает:
- удобное клиенту время приезда
- ваш адрес
- марку-модель прибора — с целью сразу привезти с собой нужные запчасти Мили
Иногда сервис-мастер в ходе телефонного общения может сразу понять причину проблемы и сориентировать потребителя по цене работ.
4) На месте мастер сначала производит диагностику техники.
5) По ее завершении сервис-мастер озвучивает вам итоговую цену ремонтных работ.
6) В случае Вашего соглашения сервисный инженер делает ремонтные работы.
Иначе, заказчик платит только диагностические работы.
7) Итак, сервисный инженер устранил неполадки прибора МИЛЕ.
Довольный результатом клиент оплачивает согласованную работу.

Расценки
| услуга | цена, руб |
| диагностика | |
| при отказе от ремонта | 0,5-2 нормо-часа |
| при заказе ремонта | бесплатно |
| сопутствующие | |
| чистка системы | 1 нормо-час |
| ремонт узлов, модулей | 50% от цены нового |
| монтаж-демонтаж встроенного прибора | 1 нормо-час |
| коэффициенты | |
| квалификационная наценка мастера | индивидуально |
| срочный выезд (в течение 15 мин) | 1,5 |
| премиум-бренд | 1,8 |
| встройка | 1,8 |
| стесненные условия работы | 1,5 |
| ночной выезд (после 22 ч) | 2 |
| базовые величины | |
| нормо-час (округляется в бОльшую сторону до получаса) | 900 |
| финальные положения | |
|
-окончательную цену ремонта определяет мастер, исходя из сложности поломки и квалификационного опыта -выезд за пределы города — 40 руб/км -запчасти и расходные материалы оплачиваются отдельно |
| категория сложности | виды работ | коэффициент наценки |
| категория 1 |
замена трех-контактной розетки замена направляющих дверцы ремонт / замена одного-двух переключателей ремонт / замена сетевого шнура замена лампы освещения замена вентилятора |
1,5 |
| категория 2 |
замена трех/четырех переключателей ремонт / замена клеммной колодки замена ТЭНа духовки замена гриля замена реле замена (отключение) таймера замена термостата |
2 |
| категория 3 |
ремонт внутренней проводки нестандартный ремонт плиты (самостоятельная доработка и подгонка деталей) ремонт электросхемы восстановление модуля управления на компонентном уровне проведение работ по нескольким категориям одновременно любой ремонт связанный с полной разборкой изделия |
2,5 |

Скидки — кому положены
- семьи с приемными детьми : скидка 25 процентов
- многодетные семьи : скидка 20 процентов
- матери-одиночки : скидка 20 процентов
- при заявке на ремонт от 2 и более приборов : скидка 20 %
- ветераны ВОВ — спасибо Вам! : — 40 процентов
- все социально незащищенные категории населения : расчет индивидуально
- при упоминании нашего заказчика : минус 10 %

Гарантии
На все оригинальные компоненты существует официальная гарантия, вне зависимости от места приобретения — ст. 16 и 35 Закона о Защите прав потребителей.
Относительно срока гарантии — узнайте у нашего мастера перед монтажом — он зависит от конкретной детали.
Как правило от 6 месяцев.
Какие документы
По завершении ремонтных работ Ваш мастер передает дубликат бланка БСО, в нём зафиксирован перечень купленных запасных частей, произведенных работ, расценки и условия гарантии.

Ваши сервисные инженеры
Все ваши мастера наработали солидный стаж в ремонте духовок Миле с разными поломками.
Каждый сервисный инженер, кроме того, зарегистрирован ИП, несущим личную ответственность за проделанные работы.
Более двадцати мастеров, живущих в ареале Ст.-Петербурга, могут приехать к Вам в самое подходящее время и отремонтируют духовой шкаф MIELE.

Как долго выполняем работы
В среднем, ремонт длится полтора часа.
Но всякий выезд – индивидуален.
Для того, чтобы ваш бытовой прибор МИЛИ за 1 приезд, мастер уже по телефону спрашивает у клиента все симптомы поломки, перечень которых позволяет предположить наиболее вероятные первопричины поломки.
Тогда мастер приходит уже подготовленным – с наличием всевозможных модулей Miele и инструментарием для их монтажа.

где чиним
Для существенного удобства заказчиков, заинтересованных в услуге ремонта техники Милли, мы производим работы по ремонту на дому у клиентов.
Таким образом, нет необходимости доставлять неудобные кухонные приборы в сервис.
Такое возможно, поскольку современная кухонная техника MIELE смонтирована из взаимозаменяемых узлов.
Получается наш инженер приходит, производит диагностику, определяет требующий ремонта модуль и заменяет его.
Посмотреть перечень округов

ПОСТГАРАНТИЙНЫЙ
СЕРВИСНЫЙ ЦЕНТР